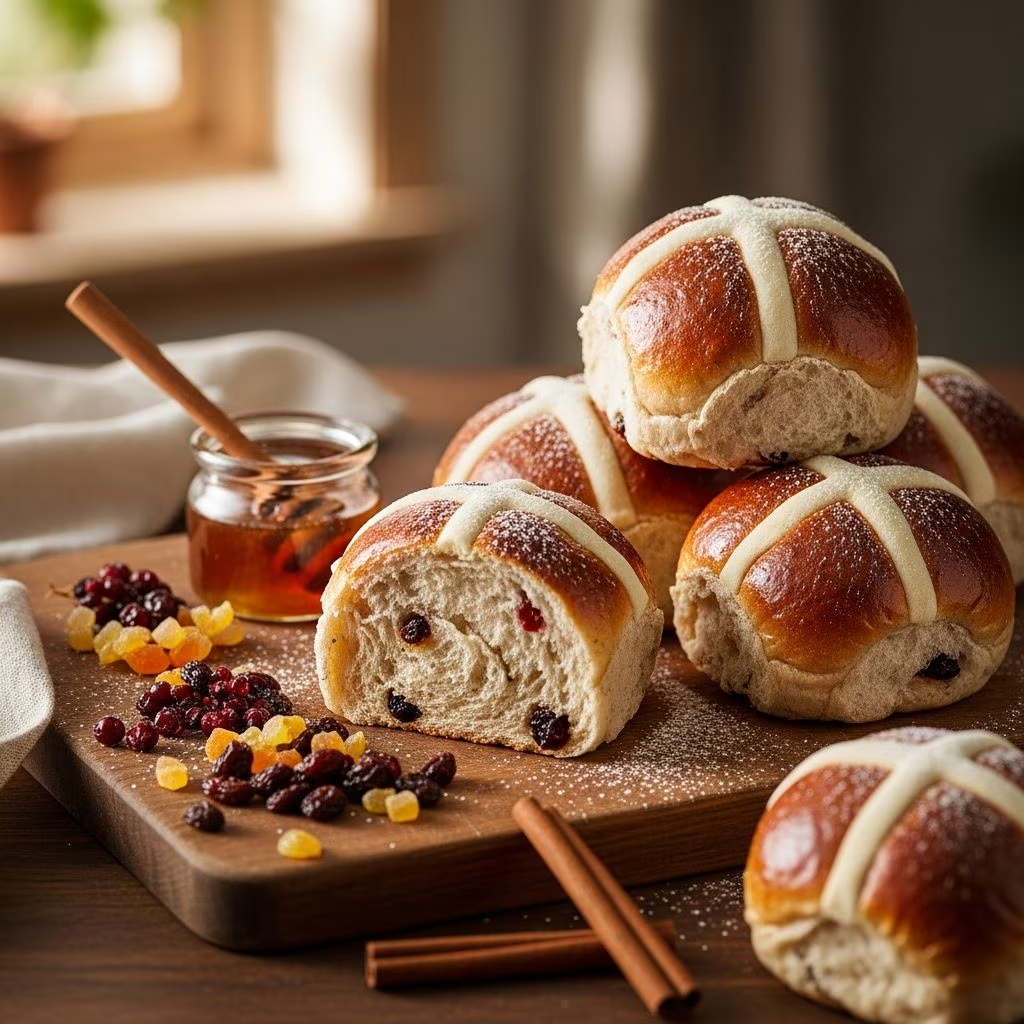
Hot cross buns represent one of the most cherished baking traditions, particularly during Easter celebrations. These soft, subtly spiced rolls feature a distinctive cross pattern piped on top and are studded with dried fruit. Whether you’re an experienced baker or approaching this classic recipe for the first time, understanding the fundamentals of preparing these beloved treats will ensure consistent success in your kitchen.
Understanding the Heritage and Significance
Hot cross buns carry deep cultural significance, with roots tracing back centuries in British baking tradition. The cross marking these buns holds symbolic meaning, making them far more than just another sweet roll. The combination of warm spices, tender crumb, and sweet dried fruit creates a distinctive flavor profile that has remained largely unchanged through generations. Modern interpretations maintain these traditional elements while allowing for creative variations in spices and fruit selections.
Essential Ingredients and Their Roles
Creating authentic hot cross buns requires specific ingredients that work together to develop the characteristic texture and flavor. Understanding what each component contributes helps you make informed substitutions when necessary.
The Foundation: Flour and Leavening Agents
Flour serves as the structural foundation of your buns. Most recipes call for all-purpose flour, though some bakers incorporate whole wheat or specialty flours for different results. The quantity typically ranges from 3.5 to 4 cups, depending on humidity and flour absorption rates. Instant yeast activates when combined with warm liquid, creating the rise that produces the characteristic light, airy crumb. Typically, 2 to 3 teaspoons of instant dried yeast suffices for a standard batch.
Flavor Components: Spices and Aromatics
The spice blend distinguishes hot cross buns from ordinary sweet rolls. Cinnamon provides warmth and depth, while nutmeg adds subtle earthiness. Some recipes incorporate allspice or ginger for additional complexity. Lemon zest brightens the overall flavor profile and adds aromatic complexity. These spices should be measured carefully, as their intensity varies by freshness and source. Typical proportions include one teaspoon of cinnamon and one-half teaspoon each of nutmeg and allspice, though personal preferences guide final adjustments.
Moisture and Richness: Butter, Milk, and Eggs
Butter contributes richness and develops a tender crumb structure. Most recipes call for four to six tablespoons, melted before incorporating into the dough. Milk, warmed to approximately 100 to 115 degrees Fahrenheit, activates the yeast and hydrates the flour. Whole milk produces richer results than lower-fat alternatives. Beaten eggs bind ingredients together while adding structure and golden color to the finished buns.
Sweet Additions: Dried Fruit
Raisins, currants, and dried cranberries provide bursts of sweetness and texture contrast. These dried fruits should be soaked in hot water before mixing into the dough, as this plumps them and prevents them from drawing moisture from the finished buns. Typical quantities range from three-quarters to one and one-half cups, depending on preference.
Step-by-Step Preparation Process
Activating the Yeast
Begin by combining one-half teaspoon of sugar with warm water in a small bowl, then sprinkle yeast over the surface. Allow this mixture to sit undisturbed for approximately ten minutes. During this time, the yeast activates and develops a foamy appearance, indicating successful activation. This step confirms yeast viability before you commit other ingredients to the recipe.
Preparing the Wet Ingredients
While yeast proofs, melt butter in a small saucepan over low heat. Once melted, remove from heat and stir in milk, honey or sugar, salt, and lemon zest. This mixture should reach a comfortable warm temperature—not hot enough to inhibit yeast, but warm enough to continue the activation process. The combination of these ingredients creates the liquid base that hydrates your flour and carries flavor throughout the dough.
Combining Ingredients
Pour the butter and milk mixture into a large mixing bowl. Add the activated yeast mixture along with beaten eggs. Stir these components together thoroughly until well combined. This stage begins developing the dough structure and ensures even distribution of flavoring ingredients.
Incorporating Flour and Fruit
Add raisins or your chosen dried fruit to the wet ingredients, distributing them evenly. Begin adding flour gradually, stirring thoroughly after each addition. Beat in approximately two cups of flour until the mixture achieves a smooth consistency. Continue adding remaining flour gradually until you develop a moist but not sticky dough. Different flour types and humidity levels affect the final consistency, so adjust flour quantity incrementally rather than all at once.
Kneading and Initial Rise
Turn the dough onto a floured surface and knead lightly for several minutes until smooth and elastic. Shape into a ball and place in an oiled bowl, turning once to coat all sides. Cover with a clean cloth and place in a warm location to rise. This bulk fermentation stage should continue for approximately two hours, until the dough roughly doubles in size. A warm corner of your kitchen, an unheated oven, or a proofing box all work well for this stage.
Shaping Individual Buns
After the initial rise, knead the dough several times to release accumulated gas bubbles. Divide the dough into twelve equal portions—weighing if possible ensures consistency. Shape each portion into a smooth ball and place on a greased or parchment-lined baking sheet, leaving sufficient space between buns for expansion. Cover and allow another hour for the second rise until buns roughly double in volume.
Creating and Piping the Distinctive Cross
The characteristic cross marking distinguishes hot cross buns from other sweet rolls. Rather than scoring the dough before baking, most traditional recipes involve piping a flour and water mixture directly onto the dough surface.
Preparing the Cross Mixture
Combine two tablespoons of flour with two and one-half tablespoons of water and one-quarter teaspoon of vanilla extract in a small bowl. Stir until the mixture achieves a thick glaze consistency—thicker than regular frosting but pourable enough to pipe through a piping bag. The consistency proves critical for success. Too-thick paste will crack as the buns expand during baking, while too-thin paste will disappear during the baking process. Adjust by adding small amounts of flour to thicken or water to thin as needed.
Application Techniques
Transfer the cross mixture to a piping bag fitted with a small round tip, or use a plastic sandwich bag with a small hole cut in one corner. Carefully pipe a cross pattern on each bun, working from one side to the other to create evenly-sized lines. Avoid pressing too firmly, which might deflate the risen dough. If the mixture thickens during piping, add tiny amounts of water to maintain proper consistency.
Baking and Finishing Touches
Oven Preparation and Temperature
Preheat your oven to 375 degrees Fahrenheit approximately fifteen minutes before baking. Proper oven temperature ensures even browning and appropriate rise during baking. Many home ovens vary in actual temperature despite thermostat settings, so consider using an oven thermometer for accuracy.
Application of Egg Wash
Before baking, brush the tops of each bun generously with egg wash, prepared by whisking one egg with one tablespoon of milk. This coating provides a beautiful golden-brown finish and slight shine to the completed buns. Apply the wash carefully to avoid disturbing the piped crosses.
Baking Timeline
Bake for fifteen to twenty-five minutes, depending on oven characteristics and bun size. The surface should develop a deep golden-brown color—this visual indicator proves more reliable than strict timing for determining doneness. The buns should feel firm to gentle touch but not hard or overly browned.
Glazing After Baking
While buns cool, prepare a simple glaze by combining one-half cup powdered sugar with approximately two and one-half teaspoons of milk, adjusting consistency as needed. Once buns cool to warm (not piping hot), transfer the glaze to a piping bag and apply in cross patterns over each bun, or brush generously across all buns for complete coverage. This glaze adds sweetness and creates an attractive finishing touch.
Troubleshooting Common Issues
Dense or Heavy Crumb
Dense texture typically results from insufficient rising time or expired yeast. Ensure adequate proofing periods in a truly warm location. Test yeast viability before beginning by confirming foamy development during the activation stage.
Crosses Cracking During Bake
Cracks develop when the cross mixture is too thick relative to dough expansion. Ensure the flour-water paste remains thin enough to accommodate bun growth without cracking. Adding slightly more water helps achieve proper consistency.
Crosses Disappearing During Baking
If crosses vanish completely, the paste mixture was too thin. Next time, reduce water slightly or add additional flour to create a thicker consistency that maintains visibility during baking.
Uneven Browning
Oven temperature variations cause uneven browning. Rotate the baking sheet halfway through cooking if you notice browning concentrating on one side. Consider oven thermometer verification to confirm actual temperature.
Ingredient Variations and Substitutions
Flour Options
While all-purpose flour remains standard, whole wheat flour adds nutty complexity—though it requires slightly more liquid due to higher absorption rates. Spelt flour creates unique flavor but produces denser results. Combining all-purpose with small portions of specialty flours maintains traditional texture while introducing new dimensions.
Spice Adjustments
Personal taste guides spice levels significantly. Those preferring subtle spicing might reduce cinnamon and allspice by one-quarter teaspoon, while spice enthusiasts could increase proportions slightly. Ginger adds warmth and complexity to the traditional blend, though some prefer omitting it entirely.
Dried Fruit Selections
While traditional recipes favor raisins or currants, dried cranberries offer tartness that balances sweetness. Chopped dried apricots add different flavor dimensions. Some bakers use combinations of multiple dried fruits for complexity.
Storage and Make-Ahead Options
Completed hot cross buns store well in airtight containers at room temperature for up to three days. Freeze baked buns for up to one month; thaw at room temperature before serving. Dough can be prepared through the shaping stage, refrigerated overnight, and completed the following day, allowing for convenient make-ahead preparation.
Frequently Asked Questions
Can I make these buns without a stand mixer?
Absolutely. Hand mixing requires more effort but produces equally excellent results. Combine dry ingredients in a large bowl, add wet ingredients, and stir vigorously until well combined. Knead by hand for eight to ten minutes until dough becomes smooth and elastic.
What temperature should milk reach before mixing?
Milk should be warm to the touch—approximately 100 to 115 degrees Fahrenheit. Too-hot liquid kills yeast, while too-cool liquid fails to properly activate yeast. When in doubt, test on your wrist; it should feel pleasantly warm but not hot.
How do I know when dough has risen enough?
Properly risen dough roughly doubles in volume and springs back slowly when gently poked with a floured finger. If the indentation remains, more time is needed. If it springs back immediately, rising neared completion.
Can I use active dry yeast instead of instant?
Yes, though instant yeast performs slightly better due to smaller particle size and faster activation. If using active dry yeast, increase quantity by one-quarter teaspoon for equivalent results.
Are these buns suitable for freezing?
Definitely. Freeze baked, cooled buns in freezer bags for up to one month. Thaw at room temperature for two to three hours before serving. For best texture, warm gently before eating.
References
- Traditional Hot Cross Buns – Easy Recipe from 1950 — Melissa K. Norris. Accessed 2026. https://melissaknorris.com/hot-cross-buns-vintage-recipe-from-1950/
- How to Make Traditional Hot Cross Buns – Culinary Ginger — Culinary Ginger. Accessed 2026. https://culinaryginger.com/hot-cross-buns/
- Hot Cross Buns Recipe — Natasha’s Kitchen. Accessed 2026. https://natashaskitchen.com/hot-cross-buns-recipe/
- Traditional Hot Cross Buns — The Daring Gourmet. Accessed 2026. https://www.daringgourmet.com/traditional-hot-cross-buns/
- Hot Cross Buns Recipe — RecipeTin Eats. Accessed 2026. https://www.recipetineats.com/hot-cross-buns-recipe/