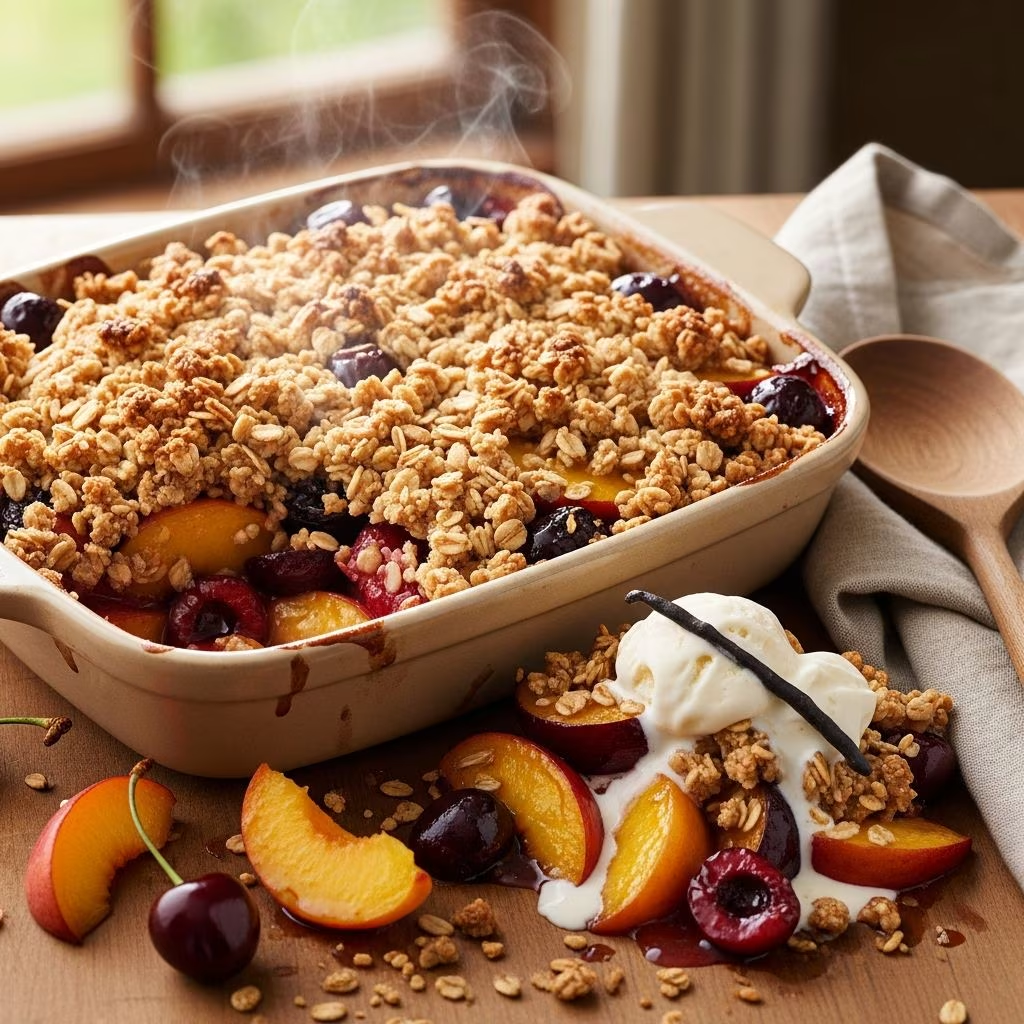
Stone fruit crisps represent one of the most versatile and rewarding desserts a home baker can master. The combination of juicy peaches and nectarines with a crunchy, buttery topping creates a textural contrast that appeals to diverse palates. Whether you’re preparing a casual family dinner or impressing guests at a dinner party, understanding the fundamentals of crisp-making transforms what appears to be a simple dessert into a sophisticated culinary creation.
Understanding Your Core Ingredients: Selecting Quality Produce
The foundation of any exceptional crisp begins with ingredient selection. Fruit quality directly impacts the final product’s flavor profile and texture. When choosing peaches and nectarines, look for specimens that yield slightly to gentle pressure without being soft or bruised. Ripe fruit contains higher sugar concentrations and produces more vibrant flavor compounds during baking.
The distinction between peaches and nectarines matters less than their ripeness level. Peaches feature a fuzzy exterior, while nectarines present smooth skin, but both fruits share identical internal structures and flavor profiles. Combining the two varieties in a single crisp creates visual interest and allows flavors to complement one another. A mixture provides balanced sweetness and complexity that either fruit alone might not achieve.
Consider these selection criteria when shopping:
- Choose firm-ripe fruits rather than hard or overripe specimens
- Examine the fruit for consistent coloring without green undertones
- Smell the fruit near the stem end for fragrance intensity
- Press gently—fruit should give slightly without feeling mushy
- Avoid fruits with bruises, cuts, or soft spots
Frozen stone fruits offer a practical alternative when fresh options prove unavailable or cost-prohibitive. Thawed frozen peaches and nectarines perform adequately in crumbles, though their texture becomes slightly softer than fresh fruit. Frozen produce works particularly well if you drain excess moisture before mixing with other filling ingredients.
Building the Perfect Filling: Flavor Development and Texture Control
Creating a properly balanced filling requires understanding how different ingredients interact during baking. Sugar serves multiple functions beyond sweetness—it draws moisture from fruit through osmosis, combines with other compounds to create new flavors through the Maillard reaction, and browns to develop caramelized notes.
The quantity of added sugar depends on fruit ripeness and personal preference. Riper fruits require less supplemental sugar, while underripe specimens benefit from additional sweetness. Generally, between ¼ and ½ cup sugar per 3-4 pounds of fruit provides adequate balance without overwhelming natural fruit flavors.
Cornstarch and flour function as thickening agents essential for preventing soggy, runny crisps. These starches absorb excess moisture released during baking, creating a cohesive, spoonable filling. Without thickening agents, fruit juice accumulates at the bottom of the dish, preventing the crisp topping from adhering properly to the filling.
Typical thickening ratios include:
- 3-4 tablespoons cornstarch per 3-4 pounds of sliced fruit
- Alternative: 2-3 tablespoons all-purpose flour for lighter thickening
- Tapioca flour provides similar results with slight textural differences
Acid enhancement through lemon juice brightens fruit flavors and prevents the filling from becoming cloying. Lemon juice’s acidity also affects pectin gelation, supporting the thickening process. Between 1-2 tablespoons of fresh lemon juice typically suffices for standard batches.
Spice selection elevates a basic fruit mixture into a more sophisticated dessert. Cinnamon appears in nearly every variation, warming the palate and complementing stone fruit’s subtle sweetness. Nutmeg adds complexity and depth, while cardamom introduces exotic floral notes. Begin with conservative spice quantities—¼ to ½ teaspoon per batch—adjusting based on personal preference in subsequent preparations.
Constructing the Crisp Topping: Achieving the Perfect Crumb
The topping distinguishes crisps from other fruit desserts like cobblers or pies. A well-constructed topping achieves golden-brown coloring with a texture ranging from tender to slightly crunchy, depending on ingredient proportions and preparation method.
Dry ingredients form the topping’s foundation. All-purpose flour provides structure, while rolled oats contribute textural complexity and heartiness. Brown sugar, compared to granulated sugar, introduces moisture and molasses flavor that deepens caramel notes during baking. Salt balances sweetness and enhances flavor perception.
Typical dry ingredient proportions include:
- 1-1.5 cups all-purpose flour
- 1-1.5 cups rolled oats
- ½-¾ cup brown sugar
- ¼ teaspoon salt
Fat incorporation transforms dry ingredients into the signature crumbly texture. Cold butter, cut into small cubes, distributes evenly throughout the dry mixture through manual rubbing or pastry cutters. The cold temperature prevents fat from melting prematurely, ensuring it remains dispersed in small particles rather than forming one cohesive paste.
Work butter into dry ingredients using one of these techniques:
- Pastry cutter or two forks for precision control
- Fingertips for traditional tactile method
- Pulse in food processor for consistent distribution
The mixture should resemble coarse breadcrumbs or sand when properly combined. If butter melts during handling, refrigerate the mixture for 15-20 minutes before proceeding.
Optional additions customize the topping to personal preferences. Chopped nuts—particularly walnuts, pecans, or almonds—introduce crunch and nutty flavors. Shredded coconut provides tropical sweetness. Some bakers incorporate chopped dates for natural sweetness and textural variety.
Preparation Techniques: Setting Yourself Up for Success
Proper preparation before baking prevents common mistakes that result in disappointing crisps. Begin by preheating your oven to 350-375°F (175-190°C), allowing adequate temperature stabilization. Oven temperature consistency affects baking time and browning patterns significantly.
Baking dish selection influences how heat distributes throughout the dessert. Standard 9×13-inch glass or ceramic dishes provide reliable results for most recipes serving 6-8 people. Glass conducts heat efficiently and allows visual monitoring of browning progress. Ceramic dishes retain heat well, potentially requiring slightly shorter baking times.
Prepare the baking dish by lightly buttering the interior surfaces, preventing the fruit mixture from sticking to edges and bottom. This step proves particularly important if serving directly from the baking dish.
Assemble all ingredients before combining anything—a practice called mise en place. Organize peaches and nectarines in a dedicated bowl, sugar and spices in another, and topping dry ingredients in a third container. This organization streamlines the assembly process and reduces the likelihood of forgotten ingredients.
Assembly and Baking: Bringing Everything Together
Proper assembly ensures even cooking and optimal texture distribution. Begin by arranging prepared fruit in the baking dish in a single, relatively even layer. Pour any accumulated juices from the preparation bowl over the fruit, as these contain flavor compounds and moisture essential for filling consistency.
Sprinkle the prepared crumb topping evenly across the fruit surface, using your fingers to distribute it if the topping hasn’t been broken into fine crumbs. Avoid compacting the topping—a loosely distributed topping becomes crunchier during baking than a densely packed one.
Bake until the topping achieves golden-brown coloring and the fruit filling visibly bubbles at the edges—typically 45-50 minutes for standard batches. If the topping brownes too quickly while the fruit interior remains uncooked, tent the dish with aluminum foil, reducing direct heat exposure while allowing internal cooking to continue.
Proper doneness indicators include:
- Topping displaying even golden-brown color
- Fruit juices bubbling at the edges of the baking dish
- Internal temperature of 190-200°F when measured at the center with an instant-read thermometer
- Slight firmness when the topping is pressed gently
Cooling, Storage, and Serving Recommendations
Allowing the crisp to cool sufficiently before serving prevents burning your mouth and allows the filling to set properly. Cool at room temperature for at least 30 minutes, though one hour provides optimal texture development. As crisps cool, the thickening agent fully hydrates and sets, transforming the filling from loose fruit mixture into cohesive, spoonable consistency.
Serving options expand beyond the plain dessert. Vanilla ice cream’s cold creaminess contrasts beautifully with warm crisp components. Whipped cream adds lightness, while custard sauce introduces richness and complexity. Some diners prefer their crisps at room temperature rather than warm, particularly during summer months.
Storage considerations depend on whether you’ve consumed the entire dish immediately. Covered crisps maintain quality for 2-3 days when refrigerated. Reheat individual portions in the microwave for 30-45 seconds or in a 350°F oven for 10-15 minutes to restore warmth without overcooking the topping.
Troubleshooting Common Crisp Problems
Soggy topping typically results from insufficient thickening agents or excess moisture. Increase cornstarch quantity by one tablespoon and reduce baking time by 5-10 minutes in subsequent preparations. Ensuring fruit reaches proper ripeness—neither underripe nor overripe—prevents excessive liquid release.
Undercooked filling becomes evident when fruit remains firm and crunchy rather than tender. Extend baking time by 10-15 minutes, or increase oven temperature by 25°F. Ensure you’re measuring fruit quantities accurately relative to thickening agent quantities.
Overly dry filling develops when too much thickening agent absorbs moisture or when insufficient ripe fruit provides natural juices. Reduce cornstarch quantity by half a tablespoon and ensure you’re selecting properly ripe stone fruits.
Variations and Creative Adaptations
Once you’ve mastered the basic technique, experimentation becomes enjoyable. Spice variations might include adding ¼ teaspoon ground ginger for warmth or cardamom for floral complexity. Topping modifications could involve replacing oats with additional nuts, incorporating coconut, or using alternative sweeteners like maple syrup or honey in the crumb mixture.
Mixed fruit combinations expand beyond peaches and nectarines to include berries, blackberries, or cherries. The base filling and topping techniques remain unchanged, though fruit-specific moisture contents may require minor thickening agent adjustments.
Frequently Asked Questions
Can I use canned peaches instead of fresh? Canned peaches work adequately, though they contribute less textural interest than fresh fruit. Drain canned fruit thoroughly and reduce cornstarch quantity by half, as canned fruit releases less juice during baking.
How far in advance can I prepare a crisp? Assemble the crisp entirely up to 4 hours before baking. Cover and refrigerate until ready to bake. Cold crisps may require 5-10 additional minutes baking time.
What if my topping isn’t browning evenly? Rotate the baking dish halfway through baking, turning it 180 degrees. Uneven browning often results from inconsistent oven heat distribution or incorrect oven rack positioning.
Can I halve the recipe for smaller servings? Yes, proportionally reduce all ingredients and bake in an 8×8-inch dish. Reduce baking time to 30-35 minutes, checking for doneness earlier than full-size batches.
Is peeling peaches necessary? No—peach skins are entirely edible and contribute fiber and nutrition. Some diners prefer peeled fruit for texture consistency, which requires briefly blanching peaches in boiling water before the skins slip off easily.
References
- Peach and Nectarine Crumble — Kopiaste (Greek Hospitality). Retrieved 2026-04-10. https://www.kopiaste.org/2010/09/peach-nectarine-crumble-and-how-to-peel-stone-fruit/
- Peach and Nectarine Pecan Sandy Crumble — Olive & Mango. Retrieved 2026-04-10. https://www.oliveandmango.com/peach-and-nectarine-pecan-sandy-crumble/
- Easy Peach Crisp (Brown Butter Oat Topping) — Blue Bowl Recipes. Retrieved 2026-04-10. https://bluebowlrecipes.com/peach-nectarine-blackberry-crisp/