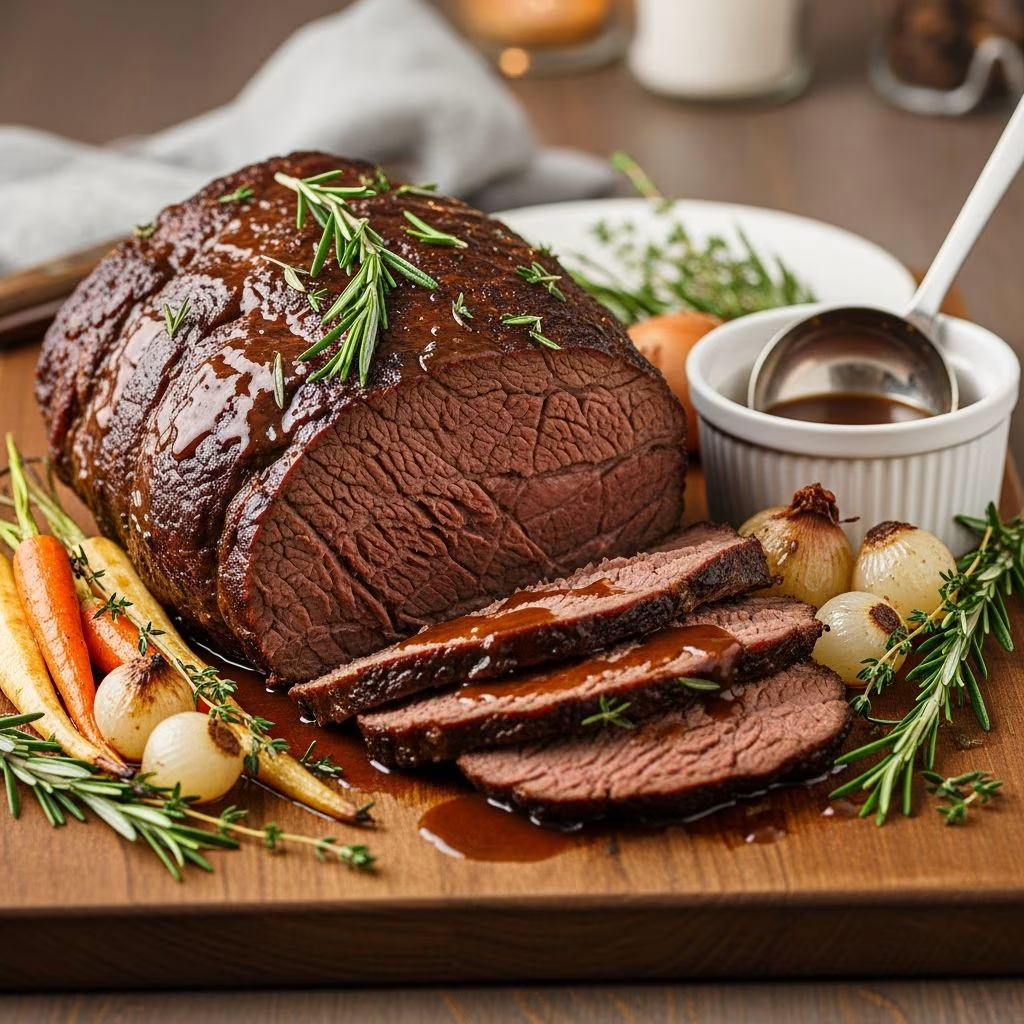
Braising represents one of the most transformative cooking techniques available to home cooks, capable of converting economical cuts of beef into restaurant-quality centerpieces for memorable meals. The process involves searing meat to develop complex flavors, then slowly cooking it in liquid at controlled temperatures until the connective tissues break down into gelatin, creating an incredibly tender texture and rich sauce.
Understanding Your Protein: Selecting the Right Cut
The beef chuck roast stands as the ideal candidate for braising applications. This particular cut originates from the shoulder region of the animal, where significant intramuscular fat and connective tissue create the perfect conditions for long, slow cooking. When exposed to moist heat over extended periods, these elements transform into something desirable rather than problematic.
When shopping for your roast, aim for pieces weighing between three and four pounds, as this size ensures even cooking throughout while remaining manageable in standard Dutch ovens. Look for beef displaying a deep red color with marbling—those small veins of fat running through the muscle—as these fat deposits contribute essential flavor and moisture during the braising process. Roasts wrapped in plastic should show no excessive liquid pooling at the bottom, which would indicate poor storage conditions.
Preparation Strategy: The Foundation for Success
The initial preparation phase establishes the foundation for your entire dish. Begin by removing your roast from refrigeration approximately one hour before cooking begins, allowing the interior temperature to rise closer to room temperature for more uniform cooking. This temperature equilibration proves particularly important for achieving consistent results across the entire piece of meat.
Season your roast generously with kosher salt and freshly ground black pepper on all surfaces. Some experienced cooks extend this preparation by placing the seasoned roast uncovered on a rack in the refrigerator for twelve to forty-eight hours before cooking. This extended dry-curing allows the salt to penetrate deeper into the muscle fibers while the dry environment promotes better browning during the searing stage.
The Searing Process: Building Flavor Through Heat
Never underestimate the importance of the searing step. Pat your roast completely dry with paper towels, as moisture inhibits proper browning. Heat a heavy Dutch oven or large ovenproof pot over medium-high heat until the interior reaches the point where a drop of water instantly sizzles and evaporates.
Add oil with a high smoke point—such as refined olive oil, vegetable oil, or avocado oil—allowing it to heat until wisps of smoke appear. Carefully place your roast into the pot, resisting the urge to move it for at least four to five minutes. This undisturbed contact allows the meat’s exterior to develop a flavorful brown crust through the Maillard reaction, a chemical process that creates hundreds of complex flavor compounds.
After browning the first side, flip the roast and repeat the process for the remaining surfaces. Plan on approximately four to five minutes per side for a typical four-pound roast. This investment of time directly translates to the depth and complexity of your final braising liquid.
Aromatic Foundation: Building the Flavor Base
Remove your seared roast temporarily and set it aside on a clean plate. In the same pot, add diced onions—typically one large yellow onion or two smaller ones, coarsely chopped. Allow the onions to cook until they begin releasing their natural juices and softening, approximately two to three minutes.
Add minced or smashed garlic cloves and cook until the aroma becomes distinctly fragrant, usually thirty to forty-five seconds. Some recipes incorporate tomato paste at this stage, stirring it into the vegetables and allowing it to cook for two to three minutes. This step further concentrates flavors and adds subtle umami depth to the braising liquid.
If using tomato paste, deglaze your pot with a quarter cup of wine or broth, using a wooden spoon to scrape up the flavorful browned bits stuck to the bottom. These fond particles contain concentrated beef flavors and should be fully incorporated into your cooking liquid.
Liquid Selection and Braising Composition
The liquid component critically influences your final dish’s character. Traditional approaches combine beef broth with wine, typically maintaining a ratio of approximately three parts broth to one part wine. This combination provides the savory depth of good broth while the wine adds acidity and complexity.
Plan to add between two to three cups of beef broth, depending on your pot size and roast dimensions. The liquid should partially submerge the roast but not completely cover it—approximately two-thirds of the roast should remain above the liquid line. This partial submersion allows the top to develop additional browning while the bottom remains moist.
Red wine varieties such as Cabernet Sauvignon, Pinot Noir, or Côtes du Rhône work particularly well, though white wine or additional broth serves equally effectively if alcohol is a concern. If avoiding wine entirely, simply substitute additional broth or water.
Seasoning Profile: Creating Depth
Bay leaves form the cornerstone of traditional pot roast seasoning. Add two to three whole leaves to your braising liquid, as their subtle piney notes complement beef beautifully without overpowering other flavors. Fresh or dried thyme contributes earthiness and herbaceous quality; use six to ten fresh sprigs or one teaspoon of dried thyme.
Additional herbs to consider include fresh parsley, which adds brightness, and rosemary, though use this sparingly as its strong piney character can easily dominate. Many cooks also appreciate a touch of paprika or Creole seasoning for additional warmth and complexity. Sea salt and freshly ground black pepper should be added to taste after the initial seasoning.
Cooking Method Variations
Oven Braising
Place your pot, lid on securely, in a preheated three-hundred-degree Fahrenheit oven positioned on the lower rack. This low, steady heat allows collagen to hydrolyze into gelatin gradually without drying out the exterior. Plan for three and one-half to four hours of cooking time, depending on your roast’s exact dimensions and your particular oven’s characteristics.
Slow Cooker Method
Transfer your seared roast and braising components to a large slow cooker. Cover and cook on the low setting for six to seven hours until the meat reaches complete tenderness. The low, consistent temperature in a slow cooker produces slightly different results than oven braising, often creating a more uniform texture throughout.
Pressure Cooker Application
For faster results, an Instant Pot or similar pressure cooker can complete the braising process in approximately fifty-five minutes on high pressure. This method produces excellent results, though the rapid heating prevents some of the complex flavor development that occurs through slower cooking methods.
Vegetable Integration: Timing Matters
Rather than adding all vegetables simultaneously, strategic timing ensures each achieves optimal texture. After the initial hour and a half of cooking, add heartier vegetables such as carrots cut into two-inch pieces and celery chunks. These vegetables require approximately two hours to become properly tender in the braising liquid.
Potatoes—whether fingerling, baby Yukon, or tri-colored varieties—should be added approximately one hour before the estimated completion time. Adding them earlier results in mushy, disintegrating potatoes, while later addition may leave them insufficiently cooked when the beef reaches the desired tenderness.
Doneness Assessment: The Fork Test
The roast reaches completion when a fork easily pierces the thickest section of the meat and separates into tender chunks with minimal resistance. The internal temperature should register between two hundred and two hundred and ten degrees Fahrenheit when measured with a meat thermometer inserted into the thickest portion.
Finishing Techniques: Creating the Perfect Sauce
Once your braising is complete, carefully remove the roast and vegetables to a serving vessel. Strain the braising liquid through a fine-mesh sieve into a separate container, allowing fats to rise to the surface. For a richer sauce, leave the fat; for a lighter version, skim it away using a spoon or fat separator.
For a thickened sauce, create a slurry by whisking together cornstarch or flour with equal parts cold water, then slowly whisk this into the warm braising liquid while heating to a simmer. Cook for two to three minutes, stirring frequently, until the sauce reaches your desired consistency.
Common Variations and Flavor Profiles
Italian-Inspired Version: Incorporate basil, oregano, and garlic in larger quantities, using red wine as your primary liquid component. Add tomato paste and finish with fresh parsley.
Southern Style: Include Creole seasoning, Worcestershire sauce, and bell peppers alongside traditional aromatics. Some recipes add a teaspoon of cayenne pepper for subtle heat.
French Bourguignon Approach: Use burgundy wine, pearl onions, mushrooms, and lardons (small bacon pieces) for a classic preparation.
Storage and Make-Ahead Options
Pot roast actually improves when prepared a day or two ahead, as the flavors continue developing and intensifying during refrigeration. Cool the braised meat and vegetables completely before storing in an airtight container with the braising liquid for up to four days in the refrigerator.
For longer storage, freeze the complete dish in suitable containers for up to three months. Thaw overnight in the refrigerator before gently reheating in a low oven, adding a splash of broth if the sauce has thickened excessively during storage.
Troubleshooting Common Issues
Tough or Chewy Meat: The roast likely required additional cooking time. Braising cannot be rushed; low and slow remains the fundamental principle.
Thin, Watery Sauce: Continue simmering uncovered after removing the meat to reduce and concentrate flavors, or use a cornstarch slurry as described above.
Excessive Grease: Allow the braising liquid to cool completely, which solidifies the fat for easy removal. Alternatively, use a fat separator to skim during preparation.
Bland Flavor: Ensure you properly seared the roast initially. Insufficient browning reduces the flavorful fond development, compromising the entire dish.
Serving Suggestions and Pairings
Serve your braised roast directly from the pot for casual family meals, or arrange plated portions with vegetables and sauce for more formal presentations. Excellent accompaniments include creamy mashed potatoes, egg noodles, crusty bread for soaking in the sauce, or simple steamed vegetables.
A full-bodied red wine pairs beautifully with the finished dish, particularly wines from the same region or grape variety used in cooking. Roasted Brussels sprouts, green bean casserole, or roasted root vegetables provide textural contrast to the soft braised components.
References
- Classic Pot Roast Recipe — Chef Billy Parisi. Accessed 2026. https://www.billyparisi.com/pot-roast/
- Perfect Pot Roast Recipe — Spend With Pennies. Accessed 2026. https://www.spendwithpennies.com/perfect-pot-roast/
- Pot Roast – Fall Apart Beef, Tender Flavour Infused Vegetables — RecipeTin Eats. Accessed 2026. https://www.recipetineats.com/slow-cooker-beef-pot-roast/
- Mom’s Perfect Southern Pot Roast Recipe — Butter Be Ready. Accessed 2026. https://www.butterbeready.com/southern-pot-roast-recipe/
- Cozy, Classic Pot Roast Recipe — Sugar Spun Run. Accessed 2026. https://sugarspunrun.com/best-pot-roast-recipe/