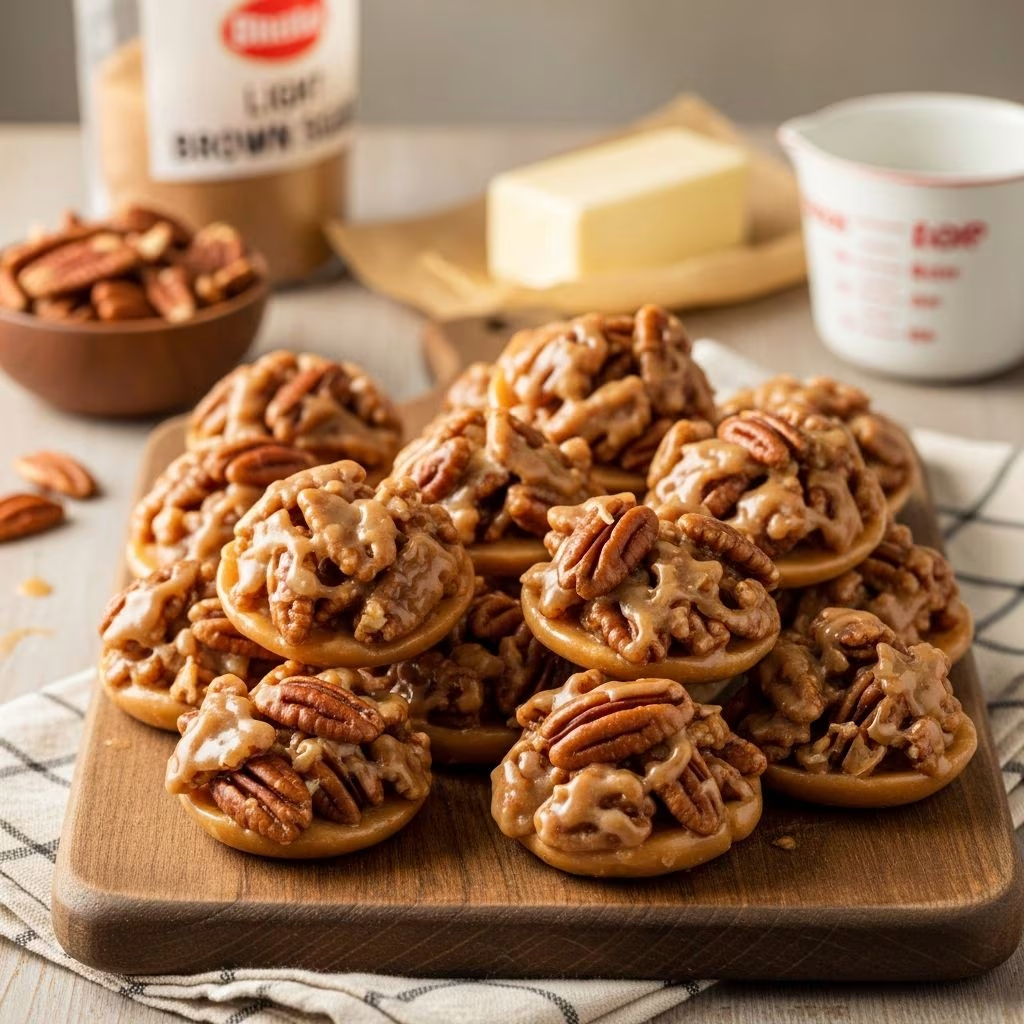
Southern pralines represent one of the most cherished confections in American culinary tradition, combining simple ingredients into a sophisticated candy that melts elegantly on the tongue. These bite-sized treasures have graced holiday tables and gift boxes for generations, earning their place as a quintessential symbol of Southern hospitality and culinary excellence. Unlike other candies that require specialized equipment or advanced techniques, pralines remain surprisingly accessible to home cooks willing to understand the fundamental principles of candy-making.
The beauty of praline-making lies in its elegant simplicity paired with the precision required to achieve that perfect texture—neither too soft nor excessively firm. This balance transforms basic pantry staples into a delicacy that rivals commercial confections, all within the comfort of your own kitchen.
Understanding the Essential Ingredients
Creating authentic Southern pralines requires thoughtful selection of each component, as quality ingredients directly influence the final product’s flavor and texture.
The Sugar Foundation
Pralines derive their distinctive caramel-like flavor from a careful combination of granulated sugar and packed light brown sugar. The granulated sugar provides the structural foundation and sweetness, while brown sugar contributes molasses undertones that create depth and richness. Most recipes combine these in roughly equal proportions, though variations exist depending on desired sweetness levels and texture preferences. The ratio of sugars affects not only flavor but also the mixture’s cooking behavior and final consistency.
Dairy Components and Their Impact
The choice of dairy product significantly influences praline texture and consistency. Three primary options dominate praline recipes, each producing slightly different results. Evaporated milk creates the most reliable, consistent texture and represents the preference among experienced candy makers for its ability to produce pralines that maintain structural integrity without becoming overly dense. Heavy whipping cream generates a richer flavor profile and slightly softer consistency. Half-and-half serves as a middle ground between these options, providing decent results while offering a compromise in texture and richness. Some contemporary recipes experiment with whole milk, though this produces notably softer pralines that may require adjusted cooking temperatures or extended setting times.
Butter and Salt Considerations
Quality butter amplifies the candy’s depth, with many recipes calling for either salted or unsalted varieties depending on desired sodium levels. Unsalted butter paired with added salt provides greater control over the final salt content, while salted butter offers convenience and subtle flavor enhancement. The quantity of butter affects richness and smoothness, with most recipes incorporating six tablespoons to half a cup per batch. Salt, whether added separately or incorporated through salted butter, enhances the overall flavor profile and balances the sweetness, typically using just a quarter teaspoon or pinch per batch.
Vanilla and Pecans
Vanilla extract, added after cooking, provides aromatic complexity that elevates the candy beyond simple sugar confection. True vanilla produces superior results compared to imitation varieties, though both remain acceptable. Pecan selection matters equally—fresh, high-quality pecan halves ensure optimal crunch and flavor. Some experienced cooks recommend allowing frozen pecans to reach room temperature before incorporation, which promotes better mixing and more consistent texture distribution throughout the finished candy.
The Science Behind Praline Cooking Temperatures
Understanding candy-making temperatures represents the most critical technical skill for successful praline production. Candy thermometers measure the concentration of dissolved sugar in the mixture, which directly determines the candy’s final texture.
The soft-ball stage, ranging from 235 to 240 degrees Fahrenheit, represents the target zone for praline production. At this temperature, the sugar syrup, when cooled and tested in cold water, forms a ball that remains soft and pliable rather than becoming hard or brittle. This specific temperature range ensures pralines achieve the characteristic creamy texture that defines quality confections. Temperatures below this range produce candy that remains too soft and sticky, failing to set properly and maintaining an undesirable liquid or paste-like consistency. Conversely, exceeding this temperature range produces harder candy that loses the melting quality pralines should possess, becoming grainy or difficult to bite through.
Investing in an accurate candy thermometer proves essential, as even slight temperature variations—differences of just a few degrees—significantly impact results. Digital thermometers often provide greater accuracy than traditional analog versions, reducing guesswork and improving consistency across multiple batches.
Step-by-Step Preparation and Cooking Method
Pre-Cooking Preparation
Success begins before the mixture ever touches heat. Line a baking sheet with parchment paper, arranging it within arm’s reach of your cooking station, as the candy sets rapidly once removed from heat and requires immediate portioning. Having a tablespoon-sized scoop or spoon positioned nearby prevents scrambling for implements while the mixture firms up. Some cooks prefer ice cream scoops for consistent sizing, while others use rubber spatulas or wooden spoons for more organic shapes. Gather all ingredients and measure them precisely before beginning—candy-making tolerates no improvisation or mid-process measuring.
Combining and Heating Ingredients
Add all ingredients except pecans, salt, and vanilla extract to a heavy-bottomed pot, as thin-walled cookware conducts heat unevenly and produces inconsistent results. Medium heat provides the ideal balance between rapid cooking and preventing scorching. Stir regularly with a wooden spoon as the mixture begins to melt and combine. Initially, the mixture appears rough and separated, but patience yields a smooth, homogeneous liquid that gradually rises in temperature. This phase typically requires several minutes before the mixture begins foaming and boiling.
The Critical Boiling and Temperature Phase
Once the mixture begins foaming and boiling, increase stirring frequency to constant motion. This prevents sugar crystallization on the pot sides and ensures even heating throughout the mixture. Continue cooking while stirring constantly until the thermometer reaches the target temperature of 235 to 240 degrees Fahrenheit. Depending on the quantity and heat level, this phase typically requires 10 to 18 minutes. Monitor the thermometer carefully as temperatures approach the target zone, as the final degrees rise quickly.
Post-Cooking Mixing and Setting
Immediately upon reaching target temperature, remove the pot from heat and allow the mixture to cool for approximately five minutes. This brief cooling period prevents the candy from setting too rapidly while still warm from cooking, which can create undesirable texture or prevent proper incorporation of additions. Add vanilla extract and pecans to the cooled mixture, then beat vigorously using a wooden spoon or rubber spatula.
The stirring phase represents a critical control point for final texture. Approximately two to three and a half minutes of vigorous stirring causes the candy to lose its glossy appearance and thicken slightly. The mixture transitions from liquid to increasingly viscous as the sugar crystallizes. This represents the ideal endpoint—the candy should thicken noticeably but remain workable for scooping. Excessive stirring causes the mixture to seize, becoming grainy and crumbly as the sugar crystallizes prematurely. Insufficient stirring prevents proper setting, leaving finished pralines soft and sticky.
Portioning and Cooling
Working quickly before the mixture firms completely, scoop portions onto the prepared parchment paper using consistent sizing for uniform appearance. The candy will continue thickening as it cools, eventually achieving its final firm texture within 30 minutes to an hour, depending on room temperature and humidity. Avoid moving the pralines until they have set completely, as premature disturbance creates cracks or uneven surfaces.
Common Challenges and Solutions
| Issue | Likely Cause | Solution |
|---|---|---|
| Pralines remain too soft and sticky | Insufficient stirring or temperature too low | Extend stirring time, verify thermometer accuracy, use evaporated milk for more consistent texture |
| Candy seizes and becomes grainy | Over-stirring or too much heat | Practice shorter stirring durations, cool mixture slightly before adding pecans, use medium or medium-low heat |
| Uneven texture or crystallization | Inconsistent stirring or temperature fluctuations | Maintain constant stirring motion, use accurate thermometer, ensure consistent heat level |
| Pralines crack or develop surface defects | Premature movement or humidity changes | Allow complete cooling before moving, avoid kitchen humidity spikes, store in airtight containers |
| Candy won’t reach proper temperature | Thermometer inaccuracy or inadequate heat | Verify thermometer calibration, increase heat slightly, ensure pot has adequate contact with heat source |
Storage and Longevity
Properly stored pralines maintain quality for extended periods. Keep finished candies in airtight containers at room temperature, away from direct sunlight and humidity sources. The candy’s tendency to absorb atmospheric moisture makes dry storage essential for maintaining texture. In humid climates, refrigeration may be necessary, though this can sometimes alter mouthfeel slightly. Pralines stored correctly remain fresh and delicious for two to three weeks, making them ideal for advance holiday preparation or gift-giving.
Troubleshooting with the Vinegar Method
Some experienced candy makers add one tablespoon of white vinegar to their mixture before cooking, claiming this prevents crystallization and improves texture consistency. The acidic vinegar interferes with sugar crystal formation, potentially yielding smoother, more predictable results. This technique proves particularly valuable for cooks experiencing recurring seizing or graininess issues.
Frequently Asked Questions
Can I use butter directly from the refrigerator instead of room temperature?
While cold butter will eventually incorporate, room-temperature butter blends more smoothly into the mixture and distributes more evenly throughout the finished candy. For best results, remove butter from refrigeration 15 to 20 minutes before use.
What should I do if my pralines spread too thin on the parchment paper?
This indicates insufficient stirring before scooping. The mixture remained too liquid, preventing proper thickening. Try extending your next batch’s stirring time by 30 seconds to one minute and verify your thermometer reaches the proper temperature.
Is a candy thermometer absolutely necessary?
While the cold water test (dropping a small amount into cold water to check consistency) provides an alternative, a thermometer removes guesswork and produces more consistent results, especially for novice candy makers.
Can I double the recipe?
Doubling recipes is possible but requires increased cooking time and careful thermometer monitoring. Larger batches heat less uniformly and may require slightly extended cooking periods. Some cooks recommend using a heavier pot and lower heat for larger quantities.
Why do my pralines have an oily appearance or separated butter?
This typically indicates the mixture was not stirred sufficiently before scooping, preventing proper emulsification. The butter separated from the sugar mixture as it cooled. Increase stirring duration in future batches to achieve proper blending.
Conclusion
Mastering homemade praline production transforms a seemingly complex candy-making process into an achievable home culinary project. By understanding ingredient roles, respecting temperature precision, and practicing proper technique, anyone can produce professional-quality pralines rivaling commercial confections. The satisfaction of creating these sophisticated candies from basic ingredients justifies the modest effort required, delivering impressive results that delight family members and impress gift recipients throughout the year.
References
- The Culinary Institute of America Professional Chef — The Culinary Institute of America. 2015. Official culinary education standards and candy-making techniques used in professional kitchens.
- Candy Thermometer Guide and Temperature Chart — National Institute of Standards and Technology (NIST). 2022-06-15. https://www.nist.gov/
- Food Safety Guidelines for Homemade Candy Production — U.S. Food and Drug Administration (FDA). 2024-02-10. https://www.fda.gov/food
- Understanding Sugar Crystallization and Candy Structure — Institute of Food Technologists. 2023-08-22. https://www.ift.org/
- Traditional Southern Confection Documentation — Smithsonian Institution Food History Archives. 2021-03-11. https://www.si.edu/