There is something genuinely satisfying about biting into a burger nestled in a bun you created from scratch. The aroma of fresh bread baking in your oven, the soft texture that gives way to your teeth, and the homemade flavor that no store-bought option can quite replicate—these are the rewards of learning to bake hamburger buns at home. Whether you’re planning a backyard barbecue, hosting a casual family dinner, or simply wanting to elevate your everyday burgers, mastering this fundamental bread-baking skill opens doors to culinary confidence and delicious results.
Making hamburger buns from scratch might seem daunting if you’re new to bread baking, but the process is more approachable than you might think. With basic pantry ingredients and a little patience, you can produce a batch of beautiful, golden-brown buns that will impress your family and guests. This guide walks you through every aspect of the baking journey, from understanding your ingredients to troubleshooting common challenges.
Understanding Your Ingredients and Their Roles
Every ingredient in a hamburger bun recipe serves a specific purpose in creating the final product. Understanding what each component contributes helps you make informed adjustments and develop better baking instincts.
The Foundation: Flour
All-purpose flour is the backbone of most hamburger bun recipes, though some bakers prefer bread flour for a slightly chewier texture. Flour provides structure through its gluten content, which develops as you knead the dough. The amount of flour needed can vary based on humidity, altitude, and how you measure the flour. Rather than relying solely on measurements, experienced bakers judge flour amounts by observing the dough’s consistency—it should form a soft, slightly sticky ball that holds together but remains pliable.
Activating the Rise: Yeast
Yeast is the living organism responsible for making your buns rise and develop flavor. Two common types appear in hamburger bun recipes: instant yeast (also called rapid-rise) and active dry yeast. Instant yeast dissolves more readily and works slightly faster, while active dry yeast requires a brief activation period in warm water before mixing with other ingredients. The water temperature is crucial—between 105 and 110 degrees Fahrenheit provides the ideal environment for yeast activation. Water that’s too hot kills the yeast, while water that’s too cool doesn’t activate it sufficiently.
Sweetness and Flavor: Sugar
Sugar serves multiple functions in your bun dough. It feeds the yeast, promoting a more vigorous rise and better browning during baking. Sugar also balances and enhances the overall flavor profile of the buns, creating that slightly sweet taste characteristic of classic hamburger buns. Most recipes call for two to four tablespoons of sugar, depending on your preference for sweetness.
Enriching the Dough: Fat and Eggs
Butter or oil contributes richness and helps create a tender crumb structure. Eggs add moisture, nutrition, and contribute to browning during baking. These ingredients also help the buns stay soft and fresh longer after baking. Most recipes use one egg and two to three tablespoons of butter or oil.
Bringing It Together: Salt and Water
Salt enhances flavor and helps control yeast fermentation—it actually slows down yeast activity slightly, which can lead to better flavor development. Water hydrates the flour and allows gluten development. The total water content typically ranges from three-quarters cup to one and a half cups, depending on the flour and other ingredients used.
The Process: From Mixing to Shaping
Step One: Activating Your Yeast
Begin by combining warm water (105–110 degrees Fahrenheit) with yeast and sugar in a bowl or measuring cup. Let this mixture sit undisturbed for five to ten minutes. You’ll notice it becoming foamy—this visual cue indicates that your yeast is alive and active. If the mixture remains flat and doesn’t foam, your yeast may be expired or the water temperature was incorrect; start fresh rather than proceeding with inactive yeast.
Step Two: Combining Dry Ingredients
While the yeast activates, whisk together flour and salt in a separate large bowl. Some recipes combine flour, salt, and sugar together at this stage. This separate mixing step ensures even distribution of salt throughout the dough, preventing any pockets of overly salty flavor.
Step Three: Bringing Wet and Dry Together
Once your yeast mixture is foamy, combine it with your dry ingredients. Add beaten egg and any fat (butter or oil) at this stage. Mixing can be done by hand with a wooden spoon or in a stand mixer with a dough hook attachment. If using a stand mixer, start on low to medium speed to incorporate all ingredients before increasing speed. The resulting dough should be soft and slightly sticky—not stiff and dry.
Step Four: The Kneading Stage
Knead the dough for five to seven minutes until it becomes smooth and elastic. During kneading, gluten strands develop and organize, creating the network that traps gas bubbles and gives bread its characteristic structure. You’ll notice the dough becoming less sticky and more cohesive as gluten develops. If using a stand mixer with a dough hook, knead on low to medium speed for about five minutes. If kneading by hand, work the dough on a lightly floured surface, folding it toward you and pushing it away with the heel of your hand in a rhythmic motion.
Rising and Development: Patience Pays Off
The First Rise
After kneading, place your dough in the same mixing bowl (lightly oiled or left as-is) and cover it loosely with plastic wrap or a clean towel. Allow the dough to rise at room temperature for one hour or until doubled in size. This rising period is crucial—yeast ferments the dough, creating carbon dioxide bubbles that make the buns light and airy. Temperature affects rising time: in a warm kitchen, it may take less time, while cooler conditions may extend it to ninety minutes or longer.
Shaping for Success
Once risen, turn the dough out onto a lightly floured or greased surface and gently divide it into eight equal pieces. To ensure even-sized buns, you can weigh each piece if you have a kitchen scale. For each piece, shape it into a ball by gently pulling the surface toward the bottom, creating tension on top. Then gently flatten the top slightly—the result should resemble a dome or mushroom shape with a flat base. This shape allows even browning and provides a flat surface for your burger.
Placement and Second Rise
Arrange your shaped buns on a parchment-lined or greased baking sheet with about three inches of space between each one. Cover loosely with plastic wrap (spray with non-stick cooking spray to prevent sticking) or a clean towel and allow to rise for thirty minutes to one hour, until nearly doubled in size. Some recipes call for a shorter rest period of just fifteen to twenty minutes, which produces slightly denser buns. The longer rise creates airier, more open crumb structures.
Finishing Touches: The Details That Matter
The Egg Wash
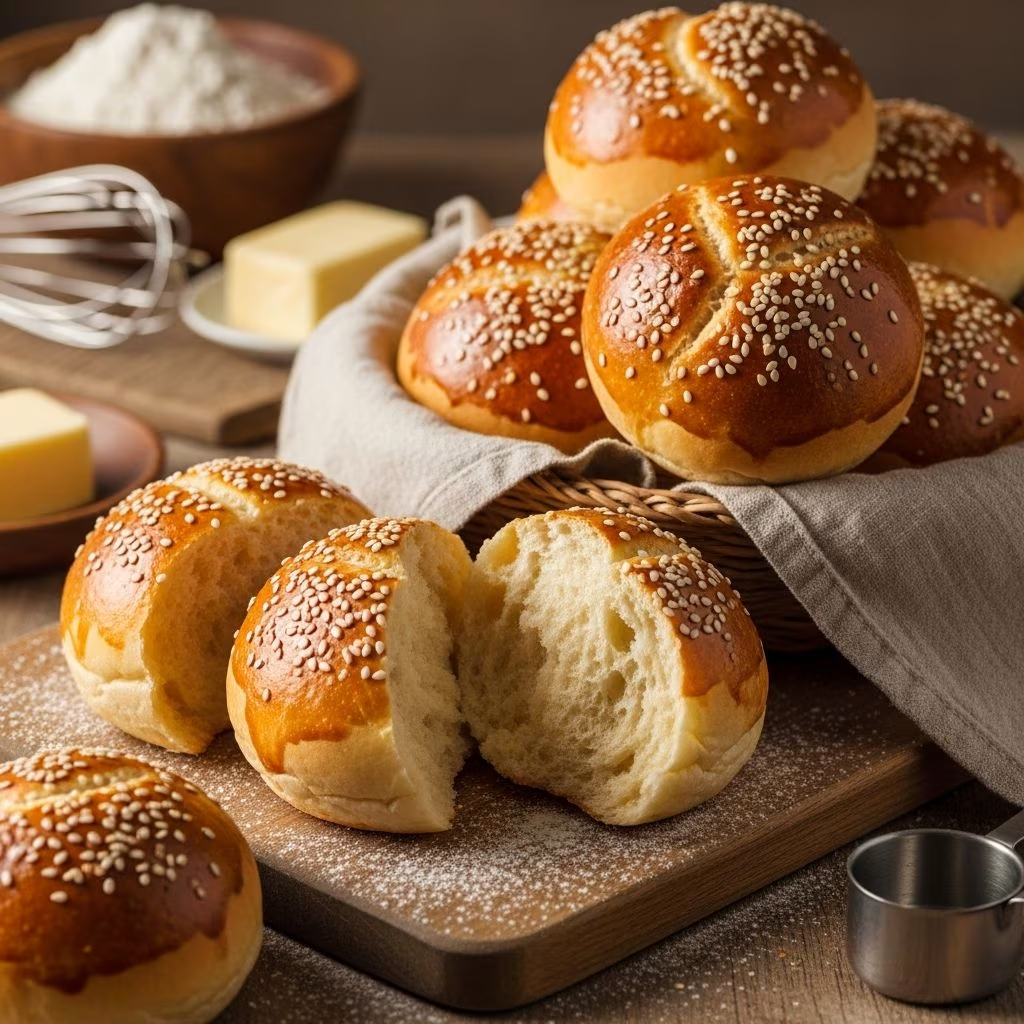
Before baking, brush the top of each bun with an egg wash made from one beaten egg mixed with a tablespoon of milk. This creates a beautiful golden-brown exterior and gives the buns an appetizing sheen. Apply the egg wash gently with a pastry brush, being careful not to deflate the risen dough.
Toppings and Seeds
Immediately after applying egg wash, sprinkle sesame seeds or poppy seeds over the tops if desired. These seeds not only look appealing but also add slight texture and nutty flavor. Some bakers prefer to leave their buns plain for a cleaner appearance.
Baking Temperature and Time
Bake your buns at either 400 degrees Fahrenheit for fifteen minutes or 425 degrees Fahrenheit for eight to twelve minutes, depending on your oven. Some recipes suggest 375 degrees Fahrenheit for fifteen to seventeen minutes. The variation in temperature and time reflects differences in oven behavior and personal preference for browning level. Buns are done when they’re golden brown on top and feel firm when lightly pressed. The internal temperature should reach about 190 degrees Fahrenheit if you have a meat thermometer.
Post-Baking Enhancement
Immediately after removing buns from the oven, brush them with melted butter. This adds richness, prevents the crust from becoming too hard, and enhances flavor. Some bakers prefer to skip this step for a crispier crust.
Troubleshooting Common Challenges
Dough Won’t Rise
If your dough isn’t rising, the yeast may be inactive or expired. Check that your water temperature was correct during activation. Yeast dies in water above 120 degrees Fahrenheit. Additionally, ensure your kitchen isn’t too cold—yeast works slowly in cool environments. Move your dough to a warmer spot or use an oven with the light on as a makeshift proofing box.
Buns Are Too Dense
Dense buns usually result from insufficient rising time or over-kneading. Allow more time for rising—the dough should visibly double. Additionally, avoid kneading for longer than recommended, as excessive kneading can make buns tough rather than tender.
Uneven Browning
If your buns brown unevenly, your oven may have hot spots. Rotate the baking sheet halfway through baking. Consider whether your oven has a convection fan—recipes typically specify “no convection fan” or “regular bake,” and using the wrong setting can cause browning issues.
Buns Spring Back When Pressed
If the dough springs back after being lightly pressed during shaping, the gluten is too tight. Let it rest for five to ten minutes before attempting to shape again—this allows the gluten to relax and makes shaping easier.
Storage and Make-Ahead Options
Room Temperature Storage
Freshly baked buns stay soft at room temperature for one to two days when stored in an airtight container or wrapped in plastic wrap. Keep them away from direct sunlight and heat sources.
Freezing for Later
Hamburger buns freeze remarkably well. Cool them completely, then place in a freezer bag, removing as much air as possible. They’ll keep frozen for up to three months. Thaw at room temperature for about an hour before serving, or warm them briefly in a 350-degree Fahrenheit oven for five to ten minutes for a fresh-baked taste.
Essential Equipment and Tools
While a stand mixer with a dough hook makes the process easier, it’s entirely possible to make hamburger buns by hand. A large mixing bowl, wooden spoon, measuring cups and spoons, kitchen scale (optional but helpful), and baking sheets are the basic requirements. A pastry brush for applying egg wash and an oven thermometer to verify your oven temperature round out the essential toolkit.
Flavor Variations and Creative Adaptations
Once you master the basic recipe, you can explore variations. Whole wheat flour can replace some all-purpose flour for added nutrition and nuttier flavor. Honey can substitute for sugar, creating slightly different browning and flavor characteristics. Adding herbs, garlic powder, or everything bagel seasoning to the dough creates specialty buns suited to specific burger styles.
Frequently Asked Questions
Can I make this recipe without a stand mixer?
Absolutely. Mix ingredients with a wooden spoon or your hands, then knead by hand on a floured surface for eight to ten minutes. Hand kneading takes a few minutes longer than machine kneading but produces identical results.
What’s the difference between instant yeast and active dry yeast?
Instant yeast (rapid-rise) has finer particles and dissolves more quickly, so you can mix it directly with flour. Active dry yeast has larger particles and should be activated in warm water first. You can use them interchangeably, though timing may vary slightly.
Why didn’t my yeast activate?
Yeast dies in water above 120 degrees Fahrenheit or fails to activate in water below 100 degrees Fahrenheit. Check your water temperature with a thermometer. Additionally, check the expiration date on your yeast—expired yeast won’t activate.
Can I refrigerate the dough overnight?
Yes. After shaping, cover and refrigerate the buns for up to sixteen hours. Allow them to come to room temperature and rise for thirty minutes before baking, or bake directly from the refrigerator and add a few extra minutes to baking time.
How do I know when the buns are done baking?
Fully baked buns are golden brown on top and feel firm when lightly pressed. The internal temperature should reach approximately 190 degrees Fahrenheit. If unsure, tap the bottom of a bun—it should sound hollow.
References
- Homemade Hamburger Bun Recipe (Soft and Golden Brown) — Billy Parisi. https://www.billyparisi.com/hamburger-bun-recipe/
- Homemade Hamburger Buns — Your Home Based Mom. https://www.yourhomebasedmom.com/homemade-hamburger-bun-recipe/
- Easy and Quick Hamburger Buns — My Homemade Roots. https://myhomemaderoots.com/quick-and-easy-hamburger-buns/
- Quick and Easy Hamburger Bun Recipe — The Feathered Nester. https://thefeatherednester.com/quick-and-easy-hamburger-buns/
- Homemade Hamburger Buns — Mel’s Kitchen Cafe. https://www.melskitchencafe.com/homemade-hamburger-buns/
- Homemade Hamburger Buns (Super Soft!) — Kroll’s Korner. https://krollskorner.com/recipes/breads/homemade-hamburger-buns/
- The PERFECT Homemade Hamburger Buns, Soft, Fluffy — In The Kitchen With Matt. https://www.youtube.com/watch?v=oIPm4uSKSjw