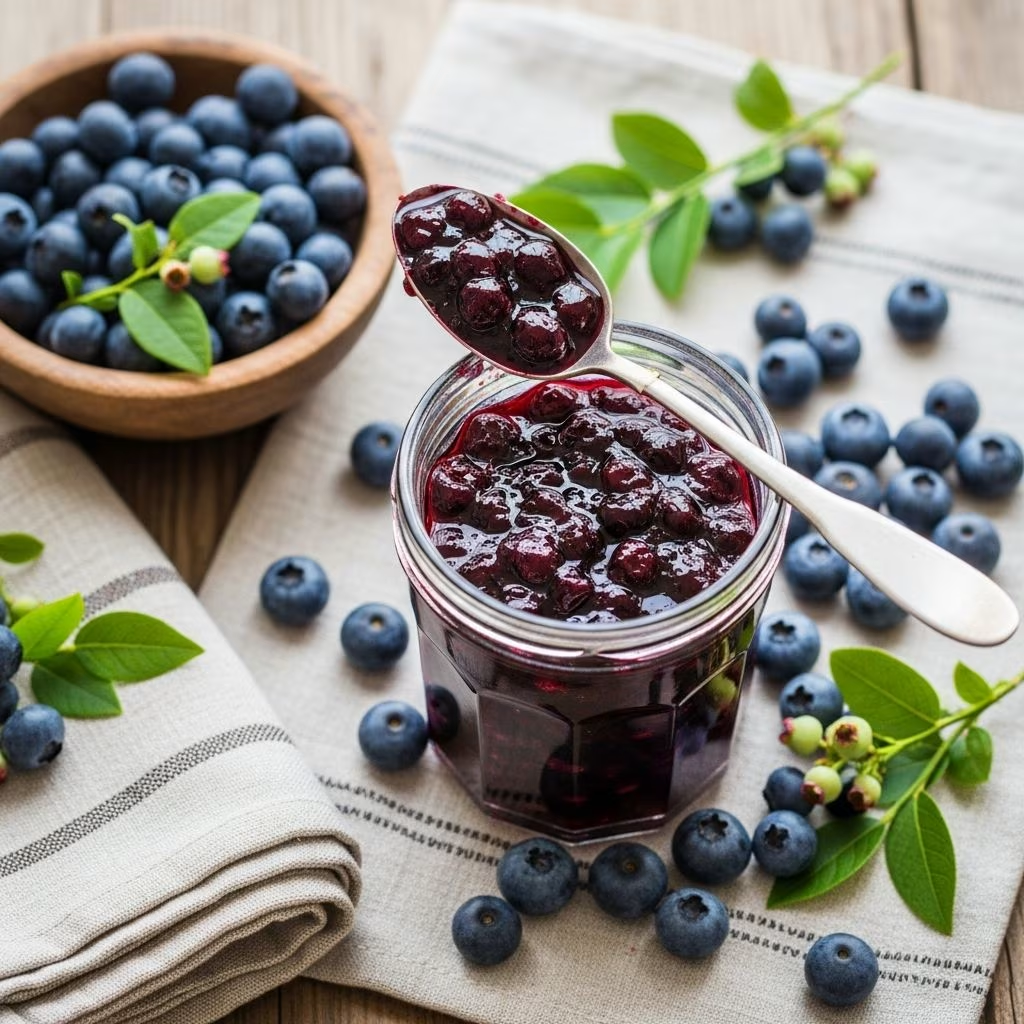
There’s something uniquely satisfying about transforming fresh blueberries into a vibrant, flavorful jam that captures the essence of summer. Unlike commercial versions loaded with additives and excessive sugar, homemade blueberry jam offers a pure taste of fresh fruit with the ability to customize sweetness levels and flavors to your preference. This comprehensive guide walks you through everything you need to know about making small-batch jam in your own kitchen, whether you’re a seasoned cook or trying jam-making for the first time.
Understanding the Fundamentals of Jam Production
Jam-making is fundamentally a preservation process that relies on basic chemistry and heat application. When fruit is heated with sugar and acid, the natural pectin in the fruit activates, creating the gel-like consistency that defines jam. Pectin is a naturally occurring compound found in fruit cell walls that acts as a binding agent. Blueberries contain moderate amounts of natural pectin, which means you can successfully create jam without commercial pectin products, though results may vary depending on fruit ripeness and cooking time.
The acid component, typically provided by lemon juice, serves multiple purposes. It enhances flavor, increases natural pectin activation, and helps preserve the finished product by lowering pH levels. Understanding these basic principles helps you troubleshoot issues and adapt recipes to your specific needs and preferences.
Selecting and Preparing Your Ingredients
Choosing quality blueberries is the foundation of excellent jam. Fresh berries should be plump, deeply colored, and firm to the touch. While you can use either fresh or frozen blueberries, fresh berries generally produce superior flavor and texture. When using frozen berries, thaw them completely before cooking to ensure even cooking and proper consistency development.
An important consideration involves fruit ripeness. Avoid overly ripe blueberries for jam-making, as they contain less natural pectin and may result in jam that doesn’t set properly. Instead, incorporate a small portion of underripe berries alongside ripe ones. This combination provides optimal pectin levels while maintaining excellent flavor. Underripe blueberries offer higher pectin content, which naturally thickens the jam during cooking.
Before beginning preparation, wash your blueberries thoroughly in a colander under cool running water. Remove any stems, leaves, or damaged berries. Allow the cleaned berries to dry completely before cooking, as excess moisture can affect the final consistency of your jam.
Essential Ingredients Breakdown
- Blueberries: The primary ingredient requiring 2 to 5 cups (approximately 1.5 to 2 pounds)
- Granulated Sugar: Typically 0.5 to 1.25 cups depending on desired sweetness and recipe variation
- Fresh Lemon Juice: Usually 1 to 2 tablespoons to provide acid and enhance flavor
- Optional Aromatics: Ground cardamom, vanilla, or cinnamon for flavor customization
Equipment Considerations for Optimal Results
The pot you choose significantly impacts jam-making success. A wide, shallow pan is preferable to deep pots because it increases surface area, allowing water to evaporate more rapidly and jam to thicken faster. Stainless steel or heavy-bottomed cookware prevents scorching and ensures even heat distribution. Avoid reactive materials like aluminum or unlined copper, which can interact with acidic ingredients.
An instant-read thermometer becomes invaluable for determining when your jam reaches the proper setting point. Jam typically sets when it reaches approximately 220°F (105°C). This temperature indicates that sufficient water has evaporated and pectin has properly activated to create the desired gel consistency. Without a thermometer, you can perform the cold plate test by placing a small spoonful of jam on a chilled plate and observing if it wrinkles when pushed.
Additional helpful equipment includes a wooden spoon for stirring (which won’t transfer heat like metal), a potato masher for breaking down berries, and heat-proof containers for cooling and storage.
Step-by-Step Cooking Instructions
Phase One: Initial Preparation and Cooking
Begin by adding your prepared blueberries, granulated sugar, and lemon juice to your selected pot. Some recipes call for roughly chopping or pulsing blueberries in a blender before cooking, which can accelerate the process and create more uniform texture. However, this step remains optional depending on your texture preference.
Set your burner to medium or medium-high heat and bring the mixture to a boil, stirring frequently to ensure the sugar dissolves evenly. Stir occasionally throughout the cooking process to prevent sticking and burning on the pot bottom. If you notice the mixture sticking excessively, reduce the heat slightly and continue stirring more frequently.
Phase Two: The Reduction Process
Once boiling, many recipes recommend reducing heat to low or medium-low for a gentler, more controllable cooking process. The mixture will foam and bubble as it boils down and reduces. This is a normal part of the process. Continue cooking while stirring occasionally for approximately 15 to 30 minutes, depending on your specific recipe and desired consistency.
During this phase, the blueberries gradually soften and break down. You can use a potato masher to crush the berries to your preferred texture—some people prefer chunky jam with visible berry pieces, while others want a smoother spread. Make this adjustment based on personal preference.
Phase Three: Testing for Proper Setting
Once your jam has cooked for the recommended time, test whether it has reached the proper consistency. The most reliable method involves using an instant-read thermometer to confirm the mixture has reached 220°F (105°C). Alternatively, perform the cold plate test by placing a small spoonful on a pre-chilled plate and observing whether it wrinkles and holds its shape when pushed with your finger.
If your jam hasn’t reached the proper setting point, continue cooking and test again after a few more minutes. Remember that jam continues to thicken slightly as it cools, so avoid over-cooking, which can result in an overly firm, rubbery texture.
Cooling and Storage Techniques
Once your jam reaches the proper consistency, remove it from heat immediately. Pour the hot jam into a large shallow heat-proof dish to cool quickly, or transfer directly to bowls or jars. Cooling in shallow containers rather than tall jars accelerates the cooling process and helps develop proper consistency more evenly.
Allow your jam to cool completely to room temperature before covering and storing. This typically takes 2 to 8 hours depending on the quantity and ambient temperature. Once fully cooled and set, store your jam in the refrigerator in glass jars or containers, where it will keep for several weeks.
Troubleshooting Common Jam-Making Issues
| Problem | Likely Cause | Solution |
|---|---|---|
| Jam won’t set or remains too runny | Insufficient cooking time, excess water content, or inadequate pectin | Return to stove and cook longer; add a handful of underripe berries; use an instant-read thermometer to ensure 220°F is reached |
| Jam becomes too thick or rubbery | Over-cooking or excess sugar | Cook for shorter duration; measure ingredients precisely; reduce sugar slightly in future batches |
| Jam scorches or burns on pot bottom | Heat too high or insufficient stirring | Reduce heat immediately; use a wide shallow pot; stir more frequently; use wooden spoon |
| Jam lacks vibrant blueberry flavor | Over-ripe berries or too much sugar masking flavor | Use fresher berries; reduce sugar ratios; add lemon zest for additional flavor intensity |
| Surface becomes moldy during storage | Improper sealing or contamination | Use clean jars; seal properly; store in refrigerator; consume within 3-4 weeks |
Creative Flavor Variations and Enhancements
While simple blueberry jam with lemon creates a classic spread, numerous variations allow for culinary creativity. Ground cardamom adds subtle warm spice notes that complement blueberries beautifully. Vanilla extract, cinnamon, or even a small amount of ginger powder offer different flavor dimensions.
Consider citrus variations beyond lemon. Orange juice and zest create a brighter, slightly different flavor profile than lemon while maintaining sufficient acidity for proper setting. You can also experiment with reducing sugar content to create a more intensely flavored jam with higher fruit-to-sugar ratios, such as using 1 cup sugar to 2 cups blueberries.
Frequently Asked Questions About Blueberry Jam
Can I use frozen blueberries instead of fresh?
Yes, frozen blueberries work excellently for jam-making. Thaw them completely before cooking and proceed with your recipe as normal. The quality of the final jam remains comparable to using fresh berries.
Do I absolutely need pectin for jam to set?
No, pectin is not necessary for blueberry jam. Blueberries contain sufficient natural pectin, particularly when combined with lemon juice and proper cooking time. Many home cooks successfully make jam without commercial pectin products.
How long does homemade jam last?
Refrigerated jam typically remains fresh and safe for 3 to 4 weeks. For longer storage, proper canning techniques using sterilized jars and water bath processing can extend shelf life for up to one year.
Why is my jam too watery?
Insufficient cooking time is the most common cause of watery jam. Ensure you cook the mixture until reaching 220°F (105°C) and perform the cold plate test successfully. Starting with slightly underripe berries also improves gel formation.
Can I reduce the sugar content?
Yes, you can reduce sugar, though this affects both sweetness and setting ability. Experiment with ratios closer to 1 cup sugar per 2 cups blueberries. Keep in mind that lower sugar jams may require slightly longer cooking or the addition of underripe berries for better setting.
Conclusion: Mastering the Art of Small-Batch Preserving
Making homemade blueberry jam represents one of the most accessible and rewarding preservation projects for home cooks. With just a handful of simple ingredients, basic equipment, and attention to fundamental principles, you can create restaurant-quality jam that rivals or surpasses commercial products. Whether you prefer chunky texture or smooth consistency, intensely sweet or tartly flavored versions, the small-batch approach allows complete customization to match your preferences perfectly.
Start with basic recipes and simple ingredients, then build confidence to experiment with flavors and techniques. Each batch teaches valuable lessons about timing, temperature, and fruit behavior during cooking. Soon you’ll develop intuition for recognizing the exact moment your jam reaches perfect consistency, enabling you to make small adjustments and create consistently excellent results.
References
- Small Batch Blueberry Jam — Renee Nicole’s Kitchen. Accessed 2026. https://reneenicoleskitchen.com/small-batch-blueberry-jam/
- Quick Small Batch Blueberry Jam without Pectin — Waiting for Blanquemange. Accessed 2026. https://waitingforblancmange.com/small-batch-blueberry-jam/
- Small Batch Blueberry Jam Recipe — Celebration Generation. Accessed 2026. https://celebrationgeneration.com/small-batch-blueberry-jam/
- The BEST 3-Ingredient Blueberry Jam — Divas Can Cook via YouTube. Accessed 2026. https://www.youtube.com/watch?v=hZishdd3Vuc
- Small Batch Blueberry Jam (3 ingredients) — Our Table 4. Accessed 2026. https://ourtable42.com/blueberry-jam/