Creating an impressive seafood pasta dish doesn’t require hours of preparation or advanced culinary skills. With the right approach and quality ingredients, you can prepare a restaurant-caliber meal in your own kitchen within half an hour. This guide explores the fundamentals of crafting exceptional seafood pasta that combines tender proteins with harmonious flavors and textures.
Why Seafood Pasta Deserves a Spot in Your Rotation
Seafood pasta represents an elegant yet approachable option for weeknight dinners or entertaining guests. The combination of delicate proteins and complementary sauces creates a sophisticated dining experience without the complexity traditionally associated with seafood preparation. The inherent speed of cooking seafood—most varieties require only minutes of heat—makes it an ideal choice for busy households seeking nutritious, satisfying meals.
Beyond convenience, seafood pasta offers remarkable versatility. You can adapt the recipe based on ingredient availability, dietary preferences, and desired flavor profiles. Whether you opt for a rich cream sauce, bright tomato-based preparation, or simple wine reduction, the core cooking principles remain consistent and straightforward.
Selecting Your Proteins: Building Blocks of Success
The foundation of exceptional seafood pasta begins with ingredient selection. Quality proteins directly influence the final dish’s taste and texture. When choosing your seafood components, prioritize freshness and proper handling.
Shrimp: The Versatile Foundation
Large shrimp serve as an excellent primary protein due to their mild flavor and quick cooking time. Raw, peeled, and deveined shrimp typically require only 1-2 minutes per side to reach optimal doneness. Look for specimens with firm texture and a slightly translucent appearance. Once cooked, properly prepared shrimp will transition from gray to vibrant pink, signaling completion. Overcooked shrimp becomes rubbery and loses its delicate quality, so monitoring cooking time carefully proves essential.
Scallops: Premium Texture
Fresh or thawed scallops bring a naturally sweet flavor and tender texture to pasta dishes. These proteins benefit from a brief soak in a saltwater brine solution before cooking—approximately 10 minutes in a solution of 3 tablespoons kosher salt dissolved in 16 ounces of water. This preparation step removes excess moisture and promotes even browning. After brining, pat the scallops dry with paper towels to facilitate proper searing. Cook them approximately 3 minutes on the first side and 1 minute on the reverse, ensuring they develop a golden crust while maintaining their tender interior.
Shellfish: Aromatic Depth
Clams and mussels contribute briny, oceanic notes that elevate the entire preparation. These proteins cook via steaming in a covered pan with minimal liquid—typically wine, water, or pasta cooking liquid—for 4-6 minutes until shells open fully. Discard any shellfish that fails to open, as this indicates they were not alive before cooking. The resulting cooking liquid becomes an invaluable component of your sauce, imparting authentic seafood flavor.
Calamari: Subtle Sweetness
For those seeking alternative proteins, cleaned calamari (squid) offers a delicate, slightly sweet flavor. Cut into 1-inch pieces, calamari cooks remarkably quickly—typically 30 seconds to 3 minutes depending on heat level and piece size. Extended cooking periods result in toughness, making precise timing crucial. The key to tender calamari involves either very brief cooking or, conversely, longer, slower cooking (30-60 minutes) in a flavorful sauce that gradually tenderizes the protein.
Pasta Selection and Preparation
Your choice of pasta shape influences both the dish’s presentation and sauce distribution. Short pasta shapes like busiati, penne, or farfalle trap sauce and seafood pieces effectively, creating more balanced bites. Alternatively, longer shapes like linguine or spaghetti provide an elegant presentation and allow sauce to cling beautifully.
Cook pasta in generously salted boiling water according to package directions, targeting al dente texture—pasta that retains slight firmness when bitten. Reserve approximately one cup of pasta cooking water before draining; this starchy liquid serves as a valuable emulsifier when finishing your dish, helping to bind sauce components and create silky consistency.
Sauce Foundations: Two Essential Approaches
Creamy Garlic Sauce
This rich preparation begins with butter as the base fat. Melt 4 tablespoons butter in a large skillet over medium heat, then add minced garlic (typically 4-5 cloves) and cook for approximately 30 seconds until fragrant. The brief cooking time prevents garlic from browning, which would impart bitter flavors. Add dry white wine—roughly 3/4 cup—and bring to a simmer, allowing the alcohol to evaporate while concentrating wine’s natural acidity and fruit notes. This process typically requires a few minutes of gentle simmering.
Pour heavy cream into the reduced wine base and return to a simmer. Allow the mixture to cook for approximately 5 minutes, stirring occasionally, until it thickens sufficiently to coat the back of a spoon. The sauce should reach silky consistency without becoming paste-like. Finish by incorporating grated Parmesan cheese—approximately 3/4 cup—stirring until fully melted. Season with salt, pepper, and fresh lemon zest for brightness and complexity.
Tomato-Based Sauce
This lighter alternative begins with sautéing aromatic vegetables. Dice one medium onion and sauté in olive oil over medium heat until softened and translucent, approximately 4-5 minutes. Add minced garlic and cook for an additional 30 seconds. Pour in tomato puree (typically 2-3 cups) along with seasonings including salt, pepper, dried oregano, and red pepper flakes to taste. Bring the mixture to a gentle simmer and maintain this heat for 10-15 minutes, allowing flavors to meld and sauce to thicken slightly. The tomato base provides a naturally acidic foundation that complements the brininess of seafood beautifully.
The Cooking Sequence: Timing and Technique
Success in seafood pasta relies heavily on proper sequencing. Begin by bringing a large pot of generously salted water to a rolling boil. This usually constitutes the longest part of the recipe. While water heats, prepare your proteins: pat shrimp and scallops dry, season with salt and pepper, and have clams and mussels cleaned and ready.
Once water boils vigorously, add pasta and set a timer according to package directions. Simultaneously, heat oil or butter in a large skillet over medium-high heat until shimmering. Arrange shrimp and scallops in a single layer without crowding. Resist the urge to move them; allow 2-3 minutes for proper browning before flipping. Cook the reverse side for 1-2 minutes until proteins turn opaque. Transfer to a clean plate and tent loosely with foil to retain warmth.
In the same skillet, add minced shallots and cook for 2-3 minutes until softened. Add garlic and cook briefly, then add wine and bring to a simmer. Place clams and mussels in the pan, cover with a lid, and steam for 4-6 minutes until shells open completely. Discard any that remain closed. Remove shellfish to the plate with other proteins, keeping any cooking liquid in the pan.
Add your chosen sauce base to the pan, stirring to combine with shellfish cooking liquid. Return all cooked seafood to the pan along with any accumulated juices. When pasta reaches al dente, drain it and add directly to the seafood and sauce. Toss gently but thoroughly, adding reserved pasta water as needed to achieve desired sauce consistency. Finish with fresh herbs—typically parsley—and additional Parmesan cheese.
Professional Searing Techniques
Achieving properly browned seafood requires attention to several factors. Use a heavy-bottomed skillet or Dutch oven that distributes heat evenly and retains temperature. Allow the pan to heat thoroughly before adding proteins—several minutes over medium-high heat ensures adequate temperature. Pat seafood completely dry, as surface moisture interferes with browning through evaporative cooling.
Arrange proteins in a single layer without crowding; overcrowded pans create steam rather than sear, resulting in pale, rubbery exteriors. Use long-handled tongs to flip delicate items like scallops, minimizing disruption to developing crust. Flip only once most proteins release easily from the pan surface—forcing them prematurely tears the developing crust and adheres proteins more firmly to the cooking surface.
Common Pitfalls and Solutions
| Problem | Cause | Solution |
|---|---|---|
| Rubbery shrimp or scallops | Overcooking | Remove proteins as soon as they turn opaque; they continue cooking slightly after removal |
| Pale, steamed seafood | Crowded pan or insufficient heat | Use a larger skillet, work in batches, ensure pan reaches proper temperature before adding proteins |
| Tough calamari | Medium-length cooking time | Either cook very briefly (30-90 seconds) or slowly in sauce (30-60 minutes) |
| Broken clams or mussels | Overcooking or forcing shells open | Reduce heat, use gentle movement, remove as soon as shells open |
| Thin, watery sauce | Insufficient reduction | Simmer longer to concentrate flavors; use cornstarch slurry if needed |
Flavor Development Strategies
Layering flavors throughout the cooking process creates complexity and depth. Toast garlic briefly in oil or butter to develop nutty undertones without bitterness. Deglaze the pan with wine, scraping flavorful browned bits from the bottom—this technique, called deglazing, extracts maximum flavor. Add lemon zest rather than just juice for aromatic brightness that transcends simple sourness. Incorporate fresh herbs like parsley near the end to preserve their delicate flavors.
Consider your seafood’s natural brininess when seasoning. Shellfish contributes significant salt, potentially reducing additional seasoning needs. Taste the dish before finalizing salt additions, adjusting carefully rather than over-salting. The starches in pasta water act as flavor amplifiers and emulsifiers; incorporating this liquid intelligently elevates the entire preparation.
Frequently Asked Questions
Can I use frozen seafood?
Yes, frozen seafood works effectively provided it’s thawed properly. Thaw in the refrigerator overnight rather than at room temperature to prevent bacterial growth and texture degradation. Pat dry before cooking to facilitate browning.
What wine pairs best with seafood pasta?
Dry white wines with crisp acidity work best. Sauvignon Blanc, Pinot Grigio, or Vermentino provide complementary flavors. Avoid overly sweet wines or heavily oaked options that might overwhelm delicate seafood.
How do I know when shellfish is cooked?
Both clams and mussels open their shells when fully cooked. This opening occurs as muscles relax in response to heat. If a shell remains closed after 6 minutes of steaming, discard it—closed shells indicate the shellfish was not alive before cooking.
Can I prepare components ahead?
Prepare sauces and brine scallops several hours in advance. Cook proteins immediately before serving, as reheating makes them tough and rubbery. Cook pasta last to ensure optimal texture.
What serving size is appropriate?
Plan for 4-6 servings from the standard recipe. The generous seafood proportion makes this dish quite rich; smaller portions alongside salad and bread create a satisfying meal.
Elevating Your Presentation
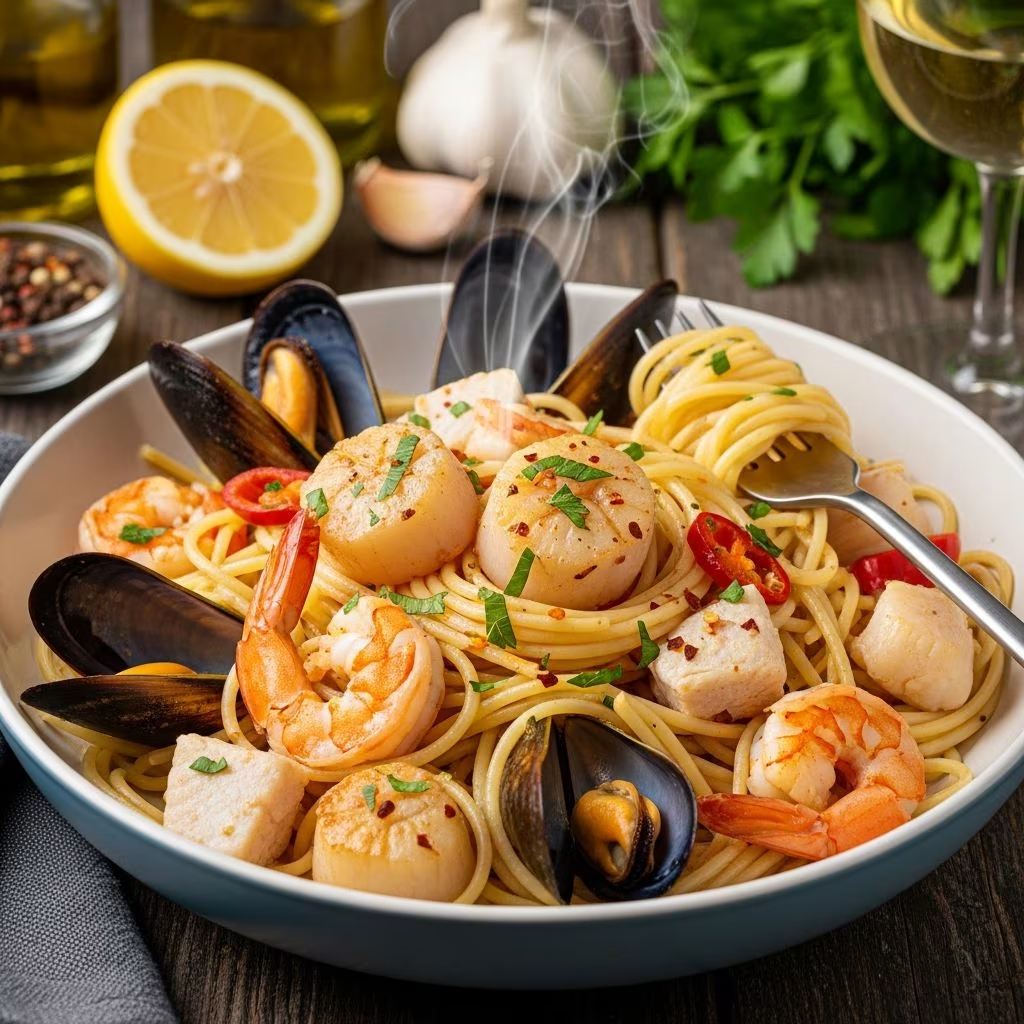
Transform everyday dinner into restaurant-quality service through thoughtful presentation. Twirl pasta onto the tines of a pasta fork before plating for height and elegance. Distribute seafood pieces evenly across the top rather than burying them beneath pasta. Drizzle sauce artfully around the plate’s perimeter. Garnish generously with fresh parsley, additional Parmesan, red pepper flakes for color, and lemon wedges for both aesthetic appeal and functional brightness at the table.
Conclusion: Mastering Accessible Elegance
Seafood pasta exemplifies how straightforward cooking principles yield impressive results. By understanding proper protein handling, timing sequences, and sauce fundamentals, you create restaurant-quality meals reliably and quickly. The 30-minute framework proves achievable through preparation and attention to detail rather than complicated technique. Whether entertaining or cooking for your household, this elegant preparation demonstrates that gourmet dining remains accessible to home cooks.
References
- Seafood Cookery and Handling — National Oceanic and Atmospheric Administration (NOAA) Fisheries. 2024. https://www.fisheries.noaa.gov/seafood-safety
- Food Safety Guidelines for Shellfish Preparation — FDA Center for Food Safety and Applied Nutrition. 2023. https://www.fda.gov/food/shellfish-safety
- Culinary Techniques for Seafood Preparation — The Culinary Institute of America. 2024. https://www.ciachef.edu
- Wine Selection and Pairing for Cooking — International Sommelier Association. 2025. https://www.sommelier.org
- Pasta Cooking Methods and Optimal Texture — Barilla Official Company. 2024. https://www.barillacooking.com