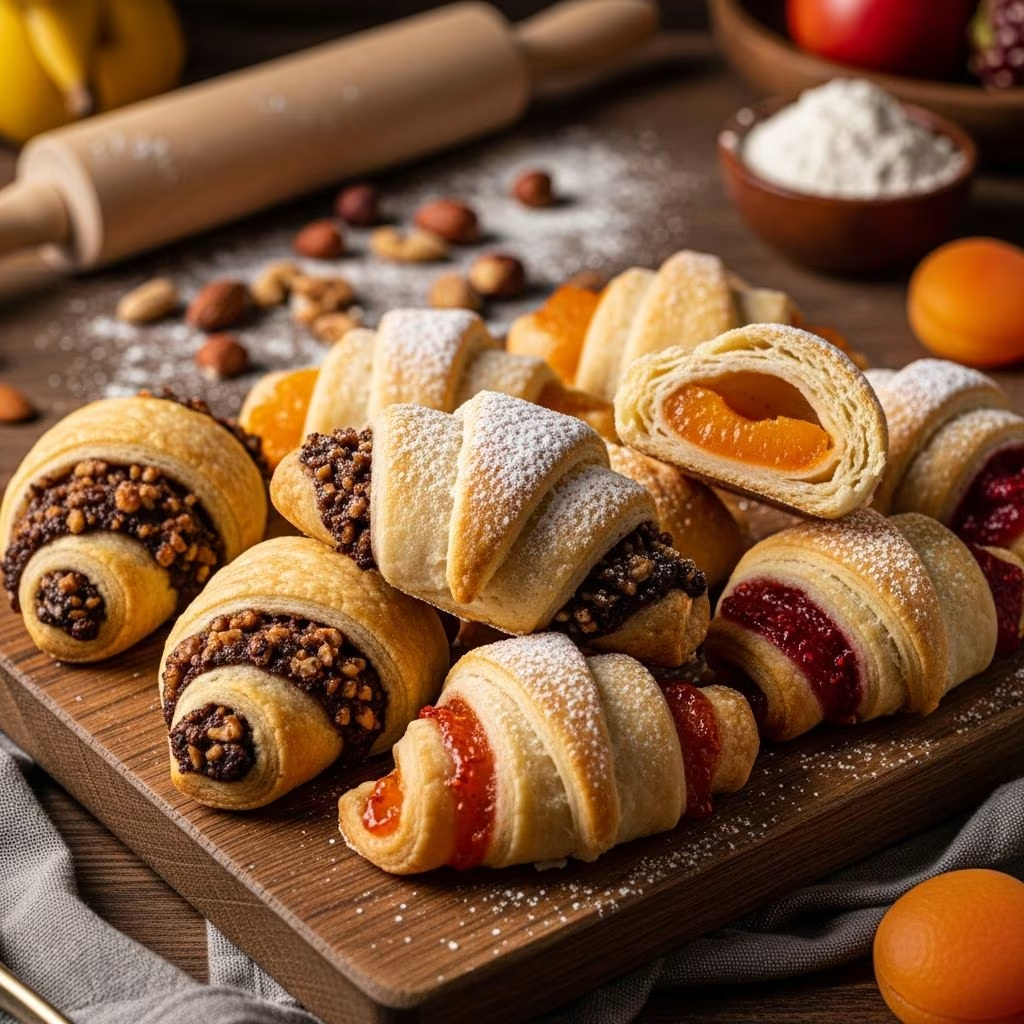
Rugelach represents one of the most cherished pastries in Jewish culinary tradition, originating from the kitchens of Eastern Europe where generations of families perfected the craft. These crescent-shaped confections have transcended their cultural roots to become beloved treats across diverse communities and celebrations. The appeal of rugelach lies not merely in their sophisticated appearance but in the delicate balance of a flaky, tender dough wrapped around an array of possible sweet fillings.
The transformation of simple pantry staples into these elegant pastries requires understanding fundamental baking principles and mastering several key techniques. Whether you’re preparing these cookies for holiday gatherings, family celebrations, or simply to satisfy a personal craving, this comprehensive guide will walk you through every step of the process from ingredient selection through the final cooling stage.
Understanding the Foundation: The Cream Cheese Dough
The secret to exceptional rugelach begins with the dough itself. Unlike many cookie recipes that rely solely on butter for texture and flavor, the most successful rugelach incorporates cream cheese as a crucial ingredient. This addition fundamentally changes the character of the dough, creating a level of tenderness and flexibility that butter alone cannot achieve.
Cream cheese contributes moisture and fat in a form that produces a distinctly different baking result. When combined with butter, it creates a dough that remains pliable enough to roll without cracking, yet bakes into wonderfully flaky layers. The acid in cream cheese also interacts with the gluten network in flour, creating a more delicate crumb structure. This scientific advantage makes cream cheese an essential component rather than a mere flavor addition.
Essential Ingredients for the Dough
- Cream cheese – Room temperature, allowing for proper incorporation and smooth texture
- Unsalted butter – Room temperature, providing richness and contributing to flakiness
- All-purpose flour – The structure-builder that supports the other ingredients
- Granulated sugar – Adds subtle sweetness without overpowering the pastry
- Kosher salt – Enhances flavor and balances the sweetness
- Vanilla extract – Provides aromatic depth to the base dough
Each of these components plays a specific role in creating the final texture and flavor profile. The proportions matter significantly; using equal weights of cream cheese and butter (typically eight ounces each) creates the optimal balance between tenderness and structure.
The Preparation Process: Building the Perfect Dough
The method used to combine ingredients dramatically influences the final result. Many traditional recipes employ an electric mixer fitted with a paddle attachment, which aerates the cream cheese and butter while combining them thoroughly. This mixing phase should continue until the mixture becomes light and fluffy, indicating proper incorporation of air throughout the mixture.
Step-by-Step Dough Assembly
- Allow both cream cheese and unsalted butter to reach room temperature. Cold ingredients will not incorporate properly and may produce a grainy, uneven dough.
- Place the softened cream cheese and butter in your mixer bowl fitted with the paddle attachment.
- Beat on medium speed for approximately two to three minutes until the mixture becomes light and fluffy in appearance.
- Add the granulated sugar, kosher salt, and vanilla extract to the creamed mixture.
- Mix on low speed to combine these ingredients evenly, approximately one minute.
- Gradually add the flour while maintaining low mixer speed, mixing only until the flour is just incorporated.
- Turn the dough out onto a well-floured surface and gather it into a ball shape.
- Divide the ball into four equal portions and flatten each into a disk.
- Wrap each disk individually with plastic wrap and refrigerate for a minimum of one hour.
This chilling period serves multiple purposes. The cold temperature firms the dough, making it easier to handle and roll without sticking. The resting time also allows the gluten to relax, preventing the dough from springing back as you work with it. Additionally, this period permits the flavors to meld and develop complexity.
Transformation Through Rolling and Shaping
Once the dough has chilled adequately, the next phase involves careful rolling and shaping. Remove one disk from the refrigerator at a time, keeping the others chilled. On a generously floured surface, begin rolling the disk outward using even pressure with a rolling pin.
The target shape is a circle approximately nine inches in diameter and roughly one-eighth inch thick. This thickness provides enough substance to contain fillings without becoming unwieldy or prone to tearing. As you roll, periodically lift the dough and rotate it ninety degrees to ensure even thickness throughout.
Once rolled to the proper dimensions, the dough circle becomes the canvas for your chosen filling. The distribution of filling affects both the final appearance and eating experience. A light hand prevents overloading the pastry, which can cause the filling to leak during baking.
Exploring Filling Possibilities and Flavor Combinations
While traditional rugelach often features cinnamon and walnuts, the versatility of this pastry accommodates countless variations. The beauty of rugelach lies in its adaptability to personal preferences and available ingredients.
Classic and Contemporary Filling Options
| Filling Type | Primary Components | Flavor Profile |
|---|---|---|
| Cinnamon Walnut | Brown sugar, ground cinnamon, chopped walnuts | Warm spices with nutty depth |
| Fruit Preserve | Apricot, raspberry, or strawberry preserves | Bright, sweet, and tangy |
| Chocolate Hazelnut | Chocolate-hazelnut spread, cocoa powder | Rich, indulgent, and sophisticated |
| Mixed Nut and Dried Fruit | Chopped nuts, raisins, dried cranberries | Complex, textured, slightly tart |
| Spiced Variation | Brown sugar, cinnamon, nutmeg, cloves | Warm and aromatic |
The traditional cinnamon-walnut combination remains popular because the warm spice complements the rich, buttery dough while the nuts provide textural contrast. To prepare this classic filling, combine brown sugar, ground cinnamon, and finely chopped walnuts. Many recipes also incorporate dried fruit such as raisins or cranberries for additional texture and flavor complexity.
For those preferring fruit-based fillings, spreading a thin layer of high-quality jam or preserves across the dough circle before sprinkling the dry filling components creates a multi-dimensional taste experience. The moisture from the preserve prevents the dry filling from absorbing all available moisture from the dough, ensuring moist cookies rather than dry ones.
The Rolling and Cutting Technique
After applying your chosen filling to the dough circle, the next phase involves rolling the dough into a tight cylinder. Begin at the edge nearest to you and roll toward the opposite edge, using gentle pressure to create an even log. Once rolled into a complete cylinder, the log is typically divided into twelve equal-sized pieces using a sharp knife.
To ensure even pieces, consider first cutting the log into thirds, then cutting each third into four equal segments. This method produces more consistent sizing than attempting to cut twelve pieces at once. The pieces can be placed point-side down or point-side up on your prepared baking sheet; point-side down creates a more traditional appearance with the point tucked underneath.
Before baking, refrigerate the shaped cookies for at least thirty minutes. This additional chilling period prevents the cookies from spreading excessively during baking and helps them maintain their shape. Many bakers prepare their cookies to this point and freeze them for future baking, allowing freshly baked rugelach to be available on demand.
Finishing Touches and Baking Fundamentals
The final visual appeal and texture of rugelach depends significantly on proper finishing techniques. Begin by preparing an egg wash, which consists of one beaten egg combined with one tablespoon of milk. This mixture is brushed over the tops of each cookie before baking.
For added visual interest and textural refinement, many recipes call for a cinnamon-sugar topping sprinkled over the egg wash. Combine three tablespoons of granulated sugar with one teaspoon of ground cinnamon, mixing thoroughly to distribute the spice evenly. This mixture should be sprinkled over the cookies immediately after applying the egg wash, ensuring the crystals adhere properly.
Bake the prepared cookies in a preheated oven at 350 degrees Fahrenheit for fifteen to twenty minutes, until the tops become lightly browned and the dough appears set. The exact timing depends on your oven’s characteristics and the size of your individual cookies. Smaller cookies may require only fifteen minutes, while larger ones might need the full twenty minutes.
Achieving Optimal Baking Results
Several factors influence whether your rugelach achieves the desired golden-brown exterior and flaky interior. Oven temperature accuracy proves crucial; invest in an oven thermometer to verify your oven maintains the correct temperature. Even a variance of twenty-five degrees can significantly affect baking time and browning.
The positioning of your baking sheet within the oven also matters. Placing cookies on the middle rack typically produces the most even browning. If baking multiple sheets simultaneously, rotate them halfway through the baking time to compensate for hot spots in your oven.
Remove the cookies from the oven when the edges show light browning, even if the very centers appear slightly underbaked. The cookies continue cooking on the residual heat of the baking sheet for several minutes after removal from the oven. This carryover cooking prevents overbaking and maintains the tender, flaky texture you’ve worked to achieve.
Cooling and Storage Considerations
Upon removal from the oven, transfer the cookies to a wire cooling rack using a thin spatula. This cooling rack allows air to circulate beneath the cookies, preventing them from steaming and becoming soggy. Allow the cookies to cool completely on the rack, approximately thirty minutes, before consuming or storing.
Once fully cooled, rugelach can be stored in an airtight container at room temperature for up to five days. Many bakers prefer to freeze unbaked, shaped cookies, allowing them to bake individual portions as needed. These frozen cookies can be baked directly from the frozen state, requiring approximately three to five additional minutes of baking time.
Troubleshooting Common Challenges
Even experienced bakers occasionally encounter difficulties when preparing rugelach. Dough that tears or cracks during rolling typically indicates insufficient chilling time or room-temperature conditions that are too warm. If this occurs, wrap the dough and refrigerate for an additional thirty minutes before resuming.
Cookies that spread excessively during baking usually result from dough that wasn’t sufficiently chilled before baking or from an oven temperature that is too high. Ensure your cookies have rested for at least thirty minutes after shaping and verify your oven temperature with a thermometer.
Fillings that leak from the cookies typically indicate overfilling. Use restraint when applying filling, distributing it in a thin, even layer rather than an excessive pile. Fillings that are too wet (such as jam that hasn’t been allowed to cool) also contribute to leakage.
Frequently Asked Questions About Rugelach Preparation
Can I prepare rugelach dough in advance?
Yes, the dough can be made several days ahead and stored in the refrigerator, or frozen for up to three months. Thaw frozen dough in the refrigerator overnight before rolling and shaping.
What substitutions work for the cream cheese component?
Some bakers incorporate sour cream into the dough for a more tangy flavor profile. However, cream cheese shouldn’t be entirely replaced, as it provides essential qualities that other ingredients cannot replicate.
How do I prevent the filling from leaking during baking?
Use moderate amounts of filling, avoid overly wet fillings, and ensure your cookies have adequate chill time before baking. Additionally, the egg wash barrier helps contain fillings.
Can rugelach be made gluten-free?
Yes, by substituting all-purpose flour with high-quality gluten-free flour blends designed for baking. Results may vary slightly, as gluten-free flours behave differently than wheat flour.
What is the optimal serving size and occasion for rugelach?
These pastries work wonderfully for holiday celebrations, formal gatherings, or casual afternoon tea. Each person typically enjoys two to three cookies as a dessert or sweet snack.
References
- Aunt Marie’s Rugelach Cookies with Cream Cheese Dough — Smells Like Home. 2024-12-15. https://www.smells-like-home.com/2024/12/aunt-maries-rugelach-cookies-with-cream-cheese-dough/
- Rugelach Cookies with Cream Cheese Dough — Sally’s Baking Addiction. 2024. https://sallysbakingaddiction.com/how-to-make-rugelach-cookies/
- Rugelach — Barefoot Contessa. 2024. https://barefootcontessa.com/recipes/rugelach
- The Best Rugelach Cookie Recipe – The Seaside Baker — The Seaside Baker. 2024. https://theseasidebaker.com/the-best-rugelach/
- The Best Rugelach — Simply Beautiful Eating. 2020-12-09. https://simplybeautifuleating.com/2020/12/09/the-best-rugelach/