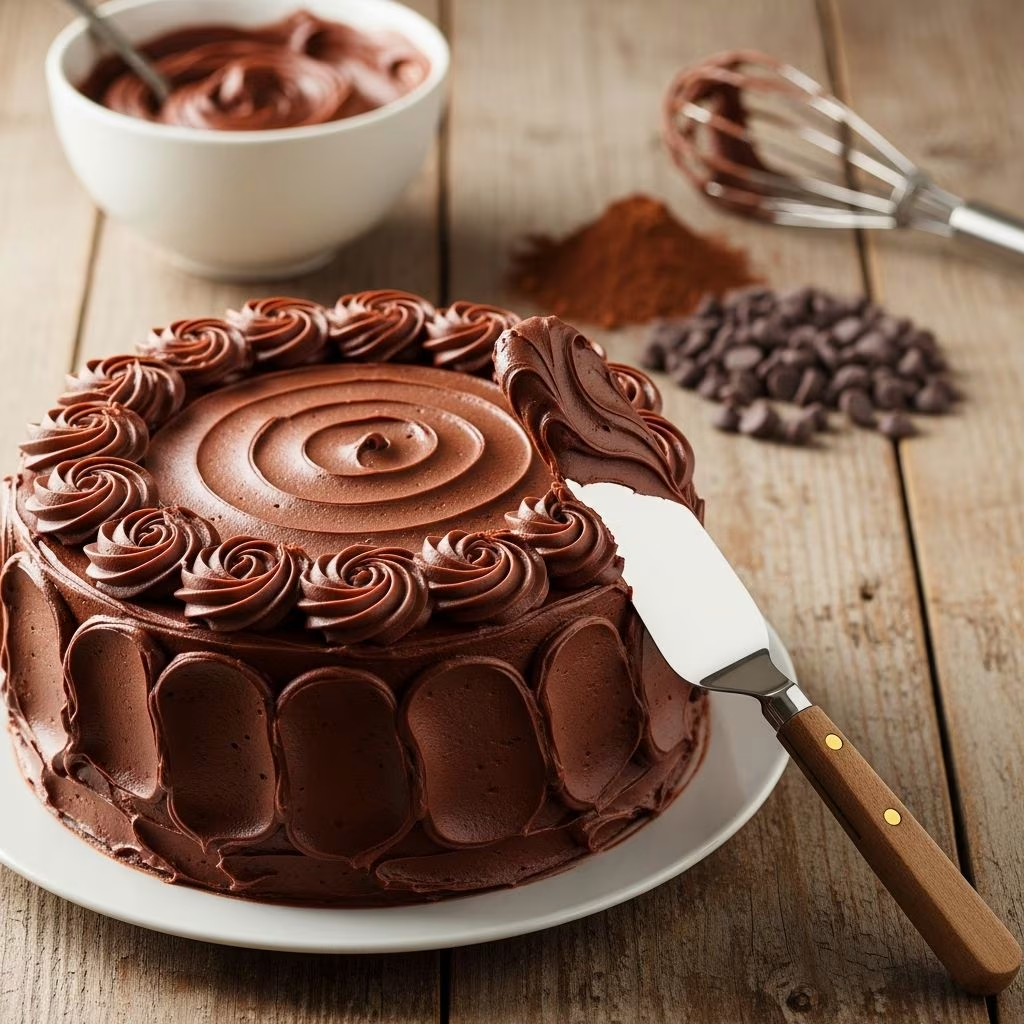
Few things elevate a homemade dessert quite like a luxurious, velvety chocolate frosting that coats your cake or cupcakes with rich, decadent flavor. Whether you’re a seasoned baker or someone attempting frosting for the first time, understanding the fundamentals of chocolate frosting creation transforms your baking endeavors from mediocre to remarkable. This comprehensive guide explores the techniques, ingredient selections, and professional secrets that separate exceptional chocolate frosting from the ordinary.
Understanding the Foundation: Essential Ingredients and Their Roles
Creating an outstanding chocolate frosting begins with recognizing how each ingredient contributes to the final product’s texture, flavor, and consistency. The foundation of most chocolate frostings relies on a carefully balanced combination of components that work synergistically to produce the desired result.
Butter serves as the primary base in traditional buttercream frostings, providing richness and the structure necessary for frosting to hold its shape. Room temperature butter is crucial because it incorporates air more effectively when beaten, creating that signature light, fluffy texture. The amount of butter in your frosting recipe directly affects how stable and spreadable it becomes.
Powdered sugar, also called confectioners’ sugar, forms the sweetening backbone and contributes to the frosting’s body. Sifting powdered sugar before incorporation ensures there are no lumps that could create a grainy texture in your final frosting. This simple step dramatically improves the smoothness of your creation.
Cocoa powder delivers the essential chocolate flavor without introducing excess moisture that melted chocolate would add. Dutch-process cocoa provides a darker, more sophisticated chocolate flavor compared to natural cocoa powder, allowing bakers to customize their frosting’s intensity and color profile.
Liquid elements—whether milk, cream, or other dairy products—create the proper consistency for spreading and piping. These components must be added carefully and gradually, as excess liquid quickly transforms frosting from spreadable to runny.
The Technique That Makes the Difference: Proper Mixing Methods
Understanding correct mixing procedures separates amateur frosting from professional-quality results. The sequence and speed at which you combine ingredients fundamentally impact your frosting’s final characteristics.
The Creaming Phase
Begin by beating softened butter on medium speed until it becomes smooth and pale, typically taking one to two minutes. This crucial step aerates the butter, creating tiny pockets that give frosting its characteristic light, fluffy texture. Skipping or rushing this phase results in dense, heavy frosting that lacks appeal.
Gradual Sugar Integration
Add your powdered sugar incrementally rather than all at once. Combine roughly half the sugar with the creamed butter first, beating thoroughly before introducing the remainder. This staged approach prevents powdered sugar from flying everywhere and ensures even distribution throughout the mixture.
Chocolate Incorporation
If using melted chocolate, allow it to cool nearly to room temperature before adding to your butter mixture. Adding warm chocolate can cause the butter to separate, resulting in a greasy, broken frosting. Beat the cooled chocolate on high speed for approximately two minutes after incorporation, scraping the bowl’s sides frequently to ensure uniform color and texture throughout.
Final Adjustments
After all primary ingredients are combined, add any liquid components drop by drop to achieve your desired consistency. Remember that frosting thickens slightly as it cools, so if your frosting seems slightly soft, patience often solves the problem better than adding more powdered sugar.
Ingredient Variations: Customizing Your Chocolate Frosting
While basic chocolate frosting remains delicious, numerous ingredient modifications allow you to tailor the frosting to your specific baking needs and flavor preferences.
Cream Cheese Incorporation
Substituting half the butter with cream cheese at room temperature creates a frosting with tanginess and superior stability for decorative piping. The cream cheese adds complexity to the chocolate flavor while reducing overall sweetness, making this variation popular for devil’s food cakes and rich chocolate layer cakes.
Heavy Cream Enhancement
Adding heavy cream creates a frosting with exceptionally silky texture and luxurious mouthfeel. Heavy cream also makes frosting easier to pipe into decorative swirls and maintains shape beautifully in warm conditions.
Dark Chocolate Elevation
Incorporating melted dark chocolate alongside cocoa powder deepens the chocolate complexity and creates a more sophisticated flavor profile. This technique works particularly well for adult-oriented desserts and elegant occasions where subtle, nuanced chocolate flavor is preferred over simple sweetness.
Milk and Consistency Control
Some recipes utilize evaporated milk for richness combined with easier consistency control compared to regular milk or cream. The concentrated nature of evaporated milk means less liquid is required, reducing the risk of accidentally over-thinning your frosting.
Professional Tips for Exceptional Results
Temperature Management
Every ingredient must be at room temperature before you begin mixing. Cold butter resists proper aeration, cold cream cheese prevents smooth blending, and cold milk mixes unevenly with other components. Set ingredients out 30 to 60 minutes before preparing your frosting to ensure they reach optimal temperature.
Strategic Bowl Scraping
Frequently scraping the bottom and sides of your mixing bowl with a rubber spatula prevents butter streaks from remaining in your finished frosting. After each ingredient addition, pause the mixer and perform a complete bowl scrape before resuming mixing.
Sifting Dry Ingredients
Sifting cocoa powder and powdered sugar together before introducing them to the butter prevents lumps and creates the smoothest possible texture. This single step noticeably improves your frosting’s final appearance and mouthfeel.
Vanilla Quality Matters
High-quality vanilla extract or vanilla paste significantly enhances the depth of chocolate flavor by complementing and amplifying chocolate notes rather than competing with them. Cheap vanilla’s off-flavors can actually detract from chocolate taste, so investing in quality vanilla positively impacts your frosting.
Salt Balancing
A small pinch of salt enhances chocolate flavor and reduces excessive sweetness without creating a salty taste. The salt amplifies chocolate notes, making the frosting taste richer and more sophisticated than the individual ingredients suggest.
Consistency Troubleshooting: Common Challenges and Solutions
Even experienced bakers occasionally encounter frosting texture problems. Understanding solutions to common issues prevents wasting ingredients and allows you to salvage frosting that seems slightly off.
Frosting That’s Too Thick
If your frosting resembles clay more than spreadable frosting, gradually add milk or cream one teaspoon at a time, beating thoroughly between additions. Rather than immediately mixing in all the liquid at once, patience with incremental additions prevents over-thinning and maintains control over final consistency.
Frosting That’s Too Thin
Thin frosting requires additional powdered sugar mixed thoroughly between additions. Add one-quarter cup at a time, which allows you to monitor thickness without suddenly over-thickening. Allow the frosting to sit at room temperature for 15 minutes, as slight thickening often occurs naturally as the mixture cools.
Frosting With a Grainy Texture
Graininess typically results from unsifted powdered sugar or from inadequate beating time. Pass your powdered sugar through a fine-mesh strainer next time, and ensure you beat the finished frosting for the full time specified in your recipe, allowing all sugar crystals to dissolve completely into the creamy base.
Separated or Greasy Frosting
Separation usually indicates either overly warm chocolate was added to the butter mixture or the frosting was beaten excessively at very high speeds. If this occurs, place the bowl in the refrigerator for 30 minutes, then attempt to bring it back together by beating on medium speed while adding a tablespoon of milk and mixing thoroughly.
Selecting the Right Chocolate Frosting for Your Project
Different baking projects benefit from different frosting styles. Understanding which variation suits your specific needs ensures professional results.
| Frosting Type | Best Used For | Key Characteristics |
|---|---|---|
| Classic Cocoa Powder Frosting | Simple cakes, everyday cupcakes | Easy to make, no melted chocolate required, stable |
| Dark Chocolate Buttercream | Elegant layer cakes, sophisticated events | Complex flavor, richer taste, melted chocolate included |
| Cream Cheese Chocolate Frosting | Devil’s food cakes, brownies, dense cakes | Tangy notes, holds shape well, less sweet than traditional |
| Heavy Cream Enhanced Frosting | Decorative piping, warm weather events | Silky texture, easier to pipe, holds swirls beautifully |
Practical Storage and Make-Ahead Strategies
Properly storing frosting extends its usability and allows for convenient make-ahead preparation. Refrigerated frosting lasts approximately two weeks when stored in an airtight container, allowing bakers to prepare frosting days before decorating their cakes or cupcakes. Allow refrigerated frosting to reach room temperature and beat briefly before using, as chilled frosting becomes quite firm.
Frozen frosting maintains quality for up to three months when stored in a freezer-safe container. Again, allow complete thawing and brief re-beating before application ensures smooth, uniform texture.
Frequently Asked Questions About Chocolate Frosting
Can I make chocolate frosting without butter?
While traditional frosting relies on butter, alternative frostings using cream and chocolate ganache-style bases exist. These create different textures and flavor profiles but lack the aeration and stability of buttercream-style frostings.
How far in advance can I frost a cake?
Frosted cakes can be refrigerated up to five days in advance when covered properly. The frosting should be set before covering to prevent sticking, and the entire cake should be wrapped carefully to prevent drying out.
Why does my frosting look dull instead of glossy?
Dull frosting typically indicates either insufficient beating time, over-incorporation of dry ingredients, or improper chocolate incorporation. Beaten frosting for the full recommended time and ensuring chocolate is properly melted and cooled prevents this issue.
Can I use salted butter instead of unsalted?
Yes, though you should reduce or eliminate additional salt in the recipe. Unsalted butter provides better control over salt levels, allowing more precise flavor balancing.
References
- Barefeet in the Kitchen: Fluffy, Creamy, Perfect Chocolate Buttercream Frosting — Barefeet in the Kitchen. Accessed April 2026. https://barefeetinthekitchen.com/fluffy-chocolate-frosting-recipe/
- Displaced Housewife: Rich & Creamy Chocolate Frosting — DisplacedHousewife. Accessed April 2026. https://www.displacedhousewife.com/chocolate-frosting/
- Serving Up Southern: Creamy Chocolate Frosting — Serving Up Southern. Accessed April 2026. https://servingupsouthern.com/creamy-chocolate-frosting/
- The Food Charlatan: Creamy Chocolate Buttercream Frosting — The Food Charlatan. Accessed April 2026. https://thefoodcharlatan.com/chocolate-buttercream-frosting/