Creating ramen noodles at home represents a fascinating culinary journey that combines technique, patience, and quality ingredients. While many home cooks view ramen as an instant convenience food, the process of making genuine ramen noodles from scratch reveals the artistry behind this beloved Japanese staple. This comprehensive guide walks you through every stage of ramen noodle preparation, from mixing your initial dough to achieving that perfect al dente texture.
Understanding the Foundation: Essential Ingredients
Before embarking on your ramen-making adventure, gathering the right ingredients forms the critical first step. The beauty of homemade ramen lies in controlling every component that goes into your noodles, ensuring superior quality compared to many commercial options.
The Primary Components
- All-purpose flour serves as the backbone of your ramen dough, providing structure and elasticity
- Water acts as the binding agent, though the exact amount varies based on humidity and flour type
- Salt enhances flavor development and strengthens gluten formation
- Kansui (alkaline mineral water) gives ramen its characteristic texture and golden color, though this specialty ingredient can be substituted with baking soda and water solutions
The ratio of these ingredients matters significantly. Most traditional recipes call for approximately 100 grams of flour per egg-sized portion of dough, adjusted with water to achieve the proper consistency. The addition of kansui specifically transforms ordinary noodles into authentic ramen by creating the distinctive slightly chewy, springy texture that defines the dish.
The Dough Development Process
Creating ramen dough requires understanding how these simple ingredients interact during mixing and resting phases. The process differs substantially from making bread dough, requiring a more methodical approach to achieve the desired results.
Mixing and Initial Hydration
Begin by combining your dry ingredients—flour and salt—in a large mixing bowl. Create a small well in the center and gradually add your water mixture containing the kansui. Using chopsticks or a wooden spoon, stir the flour into the liquid using a circular motion, incorporating flour from the bowl’s edges into the center. This gradual incorporation prevents lumps from forming and ensures even distribution of the alkaline solution throughout the dough.
The initial mixing phase typically takes 3-5 minutes of consistent stirring. You’ll notice the dough transforming from a shaggy collection of flour particles into a more cohesive mass. At this stage, don’t worry if the dough appears rough or slightly dry—these characteristics will improve during the next phase.
Kneading for Strength and Elasticity
Once your initial mixing is complete, transfer the dough to a clean work surface. Kneading ramen dough requires vigorous action, pushing the heel of your hand into the dough with firm pressure, folding it back over itself, rotating it slightly, and repeating this process for 10-15 minutes. This extended kneading develops the gluten network, creating the elastic strands that give ramen its characteristic springy bite.
Proper kneading transforms your dough from a rough texture into a smooth, slightly shiny surface. You’ll notice the dough becoming increasingly pliable and responsive. The dough should not stick excessively to your hands or the work surface—if it does, dust lightly with flour. However, avoid over-flouring, as this can make your noodles tough and brittle.
The Critical Resting Period
After kneading, shape your dough into a ball and wrap it tightly in plastic wrap. This resting phase, lasting 30 minutes to 2 hours, allows the gluten strands to relax and the flour to fully hydrate. During this time, the dough’s texture becomes smoother and more manageable, making the rolling and cutting stages substantially easier. Some recipes recommend multiple shorter rest periods interspersed with additional kneading, which can further improve the final noodle texture.
Rolling and Shaping Your Noodles
The transformation from dough to noodles requires specialized equipment or substantial patience with manual techniques. Each method produces slightly different results, and your choice depends on available tools and desired outcomes.
Machine Rolling Approach
A pasta maker or ramen-specific noodle machine dramatically simplifies the rolling process. Start with your rested dough divided into manageable portions approximately the size of a golf ball. Flatten each portion slightly and pass it through the widest setting of your machine several times, folding the sheet in half between passes. This repeated rolling develops the dough’s structure and achieves even thickness.
Progressively reduce the machine’s thickness setting with each pass, moving from the widest to progressively narrower settings. The resulting sheet should be thin enough to see light through it, typically around 2-3 millimeters thick. Handle the sheets gently after each pass, as the dough continues developing during this process.
Manual Rolling Technique
For those without specialized equipment, a traditional rolling pin works effectively, though requiring more physical effort. Place your dough portion between two sheets of plastic wrap or parchment paper to prevent sticking. Roll with steady, even pressure, rotating the dough quarter-turns periodically to achieve consistent thickness. This method demands patience but produces excellent results when executed carefully.
Cutting to Desired Thickness
Once your sheets reach the proper thinness, cutting them into noodles follows logically. Traditional ramen noodles measure approximately 2-3 millimeters wide, though personal preference can influence this choice. Using a sharp knife or specialized noodle cutter, cut your sheets into parallel strips. Work quickly to prevent the sheets from drying excessively—lightly dust the cut noodles with cornstarch or potato starch to prevent sticking.
Cooking Your Homemade Ramen
Properly cooking your freshly made noodles brings your homemade ramen experience to completion. The cooking method differs depending on whether you’re using fresh or dried noodles.
Fresh Noodle Preparation
Bring a large pot of water to a rolling boil—using generous quantities of water prevents the noodles from sticking together during cooking. Gently add your fresh ramen noodles, stirring immediately to prevent clumping. Fresh noodles typically cook very quickly, requiring only 2-3 minutes of simmering until they reach your desired texture. Test frequently during this window, as cooking time varies based on thickness and moisture content.
When the noodles achieve your preferred firmness—al dente texture with a slight resistance to the bite—immediately drain them using a colander. Some cooks reserve a portion of the cooking water for adjusting broth consistency.
Drying and Storage Considerations
If you prefer to dry your noodles for later use, lay them on a clean cloth or drying rack immediately after cutting. Allow them to air dry in a warm, well-ventilated area for 24-48 hours, depending on humidity levels. Completely dried noodles can be stored in airtight containers for several weeks. Dried noodles require longer cooking times—typically 4-5 minutes in boiling water—compared to their fresh counterparts.
Building Your Ramen Bowl: Broth and Toppings
While the noodles form the foundation of your ramen experience, the supporting elements—broth and toppings—elevate your dish into a complete culinary masterpiece.
Broth Development Strategies
Creating flavorful broth requires building layers of umami and depth. Start with a quality stock, whether chicken, vegetable, or seafood-based, enhanced with aromatics like garlic, ginger, and scallions. Dried shiitake mushrooms contribute significant umami complexity to your broth. Simmer these elements together for at least 15-20 minutes to allow flavors to meld thoroughly.
Consider incorporating miso paste, soy sauce, and sesame oil to introduce additional flavor dimensions. Some cooks create concentrated flavor bases that are then thinned with stock just before serving, allowing greater control over the final taste profile.
Strategic Topping Selection
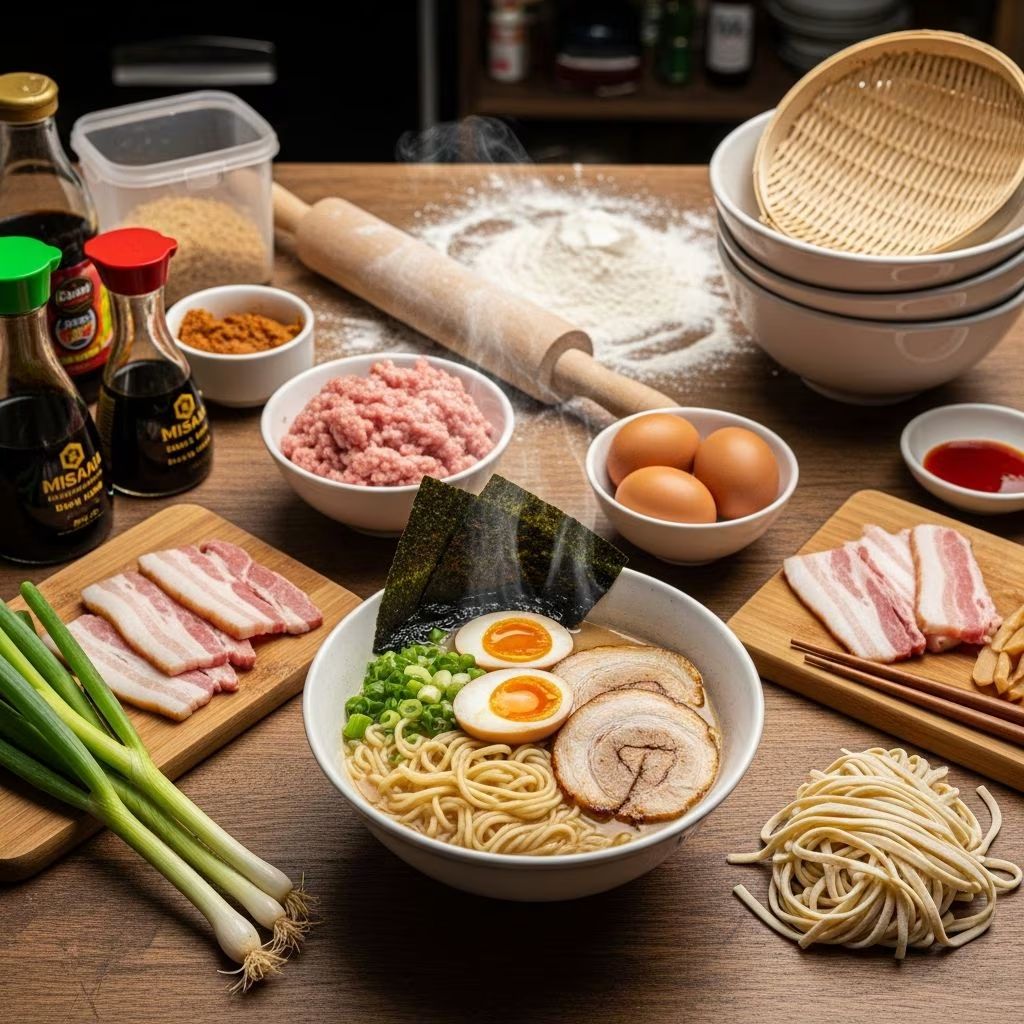
Traditional and contemporary toppings offer both nutritional value and textural contrast. Fresh vegetables like bok choy, kale, and spinach provide nutritional benefits when added to the hot broth shortly before serving. Soft-boiled eggs, often called ramen eggs or ajitsuke tamago, add richness and protein. Sesame seeds, scallions, and crispy panko breadcrumbs contribute textural variety.
Additional protein options include thinly sliced steak for beef ramen, which pairs beautifully with a ginger-soy sauce preparation. Some preparations feature miso-flavored broths with umami-rich ground pork and vegetables. Chili oil, hot sauce, and sriracha allow diners to adjust spice levels according to personal preference.
Troubleshooting Common Challenges
Even experienced cooks encounter occasional difficulties when making ramen. Understanding common issues and their solutions ensures consistent success.
Dough Texture Problems
Excessively dry dough that crumbles when kneading indicates insufficient water content. Add water gradually—one tablespoon at a time—and continue kneading until the dough achieves the proper consistency. Conversely, sticky dough that refuses to hold shape suggests too much water or insufficient kneading. Dust lightly with flour and knead more vigorously for an additional 5-10 minutes.
Noodle Quality Issues
Noodles that become mushy during cooking often indicate either excessive cooking time or insufficient kansui in the original dough. Reduce cooking time by 30 seconds and monitor more carefully. Noodles that snap easily when raw suggest the dough needs longer resting periods to allow gluten strands to fully develop and relax.
Inconsistent Results
Environmental factors like humidity and temperature significantly impact ramen dough behavior. Record the exact water amounts used in successful batches and adjust future recipes based on these notes. Maintaining consistent room temperature during dough development and resting phases also improves reproducibility.
Frequently Asked Questions About Homemade Ramen
Can I substitute all-purpose flour with other flours?
Bread flour, with its higher protein content, produces chewier noodles, while cake flour creates more delicate results. Whole wheat flour can replace 10-20% of the all-purpose flour for added nutrition, though this alters the final texture. Specialized ramen flour, available through specialty suppliers, produces authentic results.
What if I cannot find kansui?
Creating a kansui substitute requires combining baking soda with water in specific ratios. A common substitute uses 1/4 teaspoon baking soda dissolved in 1 teaspoon water per portion of dough. This produces similar results to commercial kansui, though subtle flavor and color differences may occur.
How far in advance can I prepare ramen noodles?
Fresh noodles are best used within hours of preparation for optimal texture. Dried homemade noodles store in airtight containers for up to three weeks. For longer storage, freezing fresh noodles extends shelf life to three months—simply increase cooking time by 1-2 minutes when preparing frozen noodles.
What makes homemade ramen taste different from instant ramen?
Homemade ramen offers superior texture, fresher flavor, and complete ingredient control. Commercial instant ramen often undergoes frying or air-drying processes that alter the final taste and texture. Additionally, homemade broths provide exponentially more flavor complexity than packaged seasoning packets.
Conclusion: Mastering Your Ramen Craft
Creating ramen noodles at home transforms your appreciation for this beloved dish. While the process requires practice and attention to detail, the rewards of perfectly textured, flavorful noodles justify the effort invested. Each batch teaches valuable lessons about dough behavior, technique refinement, and personal flavor preferences. Whether you’re preparing a simple bowl with basic vegetables or crafting an elaborate presentation with multiple toppings, homemade ramen elevates your culinary skills while delivering an authentically satisfying dining experience.
References
- Quick Homemade Ramen Recipe — Pinch of Yum. https://pinchofyum.com/quick-homemade-ramen
- Comfort-First Ramen Recipes Worth the Slurp — Binky’s Culinary Carnival. https://www.binkysculinarycarnival.com/comfort-first-ramen-recipes-worth-the-slurp/
- Feeling Broke? These Ramen Noodle Recipes Are The Best Way To… — Delish. https://www.delish.com/cooking/g70195850/best-ramen-noodle-recipes/