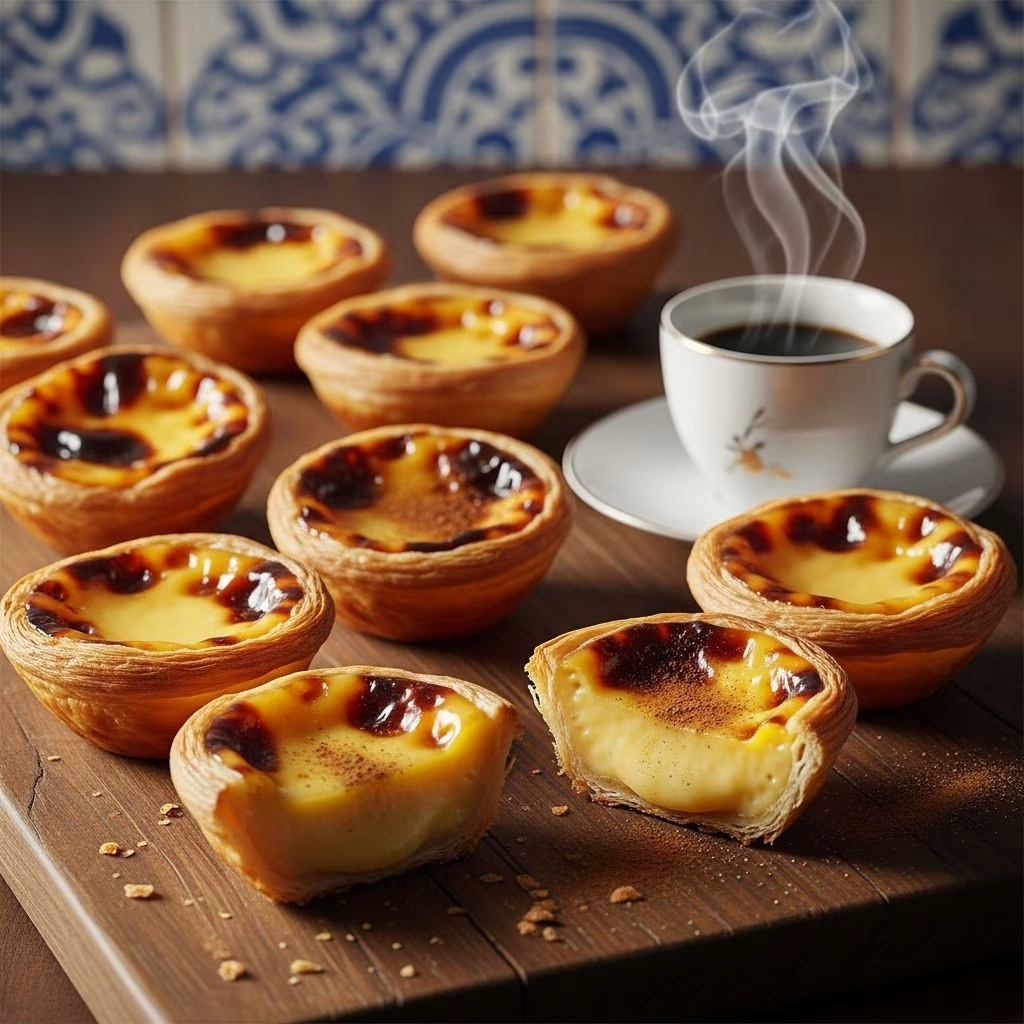
Nothing captures the essence of Portuguese pastry artistry quite like pastéis de nata. These iconic custard tarts, with their shatteringly crisp pastry shells and silky, caramelized custard filling, have enchanted taste buds for centuries. Originating from Portugal’s rich culinary heritage, they offer a perfect balance of textures and flavors that make them irresistible. Whether you’re a seasoned baker or a curious home cook, crafting these tarts at home brings a slice of Lisbon’s famous pastry shops right to your kitchen.
The Alluring History Behind Pastéis de Nata
The story of Portuguese custard tarts begins in the early 19th century at the Jerónimos Monastery in Belém, Lisbon. Monks, seeking to utilize egg yolks left over from clarifying wine and starching habits, developed a simple yet divine custard recipe. When the monastery closed in 1834, local laywomen took over production, turning it into a commercial venture. Today, the original Pastéis de Belém bakery still operates, guarding its recipe as a closely held secret.
This dessert’s popularity exploded worldwide, especially after Portuguese explorers spread their culinary influences. In places like Macau and Hawaii, variations emerged, but the classic version remains a symbol of national pride. UNESCO recognizes the cultural significance of these tarts within Portugal’s intangible heritage, underscoring their role in festive traditions and daily indulgences.
Essential Ingredients for Authentic Flavor
Creating genuine pastéis de nata starts with high-quality ingredients. The pastry demands all-butter puff pastry for its layers of flakiness, while the custard relies on simple staples elevated by precise ratios.
- Pastry: 1 package (about 14 ounces) of store-bought all-butter puff pastry, thawed if frozen. Homemade is ideal for purists but time-intensive.
- Custard Base: Whole milk (2 cups), heavy cream (1 cup), granulated sugar (1 1/2 cups), egg yolks (6 large), and a touch of cornstarch (1 tablespoon) for stability.
- Flavor Enhancers: Vanilla extract (1 teaspoon), lemon zest (from 1 lemon), and cinnamon stick (1) for aromatic depth.
Opt for fresh, high-fat dairy to achieve the custard’s signature velvety texture. Avoid low-fat substitutes, as they compromise creaminess. For the sugar syrup, use superfine sugar to dissolve quickly without graininess.
Step-by-Step Guide to Baking Perfection
Baking pastéis de nata requires patience and precision. Follow these steps for tarts that rival those from Portugal.
Prepare the Pastry Shells
- Preheat your oven to 550°F (290°C) with a rack in the upper third. This intense heat creates the blistered, caramelized tops.
- Lightly grease a 12-cup muffin tin with unsalted butter.
- Roll out the puff pastry to a 12×16-inch rectangle on a floured surface. Sprinkle lightly with flour, then roll into a tight log. Cut into 12 equal pieces (about 1 1/4 inches thick).
- Press each piece into a muffin cup, stretching to cover the bottom and sides evenly. The dough should come just above the rim for dramatic puffing.
Make the Luscious Custard Filling
- In a saucepan, combine milk, cream, cinnamon stick, and lemon zest. Heat over medium until steaming, then remove from heat and steep for 30 minutes.
- In another pan, melt sugar with 1/4 cup water to form a light syrup (about 220°F). Cool slightly.
- Whisk egg yolks with cornstarch and vanilla. Strain the steeped milk mixture into the yolks, then slowly incorporate the syrup while whisking vigorously to prevent curdling.
- Strain the custard twice through a fine-mesh sieve for smoothness.
Assemble and Bake
- Fill each pastry shell nearly to the top with custard.
- Bake for 12-16 minutes, rotating halfway, until edges are golden and custard bubbles with dark spots.
- Cool in the tin for 10 minutes, then transfer to a wire rack. Dust with cinnamon if desired.
Yield: 12 tarts. Total time: About 1.5 hours, including cooling.
Pro Tips for Flawless Results Every Time
Achieving bakery-quality tarts involves mastering heat, timing, and technique.
| Common Challenge | Solution |
|---|---|
| Soggy bottoms | Chill formed shells for 20 minutes before filling; ensure high oven temp. |
| Curdled custard | Strain after mixing syrup; temper yolks gradually. |
| Under-browned tops | Broil for 1-2 minutes at the end, watching closely. |
| Shrinking pastry | Don’t overstretch dough; let it rest after lining tins. |
For extra crispness, use a pizza stone preheated in the oven. Silicone muffin liners prevent sticking without added fat. Experiment with sea salt flakes post-baking for a modern twist.
Variations to Suit Every Palate
While traditionalists stick to the classic, creative bakers love adaptations.
- Chocolate Version: Stir 2 ounces melted dark chocolate into the custard.
- Matcha Infusion: Replace lemon zest with 1 teaspoon matcha powder for an East-meets-West fusion.
- Gluten-Free: Use gluten-free puff pastry sheets, available at specialty stores.
- Mini Tarts: Bake in mini muffin tins for bite-sized treats at parties.
These tweaks maintain the tart’s spirit while broadening appeal.
Pairing and Serving Suggestions
Serve pastéis de nata warm for optimal contrast between hot custard and cool pastry. Pair with strong black coffee or espresso to cut the sweetness. In Portugal, they’re enjoyed alongside chá de limão (lemon tea). For dessert, accompany with fresh berries or a scoop of vanilla gelato.
Store leftovers in an airtight container at room temperature for up to 2 days; reheat at 350°F for 5 minutes to revive crispness. They freeze well for up to a month—thaw and reheat similarly.
Health Considerations and Nutritional Insights
These tarts are indulgent, clocking in at about 300 calories each, primarily from butter and sugar. To lighten up, reduce sugar by 1/4 cup or use half-and-half instead of cream. They’re naturally gluten-dense but can be adapted. Per the USDA, a serving provides calcium from dairy, though moderation is key due to saturated fats.
Frequently Asked Questions (FAQs)
Can I make the pastry from scratch?
Yes, but it requires multiple folds and rests over 3 days for optimal layers. Store-bought works excellently for beginners.
Why do my tarts leak custard?
Overfilled shells or thin pastry walls cause this. Fill 3/4 full and reinforce dough thickness.
What’s the best oven for this recipe?
A convection oven ensures even browning; otherwise, rotate pans midway.
Are these tarts vegan-friendly?
Traditional no, but vegan puff pastry and custard (using coconut milk and aquafaba) yield good results with practice.
How long do they keep?
Best eaten same day; refrigerate up to 3 days, though texture softens.
Conclusion: Bake Your Way to Portuguese Bliss
Portuguese custard tarts embody simplicity turned extraordinary. With practice, you’ll master the rhythm of dough and custard, producing treats that transport you to sunny Belém. Gather your ingredients, fire up the oven, and savor the magic of pastéis de nata. Share them with loved ones, and watch as they spark joy with every creamy bite.
References
- Belém Cultural Center Official History — Mosteiro dos Jerónimos. 2023-05-15. https://www.mosteirojeronimos.gov.pt/en/history/
- Portuguese Intangible Cultural Heritage Inventory — Direção-Geral do Património Cultural. 2024-01-10. https://www.patrimoniocultural.gov.pt/en/inventory/
- Food Composition Databases — United States Department of Agriculture (USDA). 2025-03-20. https://fdc.nal.usda.gov/
- The Oxford Companion to Sugar and Sweets — Oxford University Press. 2015-04-01. https://doi.org/10.1093/acref/9780199313396.001.0001 (Authoritative historical reference, remains standard).