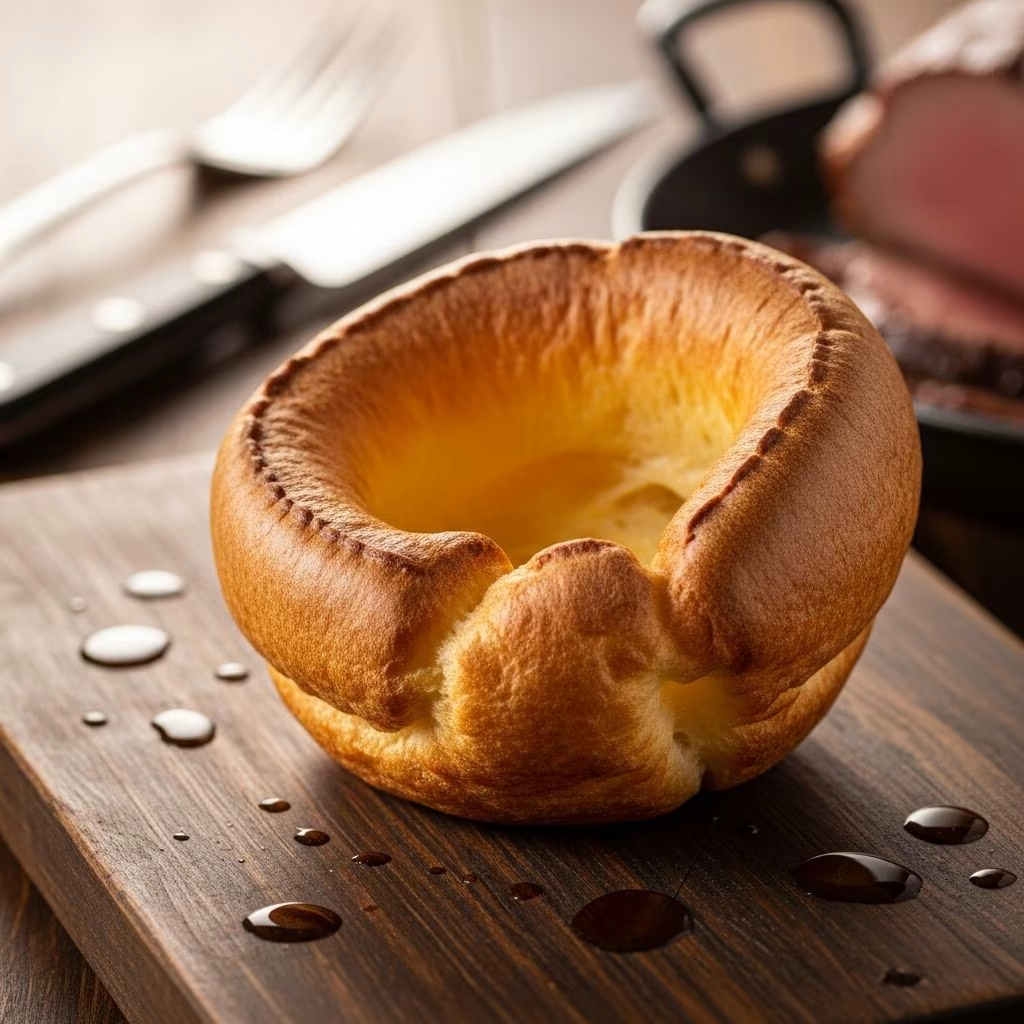
Yorkshire puddings represent one of Britain’s most beloved culinary traditions, yet many home cooks approach them with trepidation. The reality is that this classic side dish requires nothing more than a handful of basic pantry staples and an understanding of a few essential techniques. Once you grasp the fundamental principles behind batter preparation and oven temperature management, you’ll find yourself creating consistently impressive results that rival those served in traditional British restaurants.
Understanding the Core Ingredients
The beauty of Yorkshire puddings lies in their ingredient simplicity. You’ll need just four essential components: plain flour, eggs, milk, and salt. The elegance of this recipe emerges from the careful balance and interaction of these basic elements rather than from complex flavor additions or specialized ingredients.
Plain all-purpose flour forms the structural foundation of your batter. Unlike self-raising flour, which contains leavening agents, plain flour allows the pudding to rise naturally through the steam generated during baking and the incorporation of air during whisking. This creates the characteristic light, airy texture that distinguishes authentic Yorkshire puddings from heavier alternatives.
Eggs serve a dual purpose in this recipe. They provide both binding capability and a significant portion of the batter’s liquid content. The proteins in eggs coagulate during heating, creating structure that traps steam and promotes the dramatic rise that makes Yorkshire puddings visually striking. Using room-temperature or slightly warm eggs can marginally improve incorporation, though cold eggs work perfectly adequately.
Whole milk, preferably semi-skimmed rather than skimmed varieties, creates the ideal consistency for the batter mixture. Skimmed milk tends to produce less rich results, while full-fat milk occasionally yields overly dense puddings. Semi-skimmed milk strikes the optimal balance between flavor and texture development.
The fat component—whether vegetable oil, beef dripping, or lard—plays a crucial role in achieving crispiness. The intense heat applied to this fat before batter introduction creates the conditions necessary for rapid moisture evaporation from the batter’s exterior, resulting in golden, crispy surfaces. Traditional British cooks often prefer beef dripping for superior flavor and superior heat tolerance, though vegetarian versions using high-smoke-point oils work equally well from a textural perspective.
Ingredient Measurements and Scaling
One of the most straightforward aspects of Yorkshire pudding preparation involves the ingredient ratio. The classic formula maintains perfect balance: equal volumes of flour, eggs, and milk, with salt added to taste.
| Ingredient | Standard Recipe (10-12 puddings) | Half Recipe (5-6 puddings) | Double Recipe (20-24 puddings) |
|---|---|---|---|
| Plain Flour | 1 cup (140g) | ½ cup (70g) | 2 cups (280g) |
| Eggs | 1 cup / 4 medium | ½ cup / 2 medium | 2 cups / 8 medium |
| Milk | 1 cup (240ml) | ½ cup (120ml) | 2 cups (480ml) |
| Salt | ½ teaspoon | ¼ teaspoon | 1 teaspoon |
| Fat for tin | 6 teaspoons | 3 teaspoons | 12 teaspoons |
This scalability feature makes Yorkshire puddings exceptionally flexible for various occasions. Whether you’re preparing a casual family meal or hosting a gathering for two dozen guests, simply adjust all quantities proportionally to maintain the delicate balance that ensures success.
Step-by-Step Batter Preparation Method
Phase One: Flour and Eggs Foundation
Begin by measuring your flour into a medium-sized mixing bowl. Add a generous pinch of salt directly to the flour. Create a small well in the center of the flour, similar to how you might form a volcano shape with sand. This technique facilitates incorporation and prevents lumping.
Crack your eggs into a separate container and beat them thoroughly until the yolks and whites combine into a uniform mixture. Pour the beaten eggs into the flour well you’ve created. Using a whisk, begin stirring from the center of the well, gradually incorporating flour into the egg mixture as you move outward. This methodical approach prevents lumps from forming and ensures smooth integration.
Continue whisking until the flour and eggs form a thick paste without visible lumps. The consistency should resemble thick pancake batter at this stage, and the texture should appear relatively smooth despite no milk yet being incorporated.
Phase Two: Milk Integration
Begin adding milk gradually while continuing to whisk steadily. Rather than pouring the entire volume at once, introduce the milk in stages—perhaps a third at a time—whisking thoroughly between additions. This patient approach prevents the formation of lumps that might otherwise resist breakdown.
The finished batter should achieve a consistency resembling single or light cream—pourable yet substantial enough to coat the back of a spoon. If your batter appears thicker than this, add milk in small increments until reaching the proper consistency. Conversely, if the mixture seems too thin, whisk in a tablespoon of flour.
Some cooks note that minor lumps remaining in the batter at this stage pose no significant concern, as they typically dissolve during the resting period or during baking. However, most lumps can be eliminated through patient whisking, which also incorporates beneficial air into the batter.
Phase Three: Resting and Flavor Development
Transfer your prepared batter to a clean jug or pitcher for convenient pouring later. Cover this vessel with plastic wrap or a clean cloth, then refrigerate for a minimum of thirty minutes. Ideally, allow the batter to rest overnight or for several hours, as this extended resting period permits several beneficial developments.
During refrigeration, the flour gradually hydrates more completely, resulting in a smoother final texture. The gluten network in the flour relaxes, which can contribute to more tender puddings. Additionally, the cold batter temperature creates superior contrast with the intensely hot fat in your baking tin, promoting more vigorous rise and superior crispiness.
Oven Preparation and Temperature Management
Yorkshire pudding success depends critically on achieving and maintaining extremely high oven temperatures. Preheat your oven to 425-450°F (220-230°C) for at least fifteen to twenty minutes before you plan to bake. This extended preheating period ensures the oven reaches its target temperature uniformly throughout the interior.
Select a Yorkshire pudding tin—a specialized pan featuring twelve small cup-shaped sections—or alternatively, a standard muffin tin with twelve cups. Add approximately half a teaspoon of your chosen fat to each cup. Place this tin in the preheated oven for an additional eight to ten minutes, allowing the fat to reach smoking temperature.
The fat must be genuinely hot—far hotter than you might initially imagine necessary. When you pour the cold batter into these extremely hot fat receptacles, the batter should sizzle audibly and immediately begin setting around the edges. This rapid moisture evaporation creates the crispy exterior texture that distinguishes excellent Yorkshire puddings from mediocre versions.
Batter Application and Baking Process
Remove your rested batter from the refrigerator and stir gently with a whisk. Take your preheated tin from the oven and, working quickly to minimize heat loss, pour the batter into each cup until approximately half to three-quarters full. Work with confidence and speed during this process, as every second your tin spends outside the oven reduces its temperature.
Return the filled tin to the oven immediately, closing the oven door firmly. Resist any temptation to open the door during the initial fifteen minutes of baking, as internal heat loss compromises rise and may result in puddings that fail to achieve proper height.
After approximately fifteen to twenty minutes, open the oven door briefly to assess progress. Your puddings should have risen dramatically above the tin edges and developed golden-brown coloring. If they appear insufficiently risen or pale, continue baking for an additional five minutes before reassessing.
Total baking time typically ranges from eighteen to twenty-five minutes, depending on your specific oven’s characteristics, the size of your pudding cups, and the temperature of your batter when poured. Puddings are finished when they’ve risen well above the tin, display deep golden-brown coloring, and feel firm rather than soft when gently pressed.
Troubleshooting Common Issues
Puddings fail to rise: This typically indicates insufficient oven temperature or fat temperature. Ensure your oven has preheated adequately and your fat is genuinely hot—visible wisps of smoke from the fat represent the ideal condition. Additionally, verify that your batter was sufficiently cold when poured.
Puddings rise but collapse after removal: This suggests the puddings haven’t fully set internally. Continue baking for several additional minutes to ensure the interior structure firms properly. Puddings should feel slightly firm to gentle pressure before removal from the oven.
Puddings emerge dense rather than airy: Under-whisking the batter or failing to rest it adequately commonly causes this problem. Ensure thorough whisking to incorporate air, and permit adequate resting time for gluten relaxation and flour hydration.
Puddings taste greasy: This usually results from using excessive fat in each tin cup. Reduce fat quantity to approximately half a teaspoon and ensure even distribution. Additionally, verify that your fat choice possesses appropriate smoke point characteristics.
Serving Suggestions and Presentation
Yorkshire puddings achieve their traditional purpose as accompaniments to Sunday roast dinners featuring beef, Yorkshire puddings contribute to the meal’s structure and absorb delicious meat juices and gravy. However, modern applications extend far beyond this classic pairing.
Serve puddings immediately after removal from the oven while they maintain maximum crispiness and warmth. Individual puddings can be plated alongside roasted meats and vegetables, or arranged on a separate platter for family-style service. Some diners prefer drizzling puddings with rich gravy, while others enjoy them plain to appreciate their delicate flavor.
Yorkshire puddings work equally well as vessels for savory fillings—curries, stews, or roasted vegetable mixtures can be nestled inside puddings for creative presentations. Alternatively, smaller puddings can serve as appetizer vessels for various toppings at casual gatherings.
Essential Storage and Make-Ahead Considerations
Prepared Yorkshire puddings maintain optimal texture for approximately one hour after baking. For longer storage, refrigerate cooled puddings in airtight containers for up to three days. Reheat in a 350°F (175°C) oven for approximately five minutes until warmed through and crispness is restored.
Batter prepared in advance keeps refrigerated for up to forty-eight hours, though most cooks report superior results with batter used within twenty-four hours of preparation. The batter freezes adequately for up to one month, though thawing to room temperature before using produces better results than pouring frozen batter directly into hot fat.
Frequently Asked Questions
Can I use egg substitutes? Authentic Yorkshire puddings require genuine eggs for structure and rise. Egg replacer products typically produce inadequate results, as they lack the protein coagulation characteristics necessary for proper pudding formation.
What oil temperature is ideal? Vegetable or sunflower oil should reach approximately 400°F (200°C), evidenced by visible wisps of smoke. Olive oil possesses an insufficient smoke point and will burn, compromising both flavor and the batter’s behavior.
Should I use a Yorkshire pudding tin or muffin tin? Either works adequately, though traditional Yorkshire pudding tins feature slightly different proportions optimized for pudding production. Standard muffin tins produce perfectly acceptable results.
Can I make giant individual Yorkshire puddings? Yes, using two 8-inch cast iron pans or similar vessels. Expect longer baking times—approximately twenty-five to thirty minutes—for larger puddings compared to individual versions.
References
- Science of Cooking: How Heat and Chemistry Transform Everyday Ingredients into Delicious Meals — Dr. Stuart Farrimond. 2021. Academic Publishers
- The Flavor Bible: The Essential Reference for More Than 500 Ingredients and How to Cook with Them — Karen Page and Andrew Dornenburg. 2008. Penguin Random House
- Food Safety Guidelines for Home Cooking — United States Department of Agriculture. 2024. USDA Official Website
- Professional Cooking Techniques and Food Science — The Culinary Institute of America. 2020. CIA Official Publications