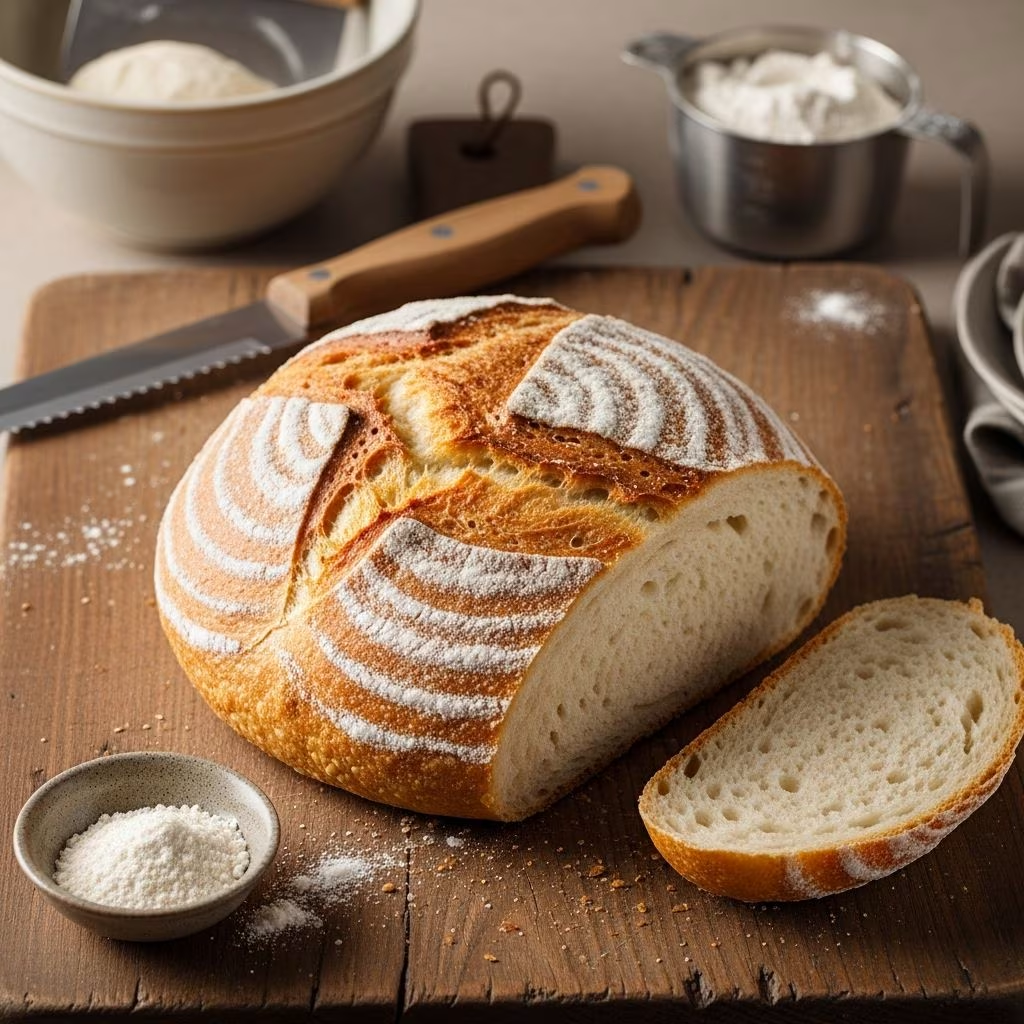
Baking white bread from scratch is both an art and a science that combines fundamental cooking principles with patience and practice. Whether you’re a novice baker or someone looking to refine your technique, understanding the core components of bread-making will transform your kitchen into a bakery. This comprehensive guide explores everything you need to know to consistently produce beautiful, soft, and delicious white bread at home.
Understanding the Essential Components of White Bread
Every successful white bread recipe relies on a foundation of key ingredients working together in harmony. The primary components—water, flour, yeast, salt, and fat—each serve specific purposes in developing flavor, texture, and structure. Water serves as the medium that hydrates the flour and allows gluten development. The type of flour you choose significantly impacts your final product; bread flour contains more protein than all-purpose flour, resulting in a stronger gluten network and chewier crumb. This distinction is crucial for achieving the desired texture in your finished loaf.
Yeast is the living organism responsible for fermentation, which creates the gas bubbles that cause bread to rise and develop its characteristic light, airy structure. Active dry yeast remains a reliable choice for home bakers, though instant yeast can be substituted when necessary. Sugar doesn’t just add sweetness—it feeds the yeast and helps develop browning during baking. Salt enhances flavor while controlling fermentation speed and strengthening gluten strands. Fat, typically butter or oil, contributes richness, moisture retention, and a tender crumb structure.
Preparing Your Ingredients for Success
Ingredient temperature plays a critical role in bread baking that many beginners overlook. Water temperature should be between 105 and 110 degrees Fahrenheit when you activate your yeast, as this range optimally stimulates fermentation without killing the living yeast cells. Using a kitchen thermometer removes guesswork from this crucial step. If your water is too cold, fermentation proceeds slowly; if too hot, you risk damaging the yeast entirely.
For the best results, ensure all your ingredients are fresh. Yeast has an expiration date—expired yeast will not provide adequate rise, resulting in dense, disappointing bread. If you store yeast in your refrigerator or freezer, allow it to come to room temperature before using. Flour also ages and absorbs moisture differently depending on storage conditions and humidity levels in your home. While this won’t ruin your bread, it may require slight adjustments to hydration levels during mixing.
The Mixing Process: Building Flavor and Structure
Proper mixing establishes the gluten network that gives bread its structure and elasticity. Begin by combining warm water, yeast, and sugar in your mixing bowl and allowing this mixture to sit for approximately five minutes until it becomes visibly foamy. This proofing step confirms that your yeast is alive and active before you add it to the remaining ingredients.
After the yeast mixture is ready, add your flour, salt, and melted butter. Using a stand mixer with the dough hook attachment takes the physical labor out of this process. Mix on low speed for about one minute until the dough comes together in a shaggy ball that pulls away from the bowl’s sides. This initial mixing should not be aggressive—you’re simply combining ingredients at this stage.
Next, continue mixing for an additional one to two minutes on low speed. If your dough appears shiny and wet, gradually add small amounts of flour until the surface loses its shine. This indicates sufficient flour has been incorporated. The consistency should be slightly sticky but manageable. Over-mixing at this stage can develop too much gluten too quickly, resulting in a tough, chewy bread rather than the tender crumb you’re seeking.
First Rise and Bulk Fermentation
After mixing is complete, your dough enters the first rise phase, also called bulk fermentation. Transfer your dough to a lightly oiled or cooking spray-treated bowl, turning it once to coat all surfaces with oil. This prevents the dough from drying out on the edges. Cover the bowl with plastic wrap or a clean kitchen towel and place it in a warm, draft-free location. An ideal proofing environment maintains temperatures around 75 to 80 degrees Fahrenheit.
The first rise typically takes 20 to 30 minutes, during which the dough should visibly expand. You’re looking for approximately 50 percent growth rather than full doubling at this stage. This shorter first rise develops flavor while maintaining manageable dough consistency for shaping. If your kitchen is particularly cold, place the bowl in an unlit oven with just the light on, or near—but not touching—a heating vent.
Shaping and Second Rise
Once your dough has risen sufficiently, turn it out onto a lightly floured work surface. Gently shape it into a round or oval loaf, depending on your preferred bread shape and whether you’re baking in a loaf pan or on a baking sheet. For a traditional sandwich loaf, gently stretch the dough into a rectangle about twice the length of your loaf pan. Roll it tightly from one short end, pinching the seams to seal. Place this shaped dough into a lightly oiled loaf pan, seam side down.
Cover your shaped loaf with plastic wrap or a towel and allow it to rise again in a warm location until it rises above the rim of the loaf pan, approximately 30 to 45 minutes. This second rise is where significant volume development occurs. Don’t rush this step—proper proofing ensures a light, airy crumb rather than a dense, sunken loaf.
Preparing for Baking: Temperature and Oven Setup
Approximately 30 minutes before baking, preheat your oven to 350 to 375 degrees Fahrenheit, depending on your recipe’s specific instructions. This ensures your oven reaches a stable temperature by the time your dough is ready. Some bakers prefer higher temperatures (400°F) for a more pronounced crust, while lower temperatures (350°F) produce a softer, more tender exterior.
If you want an attractive, shiny crust on your finished loaf, prepare an egg wash using one egg beaten with one tablespoon of water. Brush this mixture gently over the top of your risen loaf about five minutes before it goes into the oven. For a more rustic appearance, skip the egg wash or brush with melted butter instead.
Baking: Time, Temperature, and the Transformation
Bake your loaf for 35 to 45 minutes, depending on your oven and loaf size. The bread is finished when it turns golden brown on top and the internal temperature reaches approximately 190 to 210 degrees Fahrenheit when measured with an instant-read thermometer inserted into the center of the loaf. You can also test doneness by tapping the bottom of the loaf—a hollow sound indicates proper baking.
During baking, the dough undergoes dramatic transformation. Heat causes yeast to produce a final burst of gas before dying at around 140 degrees Fahrenheit. Starches gelatinize, proteins coagulate, and the crust develops its characteristic color through the Maillard reaction, which creates complex flavors and appealing browning.
Cooling and Storage Guidelines
After removing your bread from the oven, resist the urge to slice it immediately. Allow it to cool in the pan for 10 minutes, then turn it out onto a wire rack to cool completely. This resting period allows the interior crumb to set properly. Cutting into warm bread releases steam and can result in a gummy texture inside.
Once completely cool, store your bread at room temperature in a paper bag or bread box for up to three days. For longer storage, wrap cooled bread in plastic wrap and freeze for up to three months. Thaw frozen bread at room temperature for several hours before consuming.
Common Baking Challenges and Solutions
| Challenge | Likely Cause | Solution |
|---|---|---|
| Dense, heavy crumb | Insufficient rising time or dead yeast | Ensure proper proofing periods and check yeast expiration date |
| Gummy interior | Under-baking or slicing while warm | Bake to proper internal temperature and cool completely before slicing |
| Tough, chewy texture | Over-mixing or too much flour | Mix minimally and measure flour accurately |
| Bread doesn’t rise | Dead yeast or water too hot | Use fresh yeast and verify water temperature with thermometer |
| Overly thick crust | Oven temperature too high | Lower oven temperature by 25 degrees |
Ingredient Variations and Customization Options
While traditional white bread follows a standard formula, bakers can introduce subtle variations to customize their results. Substituting half the water with whole milk creates a richer, softer crumb with improved keeping qualities. Adding an egg contributes fat and structure, resulting in an even more tender loaf. Some heritage recipes incorporate both milk and egg for maximum softness and richness.
The type of flour used also affects outcomes. Bread flour with its higher protein content produces a more pronounced gluten structure and chewier crumb. All-purpose flour yields a softer, more tender texture suitable for sandwich bread. Mixing the two types provides a middle ground between chewiness and tenderness.
Frequently Asked Questions
Can I use instant yeast instead of active dry yeast?
Yes, though the substitution ratio differs slightly. Instant yeast is more concentrated, so use about 25 percent less than the recipe calls for. Alternatively, use the same amount but expect slightly faster fermentation.
What should I do if my dough is too sticky?
Add flour gradually—one tablespoon at a time—while mixing. Overly sticky dough indicates too much hydration. However, modern bread recipes often use higher hydration levels intentionally to create open crumb structure, so some stickiness is normal.
How can I tell when my bread has risen enough?
During the second rise, the loaf should rise noticeably above the rim of the loaf pan. Use the “poke test”—press your finger lightly into the dough. If the indent slowly springs back halfway, it’s properly proofed. If it springs back completely, it needs more time. If it doesn’t spring back, you may have overproofed.
Can I prepare dough ahead of time?
Yes! After the initial mixing, refrigerate your dough overnight or for up to two days. The cold temperature slows fermentation, allowing flavors to develop. Shape and proof at room temperature before baking as directed.
Why did my bread turn out dense?
Dense bread typically results from insufficient rising time, dead yeast, or water temperature that was too hot. Verify each factor in your next attempt, and the issue should resolve.
Mastering Your White Bread Technique
Baking consistently excellent white bread requires understanding fundamental principles rather than blindly following recipes. Each oven, kitchen environment, and batch of flour behaves slightly differently. By learning to recognize visual and tactile cues—how dough should feel, what properly risen bread looks like, when the crumb has set—you’ll develop intuition that guides your baking decisions.
Keep detailed notes about your baking sessions, recording oven temperature, rising times, and results. This personalized record becomes invaluable for troubleshooting and improvement. With practice, you’ll develop the skill and confidence to produce beautiful, delicious white bread that rivals any bakery offering.
References
- King Arthur Baking Company Flour Guide — King Arthur Baking Company. https://www.kingarthurbaking.com/learn/guides/bread-flour
- National Institutes of Health: Thermal Stability of Saccharomyces cerevisiae — U.S. National Institutes of Health. 2024. https://pubmed.ncbi.nlm.nih.gov/
- The Flavor Bible: Essential Reference for Cooking — Karen Page and Andrew Dornenburg. Little, Brown. https://www.penguinrandomhouse.com/books/
- The Joy of Cooking: All About Bread and Yeast — Irma S. Rombauer, Marion Rombauer Becker, and Ethan Becker. Scribner. 2019.
- USDA Food Composition Database: Milk and Dairy Products — United States Department of Agriculture. https://fdc.nal.usda.gov/