Tlacoyos represent one of Mexico’s most beloved street foods, featuring a distinctive football-shaped or oval form that encloses a savory filling of beans, favas, or other legumes. The foundation of any exceptional tlacoyo lies in the preparation of its masa, or dough base. While the concept of working with masa harina might seem straightforward, achieving the perfect consistency and texture requires understanding several critical factors that distinguish amateur efforts from professional-quality results.
Understanding the Foundation: Masa Harina Essentials
Masa harina forms the cornerstone of tlacoyo preparation. This specially processed corn flour, made from nixtamalized corn, provides the distinctive flavor and texture that characterizes authentic tlacoyos. The nixtamalization process, which involves treating corn with an alkaline solution, not only enhances nutritional value but also develops the unique corn flavor that distinguishes masa harina from ordinary cornmeal.
When selecting masa harina for your tlacoyos, you’ll encounter several varieties. Blue corn masa harina has gained popularity in recent years, offering a subtly different flavor profile compared to traditional white or yellow varieties. Many regional recipes call for specific types, with some culinary traditions favoring particular colors based on local availability and preference. The choice between varieties ultimately depends on your flavor preferences and the aesthetic appearance you desire for your finished tlacoyos.
Calculating Ingredient Proportions
The ratio of masa harina to water represents perhaps the most critical measurement in tlacoyo dough preparation. Most traditional recipes utilize between 1.5 to 2.5 cups of masa harina, with water quantities ranging from 1 to 1.5 cups depending on the specific masa harina brand and ambient humidity conditions. This variability exists because different masa harina products possess different moisture retention properties, and environmental factors influence how much water your dough will require.
Salt serves an important function beyond mere seasoning. Typically, recipes call for approximately 0.25 to 0.5 teaspoons of salt per batch, though some preparations include optional flavor enhancers such as chile powder or annatto for enhanced complexity. The salt not only seasons the masa but also strengthens the gluten network, contributing to better structure and moldability.
Water temperature warrants careful attention. Using very warm or hot water helps the masa harina hydrate more effectively and creates a more pliable dough. However, the water should not be boiling, as excessive heat can affect the gluten development and overall texture of your finished dough.
The Art of Achieving Ideal Texture
Perhaps the most commonly overlooked element that determines success or failure in tlacoyo preparation involves attaining the proper dough consistency. The masa should feel soft and pliable, similar to modeling clay or soft play dough, but should maintain enough firmness to hold its shape without excessive stickiness.
When combining your dry ingredients with water, employ a gradual approach rather than introducing all liquid at once. Begin by whisking the masa harina and salt together in your mixing bowl. Pour approximately three-quarters of your total water quantity into the dry ingredients, stirring with a spatula or wooden spoon to combine. This initial mixing stage establishes the foundation for proper hydration.
As the mixture begins to form a cohesive mass, transition to kneading with your hands once the dough cools enough to handle. This kneading process typically requires five to ten minutes of continuous work. During this stage, you’ll gradually add the remaining water, working it in tablespoon by tablespoon as needed. The key involves maintaining constant tactile feedback, continually assessing whether your dough needs additional moisture or if it has reached optimal consistency.
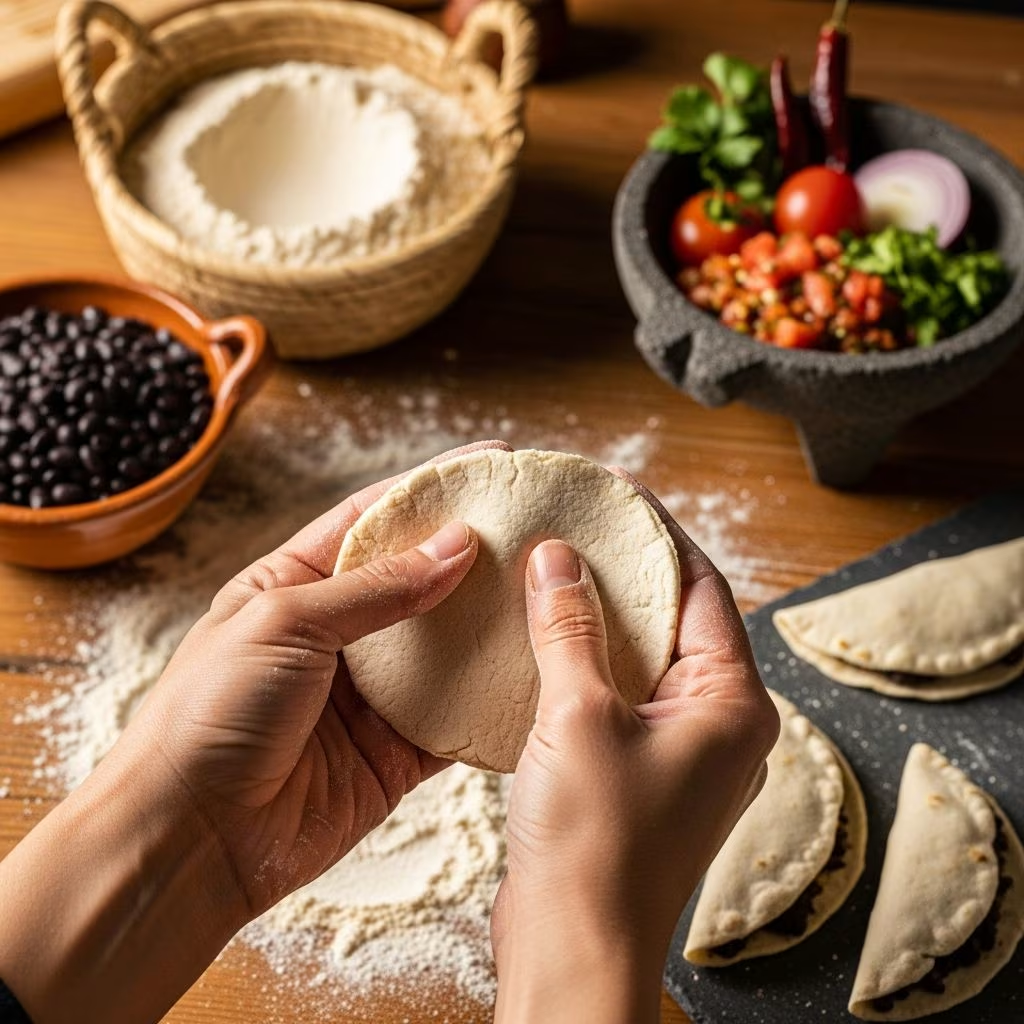
A simple test determines whether your masa has achieved proper hydration: press a small portion of dough between your palms and release it. If the edges crack noticeably, your masa requires more water. Conversely, if the dough leaves sticky residue on your hands, incorporate additional masa harina in small quantities. The target consistency should feel slightly tacky but should not adhere excessively to your skin.
Step-by-Step Dough Preparation Process
The preparation sequence significantly influences your final results. Begin by gathering all ingredients and equipment before commencing work. This mise en place approach prevents unnecessary delays and ensures smooth progression through each stage.
Initial Combination: Whisk together your masa harina and salt in a large mixing bowl, breaking up any clumps. Pour in your warm water gradually, stirring with a spatula or wooden spoon until the mixture achieves a shaggy consistency that begins holding together.
Temperature Management: Allow the dough to cool to a temperature comfortable for hand handling. This waiting period, typically two to five minutes, permits the masa harina to fully hydrate and the dough to become more cohesive.
Kneading Development: Transfer the partially cooled dough to a clean work surface or continue kneading in the bowl. Using your hands, work the dough continuously, pressing and folding for approximately five to ten minutes. This kneading develops the gluten network and creates a more uniform, elastic texture.
Moisture Adjustment: Throughout the kneading process, evaluate the dough’s consistency regularly. Add water in one-tablespoon increments if needed, incorporating each addition fully before assessing whether additional moisture is necessary. Similarly, if excessive stickiness develops, dust additional masa harina onto your work surface or hands rather than directly into the dough.
Rest Period: Once you’ve achieved satisfactory consistency, cover the dough with a damp cloth or plastic wrap. This resting period, lasting fifteen to thirty minutes, allows the flour to fully absorb remaining moisture and creates a more workable dough for portioning and filling.
Forming and Filling Your Tlacoyos
After your resting period, divide the prepared masa into uniform portions, typically creating six to twelve pieces depending on desired serving size. Cover the portions not currently in use with plastic wrap or a damp cloth to prevent drying.
Working with one portion at a time, flatten the masa ball into a disk approximately 2.5 inches in diameter and roughly 0.25 inches thick. Place this disk in the center of a piece of plastic wrap or parchment paper to facilitate handling.
Add approximately one tablespoon of your prepared filling, typically consisting of mashed beans, to the center of the masa disk. The filling should be thick and paste-like rather than watery. Fold the masa over the filling to create an enclosed pocket, sealing the edges carefully to prevent any filling from escaping during cooking.
Once sealed, shape the stuffed masa into a football or oval form, creating the characteristic pointed ends that distinguish tlacoyos from other masa-based preparations. Use your palms to gently smooth the exterior, ensuring uniform thickness throughout.
Common Preparation Mistakes and Solutions
Crumbly, Dry Dough: This condition indicates insufficient hydration. Rather than adding water directly to the dough mass, which can create inconsistent texture, place your dough into a plastic bag or wrap it tightly in plastic wrap and let it rest for fifteen to twenty minutes. This resting period allows existing moisture to redistribute throughout the mixture. If crumbling persists after resting, gradually incorporate additional warm water during further kneading.
Excessively Sticky Dough: Over-hydration creates handling difficulties. Dust your work surface and hands with additional masa harina, then continue working the dough. Avoid adding masa harina directly into the wet dough, as this typically creates lumps rather than uniform consistency improvement.
Inability to Seal Fillings: This problem often stems from dough that’s either too dry or insufficiently developed. Ensure you’ve kneaded the dough adequately and that its moisture level falls within the ideal range. Additionally, verify that your filling isn’t excessively wet, as moisture from the filling can prevent proper sealing.
Tlacoyos Flattening During Cooking: Inadequately developed gluten structure causes this issue. Extend your kneading duration and ensure your dough rests sufficiently before cooking. This allows gluten development and promotes better structural integrity.
Cooking Considerations and Equipment
While masa preparation represents the foundation of tlacoyo success, cooking technique significantly impacts final results. Traditional preparation employs a comal, a flat griddle used throughout Mexico for cooking tortillas and related items. A cast-iron skillet provides an excellent alternative, offering similar heat distribution and retention properties.
Preheat your cooking surface over medium heat for five to six minutes before adding your formed tlacoyos. Each side typically requires three to four minutes of cooking, depending on thickness and heat intensity. The cooked surface should develop light browning and slight dryness before flipping. Some preparations include brief pan-frying in oil or lard after initial griddle cooking, though this step remains optional based on personal preference and traditional variations.
Frequently Asked Questions About Tlacoyos Masa
Can I prepare masa in advance? Yes, masa can be prepared up to eight hours ahead. Store it covered in the refrigerator, then bring it to room temperature before working with it. Extend your initial kneading slightly to reactivate the gluten network after refrigeration.
What types of fillings work best? Thick, paste-like fillings work optimally. Traditional options include refried beans, fava bean preparations, or mashed black beans. Some regional variations incorporate cooked squash or cheese-based fillings.
Is blue masa harina superior to other varieties? Blue, white, and yellow masa harinas each offer distinct flavors and aesthetic appeal. Selection depends entirely on personal preference and regional tradition rather than objective quality differences.
How long can formed, unfilled tlacoyos remain at room temperature? Covered with plastic wrap, formed tlacoyos remain usable for approximately two to three hours. Extended storage risks drying and cracking.
Can tlacoyos be frozen? Yes, uncooked formed tlacoyos freeze successfully for up to three months. Cook directly from frozen, extending cooking time by approximately one minute per side.
Achieving Professional-Quality Results
Mastering tlacoyo masa preparation requires patience, attentiveness to texture development, and willingness to adjust based on observed results. Each batch of masa harina behaves slightly differently, necessitating minor adjustments based on brand and environmental conditions. As you prepare tlacoyos multiple times, your hands develop sensitivity to proper dough consistency, and texture assessment becomes increasingly intuitive.
Focus initially on achieving proper masa texture and consistency. Once this fundamental skill becomes automatic, experimenting with filling variations and cooking techniques becomes more enjoyable and successful. Professional tlacoyo makers develop their expertise through repeated practice, each preparation reinforcing successful techniques and identifying refinements.
References
- Easy Vegan Tlacoyos Recipe — Broke Bank Vegan. Accessed April 2026. https://brokebankvegan.com/tlacoyos-de-frijol/
- Tlacoyos Recipe: Cooking Vacations Mexico — The International Kitchen. Accessed April 2026. https://www.theinternationalkitchen.com/recipes/tlacoyos-recipe-cooking-vacations-and-foodie-tours-in-mexico/
- How to Make Tlacoyos, a Tasty Street Food — Mexican Recipes. Accessed April 2026. https://www.mexicoinmykitchen.com/how-to-make-tlacoyos/
- Tlacoyos de Frijol con Salsa de Nopalitos — Pina en la Cocina. Accessed April 2026. https://pinaenlacocina.com/tlacoyos-de-frijol-con-salsa-de-nopalitos-black-bean-masa-cakes-with-cactus-pico-de-gallo/