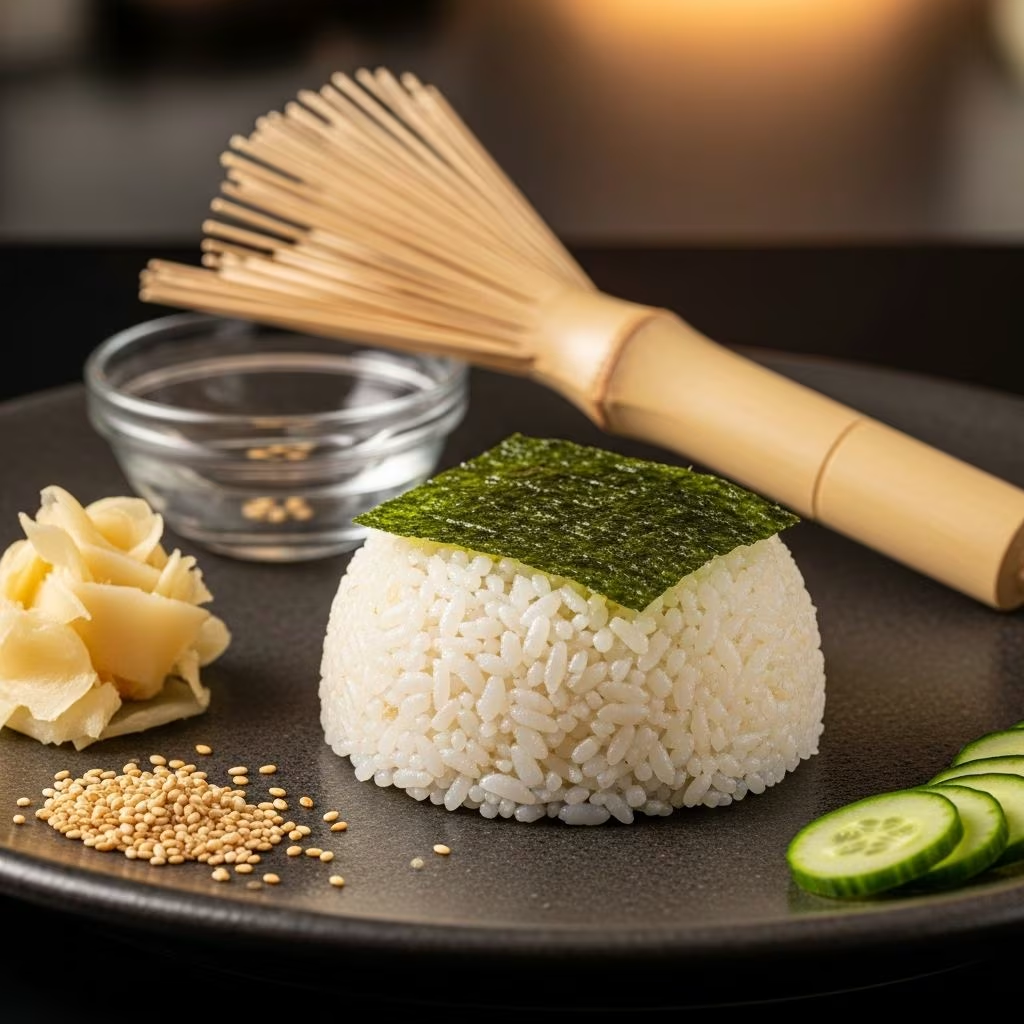
Creating exceptional sushi begins with understanding the foundation of this beloved Japanese cuisine: perfectly prepared sushi rice. Unlike ordinary cooked rice, sushi rice requires specific techniques, quality ingredients, and careful attention to detail to achieve the ideal balance of texture, stickiness, and flavor that makes authentic sushi memorable. Whether you’re a beginner or an experienced home cook, this comprehensive guide will walk you through every stage of the sushi rice-making process.
Understanding Your Rice Selection
The journey to perfect sushi rice starts before you even enter the kitchen. The type of rice you choose directly influences the final outcome of your dish. Short-grain Japanese varieties, particularly Japonica or California rice, are specifically cultivated to develop the starchy, sticky quality that defines quality sushi rice. When shopping, look for bags explicitly labeled as “sushi rice” or “sushi-grade rice,” though high-quality medium-grain varieties can serve as acceptable alternatives when premium options are unavailable.
The crucial distinction between sushi rice and regular long-grain varieties lies in their starch composition. Long-grain rice tends to remain separate and fluffy after cooking, which is ideal for many dishes but counterproductive for sushi preparation. Conversely, short-grain rice releases more starch during the cooking and seasoning process, creating the characteristic sticky texture that allows sushi rolls to hold together while remaining delicate and pleasant to eat.
The Critical Rinsing Process
Before cooking, proper rinsing removes excess surface starch that would otherwise make your rice overly gummy and unappetizing. This preliminary step demands patience and thoroughness to achieve optimal results.
- Fill a large mixing bowl with cool water and submerge your uncooked rice
- Using your hands, gently rub the rice grains against one another, creating friction that dislodges surface starch
- Drain the cloudy water and repeat this process multiple times
- Continue rinsing until the water runs nearly clear, typically requiring 5 to 10 repetitions
- Transfer the rinsed rice to a fine mesh strainer and allow it to drain thoroughly
Some culinary professionals recommend allowing the rinsed rice to sit in the strainer for approximately one hour before cooking. This drying period allows moisture to evaporate slightly, promoting more even cooking and contributing to superior grain separation in the finished product.
Cooking Techniques and Methods
Once your rice is properly rinsed and drained, the cooking stage begins. You have two primary options: using a dedicated rice cooker or employing the traditional stovetop method. Each approach yields excellent results when executed with precision.
Rice Cooker Method
For those with access to a rice cooker, this method provides consistent, reliable results with minimal intervention. The device’s built-in mechanisms regulate heat and moisture automatically, reducing the likelihood of undercooked or overcooked rice. Place your rinsed rice in the rice cooker with the appropriate water ratio—typically three cups of water for every three cups of uncooked rice. Some recipes suggest adding a small piece of kombu (dried kelp), which imparts subtle umami depth while cooking. Cover the cooker and activate it according to your model’s instructions, then allow the rice to complete its full cycle undisturbed.
Stovetop Method
The stovetop approach requires more active participation but offers greater control and produces equally satisfactory results. Combine your drained rice with fresh water in a heavy-bottomed saucepan using the same ratio mentioned above. Place the pan over high heat and bring the mixture to a vigorous boil, then immediately reduce the heat to low and cover the pan with a tight-fitting lid. Maintain a gentle simmer for approximately 15 to 20 minutes, depending on your specific rice variety and stove characteristics. Most rice will be fully cooked when all water has been absorbed. If water absorbs before the rice reaches complete tenderness, add small amounts of additional water and continue simmering. Once finished, remove the pan from heat and allow it to rest, covered and undisturbed, for an additional 15 minutes. This resting period permits steam to finish cooking the rice thoroughly and allows the grains to firm up slightly.
Creating Your Seasoning Mixture
While your rice cooks, prepare the vinegar seasoning that will give sushi rice its distinctive flavor profile. This mixture combines three essential components in precise proportions to achieve the perfect balance of sourness, sweetness, and salt.
In a small saucepan over medium heat, combine one-quarter cup of Japanese rice vinegar, one to two tablespoons of sugar, and approximately one teaspoon of salt. Warm this mixture gently while stirring constantly until the sugar crystals and salt granules fully dissolve into the liquid—a process typically requiring two to three minutes. Avoid allowing the mixture to reach a rolling boil, as excessive heat can alter the vinegar’s delicate flavor profile. Once the ingredients have combined smoothly, remove the pan from heat and allow the mixture to cool to room temperature before applying it to your cooked rice.
Some traditional Japanese recipes incorporate additional ingredients such as mirin (sweet rice wine) or sake, which contribute subtle sweetness and complexity. However, the basic three-component formula provides an excellent foundation that works reliably across all sushi preparations.
Combining Rice and Seasoning
The manner in which you incorporate your vinegar seasoning significantly impacts the texture and appearance of your finished sushi rice. This step requires gentle handling to maintain the integrity of individual rice grains.
Transfer your cooked rice to a large shallow bowl or traditional wooden sushi oke (hangiri) if you have access to one. Drizzle the cooled seasoning mixture evenly across the surface of the rice, distributing it as broadly as possible to ensure uniform flavoring. Using a wooden paddle or silicone spatula, employ a gentle cutting motion rather than stirring or mixing. This technique—often described as “slicing” the rice—separates clumps of grains and distributes the seasoning while minimizing damage to individual rice kernels.
Professional sushi chefs simultaneously cool the rice using a hand fan or electric fan while performing this cutting motion. This dual action accomplishes multiple objectives: it accelerates cooling to room temperature, which halts the cooking process and sets the rice’s texture; it prevents the rice from becoming mushy due to residual heat; and it creates a subtle sheen on the rice grains, enhancing visual appeal. If your bowl shifts during this process, place a damp paper towel beneath it to provide traction.
Continue the cutting and fanning process for approximately five minutes, then allow the rice to rest, covered with a damp cloth, until it reaches human body temperature. At this stage, your sushi rice is ready for use in rolls, nigiri, bowls, or other applications.
Ingredient Proportions and Quantities
| Ingredient | Standard Ratio (1 Cup Rice) | Large Batch (3 Cups Rice) |
|---|---|---|
| Uncooked Sushi Rice | 1 cup | 3 cups |
| Water for Cooking | 1.5 cups | 3 cups |
| Rice Vinegar | ¼ cup | ¾ cup |
| Sugar | 1-2 tablespoons | 3-6 tablespoons |
| Salt | 1 teaspoon | 3 teaspoons |
Troubleshooting Common Issues
Even experienced cooks occasionally encounter challenges when preparing sushi rice. Understanding potential problems and their solutions ensures consistent success.
Mushy or Overcooked Rice: This typically results from excessive cooking time or too much water. Reduce your cooking time by two to three minutes and verify that your water-to-rice ratio matches your specific rice variety’s recommendations. Ensure you’re not lifting the lid during cooking, as this releases steam and extends the cooking process unpredictably.
Undercooked or Hard Rice: If some grains remain firm while others are tender, your water-to-rice ratio was likely insufficient. Add small amounts of additional water, cover your pot, and continue cooking until the rice reaches full tenderness. Future batches may require slightly more water depending on your stove and cookware.
Rice Becomes Too Sticky or Gluey: Insufficient rinsing allows excess starch to remain on the rice grains, creating an overly gummy texture. Ensure you rinse thoroughly until the water runs nearly clear. Additionally, verify that your seasoning ratio isn’t excessive, as too much vinegar mixture can add unwanted moisture.
Rice Grains Break or Shatter: This occurs from overly vigorous mixing or stirring during the seasoning stage. Always use the gentle cutting motion rather than circular stirring, and handle the rice with care using appropriate tools.
Storage and Usage Timeline
Properly prepared sushi rice maintains optimal quality for approximately two hours at room temperature, making it ideal for preparing sushi immediately after completion. If you need to prepare rice in advance, allow it to cool completely, then store it in an airtight container at room temperature for up to four hours. Refrigeration is generally discouraged, as cold temperatures firm the rice excessively and diminish the delicate texture critical to quality sushi.
When ready to use stored rice, gently reheat it by sprinkling with a small amount of water and covering it with a damp cloth for five to ten minutes, which restores some of the original moisture and texture without reheating on direct heat.
Frequently Asked Questions
Can I substitute regular white rice for sushi rice?
While regular white rice can be used in an emergency, it will not produce authentic sushi rice texture. Short-grain sushi rice contains higher starch levels specifically cultivated for the sticky quality essential to sushi preparation. Medium-grain varieties offer acceptable alternatives if sushi rice is unavailable.
What is kombu and is it essential?
Kombu is a dried kelp seaweed that imparts subtle umami flavor and additional minerals to the cooking rice. While optional, many traditional recipes include a small piece during cooking. It should be removed before seasoning the rice.
Can I make sushi rice without vinegar?
The vinegar seasoning creates the distinctive sushi rice flavor and texture. Omitting it produces plain cooked rice that functions structurally in sushi but lacks the authentic taste profile. Vinegar is not optional for traditional sushi rice.
How much sushi rice should I prepare for a sushi-making session?
One cup of uncooked rice yields approximately three cups of cooked sushi rice, sufficient for 8 to 10 standard sushi rolls or about 40 pieces of nigiri sushi. Adjust quantities based on your intended yield and number of diners.
Why is fanning the rice important?
Fanning accelerates cooling, which stops the cooking process and prevents the rice from becoming mushy. The air circulation also helps set the rice’s final texture and contributes to the subtle sheen appreciated in high-quality sushi rice.
Conclusion: Elevating Your Sushi Preparation
Mastering sushi rice preparation elevates your entire sushi-making experience. By selecting quality rice, executing thorough rinsing, employing precise cooking techniques, and carefully incorporating seasoning, you create the perfect foundation for memorable sushi creations. The attention to detail required in this seemingly simple preparation reflects the Japanese culinary philosophy of respecting ingredients and processes. With practice, these techniques become intuitive, allowing you to prepare consistently excellent sushi rice that delights family and guests alike.
References
- The Easiest Way to Make Perfect Sushi Rice — It Doesn’t Taste Like Chicken. Accessed April 2026. https://itdoesnttastelikechicken.com/the-easiest-way-to-make-perfect-sushi-rice/
- How to Make Perfect Sushi Rice — Evolving Table. Accessed April 2026. https://www.evolvingtable.com/sushi-rice/
- Easy Sushi Rice — Favorite Family Recipes. Accessed April 2026. https://www.favfamilyrecipes.com/sushi-rice/
- Recipe: Sushi Rice — Umami Insider. Accessed April 2026. https://umami-insider.com/blogs/blog/recipe-sushi-rice
- Perfect Sushi Rice — Silla Bjerrum. Accessed April 2026. http://sillabjerrum.com/perfect-sushi-rice
- From Novice to Sushi Pro: Crafting the Perfect Sushi Rice — Just One Cookbook. Accessed April 2026. https://www.justonecookbook.com/how-to-make-sushi-rice/