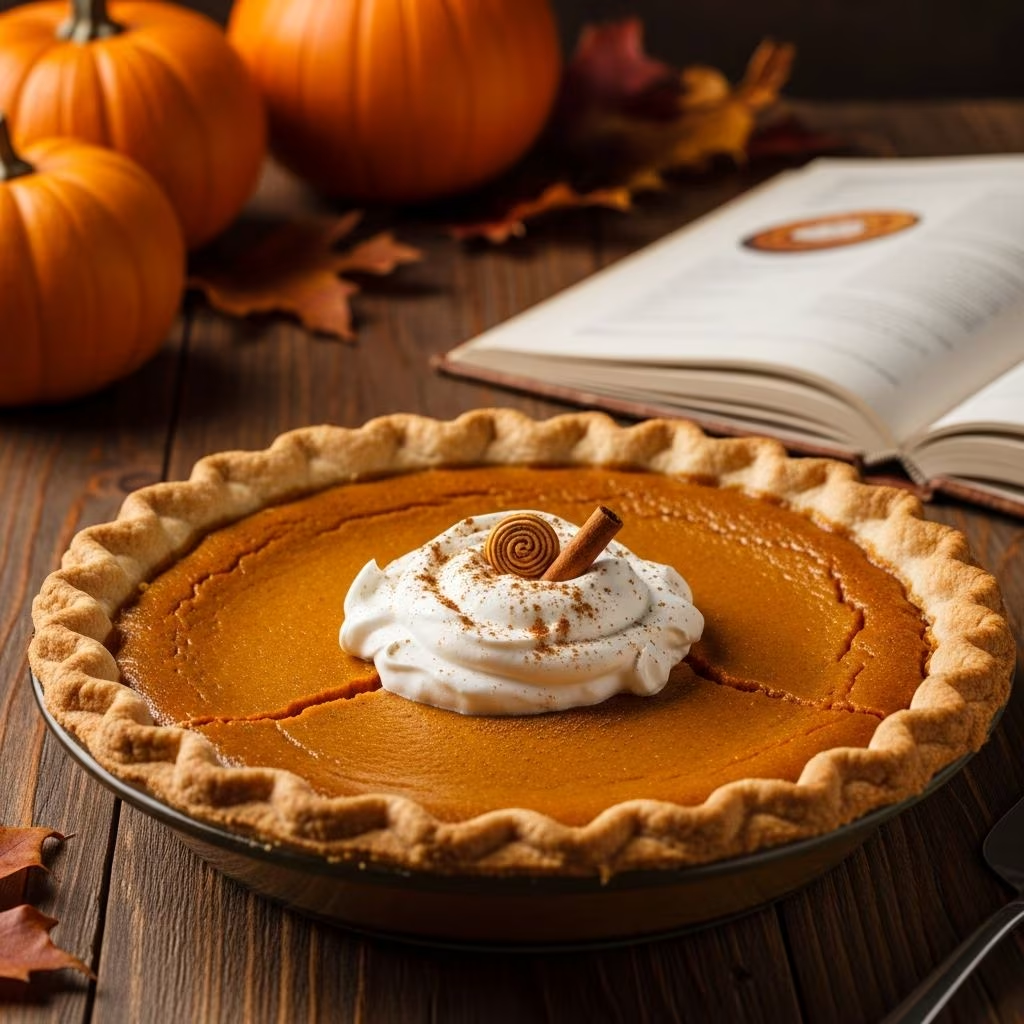
Pumpkin pie stands as one of the most beloved and iconic desserts of the autumn season, gracing tables from October through November and beyond. While this classic treat appears deceptively simple, creating a truly exceptional pumpkin pie requires understanding several key components and mastering specific techniques. This comprehensive guide will walk you through every stage of pumpkin pie preparation, from selecting your ingredients to achieving that perfect, wobbling custard center.
Understanding the Foundation: Ingredient Selection and Preparation
The journey to an outstanding pumpkin pie begins long before you combine ingredients. Each component plays a crucial role in determining the final texture, flavor, and overall quality of your dessert. Starting with the basics ensures that your finished pie will have depth of flavor and the correct consistency.
Selecting Quality Pumpkin
Many home bakers assume that all pumpkin products are created equal, but significant differences exist between varieties. Sugar pumpkins, sometimes labeled as pie pumpkins, offer superior flavor compared to their larger carving relatives. These smaller varieties have denser flesh and less watery content, resulting in a more concentrated pumpkin taste. When using fresh pumpkin, expect to invest time in roasting, cooling, and pureeing. Alternatively, pure pumpkin puree from reliable brands provides consistent results and eliminates preparation time. Verify that your can contains only pumpkin puree, not pumpkin pie filling, which already contains added spices and sweeteners.
Spice Composition and Balance
The spice profile defines pumpkin pie’s characteristic warmth and complexity. Traditional combinations typically include cinnamon, nutmeg, ginger, and cloves. Rather than using pre-mixed pumpkin pie spice, consider purchasing whole spices and toasting them briefly before grinding. This approach delivers fresher, more vibrant flavors. The general ratio involves one teaspoon of cinnamon for every quarter teaspoon each of nutmeg, ginger, and cloves, though personal preference allows for adjustment. Some bakers incorporate allspice or cardamom for additional complexity.
Sweetener Selection
Both granulated sugar and brown sugar find homes in pumpkin pie recipes, each contributing distinct qualities. Brown sugar adds moisture and a subtle molasses note that enhances the pumpkin’s natural earthiness. Many bakers prefer using brown sugar exclusively or combining equal parts brown and granulated sugar for optimal flavor and texture balance.
Mastering the Pie Crust: The Framework of Success
An excellent pie crust forms the foundation of any memorable pumpkin pie. The crust must possess sufficient structure to contain the custard filling while remaining tender and flaky when baked.
From-Scratch Crust Fundamentals
Creating pie dough from scratch requires attention to temperature and technique. Combining cold butter with flour and salt creates the small, distinct butter pockets necessary for flaking. The key involves keeping all ingredients cold throughout the process. Cut cold butter into quarter-inch cubes and work it into the flour using a pastry cutter, fork, or fingertips until the mixture resembles coarse breadcrumbs with some pea-sized butter pieces remaining visible. Add ice water gradually, stirring gently until the dough just comes together. Overworking develops gluten, resulting in a tough, chewy crust rather than a tender one.
Resting and Pre-Baking Strategies
After mixing, wrap the dough and refrigerate for at least thirty minutes. This rest period allows the flour to fully hydrate and the gluten to relax. When ready to line your pie dish, work quickly but gently. Chill the lined pan for another fifteen minutes before pre-baking, a step that significantly reduces shrinkage during baking. For partial pre-baking, prick the crust with a fork, line it with parchment paper, and fill with pie weights or dried beans. Bake at 375°F for fifteen to twenty minutes until the edges turn light golden.
Store-Bought Alternatives
High-quality store-bought crusts provide reliable results when time constraints exist. Look for crusts containing butter rather than shortening for superior flavor. Whether using frozen or fresh alternatives, follow package instructions but allow extra time for thawing if using frozen varieties.
Creating the Ideal Filling: Texture, Flavor, and Consistency
The filling represents the heart of pumpkin pie, and achieving the correct consistency requires understanding how various ingredients interact during baking.
The Custard Science
Pumpkin pie filling functions as a custard, relying on eggs to set the structure while maintaining a creamy interior. Too few eggs result in a filling that separates or remains too loose; too many eggs produce a dense, rubbery texture. The typical ratio involves two to three eggs per one-and-a-half cups of pumpkin puree. The yolks contribute richness while the whites provide setting power. Some recipes include evaporated milk for a silkier texture, while others use heavy cream for increased indulgence. Both approaches work beautifully when properly proportioned.
Mixing Techniques for Even Distribution
Combine pumpkin puree with sugar and spices, stirring thoroughly before adding eggs and dairy. Add eggs one at a time, mixing gently after each addition. Overmixing incorporates excess air, creating a filling that puffs excessively during baking and collapses afterward. Mix until just combined for the best results. Strain the filling through a fine-mesh sieve to remove any lumps and ensure a silken consistency that bakes evenly.
Flavoring Enhancements
Beyond traditional spices, consider subtle additions that elevate your pie. A half teaspoon of vanilla extract adds depth, while a tablespoon of bourbon or rum contributes warmth and complexity. Maple extract or a drizzle of maple syrup emphasizes autumn flavors, though use sparingly to avoid overwhelming the pumpkin taste.
Baking Mastery: Temperature, Timing, and the Jiggle Test
Understanding proper baking techniques prevents common issues such as cracks, weeping, or underbaked centers.
Temperature Strategy
Start baking at a higher temperature—around 425°F—for fifteen minutes. This initial burst of heat sets the crust, preventing it from becoming soggy while the filling bakes. Reduce the temperature to 350°F and continue baking for an additional thirty to forty minutes. This graduated approach helps the filling set gently throughout, rather than cooking the outer edges too quickly while the center remains runny.
Determining Doneness Without Overbaking
The famous jiggle test provides the most reliable doneness indicator. When you gently shake the pie, the outer two inches should feel firm while the center retains a slight wobble, approximately one inch in diameter. This residual carryover cooking continues as the pie cools, resulting in a perfect creamy-yet-set consistency. A fully set pie center indicates overbaking and produces a less desirable texture.
Cooling Protocol
Allow the pie to cool at room temperature for two hours before refrigerating. This gradual cooling prevents thermal shock that can cause cracking. Refrigerate for at least four hours or overnight before serving, which allows flavors to meld and the filling to set to ideal consistency.
Troubleshooting Common Issues and Finding Solutions
Even experienced bakers occasionally encounter challenges. Understanding how to prevent or resolve these issues ensures consistent success.
Addressing Cracks in the Filling
- Overbaking remains the primary culprit—use the jiggle test to prevent this
- Rapid temperature changes crack custards, so cool gradually
- High oven temperatures can cause surface cracking; maintain proper temperature throughout baking
- A thin layer of sour cream mixed with a small amount of sugar can cover minor cracks before serving
Preventing Soggy Crusts
- Pre-bake the crust partially as described above
- Brush the crust with egg white before adding filling to create a moisture barrier
- Ensure the crust has chilled thoroughly before adding filling
- Use a preheated pie pan to begin cooking the bottom crust immediately
Managing Weeping or Separation
If liquid pools around the pie’s edges after baking, it typically results from overbaking or using too much liquid in the filling. Adjust the ratio of dairy to pumpkin puree in future batches, reducing liquid by one or two tablespoons if necessary.
Presentation and Serving Suggestions
Once your pumpkin pie reaches perfection, presenting it beautifully enhances the entire experience.
Garnishing Options
Whipped cream stands as the classic accompaniment, whether dolloped generously on each slice or placed alongside individual servings. Homemade whipped cream, sweetened with a touch of vanilla and maple syrup, provides superior flavor compared to commercial alternatives. Candied pumpkin seeds, a sprinkle of cinnamon, or crushed gingersnap cookies offer textural contrast and visual appeal.
Storage and Make-Ahead Strategies
Pumpkin pie maintains quality for three to four days when covered and refrigerated. The filling’s custard nature means it doesn’t freeze well, but you can prepare the crust and filling separately ahead of time. Freeze the crust lined with parchment and pie weights, ready for partial pre-baking. Prepare the filling up to twenty-four hours in advance, storing it covered in the refrigerator, then pour into the pre-baked crust and proceed with final baking.
Frequently Asked Questions About Pumpkin Pie
Q: Can I use pumpkin pie filling instead of pure pumpkin puree?
A: Not recommended. Pre-made pumpkin pie filling already contains sugar, spices, and additives that will result in overly sweet, over-spiced pie. Pure pumpkin puree gives you control over flavoring.
Q: Should I use evaporated milk, condensed milk, or heavy cream?
A: Evaporated milk creates a traditional texture with minimal dairy richness. Heavy cream produces a luxurious, dense pie. Regular milk works but yields a slightly less creamy result. Choose based on personal preference—all three produce delicious pies.
Q: Why does my pie always crack on top?
A: Cracking typically results from overbaking or rapid temperature changes. Use the jiggle test to ensure proper doneness, allow gradual cooling at room temperature, and maintain consistent oven temperature throughout baking.
Q: Can I make pie with fresh pumpkin instead of canned?
A: Yes, though it requires additional preparation. Roast fresh sugar pumpkins at 350°F for about one hour until tender, scoop the flesh, and puree in a food processor. You’ll need approximately two pounds of fresh pumpkin to yield one-and-a-half cups puree.
Q: How long can I store pumpkin pie?
A: Refrigerate for three to four days in an airtight container. The filling’s egg content prevents freezing, but you can freeze components separately.
Q: What’s the difference between pie pumpkins and carving pumpkins?
A: Pie pumpkins are smaller, sweeter, and have denser flesh with less water content. Carving pumpkins are stringy and watery, producing inferior flavor and texture in pies.
Advanced Variations to Explore
Once you’ve mastered the classic preparation, consider experimenting with variations that build on these fundamentals. Bourbon-spiked versions add sophistication, while vegan alternatives using coconut milk and flax eggs accommodate dietary preferences. Maple-forward recipes emphasize autumn’s sweetness, while Mexican-inspired versions incorporate cinnamon and ancho chile for unexpected depth.
Pumpkin pie represents far more than a seasonal obligation—it’s an opportunity to demonstrate baking skill, create delicious traditions, and share warmth with those you love. By understanding the science behind each component and mastering proven techniques, you can consistently produce pumpkin pies that rival any bakery offering. Whether you’re a novice baker or an experienced one seeking refinement, these comprehensive guidelines provide the knowledge needed to achieve pumpkin pie excellence year after year.
References
- The Science of Cooking: Understanding Custards and Their Setting Mechanisms — McGee, Harold. On Food and Cooking: The Science and Lore of the Kitchen (Revised Edition). Scribner, 2004. https://www.penguinrandomhouse.com/books/288482/on-food-and-cooking-by-harold-mcgee/
- USDA Food Safety and Home Canning Guidelines — United States Department of Agriculture. 2024. https://www.usda.gov/
- Professional Pie Baking Techniques — The Culinary Institute of America. Techniques & Equipment for Professional Kitchens. CIA Publications, 2014. https://www.ciachef.edu/
- Pumpkin Variety Selection and Flavor Profiles — University of Illinois Extension. Vegetable Gardening Guide. 2023. https://extension.illinois.edu/