Pierogi dough is the foundation of one of Eastern Europe’s most beloved culinary creations. This humble mixture of flour, liquid, and binding ingredients transforms into delicate pockets that hold savory or sweet fillings. Whether you’re preparing this traditional Polish dumpling for a family gathering or exploring Eastern European cuisine, mastering the dough is essential. The beauty of pierogi lies in its simplicity, yet achieving the perfect texture requires understanding the fundamentals of dough composition and handling techniques.
Understanding Pierogi Dough Composition
Pierogi dough differs from bread dough or pastry dough in its structure and purpose. The dough must be flexible enough to fold around fillings without tearing, yet sturdy enough to hold its shape during boiling and pan-frying. This unique balance requires careful attention to ingredient ratios and mixing methods.
The primary component is all-purpose flour, which provides structure through its gluten network. Unlike bread flour with higher protein content, all-purpose flour yields a more tender final product. The liquid component, whether water or a combination of water with sour cream, hydrates the flour and creates the dough’s workable consistency. Fat, typically butter, contributes richness and aids in achieving a smooth, pliable texture. Eggs bind ingredients together while adding protein, and salt enhances flavor while strengthening the gluten network.
Core Ingredient Selection and Measurement
Most traditional pierogi dough recipes contain between 2 to 5 cups of all-purpose flour, depending on yield size. The variation depends on whether you’re making a single large batch or multiple portions. Precision in measuring flour is critical—using a kitchen scale provides accuracy superior to volume measurements, which can lead to excessive flour and resulting toughness.
Water temperature influences dough development significantly. Lukewarm or hot water (between 100-110°F) promotes gluten formation faster than cold water, accelerating the mixing and kneading process. Some traditional recipes incorporate sour cream as a partial liquid replacement, creating a richer, more tender dough. Butter, whether melted or softened, ranges from 2 tablespoons to ¼ cup depending on the recipe variation. Salt quantities typically fall between ¼ teaspoon to 1 teaspoon, with most recipes using approximately ½ teaspoon per batch.
| Ingredient | Typical Amount | Purpose |
|---|---|---|
| All-purpose flour | 2-5 cups | Structure and body |
| Water (hot or warm) | ½-1¼ cups | Hydration and gluten activation |
| Butter (melted or softened) | 2 tablespoons-¼ cup | Richness and texture |
| Eggs | 1-2 large | Binding and richness |
| Salt | ¼-1 teaspoon | Flavor and gluten strength |
| Sour cream (optional) | ½ cup | Tenderness and richness |
Traditional Mixing Methods and Modern Alternatives
Hand-mixing remains a respected approach rooted in Polish culinary tradition. This method begins by combining dry ingredients—flour and salt—in a large bowl, then creating a well in the center. Wet ingredients are introduced to this well, and gradual incorporation prevents lumps while developing gluten through manual kneading. This approach requires approximately 10 minutes of continuous kneading to achieve the desired smooth, elastic texture.
Stand mixer methods accelerate the process considerably. By placing a dough hook attachment on a stand mixer, you can combine ingredients on low speed, gradually incorporating flour until the dough no longer adheres to the bowl sides. This mechanical approach typically requires 5-7 minutes of mixing at low speed. Many cooks prefer the stand mixer for consistency and reduced physical effort, particularly when preparing larger quantities.
The most important distinction between methods lies not in the tool but in the outcome. Whether hand-kneaded or machine-mixed, the dough should achieve a smooth, elastic consistency that springs back slightly when pressed.
Step-by-Step Dough Preparation Process
Initial Combination Phase
Begin by measuring your flour accurately—ideally using a kitchen scale for precision. Combine flour with salt in a large mixing bowl, stirring to distribute salt evenly throughout the flour. This even distribution ensures consistent seasoning in the final dough.
Create a well in the flour’s center, similar to creating a volcano crater. Add your wet ingredients—beaten eggs, warm water, and melted butter—into this well. Using a wooden spoon or your fingers, begin drawing flour from the bowl’s sides into the wet mixture gradually. This controlled incorporation prevents lumps and creates an even dough development.
Kneading Development
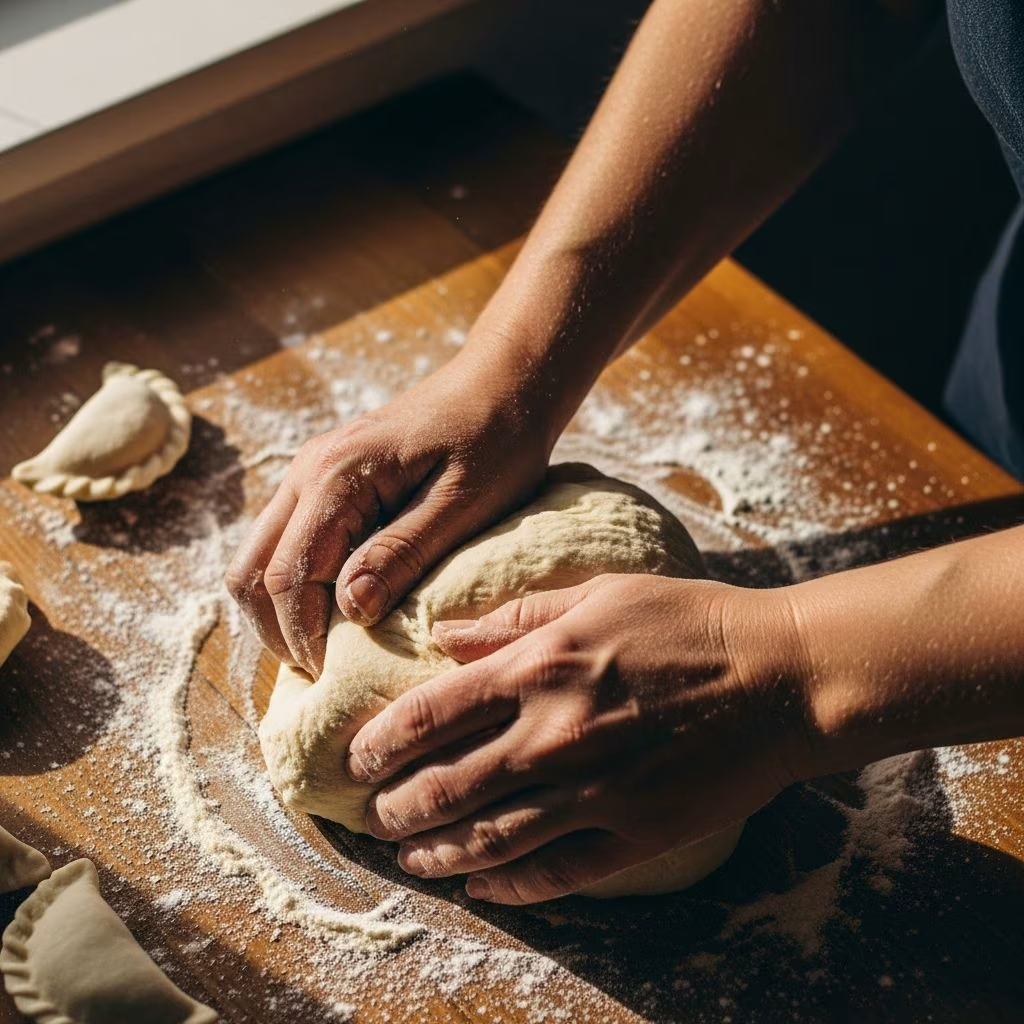
Once ingredients combine into a rough ball, transfer the dough to a lightly floured surface. Knead using the heel of your hand to push the dough forward, then fold it back over itself. Rotate the dough and repeat this motion continuously for 8-10 minutes. The dough will initially feel sticky and rough, gradually becoming smoother and more elastic. You’ll notice the texture transformation as gluten networks develop—the dough becomes less sticky and more cohesive.
If using a stand mixer, after 5-7 minutes of low-speed mixing, transfer the dough to a work surface and complete the kneading by hand for 1-2 additional minutes. This hybrid approach ensures proper gluten development while maintaining ingredient integrity.
Resting Period
After kneading, form the dough into a tight ball and place it in a covered bowl. The resting period, typically 30 minutes to 1 hour at room temperature, allows gluten to relax and hydration to distribute evenly throughout the dough. This rest produces a dough that rolls more easily without constantly springing back. Cover the bowl with plastic wrap or a damp kitchen towel to prevent surface drying.
Recognizing Optimal Dough Consistency
The ideal pierogi dough possesses specific textural qualities. It should feel smooth to the touch, not sticky or rough. When you press your finger into rested dough, it should spring back partially rather than remaining indented. The dough should hold its shape when formed into a ball but maintain enough pliability to roll thin without cracking or tearing.
If dough feels too wet and sticky, incorporate additional flour a tablespoon at a time while kneading. If it feels too dry and stiff, add water by the teaspoon until achieving the correct consistency. This adjustment requires practice—different flour brands have varying moisture absorption rates, so slight modifications are normal.
Rolling and Shaping Techniques
After the resting period, divide the dough into manageable portions—typically halves or quarters depending on batch size. Working with one portion at a time keeps the remainder covered and prevents premature drying. Flour your work surface lightly, then begin rolling the dough using a rolling pin.
The target thickness is approximately 1/8 inch (3 millimeters). Achieving consistent thickness requires rolling from the center outward, rotating the dough every few rolls to maintain even distribution. If the dough springs back excessively, let it rest for 2-3 minutes before continuing—this prevents toughness from over-working the gluten.
Cut circles using a 2-3 inch round cutter, cookie cutter, or even the rim of a drinking glass. Place 1-3 teaspoons of filling in the center of each circle, slightly off-center to allow room for sealing. Wet your finger with water and trace the dough’s edge, then fold the circle in half to create a half-moon shape. Press the edges firmly to seal, then use a fork’s tines to crimp the seams for a decorative finish and stronger seal.
Cooking and Serving Methods
Fresh pierogi cook quickly in boiling water—they’re ready when they float to the surface and remain there for 1-2 minutes. Using a slotted spoon, transfer cooked pierogi to a serving plate. For enhanced flavor, pan-fry the boiled pierogi in butter until lightly browned on both sides.
Pierogi can be prepared ahead and frozen in single layers on baking sheets before transferring to freezer bags. Frozen pierogi require no thawing—simply boil for an additional 1-2 minutes compared to fresh versions.
Troubleshooting Common Dough Issues
Dough is too dry and crumbly: Add water one teaspoon at a time while kneading until achieving the correct consistency. This typically results from flour over-measurement or using low-moisture flour.
Dough is overly sticky and difficult to handle: Incorporate additional flour a tablespoon at a time. However, avoid adding excessive flour, which results in tough, rigid pierogi. Sometimes allowing sticky dough to rest for 10 minutes enables better handling as hydration distributes.
Dough tears during rolling: This indicates insufficient kneading or premature rolling after mixing. Ensure adequate kneading time and allow proper resting before rolling. You might also try resting rolled dough for 2-3 minutes before cutting.
Pierogi split open during cooking: This occurs when filling quantity is excessive, sealing is incomplete, or the dough has dried out before cooking. Use appropriate filling amounts and ensure thorough edge sealing with water before folding.
Regional and Family Recipe Variations
Pierogi dough recipes vary across Polish communities and families, reflecting local traditions and ingredient availability. Some recipes incorporate sour cream for additional tenderness and subtle tang. Others use only the most basic ingredients—flour, water, salt, and eggs—adhering to the most traditional approach. Certain regional variations include oil or additional butter for enhanced richness.
These variations produce slightly different textures and flavors while maintaining the fundamental characteristics of authentic pierogi. Experimenting with different recipes helps you discover which version aligns with your taste preferences and cooking style.
Frequently Asked Questions
Can I make pierogi dough without eggs?
Yes, traditional pierogi dough can be made with flour, water, salt, and fat alone. However, eggs enhance binding and contribute richness. If avoiding eggs, ensure adequate kneading to develop gluten structure sufficiently.
How long can I store pierogi dough?
Uncooked dough keeps in the refrigerator for up to 3 days in an airtight container. For longer storage, freeze the dough in portions for up to 3 months. Thaw overnight in the refrigerator before using.
Should I use whole wheat flour instead of all-purpose flour?
Whole wheat flour produces denser, nuttier pierogi but requires texture and hydration adjustments. For best results, use a combination of all-purpose and whole wheat flour rather than complete substitution.
What’s the difference between pierogi dough made with sour cream versus without?
Sour cream creates tenderer, richer dough with subtle tang. Plain dough made with only water produces slightly chewier, more traditional results. Both approaches yield authentic pierogi.
Can I use a food processor for mixing?
Yes, a food processor combines ingredients quickly, though it may overwork the dough if mixing continues too long. Pulse ingredients until combined, then finish kneading by hand for 1-2 minutes.
References
- Homemade Pierogi Dough with Sour Cream — Salt & Baker. Accessed April 2026. https://saltandbaker.com/homemade-pierogies/
- Easy Pierogi Dough — Whisked Away Kitchen. Accessed April 2026. https://whiskedawaykitchen.com/pierogi-dough/
- Pierogi Dough — Peter’s Food Adventures. Accessed April 2026. https://petersfoodadventures.com/pierogi-dough/
- Perfect Pierogi Dough — Polish Your Kitchen. Accessed April 2026. https://www.polishyourkitchen.com/perfect-pierogi-dough/
- The Best Pierogi Dough Recipe — Everyday Delicious. Accessed April 2026. https://www.everyday-delicious.com/the-best-pierogi-dough-recipe-how-to-make-the-best-pierogi-polish-dumplings/