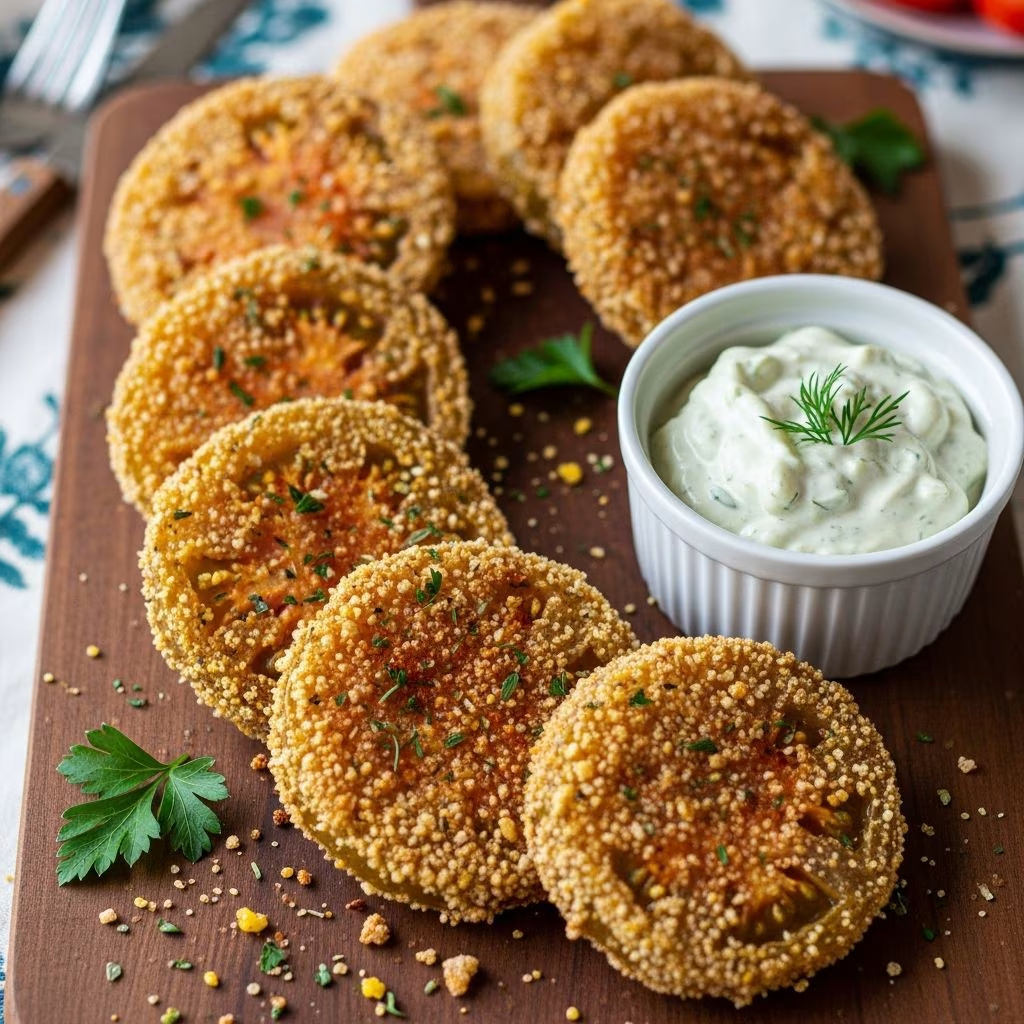
Fried green tomatoes represent one of the most beloved Southern delicacies, offering a unique combination of textures and flavors that appeal to both traditionalists and adventurous cooks alike. The contrast between a crunchy, golden exterior and the tart, tender interior of an unripe tomato creates a dining experience that has captivated home cooks and professional chefs for generations. Whether you’re preparing this classic dish for a family gathering or seeking to expand your culinary repertoire, understanding the fundamentals of preparation and cooking techniques will ensure consistent, exceptional results every time you venture into the kitchen.
Understanding Green Tomatoes and Their Culinary Properties
Green tomatoes, or unripe tomatoes harvested before reaching full maturity, possess distinct characteristics that make them ideal for frying rather than eating raw. Unlike their red counterparts, green tomatoes maintain a firmer texture when exposed to heat, preventing them from becoming mushy or collapsing during the frying process. The acidity level in green tomatoes remains higher than mature tomatoes, contributing a pleasant tartness that balances the richness of the oil and coating.
Selecting the right tomatoes is crucial for achieving optimal results. Choose firm, medium-sized green tomatoes that show no signs of yellowing, as these indicate the fruit is beginning to mature and may lose its structural integrity during cooking. The ideal tomato should feel substantial in your hand and maintain consistent color throughout, suggesting it has been picked at peak unripeness.
Essential Ingredients and Equipment Preparation
Creating restaurant-quality fried green tomatoes begins with assembling the proper ingredients and understanding their specific roles in achieving the desired outcome. Each component contributes meaningfully to the final dish’s texture, flavor profile, and visual appeal.
Core Ingredient Components
- Green tomatoes: Select 3 to 4 medium-sized unripe tomatoes, providing approximately 8 to 12 slices depending on thickness preference
- All-purpose flour: Serves as the foundational coating layer, helping subsequent ingredients adhere properly to the tomato surface
- Binding liquid: A combination of egg and milk creates an adhesive layer that allows dry ingredients to coat the tomato evenly
- Cornmeal: Yellow cornmeal provides the distinctive crispy texture and corn flavor characteristic of authentic preparations
- Breadcrumbs: Fine dry breadcrumbs enhance the crispness and create additional textural complexity
- Seasonings: Salt, black pepper, and optional Cajun spices add depth and flavor complexity
- Frying oil: Vegetable, canola, or peanut oil, requiring approximately 2 cups for adequate depth
Equipment selection significantly impacts your cooking success. A cast iron or stainless steel skillet provides superior heat distribution and retention compared to other cookware types. Cast iron especially maintains consistent oil temperature throughout the frying process, a critical factor in achieving even browning and optimal crispness. A reliable cooking thermometer ensures oil maintains the ideal temperature range of 360 to 375 degrees Fahrenheit, preventing the dual disasters of greasy, undercooked interiors or burnt exteriors.
The Three-Station Dredging Method Explained
Professional preparation demands establishing a systematic dredging approach that ensures thorough, even coating of every tomato surface. This technique minimizes excess batter while maximizing adhesion and crispness. The three-station method has proven effective across countless kitchens and culinary traditions.
Station One: Dry Flour Base
Combine approximately one-third cup of all-purpose flour with half a teaspoon of salt in a shallow plate or wide bowl. This initial coating serves a critical purpose—it removes surface moisture and creates a slightly tacky base that allows subsequent layers to adhere properly. Many home cooks overlook this foundational step, resulting in coatings that separate during frying or fail to achieve the desired crispness.
Station Two: Egg and Milk Mixture
In a separate shallow vessel, whisk together one large egg and one-quarter cup of milk until thoroughly combined. Some cooks add one tablespoon of hot sauce to this mixture for additional flavor complexity and subtle heat. The egg provides protein that sets during frying, creating structure within the coating, while the milk adds moisture and richness. This binding liquid essentially acts as culinary glue, transforming dry ingredients into a cohesive crust.
Station Three: Cornmeal and Breadcrumb Blend
Combine one-quarter cup of yellow cornmeal, one-quarter cup of fine dry breadcrumbs, half a teaspoon of salt, and one-quarter teaspoon of black pepper in a third shallow plate. Optional additions might include one-half teaspoon of Cajun seasoning, garlic powder, or cayenne pepper for those preferring additional flavor complexity. Whisk these dry ingredients thoroughly to ensure even distribution of seasonings and prevent clumping during the coating process.
Tomato Preparation and Slicing Techniques
Proper tomato preparation establishes the foundation for successful cooking. Begin by rinsing green tomatoes under cool running water, removing any dirt or residue from their surface. Pat them completely dry with paper towels, as excess moisture interferes with coating adhesion and can cause oil splattering during frying.
Slice tomatoes into uniform thickness, ranging from one-quarter inch for thinner, more delicate slices to three-eighths inch for heartier portions. Consistent thickness ensures even cooking throughout the batch, preventing some slices from becoming overcooked while others remain insufficiently browned. Many experienced cooks use a serrated knife for superior control, as the saw-like edge cleanly cuts through the tomato’s firm flesh without crushing it.
Some preparation methods recommend salting tomato slices and allowing them to rest on paper towels for five to seven minutes before dredging. This technique draws out excess moisture from the tomato’s surface, enhancing the coating’s adhesion and crispness during frying. While not absolutely essential, this extra step frequently results in noticeably superior outcomes.
Mastering the Dredging Process
With ingredients arranged and tomatoes properly prepared, the dredging sequence becomes your next critical focus. Working with 2 to 3 tomato slices at a time prevents overcrowding and allows you to maintain focus on thorough coating application.
- Press each tomato slice firmly into the flour mixture, coating both surfaces and all exposed edges. If flour fails to adhere to the edges, dip the slice edges into the egg mixture, then back into the flour before proceeding to the next step.
- Dip the flour-coated slice into the egg and milk mixture, ensuring complete submersion and thorough coverage on both sides.
- Gently press the wet slice into the cornmeal and breadcrumb mixture, applying moderate pressure to ensure the coating adheres firmly. Shake off any excess coating to prevent thick, crunchy layers that might not cook through completely.
- Transfer finished slices to a clean plate or baking sheet, arranging them in a single layer without overlap.
Many home cooks discover that allowing coated slices to rest at room temperature for 10 to 15 minutes before frying improves the coating’s adhesion and overall crispness. This resting period allows the coating to set slightly, reducing the likelihood of it separating from the tomato during the initial frying moments.
Oil Temperature Management and Frying Fundamentals
Oil temperature represents perhaps the single most critical variable in achieving perfect fried green tomatoes. Insufficient heat results in greasy, soggy slices with pale, uninviting exteriors, while excessive heat produces burnt coatings that mask the tomato’s delicate flavor.
Pour approximately two cups of your selected oil into your cast iron skillet to a depth of one-quarter to one-half inch. Heat the oil over medium heat until reaching the target temperature of 360 to 375 degrees Fahrenheit. A reliable instant-read thermometer provides precise temperature confirmation, though traditional cooks often employ the cornmeal test—sprinkling a few grains of cornmeal into the hot oil. The cornmeal should immediately sizzle and begin browning when oil has reached proper temperature.
Maintain oil temperature throughout the frying process by allowing it to return to the target range between batches. Dropping cool tomato slices into insufficiently heated oil causes temperature drops that directly impact your final product’s quality. Between each batch, permit the oil 2 to 3 minutes to reach the proper temperature before adding the next group of slices.
The Frying Process and Achieving Golden Perfection
Working in batches to avoid overcrowding the skillet, carefully slide tomato slices into the hot oil. Avoid stacking or overlapping slices, as they must cook evenly on all surfaces. The oil should sizzle immediately upon contact with the tomato slices, a sound indicating proper temperature and the beginning of the Maillard reaction—the chemical process that creates the appetizing golden-brown color and complex flavors.
Fry slices for approximately 1 to 2 minutes on the first side until achieving a deep golden-brown color, then carefully flip each slice using a slotted spatula or similar utensil. Continue frying the second side for an additional 1 to 2 minutes until both surfaces reach uniform golden-brown coloring. The total cooking time typically ranges from 3 to 4 minutes per batch, though exact timing depends on slice thickness and your specific stove’s characteristics.
Remove finished slices from the oil using a slotted spoon or spatula, transferring them immediately to a plate lined with paper towels or a wire rack set over a baking sheet. The paper towels absorb excess oil, preventing the slices from becoming greasy during cooling. Allow slices to rest for 2 to 3 minutes before serving, permitting the interior to set slightly while the coating remains at peak crispness.
Serving Suggestions and Complementary Accompaniments
Fried green tomatoes reach their peak flavor and texture moments after cooking, when the exterior crust remains maximally crispy while the interior maintains ideal temperature. Serve immediately, either standalone or alongside complementary accompaniments that enhance the dining experience.
Traditional Southern preparations frequently pair fried green tomatoes with buttermilk-based dressings or ranch-style sauces that provide cooling contrast to the warm, crispy exterior. Some cooks prefer remoulade sauce, featuring mayonnaise, mustard, and pickle relish, which adds tangy complexity. For those seeking lighter options, a simple squeeze of fresh lemon juice brightens the tomato’s natural tartness without overwhelming the palate.
Beyond standalone presentations, fried green tomatoes adapt beautifully to sandwich applications. Layer them on toasted bread with fresh lettuce, ripe tomato slices, and crispy bacon for a contemporary take on classic Southern sandwich traditions. The crispy coating provides textural contrast to soft bread and tender vegetables, creating a multidimensional eating experience.
Troubleshooting Common Preparation Challenges
Coating Separation During Frying
If coatings separate from tomato slices during frying, the most common culprit involves insufficient flour application in the initial dredging stage. This base layer creates the adhesive foundation for subsequent coatings. Additionally, ensuring tomato surfaces are completely dry before beginning the dredging process prevents moisture from compromising coating adhesion. Finally, confirm that oil has reached proper temperature before adding slices, as insufficient heat can cause coating separation.
Pale or Uneven Browning
Pale or unevenly browned slices typically indicate oil temperature has fallen below the optimal range. Verify thermometer accuracy and allow additional time for oil to reach 360 to 375 degrees Fahrenheit before adding tomato slices. Avoid overcrowding the skillet, as multiple slices simultaneously lower oil temperature, compromising browning on all pieces.
Greasy, Soggy Results
Greasiness and sogginess suggest either insufficient oil temperature or excessive cooking time. Lower temperature causes oil to absorb into the coating rather than create a crispy exterior. Additionally, cooking slices too long intensifies oil absorption. Reduce cooking time slightly, monitor oil temperature carefully, and ensure paper towels adequately drain excess oil after frying.
Storage and Reheating Recommendations
Fried green tomatoes are best consumed immediately after preparation when the contrast between crispy exterior and tender interior remains at its peak. However, leftovers can be refrigerated in an airtight container for up to 3 days. Reheat in a 350-degree Fahrenheit oven for 8 to 10 minutes, which restores crispness without drying out the tomato interior. Avoid microwave reheating, which typically produces soggy, unappealing results.
Frequently Asked Questions About Fried Green Tomatoes
Can I use red tomatoes for this recipe?
Red, ripe tomatoes are not recommended for frying. Their higher water content and softer flesh result in mushy, collapsing interiors during cooking. The tartness that makes green tomatoes appealing also diminishes in ripe red varieties.
What oil works best for frying?
Vegetable, canola, and peanut oils all work effectively, offering high smoke points around 450 degrees Fahrenheit that accommodate the 360 to 375 degree frying temperature. Peanut oil imparts subtle flavor some cooks prefer, while vegetable and canola oils provide neutral backgrounds emphasizing the tomato.
Is buttermilk essential in the wet mixture?
While buttermilk adds traditional flavor, regular whole milk or 2 percent milk perform equally well functionally. Some cooks substitute milk with egg wash alone, though milk provides additional moisture and binding properties beneficial to coating quality.
Can I air-fry fried green tomatoes?
Air frying represents a lower-fat alternative, though results differ noticeably from traditional deep frying. Air-fried versions achieve adequate crispness but lack the depth of flavor and textural complexity deep frying provides. If attempting air frying, follow your air fryer manufacturer’s temperature recommendations and adjust cooking time based on your specific unit’s characteristics.
References
- Best Fried Green Tomatoes (Perfect Every Time) — Grits and Gouda. https://gritsandgouda.com/perfect-every-time-fried-green-tomatoes/
- Southern Fried Green Tomatoes — Butter Be Ready. https://www.butterbeready.com/fried-green-tomatoes/
- Fried Green Tomatoes Recipe — Grandbaby Cakes. https://grandbaby-cakes.com/fried-green-tomatoes/
- Fried Green Tomatoes — Homesick Texan. https://www.homesicktexan.com/fried-green-tomatoes/
- The Best Fried Green Tomatoes Ever — Windy City Peach. https://windycitypeach.com/the-best-fried-green-tomatoes-ever/