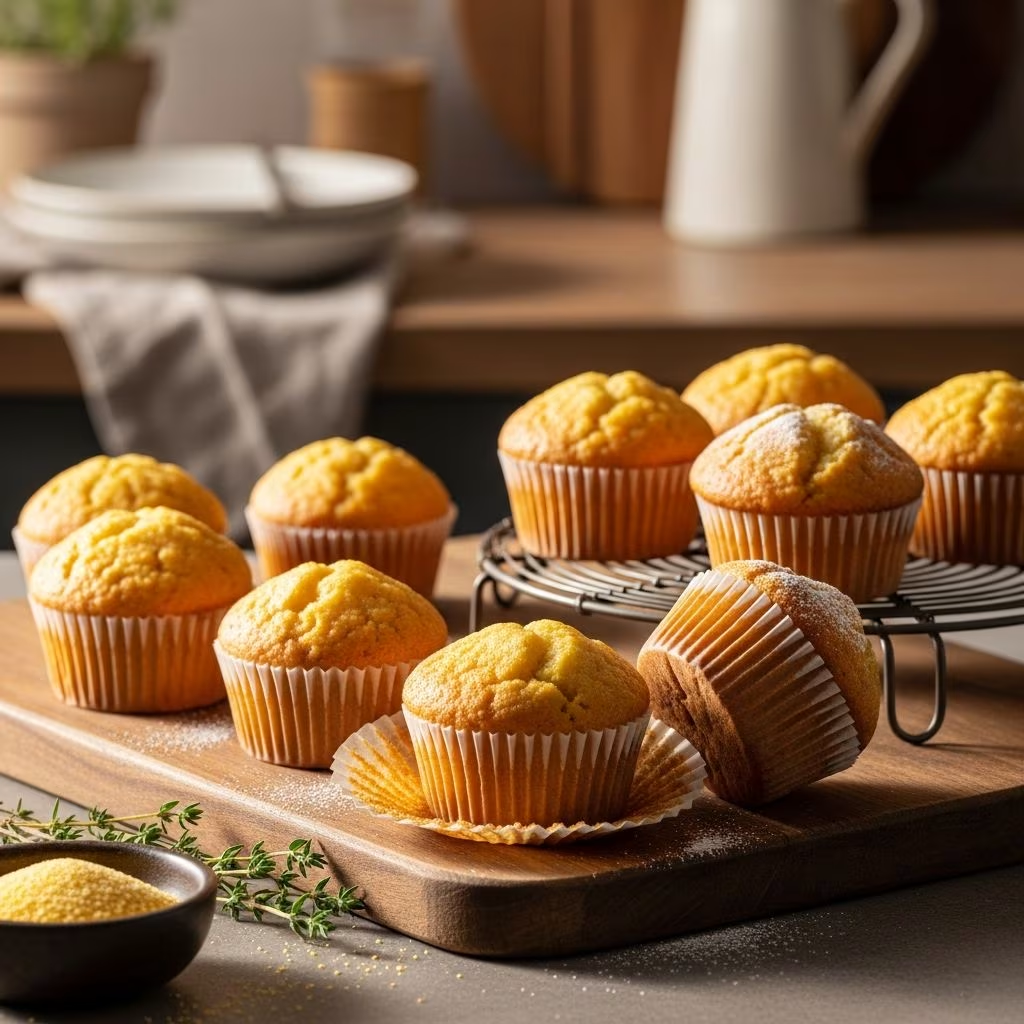
Corn muffins represent one of the most versatile and approachable baked goods that home cooks can master. These golden treats bridge the gap between sweet indulgence and savory accompaniment, making them suitable for breakfast tables, afternoon snacks, or alongside hearty dinners. The beauty of corn muffins lies in their simplicity—requiring only basic pantry staples and minimal mixing techniques to achieve impressive results. Whether you’re a seasoned baker seeking a reliable recipe or a beginner exploring the fundamentals of muffin preparation, understanding the principles behind successful corn muffin baking will elevate your kitchen confidence and produce consistently delicious outcomes.
Understanding the Foundation: Essential Ingredients Breakdown
Creating exceptional corn muffins begins with recognizing how each ingredient contributes to the final texture, flavor, and structure. The ingredient list remains refreshingly modest, which eliminates guesswork and allows precision in execution.
Dry Components and Their Functions
The dry ingredient mixture forms the structural backbone of your muffins. Cornmeal serves as the signature component, providing the characteristic texture, subtle sweetness, and golden appearance that defines these treats. The type of cornmeal matters; fine ground cornmeal produces a more tender crumb compared to coarser varieties. Most recipes employ between one and two cups of cornmeal, balanced against all-purpose flour to achieve the ideal texture ratio.
All-purpose flour contributes gluten development and structural integrity, preventing your muffins from becoming excessively dense or crumbly. The flour-to-cornmeal ratio typically ranges from 2:1 to 3:1, with higher flour ratios producing lighter, more tender muffins. Baking powder functions as the leavening agent, creating the rise and lift that characterizes well-made muffins. Most recipes call for one to two tablespoons, distributed evenly throughout the dry mixture to ensure consistent rise throughout each muffin.
Sugar provides sweetness while contributing to browning and moisture retention. Recipes typically include between one-half and one full cup, offering flexibility depending on personal preference for sweetness levels. Salt enhances flavors and balances sweetness; typically one-half to one teaspoon completes this dry component ensemble.
Wet Ingredients and Their Roles
The wet ingredient mixture carries flavor and moisture into your batter. Eggs act as binders, emulsifiers, and structure builders, typically requiring one to three large eggs depending on the batch size. Milk provides hydration and contributes to the tender crumb; recipes range from one to one and one-quarter cups depending on desired moistness. Butter and oil work in tandem to create richness and texture, with butter adding flavor while oil promotes moisture retention and tenderness. Some recipes employ exclusively butter, while others combine both for optimal results.
Optional additions like honey appear in many recipes, contributing subtle sweetness and moisture without the crystalline quality of granulated sugar. These wet ingredients must be thoroughly combined before meeting the dry mixture to ensure even distribution and proper emulsification.
Mastering the Preparation Process
Success in muffin baking hinges upon technique and timing. Following proper preparation steps ensures professional-quality results from your home kitchen.
Pre-Baking Setup and Planning
Begin by preheating your oven to the appropriate temperature, typically between 350°F and 425°F depending on your specific recipe. Most recipes hover around 400°F as the optimal temperature, balancing thorough cooking with golden-brown tops. Allow sufficient preheating time—usually ten to fifteen minutes—to ensure even heat distribution throughout the oven cavity.
Simultaneously, prepare your muffin pan by greasing each cup generously with butter or cooking spray, or by inserting paper liners into each cup. Paper liners offer the advantage of easy removal and reduced cleanup, while direct greasing creates a crispy exterior that many bakers prefer. Some experienced bakers employ both methods for insurance against sticking.
The Dry Mixture Foundation
In a large mixing bowl, combine all dry ingredients—cornmeal, flour, baking powder, salt, and sugar. Whisk these components together thoroughly to ensure even distribution of the baking powder, which prevents pockets of unmixed leavening agent that could create uneven rising. This whisking step, though seemingly simple, significantly impacts your final muffins’ consistency and rise pattern.
A common pitfall involves insufficient mixing of dry ingredients. Uneven baking powder distribution results in some muffins rising dramatically while others remain dense and underbaked. Spend thirty seconds to one minute whisking these components until the mixture appears uniform in color and texture.
The Wet Mixture Preparation
In a separate medium-to-large bowl, combine all liquid components—eggs, milk, melted butter, oil, and any optional honey or buttermilk. Whisk these ingredients vigorously until they emulsify and combine smoothly. This step ensures even distribution of fat throughout the liquid mixture, preventing oil streaks in your finished muffins and promoting uniform moisture distribution.
The Critical Combining Technique
This stage represents the most crucial moment in muffin preparation. Do not overmix—this instruction appears repeatedly in professional recipes for good reason. When wet ingredients meet dry ingredients, developing gluten in the flour begins immediately. Overmixing creates excessive gluten development, resulting in tough, dense muffins with tunneling and a tough crumb structure.
Pour the wet ingredient mixture into the dry ingredients and fold gently using a spatula or wooden spoon. Mix only until the ingredients barely combine; small lumps and streaks of unmixed flour are not only acceptable but preferable to a smooth, well-blended batter. The batter should appear shaggy and somewhat rough, never perfectly smooth. This restraint in mixing is the secret weapon of professional muffin makers.
From Batter to Baked Perfection
Filling the Muffin Cups
Using a muffin scoop or large spoon, divide the batter evenly among the prepared muffin cups. Fill each cup approximately two-thirds to three-quarters full, leaving adequate headspace for muffins to rise without overflowing. Overfilled cups produce muffins with excessive doming that may burn, while underfilled cups yield small, disappointing results.
If using a preheated pan (an optional but effective technique for achieving crispier bottoms), exercise caution when removing the hot pan from the oven. Carefully transfer batter-filled cups one by one, maintaining even distribution.
Baking Duration and Doneness Indicators
Baking times vary between twelve and forty minutes depending on oven temperature, muffin size, and specific recipe formulation. Most standard recipes bake at 400°F for approximately fifteen to twenty minutes. The most reliable doneness indicator involves the toothpick test: insert a toothpick into the center of a muffin; if it emerges clean or with only minimal crumbs adhering, the muffins are done.
Visual cues also matter. Look for golden-brown tops and slightly darkened edges. The muffin tops should feel firm to gentle pressure, and the muffins should have risen substantially above the cup rims. Underbaked muffins appear pale and wobble slightly when the pan is moved; overbaked muffins develop dark brown or nearly black tops.
Cooling and Storage Considerations
Remove muffins from the oven and allow them to rest in the pan for three to five minutes before transferring to a wire cooling rack. This brief resting period allows the structure to set sufficiently for safe transfer without tearing. Wire racks allow air circulation on all sides, preventing the bottom crust from becoming soggy.
Serve muffins warm for optimal texture and flavor, though they remain delicious at room temperature. Store cooled muffins in an airtight container for up to three days, or freeze individually wrapped muffins for up to two months. Thaw frozen muffins at room temperature or briefly warm in a 300°F oven.
Recipe Variations and Customization Strategies
Sweetness Level Adjustments
Sugar quantities can be adjusted based on personal preference and intended use. Standard recipes call for one-half to one cup of sugar; reduce to one-quarter cup for muffins intended as savory side dishes, or increase to one and one-quarter cups for dessert-style muffins. Remember that reducing sugar impacts browning and moisture retention, potentially requiring slight adjustments to other ingredients.
Flavor Enhancement Techniques
The basic corn muffin template welcomes numerous flavor additions. Honey incorporation adds subtle sweetness and moisture without crystalline texture. Buttermilk substitution for regular milk introduces subtle tanginess and improved tenderness. Fresh or frozen corn kernels folded into the batter add textural interest and enhanced corn flavor. Finely diced jalapeños create savory-sweet variations, while cinnamon or nutmeg introduce warm spice notes.
Troubleshooting Common Issues
| Problem | Likely Cause | Solution |
|---|---|---|
| Dense, heavy texture | Overmixing or insufficient baking powder | Mix only until barely combined; verify baking powder freshness |
| Dry muffins | Overbaking or insufficient fat | Reduce baking time; ensure proper fat quantities |
| Sunken or crater tops | Oven temperature too low or underbaking | Verify oven temperature; bake until toothpick test passes |
| Uneven browning | Hot spots in oven or uneven batter distribution | Rotate pan halfway through baking; fill cups evenly |
| Muffins sticking to pan | Insufficient greasing | Use generous butter coating or paper liners |
Nutritional Considerations
Standard corn muffins provide approximately 150 calories per muffin, with moderate carbohydrate content from both cornmeal and flour. The egg and butter contribute protein and healthy fats, while sugar provides concentrated energy. Recipes incorporating honey or reduced sugar appeal to those monitoring caloric or glycemic impact. Substituting buttermilk for regular milk increases the nutritional profile with additional calcium and probiotics, while whole wheat flour partially replacing all-purpose flour increases fiber content.
Frequently Asked Questions
Can corn muffins be made dairy-free?
Yes, substitute dairy milk with almond milk, oat milk, or coconut milk in equal quantities. Replace butter with coconut oil or dairy-free butter alternatives. The texture and flavor remain appealing with these substitutions, though slight adjustments may be necessary.
Are corn muffins naturally gluten-free?
Traditional corn muffins contain wheat flour, making them unsuitable for gluten-free diets. However, gluten-free versions are easily prepared by replacing all-purpose flour with certified gluten-free flour blends in one-to-one ratios.
How far in advance can corn muffins be prepared?
Batter can be prepared up to four hours in advance and refrigerated in an airtight container, though baking powder gradually loses potency. Fresh-baked muffins store well for three days at room temperature or two months in the freezer.
Why are my muffins tunneling or displaying large interior holes?
Tunneling typically results from overmixing the batter or excessive baking powder. Mix only until barely combined, and verify baking powder quantities haven’t been accidentally doubled.
Conclusion: Celebrating Simplicity and Success
Corn muffins exemplify how uncomplicated recipes, executed with attention to technique and ingredient quality, yield remarkable results. The straightforward ingredient list removes barriers to success, while understanding the role each component plays elevates your baking expertise. Whether served alongside chili on winter evenings, accompanying breakfast spreads, or enjoyed as afternoon snacks, homemade corn muffins surpass commercial varieties in flavor, texture, and satisfaction. Practice these techniques, adjust recipes to suit personal preferences, and soon you’ll produce corn muffins that become family favorites and conversation starters among friends. The confidence gained from mastering this foundational recipe serves as a springboard toward exploring more complex baking adventures.
References
- Basic Corn Muffins (Quick and Easy) — The Bossy Kitchen. Accessed April 2026. https://www.thebossykitchen.com/basic-corn-muffins-quick-and-easy/
- Ina Garten’s Corn Muffins — Food Network. https://www.foodnetwork.com/
- Cornbread Muffins Recipe — Preppy Kitchen. Accessed April 2026. https://preppykitchen.com/cornbread-muffins/
- Corn Muffins Recipe — The First Year Blog. Accessed April 2026. https://thefirstyearblog.com/corn-muffins/
- The Best Cornbread Muffins — Once Upon a Chef. Accessed April 2026. https://www.onceuponachef.com/recipes/cornbread-muffins.html
- Easy Cornbread Muffins Recipe — Sally’s Baking Addiction. Accessed April 2026. https://sallysbakingaddiction.com/cornbread-muffins-recipe/