Cinnamon rolls represent one of the most beloved baked goods in home kitchens and professional bakeries alike. Their combination of soft, pillowy dough, aromatic cinnamon filling, and creamy frosting creates a treat that satisfies both simple and sophisticated palates. However, achieving that perfect balance of texture, flavor, and visual appeal requires understanding the fundamental techniques that separate adequate cinnamon rolls from exceptional ones.
Many home bakers approach cinnamon roll baking with trepidation, believing the process requires specialized skills or equipment. In reality, success depends primarily on understanding the behavior of yeast-based doughs, managing fermentation times appropriately, and employing proper rolling and shaping techniques. This comprehensive guide explores the methods that produce reliably excellent results, drawing from time-tested baking principles and modern insights into dough development.
Understanding Dough Foundation and Ingredient Selection
The foundation of exceptional cinnamon rolls begins with selecting appropriate ingredients and understanding their individual roles in the final product. Unlike quick breads that rely on chemical leavening, cinnamon rolls depend on yeast fermentation to develop structure, flavor, and the characteristic open crumb that makes them appealing.
Bread flour serves as the superior choice compared to all-purpose flour due to its higher protein content, typically ranging from 12 to 14 percent. This elevated protein percentage develops into a more robust gluten network, which traps carbon dioxide gas generated during fermentation more effectively. The result is a more stable dough that maintains its shape through multiple folds and proofing stages, ultimately yielding rolls with better texture and a more consistent rise during baking.
Active dry yeast provides reliable fermentation when properly activated. Temperature plays a critical role in yeast performance—water that is too hot will kill the microorganisms, while water that is too cold will activate them sluggishly. The ideal temperature range for activating yeast falls between 105 and 110 degrees Fahrenheit, warm enough to stimulate activity without thermal damage.
Dairy components enhance both flavor and texture. Whole milk contributes fat and proteins that enrich the dough, creating a more tender crumb and imparting subtle sweetness. Some bakers employ the technique of scalding milk—heating it to approximately 180 degrees and then allowing it to cool—which can improve dough tolerance and final texture, though this step remains optional for home bakers.
Sugar serves multiple functions beyond sweetness. It feeds yeast during fermentation, promotes browning through the Maillard reaction, and contributes to the tender texture of the finished product. The quantity requires balance—too little sugar results in insufficient yeast nutrition and pale rolls, while excessive sugar can inhibit yeast activity by raising osmotic pressure within the dough.
Eggs enrich the dough structure and create a more tender, cake-like texture compared to egg-free versions. They also contribute to browning and help bind ingredients together. Room-temperature eggs incorporate more easily into the dough, creating a more homogeneous mixture.
The Critical Fermentation Process
Dough fermentation represents perhaps the most important yet frequently overlooked stage in cinnamon roll production. This extended rest period allows three simultaneous processes to occur: gluten development through enzymatic activity, flavor development through fermentation byproducts, and gas accumulation through yeast metabolism.
The initial mixing phase should develop sufficient gluten to create an elastic, smooth dough without overworking. Mixing duration varies based on mixing speed—approximately 8 to 10 minutes with a stand mixer at medium speed creates proper development. The dough should transition from a shaggy mass to a cohesive ball that forms a smooth surface and resists tearing when gently pulled.
Bulk fermentation typically requires 60 to 90 minutes at room temperature, depending on ambient conditions. A warmer kitchen accelerates fermentation, while a cooler environment slows it. The dough should increase approximately 50 to 75 percent in volume, creating visible air bubbles when viewed from the side of a transparent container. Experienced bakers often employ the “poke test”—gently pressing a floured finger into the dough. If the indentation springs back slowly and incompletely, fermentation has progressed appropriately.
Cold fermentation offers significant advantages for home bakers. Refrigerating the dough overnight (or up to 48 hours) dramatically enhances flavor development through extended yeast activity and enzyme action. This extended timeline also provides convenience, allowing bakers to prepare dough the day before baking. The cold slows yeast metabolism to a manageable pace, creating more complex flavors and improving dough handling characteristics.
Rolling, Filling, and Shaping Techniques
Transforming fermented dough into individual rolls requires specific techniques that ensure even filling distribution and proper rise during the final proof.
Gentle handling preserves the gas bubbles developed during fermentation. Rather than vigorously kneading or pounding the dough, gently shape it into a rectangle by hand or with a rolling pin. A light touch prevents deflating the carefully developed structure while still creating the flat surface necessary for filling application.
The filling composition deserves careful consideration. Traditional cinnamon-sugar mixtures require approximately 2 to 3 tablespoons of cinnamon per cup of sugar, creating a balanced flavor without overwhelming bitterness. Some bakers incorporate brown sugar exclusively for its molasses notes, while others blend white and brown sugar for complexity. Softened butter distributed evenly across the dough surface helps the filling adhere and creates slight lamination for textural interest.
Rolling technique significantly impacts the final product. Tightly rolling the dough creates more compact rolls that develop a more defined spiral pattern, while looser rolling produces lighter, airier rolls. Starting from the long edge and rolling toward yourself provides better control than rolling away. A bench scraper or pastry knife helps slice rolled logs into even portions, with each roll weighing similarly to ensure uniform baking.
Roll placement in the baking pan influences final appearance and texture. Spacing rolls with slight separation allows independent expansion and browning on all sides, creating a more attractive presentation. For tightly grouped rolls that develop soft sides (preferred by many bakers), arrange them touching or nearly touching in a single layer.
Proofing and Baking Parameters
The final proof before baking determines the height, texture, and overall success of the finished rolls. Properly proofed rolls should increase approximately 50 percent in volume without overproofing, which creates a fragile structure prone to collapse during baking.
Visual assessment proves more reliable than timing. Rolls should appear visibly puffy and, when gently pressed, should spring back slowly with a slight depression remaining. Underproofed rolls will spring back completely, resulting in dense, tough rolls, while overproofed rolls fail to spring back, producing a gummy interior.
Oven temperature significantly impacts browning and structure development. Most recipes specify 350 to 375 degrees Fahrenheit, creating proper exterior browning while allowing the interior to bake through completely. Baking for 20 to 30 minutes (depending on oven characteristics and roll size) typically produces golden-brown exteriors with fully cooked interiors.
Checking for doneness involves both visual assessment and internal temperature. The exterior should exhibit deep golden-brown color on the tops and lighter brown on the bottom edges. An instant-read thermometer inserted into a center roll should register between 190 and 205 degrees Fahrenheit, indicating complete yeast deactivation and moisture evaporation to appropriate levels.
Frosting and Final Touches
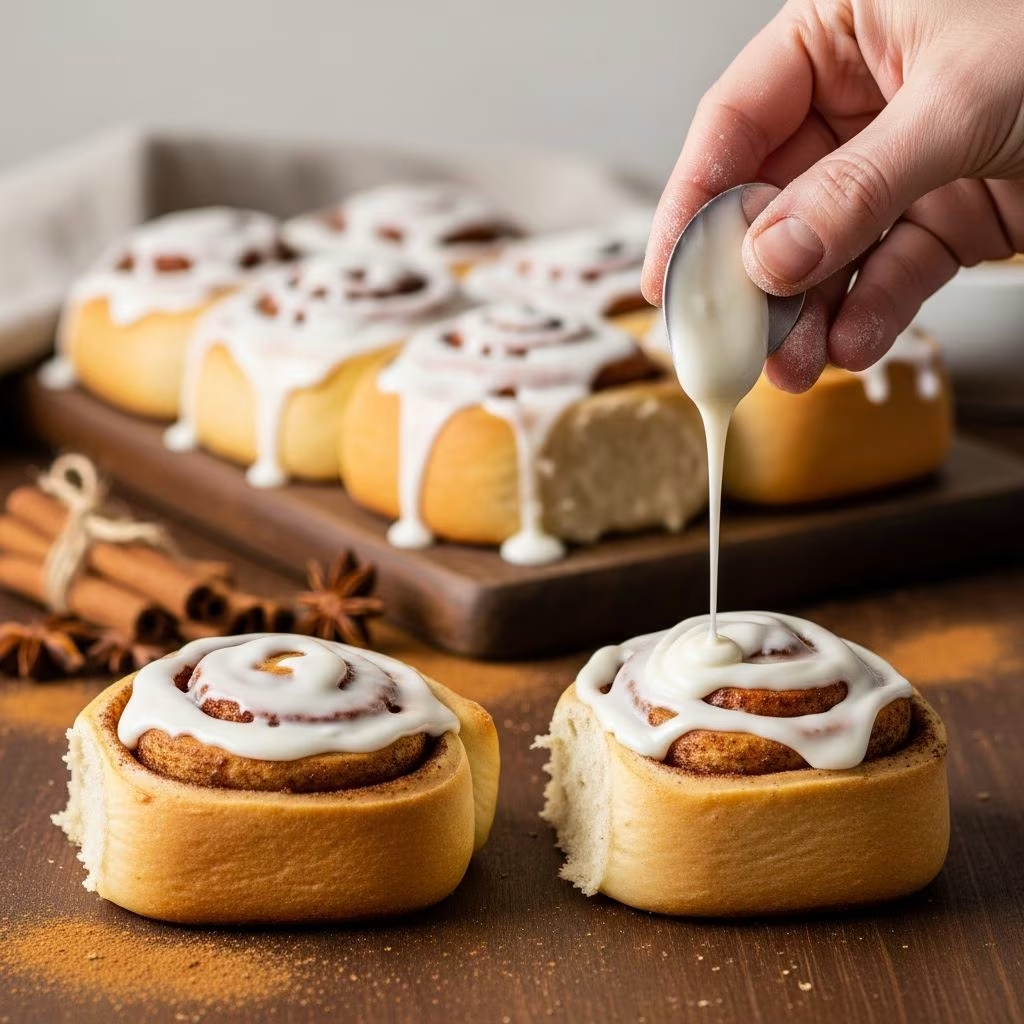
Cream cheese frosting represents the classic topping, providing tangy contrast to the sweet rolls and contributing creamy richness. The frosting should be applied while rolls are still warm enough that residual heat softens it slightly, creating a smooth, spreadable consistency. However, applying frosting to actively steaming rolls can create an overly thin layer that runs off the sides.
Waiting 5 to 10 minutes after removing rolls from the oven provides the optimal window for frosting application. During this brief rest, the structure sets slightly without losing all warmth, and surface moisture evaporates enough to allow frosting adhesion.
Common Challenges and Solutions
| Challenge | Likely Cause | Solution |
|---|---|---|
| Dense, Gummy Interior | Insufficient baking time or underproofing | Extend baking time by 5 minutes; ensure rolls double in volume during proof |
| Dry, Crumbly Texture | Excessive baking time or insufficient butter/dairy | Reduce baking time; verify egg and milk quantities in dough |
| Uneven Rising | Hot spots in oven or inconsistent roll sizing | Rotate pan halfway through baking; ensure uniform roll portions |
| Filling Leaking or Separating | Insufficient butter or overly loose rolling | Apply butter more generously; roll dough more tightly |
| Pale Exterior | Insufficient sugar or low oven temperature | Verify sugar quantity; increase oven temperature by 10-15 degrees |
Storage and Make-Ahead Strategies
Properly stored cinnamon rolls maintain quality for several days. Unbaked rolls frozen at the shaping stage require no thawing—simply extend the baking time by approximately 5 to 10 minutes when baking from frozen. This strategy allows fresh baked rolls in the morning after preparation the previous evening.
Baked rolls maintain quality at room temperature for up to two days when stored in an airtight container. Refrigeration extends storage to approximately one week, though the crumb texture gradually firms. Reheating in a 325-degree oven for 8 to 10 minutes restores the tender crumb characteristic of freshly baked rolls.
Frequently Asked Questions
Can I use instant yeast instead of active dry yeast?
Yes, instant yeast (also labeled bread machine yeast) can substitute for active dry yeast at a 1:1 ratio. The primary difference lies in particle size—instant yeast granules are smaller, allowing slightly faster hydration and fermentation. Results remain comparable when timing and technique remain consistent.
What temperature should my kitchen be for optimal fermentation?
Ideally, fermentation occurs between 72 and 78 degrees Fahrenheit. Warmer environments accelerate fermentation, while cooler kitchens slow the process. If your kitchen is significantly warmer or cooler, adjust fermentation timing accordingly—checking for proper development rather than relying exclusively on time-based recommendations.
Can I prepare the dough without eggs?
Yes, though egg-free dough will produce slightly less tender rolls with a more bread-like crumb. Substitute eggs with additional milk (approximately 3 tablespoons per omitted egg) or vegan egg replacer products. The final texture will differ subtly but remain acceptable.
How do I prevent cinnamon rolls from becoming dry after baking?
Avoid overbaking, which depletes moisture. Additionally, apply frosting while rolls remain warm, creating a protective layer that slows moisture loss. Store rolls in airtight containers rather than exposed on countertops.
Can I make cinnamon rolls entirely ahead of time?
Absolutely. Prepare and freeze unbaked rolls immediately after shaping. Thaw overnight in the refrigerator, allow 30 to 60 minutes at room temperature to complete proofing, then bake as directed. Alternatively, bake rolls completely, cool, and refrigerate or freeze for reheating later.
References
- Professional Baking — Wayne Gisslen. Wiley Education. 2012. A foundational reference on dough fermentation, gluten development, and yeast behavior in professional baking contexts.
- On Food and Cooking: The Science and Lore of the Kitchen — Harold McGee. Scribner. 2004. Comprehensive exploration of fermentation science, ingredient interactions, and the chemistry underlying bread and pastry production.
- Baking Science and Technology — Elaine Lai Hartshorn. Sosland Publishing. 2008. Technical examination of ingredient functionality, dough development, and baking process parameters in commercial applications applicable to home baking.
- The Flavor Bible: The Essential Reference for More Than 500 Ingredients and 13,000 Flavor Combinations — Karen Page and Andrew Dornenburg. Little, Brown. 2008. Reference for flavor pairing principles and ingredient selection to enhance baking results.