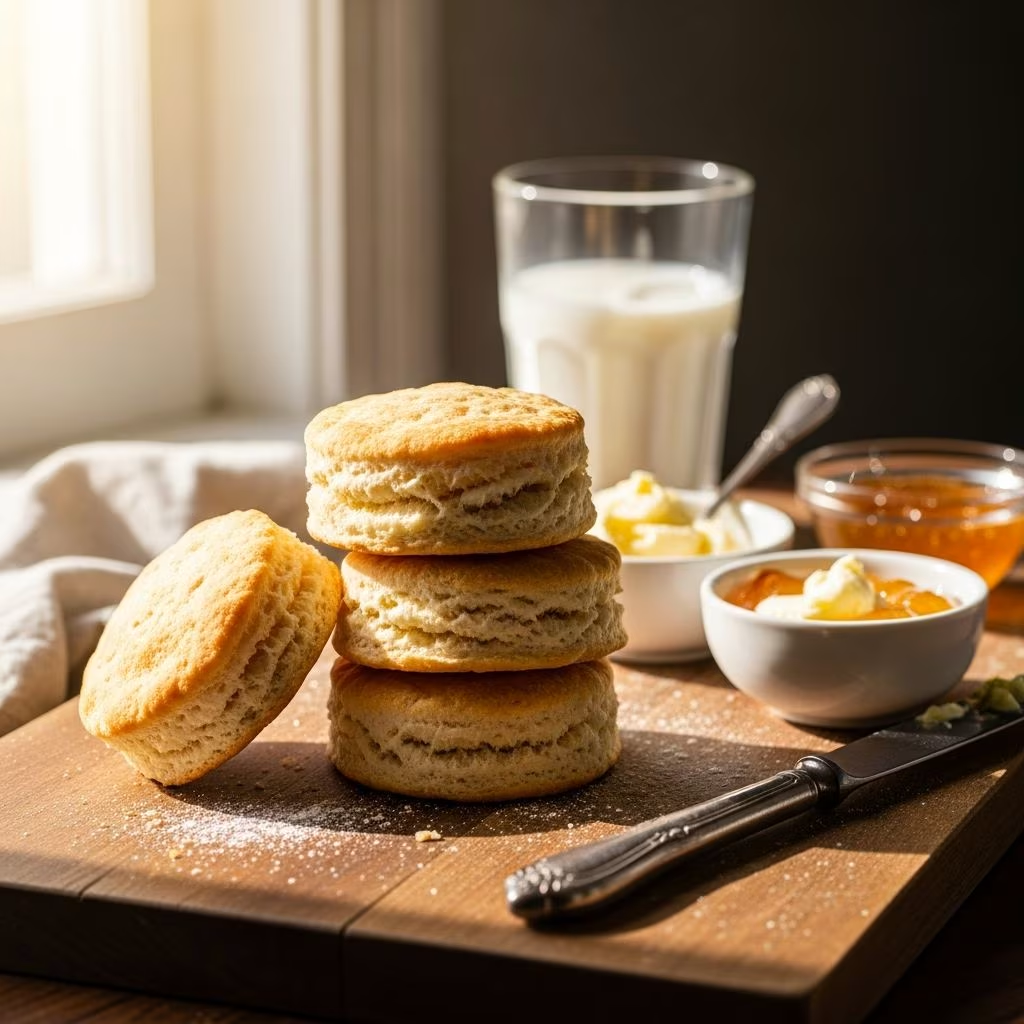
Buttermilk biscuits represent one of the most cherished staples in home baking, yet achieving consistent results requires understanding both the science behind the recipe and the practical techniques that separate mediocre biscuits from exceptional ones. This comprehensive guide explores the foundational principles that transform simple ingredients into delectable pastries with contrasting textures—a tender interior encased in a satisfying crusty exterior.
Understanding the Role of Each Ingredient
The foundation of exceptional buttermilk biscuits lies in comprehending how each ingredient contributes to the final product. Rather than following a recipe mechanically, bakers who understand ingredient functionality can troubleshoot problems and adapt recipes to their specific circumstances and preferences.
Flour Selection and Measurement
Flour serves as the structural foundation for biscuits, but its measurement methodology profoundly impacts the outcome. The conventional approach of scooping flour directly from the bag and leveling it off often leads to overcompacted flour, resulting in dense, tough biscuits. Instead, professional bakers employ a technique that involves loosening the flour with a spoon, gently stirring it within the bag to restore its natural aeration, and then carefully measuring it level with the bag.
This seemingly minor adjustment can mean the difference between light, tender biscuits and heavy, bread-like results. When flour is compacted during storage or scooping, you inadvertently add more flour to the dough than intended, creating an unfavorable ratio of flour to fat and liquid. By aerating the flour before measurement, you ensure accuracy and consistency across batches.
Fat Content and Its Impact on Texture
Fat fundamentally transforms biscuit texture, creating the characteristic layers and flakiness that distinguish biscuits from quick breads or muffins. When cold fat is cut into flour, it creates small pockets that remain separate during the initial mixing process. As the biscuits bake, these fat pockets create steam, causing the dough to rise and separate into distinct, tender layers.
The size of fat pieces matters considerably. Larger butter pieces—roughly pea-sized or slightly larger—create more pronounced layers and flakier texture. Smaller particles incorporate more thoroughly into the flour, resulting in a finer crumb structure that feels more tender but less dramatically flaky. Many professional bakers prefer cutting butter into varied sizes, with some pieces quite small and others notably larger, creating a biscuit with both complexity and visual interest.
The Chemistry of Buttermilk
Buttermilk contributes far more than moisture to biscuit dough. Its acidic nature fundamentally alters gluten development, a critical factor in achieving tender rather than tough biscuits. The acidity in buttermilk interacts with gluten proteins, effectively shortening and loosening the gluten strands. This chemical interaction prevents the development of tough, elastic gluten networks that would make biscuits chewy and dense.
Additionally, buttermilk provides tangy flavor notes that complement both sweet and savory applications. The slight sourness adds complexity without overpowering other flavors, making buttermilk biscuits remarkably versatile. When substituting regular milk for buttermilk, bakers must account for this chemical difference, typically adding lemon juice or vinegar to regular milk to approximate buttermilk’s acid content.
Leavening Agents and Their Timing
Baking powder serves as the primary leavening agent, releasing carbon dioxide gas that creates lift during baking. Using appropriate quantities ensures biscuits rise evenly without developing an excessively dense structure or acquiring a bitter, soapy taste from excess leavening powder. Most recipes employ approximately one teaspoon of baking powder per cup of flour, though individual baking powders vary in potency.
Salt enhances flavor perception and strengthens gluten structure, though it must be balanced carefully. Too little salt results in bland biscuits that taste flat and unfinished, while excessive salt interferes with gluten development and creates unpleasant textural qualities. Salt should be combined thoroughly with dry ingredients before liquid incorporation.
Mastering the Mixing Process
The methodology for combining ingredients significantly influences the final biscuit quality. This process requires balancing thoroughness with restraint—ensuring all ingredients incorporate adequately while avoiding overdevelopment of gluten, which would result in tough, chewy biscuits.
Dry Ingredient Integration
Before introducing any wet ingredients, all dry components should be thoroughly combined using a whisk or fork. This ensures even distribution of baking powder and salt throughout the flour, preventing pockets of concentrated leavening that would cause uneven baking. Whisking also gently aerates the mixture, contributing to lighter biscuits.
Fat Incorporation Strategies
Cutting fat into flour requires technique and patience. The most effective approach involves cutting cold butter into relatively small cubes, then distributing these evenly throughout the flour. Using a fork, two knives, or specialized pastry cutters, gently work the butter into the flour, breaking each piece into progressively smaller fragments while maintaining some distinctly separate, butter-coated flour particles.
The goal is to create a mixture resembling coarse sand or breadcrumbs, with no visible butter pieces but with distinct fat distributed throughout. This texture indicates successful fat incorporation—the fat has been subdivided enough to distribute evenly, yet remains sufficiently distinct to create steam pockets during baking.
Temperature management is essential throughout this process. If the mixture becomes warm, the fat begins to soften and blend entirely into the flour, diminishing the flakiness advantage. Keeping everything cold—chilled bowls, cold equipment, even briefly refrigerating the mixed dry ingredients before adding fat—supports superior results.
Strategic Buttermilk Addition
Rather than adding all buttermilk at once, successful bakers introduce it gradually in thirds. This staged addition allows you to observe how the dough hydrates and adjust the total amount as needed. Different flours absorb varying amounts of liquid, and humidity in the environment affects moisture content in both flour and air.
After each buttermilk addition, use a fork to gently toss the mixture, ensuring all flour contacts the liquid. This creates even hydration without aggressive mixing that would develop gluten. Once the buttermilk has been incorporated, cease mixing immediately—additional stirring leads to tougher, chewier biscuits with diminished tenderness.
Shaping and Pre-Baking Preparation
Once the dough has reached the proper consistency, careful handling during shaping determines whether the interior remains tender and flaky or becomes dense and compressed.
Dough Thickness and Yield
Pat the dough gently to achieve approximately three-quarters of an inch thickness. This thickness balances several considerations: it provides sufficient height for adequate rise during baking without creating awkwardly tall, top-heavy biscuits. Thinner dough yields smaller, thinner biscuits that may brown too quickly on the exterior before the interior bakes through, while thicker dough produces dense biscuits that don’t rise sufficiently.
A well-executed recipe typically yields twelve to fourteen individual biscuits from the recommended dough quantity. Achieving consistent yields across batches indicates proper technique, as variations often reflect differences in patting thickness or cutter size.
Cutting Techniques
Traditional round cutters produce classic biscuit shapes, though square or diamond cuts also work effectively. Regardless of shape, the critical factor is using a sharp cutter and employing a decisive downward motion. Twisting the cutter or applying inconsistent pressure seals the edges, trapping air and restricting rise. A clean, perpendicular cut through the dough allows steam to escape efficiently, enabling proper lift during baking.
Some bakers prefer avoiding cutters entirely, instead cutting dough into rustic shapes with a bench scraper or knife. This method eliminates the waste of trimmed dough and produces charmingly irregular biscuits with more pronounced edges.
Baking for Optimal Results
Oven preparation and baking parameters determine whether biscuits develop golden exteriors, proper rise, and the characteristic combination of crispy crust and tender crumb.
Temperature Considerations
Buttermilk biscuits bake at relatively high temperatures, typically between 400 and 425 degrees Fahrenheit. This temperature range supports rapid rise before the exterior sets, allowing maximum vertical expansion. Higher temperatures also encourage crust development through the Maillard reaction, creating the desirable golden-brown exterior.
Oven preheating is essential, as placing biscuits into an inadequately heated oven slows the initial rise and results in less impressive volume. Most biscuits require twelve to fifteen minutes of baking time, though this varies depending on oven characteristics and biscuit size.
Visual Cues for Doneness
Rather than relying solely on baking time, observe the biscuits’ appearance. Properly baked biscuits display deep golden-brown tops, indicating adequate Maillard reaction. The sides should appear set rather than wet or doughy. Gently pressing a biscuit’s side should produce only slight resistance, indicating the interior has firmed but remains tender.
Finishing Touches and Serving
The final steps significantly influence the eating experience and perceived quality of finished biscuits.
Honey Butter Enhancement
A simple honey butter—combining room-temperature butter with premium honey and finishing salt—creates an elegant accompaniment. Start with softened butter to ensure easy incorporation of honey, mixing until the sweetener distributes evenly. Flaky finishing salt adds crystalline texture and highlights the butter’s rich flavor. This topping bridges sweet and savory applications, complementing both breakfast service and dinner table presentation.
Texture and Temperature Dynamics
Freshly baked biscuits undergo a brief transformation during cooling. Immediately upon removal from the oven, the exterior remains quite soft, hardening into a crispy crust as cooling progresses. Serving warm biscuits within minutes of baking captures the optimal contrast—crunchy exterior yielding to tender interior. This textural interplay represents the hallmark of excellent buttermilk biscuits.
Common Challenges and Solutions
| Issue | Cause | Solution |
|---|---|---|
| Dense, heavy texture | Overcompacted flour or excessive mixing | Aerate flour before measuring; minimize mixing after buttermilk addition |
| Tough, chewy crumb | Overdeveloped gluten or overmixing | Stop mixing immediately when ingredients combine; use gentle hand mixing |
| Insufficient rise | Warm ingredients or inactive leavening | Keep all ingredients and equipment cold; verify baking powder freshness |
| Pale exterior | Oven temperature too low | Verify oven temperature with separate thermometer; preheat thoroughly |
| Uneven browning | Inconsistent oven heat or biscuit placement | Rotate baking sheet halfway through; ensure even spacing |
Frequently Asked Questions
Can I prepare biscuit dough in advance?
Yes, prepared biscuit dough can be refrigerated for several hours or even frozen for longer storage. Refrigeration allows flavors to develop while keeping ingredients cold for superior flakiness. Frozen dough can bake directly without thawing, though baking time may increase slightly.
What distinguishes buttermilk biscuits from other biscuit styles?
Buttermilk’s acidity creates tender crumb structure through gluten modification. This produces noticeably lighter, more tender biscuits compared to those made with water or regular milk. The slight sourness also adds complexity and flavor complexity.
How should biscuits be stored?
Cooled biscuits store best in airtight containers at room temperature for two to three days. For longer storage, freeze baked biscuits in freezer-safe bags for up to three months. Reheat briefly in a warm oven to restore crispness.
Can dietary modifications work with this recipe?
Experimentation with alternative flours or dairy products is possible but requires adjustments. Whole wheat flour produces denser results and requires additional buttermilk due to higher absorption rates. Dairy-free buttermilk substitutes vary in acidity, potentially affecting tenderness.
Conclusion
Mastering buttermilk biscuits involves understanding ingredient functionality, respecting technique requirements, and managing temperatures throughout the process. By implementing these principles—from flour aeration through strategic buttermilk addition to precise baking temperatures—home bakers can consistently produce restaurant-quality biscuits featuring the ideal combination of crispy exterior and tender, flaky interior. The reward justifies the attention to detail: warm, golden biscuits that elevate any meal and showcase the satisfaction of baking excellence.
References
- Perfect Buttermilk Biscuits, Baked & Explained — Epicurious. YouTube video. https://www.youtube.com/watch?v=5FMFDFPLua4
- Buttermilk Biscuits with Honey Butter — Epicurious. https://www.epicurious.com/recipes/food/views/buttermilk-biscuits-with-honey-butter