Creating the ideal biscuit from scratch requires more than simply following a recipe—it demands understanding the fundamental principles that transform basic ingredients into tender, flaky creations that rise beautifully and taste absolutely delicious. Whether you’re preparing breakfast for your family or serving biscuits alongside your favorite entree, mastering the craft of biscuit-making will elevate your baking repertoire significantly.
Understanding Biscuit Characteristics and Quality Standards
The hallmark of an exceptional biscuit encompasses several distinct qualities that work together harmoniously. A premium biscuit should offer a soft and flaky texture that yields easily to a fork, while simultaneously maintaining enough structural integrity to hold up under toppings or accompaniments. The interior crumb should demonstrate tenderness without becoming gummy or dense, and the overall flavor profile must showcase a rich, buttery taste complemented by moisture that keeps each bite pleasurable without any dryness.
Height is another critical component of biscuit excellence. Properly executed biscuits should rise noticeably during baking, creating an impressive presentation and indicating that leavening agents have functioned correctly. The exterior should develop a light golden-brown color that signals proper baking without any burnt edges or pale, underbaked appearance.
Selecting and Preparing Your Flour Foundation
Flour selection represents one of the most consequential decisions in biscuit preparation. While many traditional recipes call for self-rising flour, most home bakers maintain all-purpose flour in their pantries, which works equally well with minimal preparation. The advantage of all-purpose flour lies in its versatility and the fact that converting it to self-rising requires only seconds—simply incorporating the appropriate quantities of leavening agents directly into your dry ingredient mixture.
Measuring flour accurately prevents common biscuit failures. Rather than scooping directly from the flour container, which compacts the flour and results in overmeasuring, use the spoon-and-level method. Spoon flour gently into your measuring cup and level off the excess with a knife, ensuring you’re working with consistent quantities for reproducible results.
Essential Ingredient Components and Their Functions
Beyond flour, successful biscuits depend on a carefully balanced array of additional ingredients:
- Leavening Agents: Baking powder provides the primary lift, while baking soda offers additional rise and assists with browning. These must be whisked thoroughly into the flour to distribute evenly throughout the dough.
- Salt: This ingredient enhances flavor complexity and should never be omitted, as it balances sweetness and amplifies the buttery taste.
- Fat Component: While shortening can be utilized, butter provides superior flavor development and creates the most satisfying biscuit experience, resulting in superior taste compared to alternative fats.
- Liquid Base: Buttermilk surpasses regular milk due to its acidity, which reacts with leavening agents to produce optimal rise and creates a slightly tangy undertone that complements the buttery foundation.
Temperature Control: A Non-Negotiable Factor
Maintaining proper temperatures throughout the biscuit-making process directly impacts your final product. All ingredients, particularly butter and milk, should remain cold before combining with dry components. Cold butter creates small pockets within the dough that steam during baking, generating the characteristic flaky layers that distinguish superior biscuits from dense, compact versions.
Your oven must reach the correct temperature before biscuits enter—typically between 425 and 450 degrees Fahrenheit—ensuring that biscuits bake through properly while developing an attractive golden exterior within 10 to 15 minutes.
Step-by-Step Technique for Optimal Results
Combining Dry Ingredients
Begin by whisking together your flour, baking powder, baking soda, and salt in a large mixing bowl. This preliminary whisking step cannot be skipped, as it ensures even distribution of leavening agents throughout the flour, preventing any areas from leavening excessively or insufficiently.
Incorporating Fat
Add your cold, cubed butter to the dry mixture. Using a fork or pastry blender, cut the butter into the flour by pressing and dragging motions until the mixture resembles coarse breadcrumbs or meal. This process should not be rushed—the goal involves creating small butter nuggets throughout rather than achieving a smooth, homogeneous texture. These butter particles create steam during baking, producing the desired flakiness.
Adding Liquid
Form a well in the center of your flour mixture and pour in your cold buttermilk gradually. Using a gentle folding motion with a fork or your hands, combine ingredients until a shaggy, cohesive dough forms that pulls away from the bowl’s sides. Avoid aggressive mixing, which develops gluten and produces tough, dense results rather than the tender crumb you’re seeking.
Lamination Through Folding
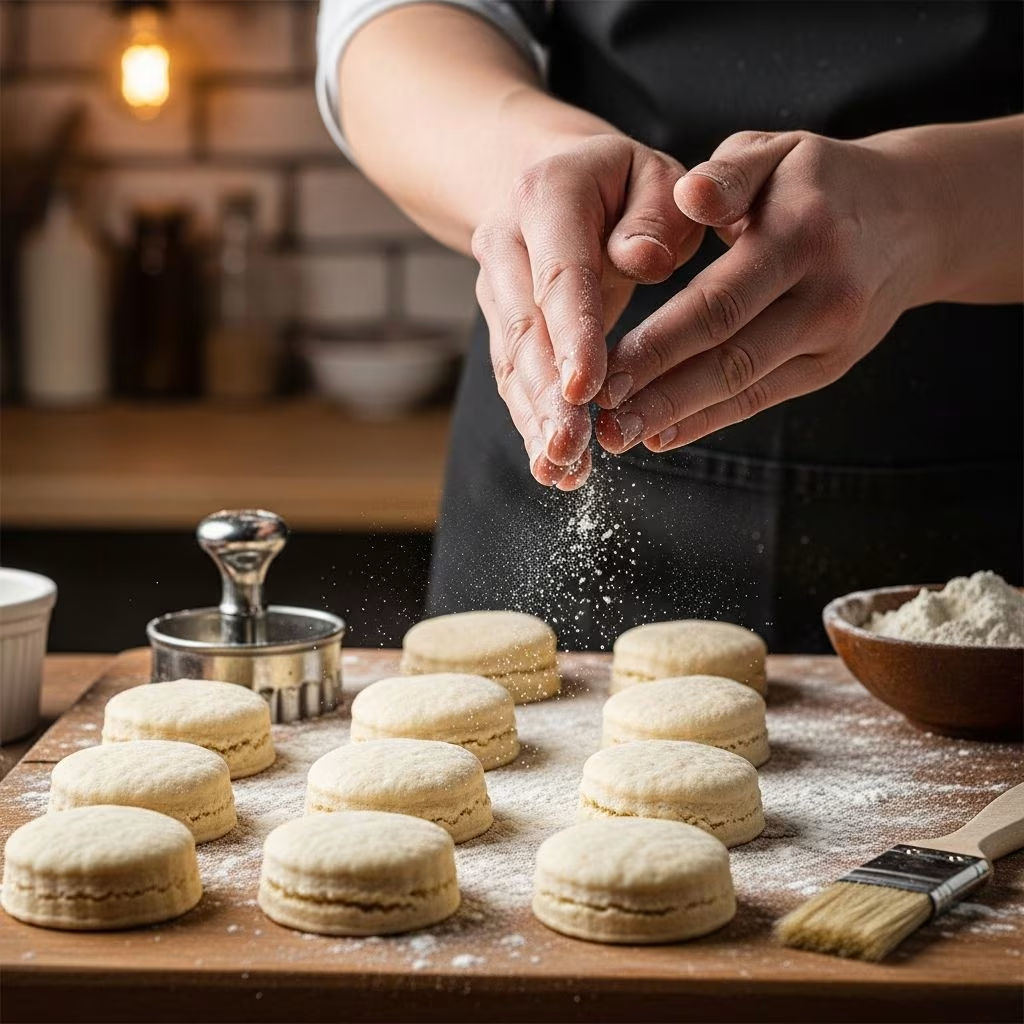
Turn your dough onto a floured surface and gently work it with flour until it’s no longer sticky. Pat the dough into a rectangle approximately half an inch thick. This is where advanced techniques come into play: fold the rectangle into thirds, then rotate ninety degrees and fold into thirds again. Pat the dough out once more into a rectangle. Repeating this folding process three to four times creates multiple layers within the dough, similar to puff pastry, which produces superior flakiness and height.
Cutting and Shaping
Roll your final dough to a thickness between half an inch and three-quarters inch. Using a floured biscuit cutter or cookie cutter, cut rounds with a sharp, downward pressing motion—never twist the cutter, as twisting seals the edges and prevents proper rising. Place biscuits on an ungreased baking sheet, leaving minimal space between them. Pressing remaining dough scraps together gently, you can reroll and cut additional biscuits, though these often don’t rise quite as impressively as the initial cuts.
Baking and Finishing
Bake your prepared biscuits in your preheated oven until the tops achieve a light golden-brown color, approximately 10 to 15 minutes depending on your oven’s characteristics. Remove biscuits promptly once baked—overbaking creates hard, dry results that disappoint. While still warm, brushing biscuits with melted butter adds richness and moisture, enhancing both flavor and texture.
Common Mistakes and Prevention Strategies
| Problem | Cause | Prevention |
|---|---|---|
| Dense, Heavy Biscuits | Overmixing dough or warm ingredients | Mix minimally; keep all ingredients cold |
| Flat Biscuits | Insufficient leavening or twisted cutter edges | Use correct leavening amounts; press cutter straight down |
| Dry, Crumbly Texture | Overbaking or insufficient liquid | Monitor baking time carefully; add liquid gradually |
| Tough Crumb | Excessive handling or gluten development | Handle dough gently; fold rather than knead |
| Uneven Browning | Inconsistent oven temperature | Rotate baking sheet halfway through baking |
Yield and Serving Flexibility
Standard biscuit recipes typically produce eight to ten generous-sized biscuits when cut with a standard biscuit cutter. If you prefer smaller biscuits for tea service or appetizers, using a smaller cutter or rolling dough thinner yields approximately twelve biscuits. Similarly, adjusting thickness allows flexibility based on your intended application—thinner biscuits work beautifully for sandwiches, while thicker varieties suit serving alongside gravies or as standalone accompaniments.
Troubleshooting Frequently Encountered Issues
Biscuits Not Rising Properly
Insufficient leavening, expired baking powder, or insufficiently cold ingredients cause inadequate rise. Verify that your baking powder hasn’t expired and that all components remain cold throughout preparation. Additionally, ensure proper oven temperature—ovens that aren’t adequately preheated struggle to generate the steam necessary for biscuit rise.
Achieving Consistent Golden Color
Uneven browning typically results from hot spots in your oven or inconsistent baking sheet placement. Rotating your baking sheet halfway through baking corrects this issue, ensuring all biscuits brown uniformly. If your oven runs particularly hot, reduce temperature by 25 degrees and extend baking time slightly.
Flavor Enhancement Variations and Adaptations
Once you’ve mastered the fundamental biscuit technique, experimenting with additions expands your creative possibilities. Incorporating sharp cheddar cheese creates savory biscuits perfect for breakfast or lunch service. Additions like fresh herbs, crispy bacon, or jalapeños introduce complexity without compromising the foundational texture. For slightly sweet applications, incorporating a tablespoon of honey or sugar alongside your dry ingredients creates versatile biscuits suitable for both sweet and savory toppings.
Storage and Reheating Best Practices
Freshly baked biscuits taste optimal within a few hours of baking but remain acceptable for one to two days when stored in an airtight container at room temperature. For extended storage, freezing baked biscuits preserves quality for up to three months—simply place cooled biscuits in a freezer-safe container and reheat in a 350-degree oven for 10 minutes before serving. Alternatively, you can freeze unbaked biscuits and bake them directly from frozen, adding a few extra minutes to the baking time.
Frequently Asked Questions
Can I prepare biscuit dough in advance?
Yes, prepared dough can be refrigerated for up to 24 hours, though it’s best used within several hours. Cover it tightly with plastic wrap to prevent drying. You can also freeze shaped, unbaked biscuits for up to three months before baking.
What’s the difference between biscuits and scones?
While similar, biscuits typically contain more fat and less liquid than scones, creating a fluffier, more tender crumb. Scones often incorporate eggs and sugar, creating a slightly sweeter product suitable for tea service.
Why did my biscuits turn out tough?
Toughness typically results from overmixing, which develops gluten, or handling the dough excessively. Focus on minimal mixing and gentle handling throughout preparation.
Should I brush biscuits before or after baking?
Brushing after baking allows butter to coat the warm surface, creating superior moisture and shine. Brushing before baking can create a barrier that inhibits proper browning.
References
- How to Make Perfect Biscuits from Scratch — Allrecipes. Video Tutorial. https://www.youtube.com/watch?v=HIftxfzFakc
- How to Make Basic Biscuits | Biscuit Recipe — Allrecipes. Video Tutorial. https://www.youtube.com/watch?v=r8U73GxdbEc
- The Science of Baking: Understanding Leavening Agents — University of Nebraska-Lincoln Institute of Agriculture and Natural Resources. Extension Materials. https://food.unl.edu/
- Flour and Its Role in Baking — King Arthur Baking Company Educational Resources. https://www.kingarthurbaking.com/