Panko breadcrumbs have become a kitchen essential for home cooks seeking that signature crunch and golden exterior on their favorite fried dishes. Unlike conventional breadcrumbs, these Japanese-style crumbs deliver a distinctly lighter, crispier texture that elevates everything from seafood to vegetables. While store-bought options are readily available, crafting your own fresh panko at home offers superior flavor, cost savings, and complete control over the final product. This comprehensive guide walks you through the entire process of creating panko from scratch, exploring the techniques, ingredients, and practical applications that make homemade versions superior to their commercial counterparts.
Understanding the Fundamentals of Panko Breadcrumbs
Panko represents a distinctive category of breadcrumbs originating from Japanese cuisine, crafted from white bread that undergoes specialized processing to create larger, flakier particles. The fundamental characteristic that distinguishes panko from ordinary breadcrumbs lies in its structure and composition. Traditional panko features whole flakes of bread rather than finely ground particles, resulting in a texture that remains coarser and airier than standard alternatives. This structural difference produces dramatic improvements in cooking outcomes, particularly when achieving optimal crispiness.
The moisture content within panko plays a critical role in determining how it performs during cooking. Fresh panko maintains higher moisture levels compared to its dried counterpart, which affects both the cooking process and the final textural result. When moisture-rich fresh panko encounters hot oil during frying, the liquid rapidly converts to steam, creating microscopic air pockets throughout the coating. These air bubbles contribute directly to the characteristic light, airy crispness that makes panko-coated foods so appealing.
The absorption rate of oil differs significantly between fresh and dried panko varieties. Fresh panko, despite its higher initial moisture content, tends to absorb more oil during the frying process. This characteristic can result in slightly higher calorie counts compared to thoroughly dried breadcrumb options, but it simultaneously contributes to the superior flavor development and textural excellence that justify its popularity among culinary professionals and home cooks alike.
Selecting and Preparing Your Base Ingredients
The quality of your homemade panko depends fundamentally on selecting appropriate bread varieties as your starting material. White bread forms the traditional foundation for authentic panko production, offering the neutral flavor profile and light color that characterize genuine Japanese-style breadcrumbs. When choosing white bread, you have considerable flexibility—artisanal sandwich breads, everyday grocery store varieties, or homemade loaves all work effectively. The key consideration involves avoiding whole wheat or specialty grain breads, which fundamentally alter the final flavor profile and produce noticeably different results compared to traditional white bread panko.
Begin with bread that has reached a particular stage of staleness rather than fresh, soft loaves. Slightly aged bread contains less moisture and processes more effectively into the desired flake consistency. If you’re working with freshly baked bread, allow it to sit uncovered for several hours or overnight before processing. This partial drying phase facilitates easier manipulation during the transformation process.
For those employing the freezing technique, select bread that you can freeze solid—approximately 24 hours in a standard freezer ensures adequate hardening. The freezing method proves particularly valuable for individuals without food processors or those preferring alternative equipment options.
Methods for Transforming Bread into Panko Flakes
Food Processor Technique
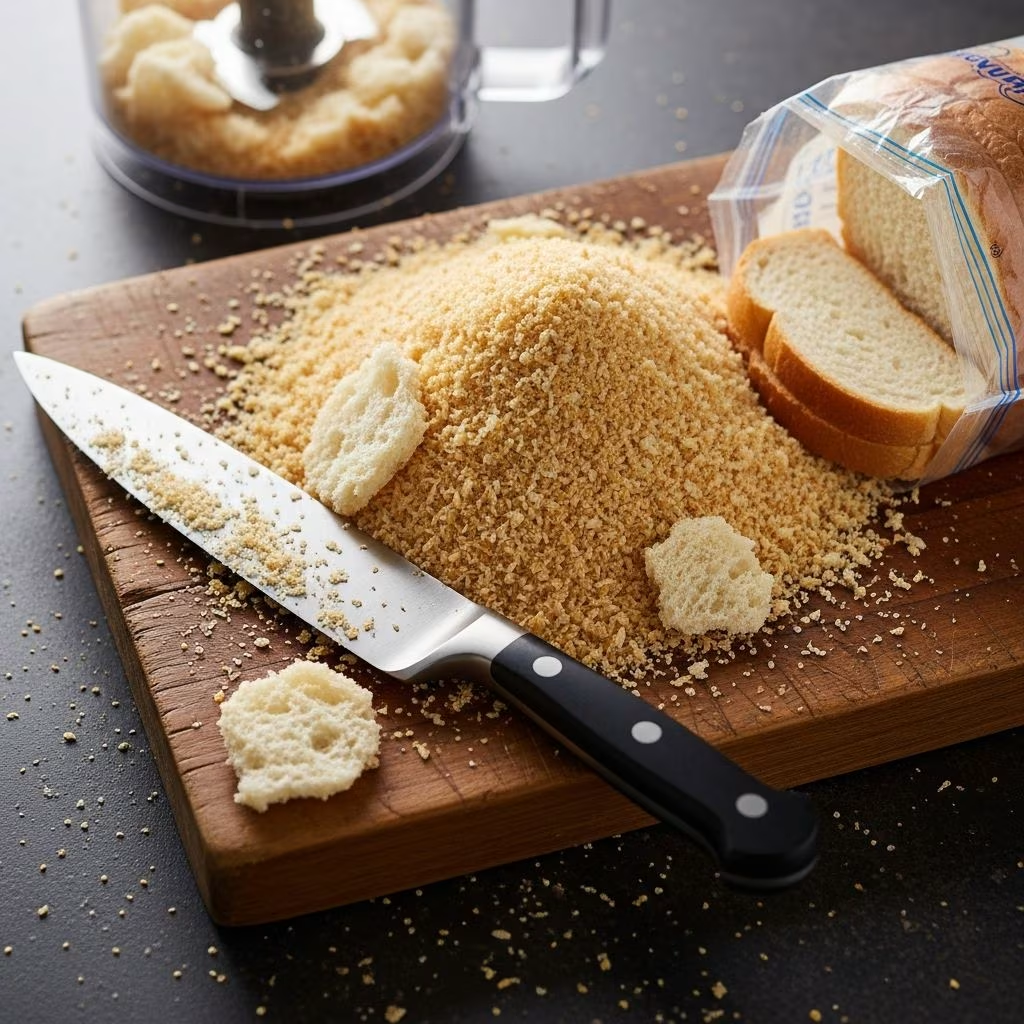
The food processor method represents the most efficient approach for most home cooks. Begin by tearing bread into roughly one-inch pieces, then distribute these pieces evenly throughout the food processor bowl. Pulse the machine using short bursts rather than continuous operation—this controlled pulsing prevents over-processing that would reduce flakes into fine dust. The goal involves creating visible breadcrumb pieces that remain relatively large compared to standard breadcrumb sizes. Continue pulsing until you achieve flakes roughly the size of small peas or rice grains, then transfer the processed bread to a baking sheet for the drying phase.
Frozen Bread Grater Method
This alternative technique works exceptionally well for those without food processors or preferring hands-on food preparation. Freeze whole bread slices until completely solid, typically requiring 24 hours or more. Using a box grater or similar tool, carefully grate the frozen bread against the largest grater surface, working methodically to transform the solid bread into manageable flakes. This labor-intensive approach requires patience but delivers surprisingly effective results and provides an engaging tactile cooking experience. The key to success with this method involves ensuring the bread achieves complete freezing—even slightly soft bread creates frustrating grating difficulties.
The Drying and Baking Process
Once your bread has been processed into appropriately sized flakes, the drying phase becomes essential for creating authentic fresh panko with proper texture and structure. Preheat your oven to 300°F, allowing the temperature to stabilize completely before proceeding. Spread the bread flakes in a single, even layer across a baking sheet, ensuring that pieces remain relatively spread out rather than clustered together. Crowded arrangements create uneven baking and result in some flakes becoming overly dried while others remain insufficiently processed.
Place the baking sheet in your preheated oven and bake for seven to ten minutes, monitoring the transformation carefully. The ideal endpoint arrives when the panko has achieved a light golden-brown color throughout, with no white or pale sections remaining. Approximately halfway through the baking period, remove the sheet and stir the flakes gently, ensuring even heat distribution and preventing any burning or excessive browning on one side.
Resist the temptation to extend the baking time excessively in hopes of creating additional crispness. Over-baking produces dried panko rather than fresh panko, fundamentally changing the product’s characteristics and reducing its effectiveness in recipes requiring the light, moist texture that defines genuine fresh panko.
Cooling, Storage, and Preservation
Upon removing your panko from the oven, spread it on a clean surface or leave it on the baking sheet to cool completely. Attempting to store warm panko results in moisture condensation, which negates the careful drying work completed during the baking phase. Allow at least 30 minutes for complete cooling, or longer if your kitchen remains warm or humid.
Store your homemade fresh panko in airtight containers—glass jars, plastic containers with secure lids, or even sealed plastic bags work effectively. Properly stored fresh panko maintains its quality for approximately one to two weeks in standard room-temperature conditions. For extended storage beyond this timeframe, refrigeration or freezing significantly extends shelf life, with frozen panko remaining viable for several months.
The key to maintaining your panko’s crispy characteristics involves preventing moisture reabsorption from the surrounding environment. Check storage containers periodically for any signs of moisture accumulation, and transfer panko to new containers if condensation becomes apparent.
Fresh Versus Dried Panko: Understanding the Distinctions
| Characteristic | Fresh Panko | Dried Panko |
|---|---|---|
| Moisture Content | Higher initial moisture | Minimal moisture |
| Oil Absorption | Moderate to high absorption | Lower absorption rates |
| Final Texture When Fried | Light, airy, exceptionally crispy | Crispy but denser |
| Caloric Content | Slightly higher due to oil uptake | Somewhat lower |
| Ideal Use Cases | Raw ingredient coatings (tonkatsu, shrimp) | Casserole toppings, general applications |
| Storage Duration | 1-2 weeks room temperature | Several months to longer |
Fresh panko demonstrates superior performance when applied directly to raw ingredients requiring immediate cooking. Dishes such as Japanese tonkatsu (breaded pork cutlets) and ebi fry (breaded shrimp) showcase fresh panko’s exceptional capabilities, with the moisture content facilitating superior coating adhesion and creating the signature ultra-crispy exterior these recipes demand.
Dried panko excels in applications where breadcrumb topping must be prepared in advance or stored for extended periods. Casserole toppings, gratins, and dishes where the breadcrumb layer sits atop other ingredients benefit from dried panko’s stability and longer shelf life.
Culinary Applications for Your Homemade Panko
Protein Coatings and Fried Dishes
Fresh panko elevates chicken preparations, transforming ordinary nuggets and cutlets into restaurant-quality creations with superior crunch and texture. The coating’s light, airy structure creates satisfying textural contrast against tender, juicy meat interiors. Fish preparations benefit equally—whether you’re preparing delicate white fish fillets or heartier seafood options, fresh panko creates exceptional golden crusts.
Vegetable Preparations
Beyond protein applications, fresh panko adds textural interest to vegetable dishes. Fried green tomatoes gain remarkable depth when double-coated with panko, creating layers of crispy exterior surrounding juicy interior sections. Onion rings transform from ordinary to spectacular when combining a thin initial batter layer beneath a panko coating, creating complex textural experiences with each bite.
Casserole and Baked Dish Toppings
Panko provides textural enhancement for baked pasta dishes, vegetable gratins, and casseroles, creating golden, crispy layers that contrast beautifully with soft, creamy components beneath.
Enhancing Your Panko with Seasonings and Flavoring
Beyond the basic preparation process, your homemade panko offers remarkable flexibility for flavor customization. During the final cooling phase, before storage, consider incorporating complementary seasonings directly into your panko base. Garlic powder, paprika, cayenne pepper, dried herbs, or parmesan cheese integrate seamlessly into fresh panko, creating pre-seasoned coating options ready for immediate use.
This seasoning approach proves particularly efficient for recipes requiring specific flavor profiles. Panko mixed with parmesan creates perfectly cheesy coatings without additional preparation steps during the coating phase. Spiced variants with cayenne pepper or paprika deliver heat and complex flavors directly to your final dishes.
Frequently Asked Questions
Can I use whole wheat bread for panko production?
Whole wheat bread fundamentally alters panko’s flavor profile and texture characteristics compared to traditional white bread varieties. The resulting product changes color noticeably and produces noticeably different cooking results. For authentic results, stick with white bread options.
How long does homemade fresh panko remain usable?
Fresh panko stored in airtight containers maintains quality for one to two weeks at room temperature. Refrigeration or freezing extends this duration significantly, with frozen panko remaining viable for several months.
Does homemade panko absorb more oil than store-bought varieties?
Fresh panko generally absorbs slightly more oil than dried commercial alternatives due to its higher moisture content. This increased absorption contributes to marginally higher calorie counts but simultaneously creates superior flavor development and textural characteristics.
Should I season panko before or after the baking phase?
Adding seasonings after the cooling phase works most effectively, preventing flavor degradation during the baking process. Alternatively, season individual batches immediately before using if you prefer freshly seasoned variations.
What bread alternatives work if I lack white bread options?
While white bread remains traditional, artisanal white sandwich breads, specialty white loaves, or even homemade white bread recipes all produce satisfactory results. Avoid dark breads, whole grains, and heavily sweetened varieties.
Conclusion: Embracing Homemade Panko Creation
Creating panko breadcrumbs at home represents an accessible, rewarding kitchen skill that delivers superior results compared to commercial alternatives. The process requires minimal equipment—a food processor or grater, an oven, and basic ingredients—yet produces exceptional outcomes that justify the modest time investment. Your homemade fresh panko elevates everyday dishes into memorable culinary creations, delivering that coveted crispness and golden exterior that distinguishes professionally-prepared foods. Whether you’re preparing Asian-inspired tonkatsu, classic fried chicken, or creative vegetable dishes, the superior texture and flavor of homemade panko transforms your cooking experience.
References
- 29 Yummy Dishes You Can Make With Panko — Mashed. 2024. https://www.mashed.com/1159091/29-yummy-dishes-you-can-make-with-panko/
- Homemade Japanese Panko Breadcrumb 101 — Sudachi Recipes. 2024. https://sudachirecipes.com/panko-breadcrumbs-101/
- Homemade Panko Bread Crumbs — A Modern Homestead. 2024. https://www.amodernhomestead.com/homemade-panko-bread-crumbs/
- Our 11 Best Panko Breadcrumbs Recipes for Crisp and Crunch — Saveur Magazine. 2024. https://www.saveur.com/best-panko-breadcrumbs-recipes/