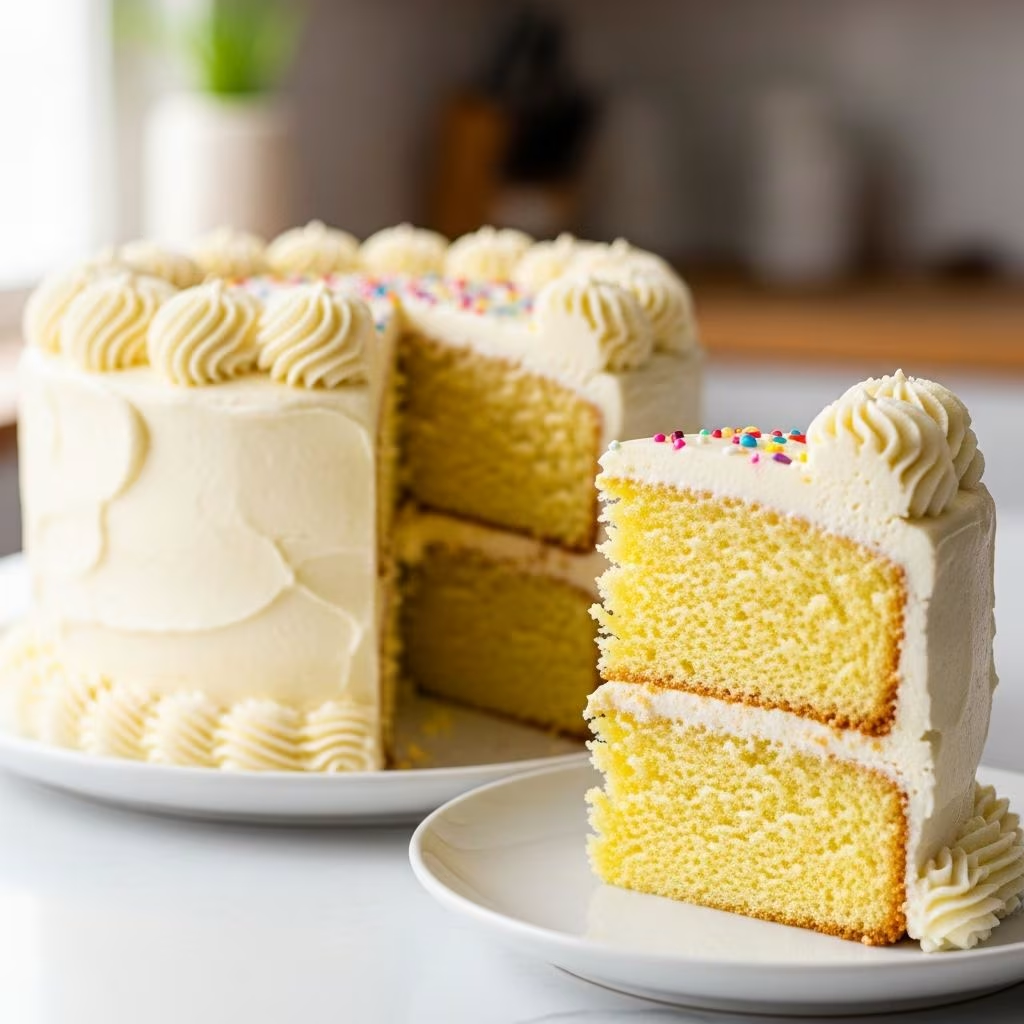
Yellow cake stands as one of the most beloved desserts in American kitchens, prized for its simplicity, versatility, and comforting flavor profile. This golden-hued cake serves as a canvas for countless frosting variations, fillings, and flavor combinations, making it an essential recipe for both novice and experienced bakers. Understanding the fundamentals of yellow cake baking—from ingredient selection to mixing techniques—ensures consistent success and delivers the moist, tender crumb that defines a truly exceptional cake.
Understanding the Foundation: Core Ingredients and Their Roles
Creating an outstanding yellow cake begins with understanding how each ingredient contributes to the final texture and flavor. The foundation of any quality yellow cake relies on a carefully balanced combination of fats, sugars, eggs, flour, and liquids, each playing a distinct purpose in the baking chemistry.
Butter serves as the primary fat source, providing richness and flavor while contributing to the cake’s tender crumb structure. Softened butter at room temperature is essential for proper creaming, which incorporates air into the batter and creates the light texture characteristic of quality yellow cake. Unsalted butter allows bakers to control the salt content precisely, preventing unwanted sodium from affecting flavor balance.
Granulated sugar not only sweetens the cake but also plays a crucial textural role. When creamed with butter, sugar crystals help incorporate air into the batter, resulting in a finer, more uniform crumb. The granules dissolve during baking, contributing moisture retention and promoting browning on the cake’s exterior.
Eggs function as both a binding agent and a leavening mechanism. The yolks contribute fat and emulsifiers that create a rich, tender crumb, while eggs collectively provide structure and moisture. Many traditional yellow cake recipes utilize primarily egg yolks, which intensifies the yellow color and creates an especially luxurious texture.
Cake flour differs significantly from all-purpose flour due to its lower protein content and finer texture. This reduced gluten development results in a more tender, delicate crumb compared to cakes made with all-purpose flour. The softer wheat used in cake flour production creates a superior eating experience.
Leavening agents like baking powder create the rise and lift necessary for proper cake structure. These chemical leaveners interact with moisture and heat, producing carbon dioxide bubbles that give the cake its characteristic light, airy structure.
Milk or similar dairy liquids hydrate the dry ingredients while adding moisture and tenderness to the finished cake. Some recipes incorporate sour cream or buttermilk, which add tang and contribute to a more complex flavor profile while affecting the cake’s moisture retention.
Essential Ingredients Breakdown
| Ingredient | Typical Amount | Function |
|---|---|---|
| Unsalted butter | 1 cup (227g) | Richness, tenderness, flavor |
| Granulated sugar | 1.5–2 cups | Sweetness, moisture, browning |
| Eggs (primarily yolks) | 3–8 yolks | Structure, richness, color |
| Vanilla extract | 1.5–2 teaspoons | Flavor enhancement |
| Cake flour | 2–2.25 cups | Structure, tenderness |
| Baking powder | 1.5–2 teaspoons | Lift and rise |
| Milk or dairy liquid | 0.75–1 cup | Hydration, tenderness |
| Salt | 0.5 teaspoon | Flavor enhancement |
Pre-Baking Preparation and Setup
Successful cake baking begins well before mixing ingredients. Proper preparation ensures that all components work together harmoniously throughout the baking process.
Temperature control represents one of the most overlooked yet critical factors in cake baking. All ingredients, particularly butter, eggs, and dairy components, should be brought to room temperature before mixing. Room-temperature ingredients blend more thoroughly, allowing better emulsification and creating a more uniform batter. Cold ingredients resist proper combination and can result in a lumpy, uneven texture.
Oven preparation requires attention to both temperature accuracy and rack positioning. Preheating the oven to the correct temperature (typically 350°F) ensures proper heat distribution and consistent baking results. Positioning the oven rack in the center of the oven allows heat to circulate evenly around the cake pans, promoting uniform browning and even baking.
Pan preparation involves greasing and optionally lining cake pans with parchment paper. This dual approach—using cooking spray or butter combined with parchment paper—prevents sticking and ensures clean cake removal. Some bakers flour their pans after greasing to create an additional non-stick barrier.
Ingredient verification includes checking baking powder freshness, as expired leavening agents significantly diminish a cake’s rise. Sifting dry ingredients together combines them evenly and aerates the flour, both of which contribute to a more delicate crumb structure.
The Mixing Method: Creating Perfect Batter Consistency
The sequence and technique used to combine ingredients directly influence the cake’s final texture and appearance. The creaming method, widely regarded as the standard approach for yellow cakes, creates the optimal balance of structure and tenderness.
Initial creaming involves beating softened butter and sugar together for several minutes. This process incorporates air into the butter, creating thousands of tiny bubbles. These air pockets serve as nucleation sites for leavening gases produced during baking, resulting in a light, fine crumb. Creaming typically continues for 4–5 minutes until the mixture becomes pale, fluffy, and noticeably increased in volume.
Egg incorporation follows the initial creaming. Eggs should be added individually or in small batches, with each addition fully incorporated before the next one is introduced. This gradual addition allows the emulsifiers in eggs to properly disperse throughout the batter, creating a stable, homogeneous mixture.
Dry ingredient addition requires careful attention to avoid overmixing. Dry ingredients should be added in alternating batches with liquid ingredients, beginning and ending with dry ingredients. This approach distributes the dry components evenly while minimizing gluten development, which would create a tough, dense cake. Mixing should continue only until ingredients are just combined—visible streaks of flour indicate complete incorporation without overdevelopment.
Gentle folding of any additional components, such as whipped egg whites in some recipes, should be done with a spatula using careful, deliberate motions rather than vigorous stirring. This preserves the air bubbles incorporated during earlier mixing stages.
Understanding Ingredient Interactions and Chemical Reactions
The chemistry of cake baking involves several key reactions that transform simple ingredients into a risen, tender finished product. Understanding these processes helps bakers troubleshoot problems and achieve consistent results.
Emulsification occurs when eggs and their lecithin content help blend fat (butter) and water-based ingredients (milk, eggs) into a stable mixture. Without proper emulsification, the batter separates, resulting in a grainy texture and uneven baking.
Starch gelatinization happens as heat penetrates the cake during baking. Flour starch absorbs moisture and swells, creating the solid structure that defines baked cake. The timing of this reaction determines whether the cake achieves the correct doneness—too little heat prevents proper structure formation, while excessive heat causes the cake to dry out.
Maillard reaction occurs as proteins and sugars interact at high temperatures, creating the golden-brown exterior characteristic of properly baked cakes. This reaction develops flavor complexity and creates the desirable visual appearance.
Baking Techniques and Temperature Management
Once batter is poured into prepared pans, baking success depends on maintaining proper temperature and avoiding common interruptions.
Avoiding oven door openings represents critical protocol during the baking process. Opening the oven door allows heat to escape suddenly, which can cause the cake’s structure to collapse before adequate crumb formation occurs. The interior of the cake remains delicate during the first two-thirds of baking, vulnerable to structural failure from temperature fluctuations. Using the oven light allows visual monitoring without opening the door.
Doneness assessment requires multiple indicators rather than relying on a single test. A toothpick inserted in the cake’s center should emerge with moist crumbs rather than wet batter or coming out completely clean—cakes that appear completely dry often result in an undesirable texture upon cooling. The cake’s top should spring back when gently touched, and the edges should pull slightly from the pan sides.
Baking duration typically ranges from 25–35 minutes depending on pan size and individual oven characteristics. Smaller pans bake faster than larger ones, while ovens vary significantly in their actual temperatures despite thermostat settings.
Cooling and Storage Guidelines
Proper cooling prevents several common cake problems including tunneling, collapse, and excessive moisture loss.
Cakes should rest in their pans for 10–15 minutes before removal. This brief cooling period allows the cake to set enough for safe removal while remaining warm enough to release easily from the pan. Extended cooling in the pan can cause the cake to stick as condensation forms.
Transfer to cooling racks allows air circulation around the entire cake surface, preventing trapped steam from creating dense, soggy areas. Complete cooling takes 1–2 hours depending on cake size and ambient temperature.
Storage in airtight containers at room temperature maintains cake freshness for 2–3 days. Refrigeration extends shelf life but can cause slight texture changes due to moisture redistribution. Properly wrapped cakes freeze successfully for up to three months.
Troubleshooting Common Yellow Cake Problems
Dense, Compact Crumb
Dense texture typically results from insufficient air incorporation during creaming, overmixing the batter, or expired leavening agents. Ensure butter and sugar are creamed for the full 4–5 minutes and that mixing continues only until ingredients combine. Verify baking powder hasn’t passed its expiration date.
Dry Cake Texture
Overbaking represents the primary cause of dry cake. Remove the cake when a toothpick emerges with moist crumbs, not when it comes out entirely clean. Some recipes incorporating sour cream or buttermilk provide additional moisture retention compared to those using only milk.
Uneven Baking or Peaked Center
Oven temperature inconsistencies or hot spots often cause uneven baking. Rotating the cake halfway through baking promotes more uniform browning. A cake that peaks excessively in the center suggests the oven temperature is too high—lower it by 25°F and increase baking time accordingly.
Cakes Sticking to Pans
Inadequate pan greasing or insufficient cooling time before removal causes sticking. Ensure both the pan bottom and sides are thoroughly greased or sprayed. Wait the full 10–15 minutes in-pan cooling before attempting removal.
Frosting and Serving Suggestions
Classic yellow cake pairs beautifully with numerous frosting options, from simple buttercream to chocolate ganache, cream cheese frosting, or stabilized whipped cream. The cake’s mild vanilla flavor serves as an excellent backdrop for bolder frosting flavors or fruit fillings.
Serving at room temperature allows the cake’s flavor to fully develop. Cakes served directly from refrigeration taste muted and texturally dense compared to those warmed slightly before serving.
Frequently Asked Questions About Yellow Cake Baking
Can I substitute all-purpose flour for cake flour?
Yes, though with slight texture modifications. All-purpose flour produces a slightly denser cake due to higher protein content. To approximate cake flour, replace one tablespoon per cup of all-purpose flour with cornstarch, sift the combination, then measure as needed.
What’s the best way to bring eggs to room temperature quickly?
Place room-temperature eggs in a bowl of warm (not hot) water for approximately 15 minutes. This gentle warming brings eggs to the ideal temperature for proper mixing without cooking them.
Should I sift flour before or after measuring?
Sift flour after measuring for more consistent results. Flour settles in storage, making pre-measured flour more reliable. After measuring, sift with dry ingredients to aerate the mixture.
How do I know if my baking powder is still active?
Mix a small amount of baking powder with warm water. If it bubbles vigorously, it remains active. Expired baking powder reacts slowly or not at all, indicated by minimal bubbling.
Can yellow cake batter be made ahead?
No—batter begins losing effectiveness immediately after mixing as leavening gases dissipate. Always bake immediately after preparation for optimal rise and texture.
References
- Moist Yellow Cake Recipe (Old Fashioned) — Divas Can Cook. https://divascancook.com/moist-yellow-cake-recipe-old-fashioned/
- Best Homemade Yellow Cake Recipe Ever – Mel’s Kitchen Cafe — Mel’s Kitchen Cafe. https://www.melskitchencafe.com/perfected-yellow-cake/
- David’s Yellow Cake — Just Today. https://dalejusttoday.wordpress.com/2021/02/13/davids-yellow-cake/
- David’s Yellow Cake — aBatteredOldSuitcase. https://abatteredoldsuitcase.com/2013/02/17/davids-yellow-cake/