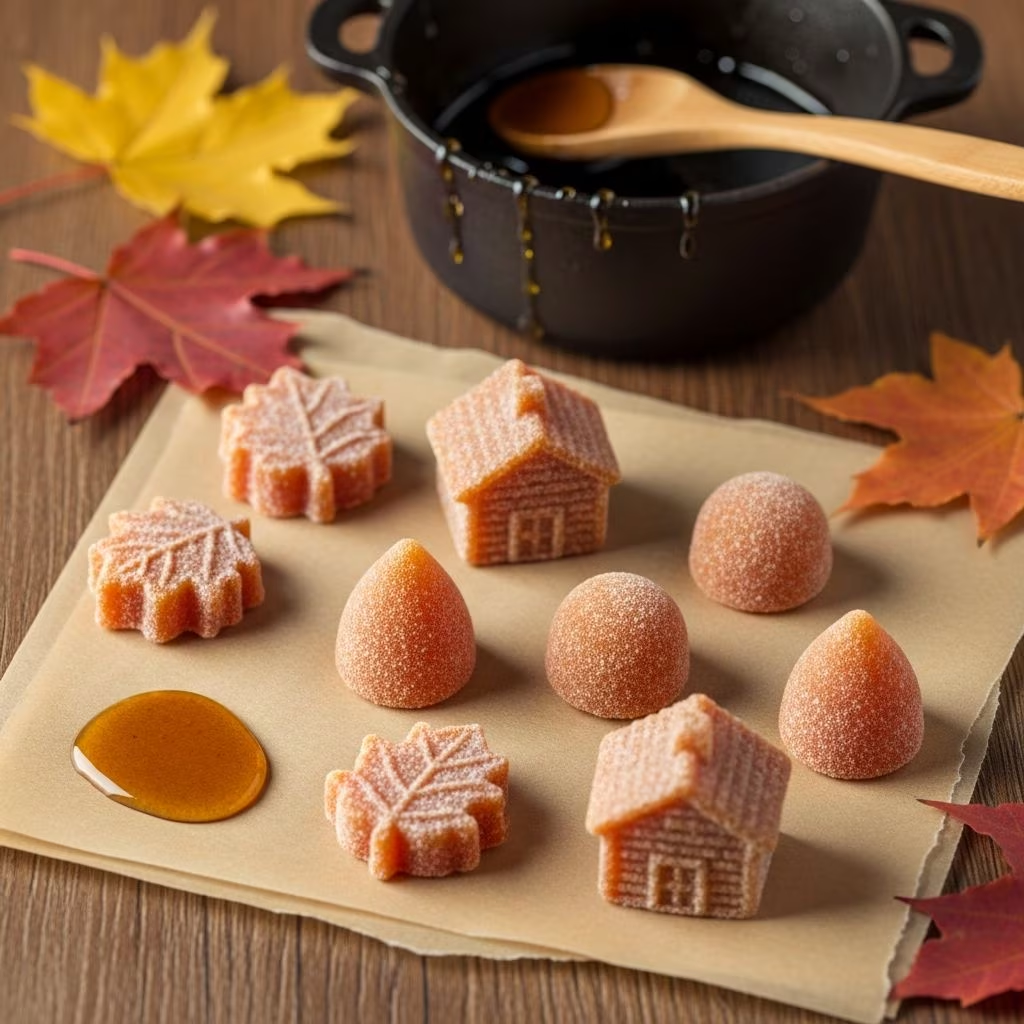
Maple candy represents one of the most straightforward yet rewarding confectionery projects you can undertake in your kitchen. With minimal ingredients and straightforward methodology, this traditional treat delivers exceptional results. The beauty of maple candy lies in its simplicity—requiring only pure maple syrup to achieve a smooth, creamy texture that melts on the tongue. This guide walks you through the complete process of transforming liquid maple syrup into delectable solid candies that rival those found at farmers’ markets and specialty shops.
Understanding the Essential Ingredient
The foundation of exceptional maple candy begins with selecting the correct ingredient. Pure maple syrup stands as the sole component necessary for creating these delicious confections. It is crucial to distinguish between pure maple syrup and the processed varieties commonly found on grocery store shelves marked for pancake use. Imitation maple syrups contain additives and thickening agents that prevent proper candy formation, making them unsuitable for this application.
When shopping for maple syrup, seek out Grade A Light Amber or Medium Amber varieties, as these grades work optimally for candy production. The quality of your starting ingredient directly impacts the final product’s flavor intensity and texture. A standard quart of pure maple syrup yields approximately two pounds of finished candy, allowing you to plan batches according to your needs.
Gathering Your Equipment and Supplies
Successful maple candy creation depends on having the right tools assembled before you begin the cooking process. The following equipment enables precise temperature control and efficient candy formation:
- Large, heavy-bottomed saucepan or pot: The substantial material prevents scorching while accommodating the syrup’s expansion as it heats
- Candy thermometer: Essential for monitoring the exact temperature during the boiling phase, ensuring you reach the soft-ball stage at approximately 235-244°F
- Wooden spoon: Required for the rapid stirring phase that transforms the cooked syrup into creamy candy
- Silicone or flexible candy molds: These molds facilitate easy removal of finished candies compared to rigid containers
- Alternative surfaces: Parchment paper, baking sheets, or muffin liners serve as viable options if traditional molds are unavailable
- Butter or oil: A light coating prevents sticking and aids removal from containers
- Flat spatula or knife: Useful for smoothing the candy surface and scraping excess material from molds
The Science of Temperature Control
Temperature management represents the critical factor differentiating successful maple candy from failed batches. The transformation from liquid to solid occurs through a controlled heating and cooling process that creates the desired crystalline structure. When maple syrup reaches the soft-ball stage—approximately 235-244°F depending on your elevation—the sugar concentration reaches the precise level necessary for candy formation.
Your elevation influences the exact boiling point of water and therefore the target temperature. At higher elevations, water boils at lower temperatures, requiring adjustment of your target temperature. You can determine your specific elevation-adjusted temperature by entering your zip code into elevation charts referenced in candy-making resources.
Before beginning your candy-making session, calibrate your candy thermometer by submerging it in boiling water. The reading should display approximately 212°F at sea level. This verification ensures accuracy throughout the cooking process, preventing undercooking or overcooking of the syrup.
Step-by-Step Candy Creation Process
Initial Heating Phase: Pour two cups of pure maple syrup into your large, heavy-bottomed saucepan. Place the saucepan over medium to medium-high heat. The syrup will gradually come to a boil; this initial phase may require approximately thirty minutes. Stir the syrup occasionally during heating to promote even temperature distribution throughout the liquid.
Temperature Monitoring: Once boiling begins, attach your calibrated candy thermometer to the side of the pan, ensuring the bulb remains submerged in the syrup without touching the pan’s bottom. Continue heating and occasional stirring until the thermometer reads 235°F (110°C). At this precise temperature, the syrup contains sufficient concentrated sugars to form proper candy consistency upon cooling and stirring.
Cooling Without Disturbance: Remove the saucepan from heat immediately upon reaching the target temperature. Place it on a stable surface away from drafts or vibrations. Allow the syrup to cool undisturbed for approximately ten minutes until the temperature drops to 175°F (80°C). Resisting the urge to stir during this phase proves essential, as premature agitation can cause unwanted crystallization patterns.
Rapid Transformation Through Stirring: Once the syrup reaches 175°F, begin vigorous stirring with your wooden spoon. Stir rapidly and continuously for three to five minutes, observing the dramatic transformation taking place. The mixture will gradually lose its glossy appearance, thicken considerably, lighten in color from dark amber to a creamier shade, and transition from transparent to opaque. This stirring phase triggers the formation of fine sugar crystals that create the characteristic creamy texture.
Speed Matters in Pouring: As soon as the mixture achieves the desired thick, creamy, opaque consistency, immediately pour it into your prepared molds or onto parchment-lined surfaces. Work with urgency during this stage, as the candy continues cooling and may become too stiff to pour smoothly. Use a spatula or knife blade to smooth the surface, creating an even thickness of approximately one-quarter to one-half inch.
Final Cooling and Removal: Allow the poured candy to cool completely at room temperature, typically requiring ten minutes to several hours depending on the thickness and ambient temperature. Once fully hardened, remove the candy from molds by flexing the silicone carefully or by breaking sheet candy into individual pieces. Store finished candies in an airtight container for up to one month.
Troubleshooting Common Challenges
| Issue | Likely Cause | Solution |
|---|---|---|
| Candy remains too soft and sticky | Syrup did not reach sufficient temperature | Reheat to 240-244°F for firmer consistency |
| Mixture hardens before pouring into molds | Excessive cooling time or excessive stirring | Work more quickly; reheat gently if needed |
| Grainy or crystalline texture instead of creamy | Stirring during cooling phase or using imitation syrup | Verify pure maple syrup use; avoid pre-cooling disturbance |
| Candy sticks to molds | Insufficient greasing or removal before complete hardening | Oil molds thoroughly; wait full cooling time |
Variations and Flavor Enhancement
While pure maple candy in its simplest form delivers exceptional flavor, several optional additions can create interesting variations. Some recipes incorporate a small amount of butter—approximately one-half tablespoon per cup of syrup—which reduces foaming and creates an even creamier final product. The butter adds richness without significantly altering the fundamental maple flavor profile.
For those seeking alternatives to butter, vegetable oil, milk, or cream can serve similar functional purposes in reducing surface foam during the boiling phase. These substitutions maintain the fundamental character of the candy while providing subtle textural improvements.
Regional Significance and Cultural Heritage
Maple candy holds particular cultural importance in Canada and the northeastern United States, especially within regions where maple syrup production remains a significant agricultural activity. The candy represents a traditional method of preserving and enjoying maple syrup’s concentrated sweetness, with roots extending back through generations of maple-producing families. Making maple candy at home connects contemporary candy makers with this heritage while creating treats that embody authentic maple flavor without artificial additives or excessive processing.
Storage and Shelf Life Considerations
Properly stored maple candy maintains quality for extended periods. Place finished candies in an airtight container, protecting them from humidity and air exposure that could cause stickiness or texture degradation. Under optimal storage conditions, maple candy remains fresh and enjoyable for up to one month. For longer-term storage, consider freezing candies in sealed, airtight containers, where they may keep for several months without significant quality loss.
Frequently Asked Questions
- Can I use pancake syrup instead of pure maple syrup?
- No. Pancake syrup contains additives and thickening agents that prevent proper candy formation. Always use pure maple syrup for successful results.
- What should I do if my candy turns out grainy?
- Graininess typically results from stirring during the cooling phase or using lower-quality syrup. Ensure you avoid stirring while the syrup cools, and always select pure maple syrup.
- How do I know when my thermometer is accurate?
- Calibrate by submerging your thermometer in boiling water; it should read approximately 212°F at sea level. Adjust for your elevation as needed.
- Can I make smaller batches?
- Yes. The proportions scale down proportionally. Simply use less maple syrup, adjusting cooking time accordingly while maintaining the same target temperatures.
- What if I don’t have candy molds?
- Parchment paper, baking sheets, muffin liners, or even small plates work effectively as alternatives. The candy will simply require cutting into pieces rather than unmolding.
- How long does the entire process take?
- From start to finish, expect approximately thirty to forty minutes for cooking, plus additional time for cooling. The most time-consuming phase involves the initial heating to reach the proper temperature.
Making Maple Candy a Regular Practice
Creating homemade maple candy offers an accessible entry point into candy making for beginners while satisfying experienced confectioners seeking traditional techniques. The simplicity of ingredients belies the satisfaction of witnessing the transformation from liquid to creamy solid candy. Each batch presents an opportunity to refine your technique, experiment with minor variations, and produce treats that surpass most commercial alternatives in both flavor and texture quality.
Whether you’re seeking a fall activity, a gift-giving opportunity, or simply a delicious treat, maple candy production delivers results worthy of the minimal effort invested. Stock your pantry with pure maple syrup, gather your equipment, and transform this traditional recipe into a regular part of your culinary routine.
References
- Maple Candy — Recipe Girl®. Accessed April 2026. https://www.recipegirl.com/maple-candy/
- DIY Maple Sugar Candy — Little House on the Prairie. Accessed April 2026. https://littlehouseontheprairie.com/diy-maple-sugar-candy/
- Maple Syrup Candy Recipe — Whipped Food. Accessed April 2026. https://whippedfood.com/maple-syrup-candy/
- Maple Candy | How to Make Maple Candy — Binky’s Culinary Carnival. Accessed April 2026. https://www.binkysculinarycarnival.com/maple-candy-how-to-make-maple-candy/
- Maple Sugar Candy — MRSEC: The Center for Nanoscale Science, Penn State University. Accessed April 2026. https://www.mrsec.psu.edu/education-outreach/public/nano-activities-kids/liquid-metal/maple-sugar-candy
- Making candy and cream — Massachusetts Maple Producers Association. Accessed April 2026. https://massmaple.org/about-maple-syrup/make-maple-syrup/making-candy-and-cream/