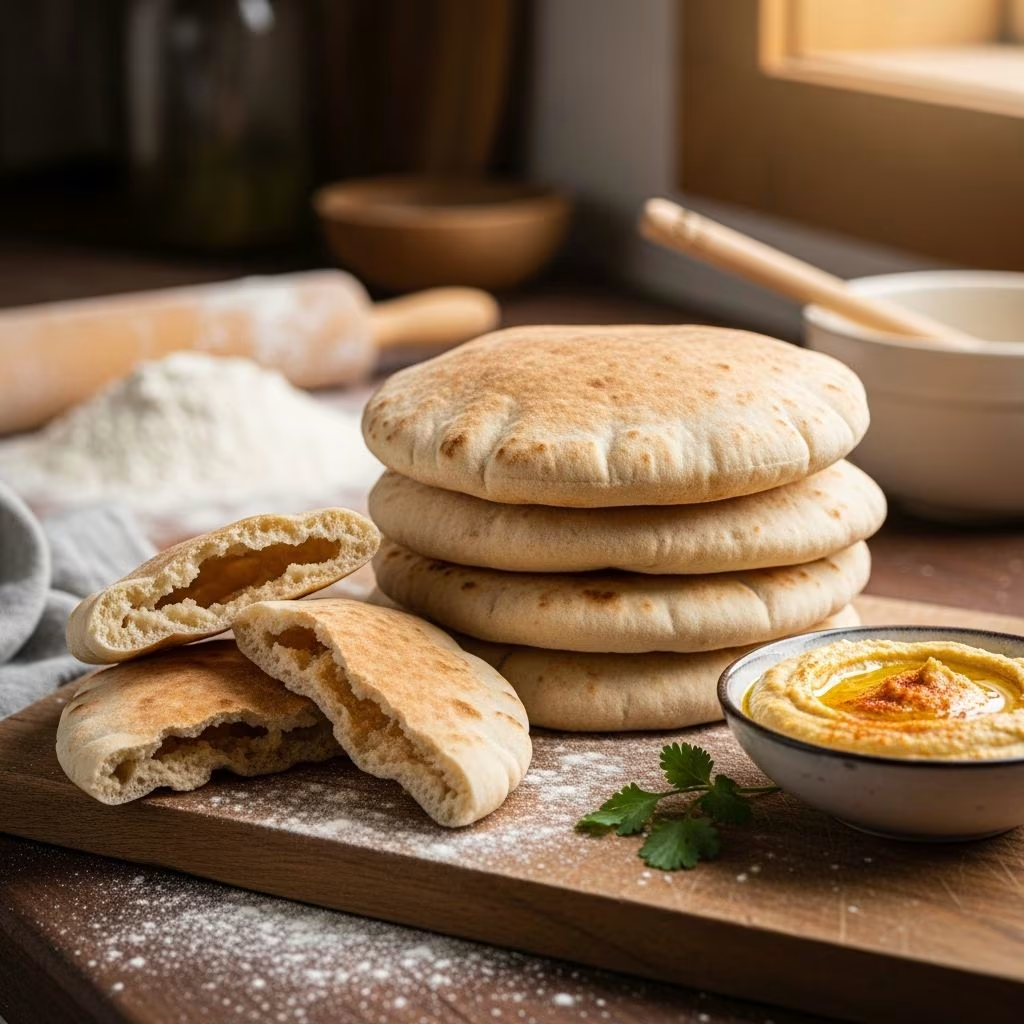
Creating pita bread in your own kitchen transforms basic pantry staples into warm, pocketed flatbreads ready for dips, sandwiches, or standalone enjoyment. This guide breaks down the entire process, from selecting ingredients to achieving that signature puff, using reliable techniques drawn from proven recipes.
Essential Ingredients for Success
The foundation of great pita lies in quality components measured precisely. Most recipes call for all-purpose flour, providing the structure needed for the characteristic pocket. A digital scale ensures accuracy, as volume measurements can vary.
- Flour: 2.5 to 3 cups all-purpose, sometimes blended with a quarter cup whole wheat for subtle nutty flavor.
- Yeast: Instant or active dry (about 2.25 teaspoons), activated with warm water between 100-110°F to avoid killing it.
- Liquid: 1 cup lukewarm water, plus optional yogurt or olive oil for tenderness.
- Salt: 1.5 teaspoons fine sea salt to enhance flavor without inhibiting yeast.
- Sweetener: A pinch of sugar (half teaspoon) to feed the yeast and promote browning.
- Fat: 2 tablespoons olive oil for richness and pliability.
These elements create a hydrated dough around 65-70% water content, key for steam generation during baking that forms the pocket.
Activating Yeast: The First Critical Step
Yeast activation sets the stage for rise. For active dry yeast, combine it with warm water and sugar in a bowl. Whisk in an initial cup of flour to form a sponge, then let it sit 15 minutes until frothy and bubbling. This confirms viability; inactive yeast means starting over.
Instant yeast skips blooming—mix directly with dry ingredients for no-knead ease. Alexandra’s method whisks flour, salt, and instant yeast, then adds water and oil for a shaggy mix that proofs in 1.5 hours.
| Yeast Type | Activation Method | Proof Time |
|---|---|---|
| Active Dry | Bloom in warm water + sugar + flour | 15 minutes |
| Instant | Mix directly with flour | 1-1.5 hours full rise |
Use filtered water to prevent chlorine from harming yeast. Ideal temperature fosters activity without scorching.
Building and Kneading the Dough
Once activated, incorporate remaining flour, salt, oil, and any extras like yogurt. Stir to a shaggy mass, then knead 5-10 minutes until smooth and elastic. Hand-kneading builds gluten for structure; a stand mixer with dough hook works too.
The dough should be soft, tacky—not sticky. Add flour sparingly to prevent toughness. Natasha’s Kitchen advises kneading until it passes the windowpane test: stretch a piece thin enough to see light through without tearing.
- Mix dry ingredients (flour, salt, yeast if instant).
- Add liquids and fat; stir to combine.
- Knead in bowl or on surface for 5 minutes.
- Oil bowl lightly, cover, and let rise in warm spot until doubled (1 hour).
A first rise develops flavor and air pockets essential for puffing.
Dividing, Resting, and Shaping
Punch down risen dough and divide into 7-8 equal portions (use scale for uniformity). Roll each into tight balls, tucking edges under. Cover and rest 10-30 minutes to relax gluten, easing rolling.
Roll balls on floured surface to 1/4-inch thick circles, 6-7 inches diameter. Uniform thickness ensures even cooking; too thin and it crisps without pocketing.
Rest rolled pitas 10 minutes more. This final relaxation prevents spring-back and promotes steam pockets.
Cooking Methods: Oven, Stovetop, or Skillet
High heat mimics traditional clay ovens, creating steam for the pocket.
Oven Baking for Perfect Puffs
Preheat oven to 500°F with baking stone or inverted sheet inside for 45-60 minutes. Bake pitas directly on stone 2-3 minutes until golden and puffed. Cool on rack to set pocket.
- Position rack high for intense bottom heat.
- Bake one tray at a time to maintain temperature.
- Expect full puff in 1-2 minutes; overbaking toughens.
Stovetop Skillet Technique
Heat cast iron skillet medium-high; test with water beads sizzling. Wipe minimal oil, add pita, cook 30 seconds until bubbles form. Flip, cook 1-2 minutes per side, pressing gently with towel for puff. Cover to trap steam.
Lower heat prevents charring; lid creates fluffy interior. Greek Dish emphasizes medium heat and lid for caramelized crust.
Troubleshooting Common Issues
Pita not puffing? Check yeast freshness, dough hydration, high heat, and thin rolling. Dense bread signals under-kneading or cool proofing.
| Problem | Cause | Solution |
|---|---|---|
| No pocket | Low heat, thick dough | 500°F oven, 1/4-inch roll |
| Tough texture | Too much flour | Measure by weight, sticky dough OK |
| Yeast inactive | Hot water, old yeast | 100-110°F, fresh packet |
| Uneven shape | No rest | 15-30 min ball rest |
Store in towel-lined basket; freeze extras up to 1 month.
Recipe Variations and Serving Ideas
Customize with whole wheat (up to 25%), herbs, or seeds. Vegan versions omit yogurt.
- Za’atar Pita: Sprinkle seeds and oil pre-bake.
- Sweet Pita: Add honey, serve with fruit.
- Gluten-Free: Adapt with specialty flour (test yeast).
Fill with hummus, falafel, gyro meat, or grilled veggies. Toast pockets for chips.
Advanced Tips from Seasoned Bakers
Steam injection via hot oven or covered skillet maximizes pocket. Weigh ingredients for consistency. Experiment with pizza oven at 700°F for char.
Maintain dough warmth (75-80°F) using proofing box or oven light. Patience in rests yields superior results.
Frequently Asked Questions
Why doesn’t my pita bread have a pocket?
Pockets form from steam trapped in high-heat environments. Ensure thin rolling, fresh yeast, and 475-500°F temps.
Can I make pita without an oven?
Yes, stovetop cast iron excels. Medium-high heat, flip twice, cover for steam.
How long does homemade pita last?
2-3 days at room temp in airtight container; freeze 1 month. Reheat to refresh.
Is bread flour better than all-purpose?
All-purpose suffices for soft pita; bread flour makes chewier texture if preferred.
Can I use a stand mixer?
Absolutely—paddle then dough hook 7-10 minutes.
Nutrition and Storage Guide
One pita (1/8 recipe): ~150 calories, 3g protein, 25g carbs, 2g fat. High in fiber if whole wheat added.
Seal in bags; thaw overnight. Revive by sprinkling water and heating.
References
- How to Make Fresh Homemade Pita Bread — Alexandra’s Kitchen. 2020-06-25. https://alexandracooks.com/2020/06/25/easy-homemade-pita-bread-recipe/
- Easy Homemade Pita Bread — Sweet Simple Vegan. N/A. https://sweetsimplevegan.com/homemade-pita-bread/
- Easy Homemade Pita Bread Recipe — The Mediterranean Dish. N/A. https://www.themediterraneandish.com/homemade-pita-bread-recipe/
- Homemade Pita Bread Recipe — Love and Lemons. N/A. https://www.loveandlemons.com/pita-bread-recipe/
- Homemade Pita Bread Recipe (with Video) — Natasha’s Kitchen. N/A. https://natashaskitchen.com/pita-bread-recipe/
- The Easiest Homemade Pita Bread — My Greek Dish. N/A. https://www.mygreekdish.com/recipe/the-easiest-homemade-pita-bread/