Creating pasta from scratch represents one of the most rewarding culinary endeavors, transforming just a handful of basic pantry staples into silky, tender sheets that taste infinitely superior to dried pasta from a box. The beauty of homemade pasta dough lies in its simplicity and the control it grants you over texture, thickness, and flavor. Whether you aspire to prepare fettuccine, pappardelle, ravioli, or any other fresh pasta variety, mastering the fundamentals of dough preparation serves as your foundation for success. This comprehensive guide walks you through every stage of the process, from ingredient selection through final shaping, ensuring that your homemade pasta consistently impresses.
Essential Ingredients for Pasta Dough
The ingredient list for traditional pasta dough remains remarkably short, yet each component plays a vital role in determining the final product’s character and performance. Understanding the purpose and properties of each ingredient empowers you to make thoughtful substitutions when necessary and troubleshoot issues as they arise.
Flour Selection and Its Impact
Flour represents the primary structural component of your pasta dough, yet the specific type you select profoundly influences texture and workability. Type 00 flour, also known as doppio zero flour, possesses an exceptionally fine, powdery consistency that many consider ideal for pasta production due to its refined texture and ability to produce silky noodles. This finely milled flour almost resembles baby powder in texture and represents the traditional choice in Italian pasta-making.
However, all-purpose flour proves entirely suitable for homemade pasta creation and offers distinct advantages in accessibility and affordability. Many home cooks discover that all-purpose flour yields chewy, bouncy noodles with satisfying texture that rivals results achieved with specialty flours. The distinction in final product quality often proves minimal enough that the convenience factor tips the scales toward all-purpose flour for everyday cooking.
Semolina flour, made from durum wheat, contributes elasticity and a rustic quality to pasta dough when combined with other flour varieties. Some recipes incorporate a blend of 00 flour and semolina to achieve balanced characteristics that combine the silky quality of 00 flour with the structural integrity provided by semolina.
Eggs as the Binding Agent
Eggs serve multiple critical functions within pasta dough: they bind the flour particles into a cohesive mass, provide moisture for proper hydration, and contribute richness and color to the finished pasta. The yolk content particularly influences the dough’s richness and final appearance, with egg yolks delivering a golden hue and luxurious texture. Some recipes employ whole eggs exclusively, while others leverage additional egg yolks for enhanced richness and a deeper golden tone.
Temperature matters when working with eggs; room-temperature eggs integrate more smoothly into the dough and reduce the shock to gluten development. The number of eggs required varies based on flour amount and desired consistency, but a general rule suggests approximately one large egg per cup of flour as a starting reference point, with adjustments made based on how the dough feels during mixing.
Olive Oil and Seasonings
Extra-virgin olive oil contributes subtle fruity notes and assists in creating a tender crumb structure within the dough. This ingredient remains optional in some traditional recipes but increasingly appears in modern preparations, where it helps create a more pliable dough that ages well and rolls smoothly. Typically, two to three tablespoons per pound of dough provides sufficient fat without overwhelming the recipe.
Salt enhances flavor development throughout the dough and strengthens gluten networks, making it an important though sometimes overlooked component. Kosher salt works particularly well due to its larger crystals and more predictable salting power compared to table salt. The addition of milk in some recipes contributes slight richness and additional moisture, though this remains entirely optional.
Mixing Methods: Finding Your Approach
Successful pasta dough creation accommodates multiple mixing techniques, each offering distinct advantages depending on your equipment availability and personal preferences. Understanding these various approaches ensures you can adapt to your specific situation and resources.
The Traditional Hand Method
The classic approach to pasta dough mixing involves creating a mound of flour on a clean work surface and fashioning a well in the center. This traditional technique connects you directly to Italian pasta-making heritage and requires no special equipment beyond your hands, a fork, and a work surface. Begin by cracking eggs into the well along with your chosen liquid ingredients, then use a fork to beat the eggs gently as though preparing scrambled eggs.
As you work the fork through the liquid mixture, gradually incorporate flour from the inner walls of your flour mound. This slow integration prevents the eggs from escaping the flour walls and running across your counter. The process continues until the mixture reaches a shaggy, somewhat unwieldy consistency that eventually comes together with hand manipulation. Despite appearing chaotic and messy during this stage, the dough will consolidate into a workable mass through persistence and continued folding and mixing motions.
Food Processor Efficiency
Modern cooks appreciate the food processor method for its speed, cleanliness, and consistency. Simply combine flour and salt in the processor bowl, add eggs and any liquid ingredients, then pulse until the mixture achieves a fine breadcrumb texture. This method eliminates the messy stage of traditional mixing and produces remarkably even distribution of ingredients in minimal time. After pulsing reaches the breadcrumb stage, remove the processor blade and use your hands to squeeze the mixture into a rough ball, then transfer to your work surface for traditional kneading.
This approach particularly appeals to cooks who find the traditional method frustrating or who value speed and convenience. The food processor’s mechanical action distributes ingredients evenly while preventing over-mixing, which can toughen the dough through excessive gluten development.
Stand Mixer Approach
Equipped with a paddle attachment, a stand mixer provides another efficient mixing solution that falls somewhere between the hand method and food processor in terms of control and involvement. Combine wet ingredients first, allowing them to blend into a homogeneous mixture, then add flour and salt while the mixer operates on low speed. This method produces consistent results and reduces physical effort, though some bakers feel less connected to the dough during the mixing process.
The Critical Kneading Stage
Kneading represents perhaps the most crucial stage in pasta dough development, yet many home cooks underestimate its importance or rush through this essential process. Proper kneading develops gluten networks that provide structure, elasticity, and the desired bite to finished pasta.
Initial Kneading and Development
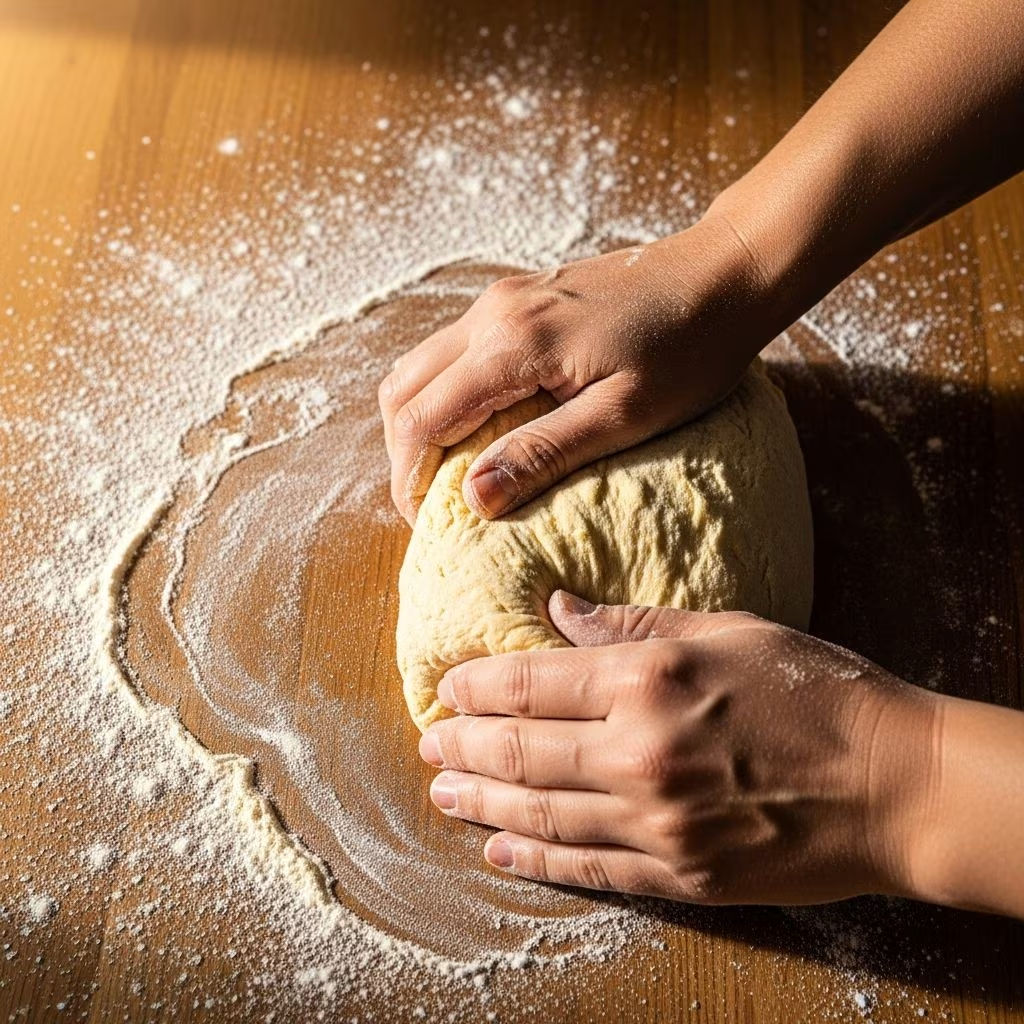
Once your dough roughly comes together, transfer it to a clean work surface and begin kneading with determination and patience. The dough will initially feel discouragingly dry and unlikely to cohere, presenting a somewhat sandy texture that seems impossibly fragmented. This stage tests resolve, but continued kneading transforms this unpromising mass into silky dough through gluten development and hydration distribution.
Push the dough away from you with the heel of your hand, fold it back over itself, rotate it a quarter turn, and repeat. This rhythmic motion continues for eight to ten minutes, after which the dough should transition into a smooth, elastic ball. The transformation proves remarkable; dough that seemed destined for failure suddenly becomes pliable and cohesive. If the dough feels excessively dry during this process, dampening your hands slightly allows moisture transfer without adding excessive liquid that would make the dough sticky.
The Rest and Reknead Technique
After the initial kneading phase produces a cohesive ball, wrap the dough loosely in plastic wrap or cover it with an inverted bowl and allow it to rest for approximately ten minutes. This brief rest allows the gluten to relax and the flour to fully hydrate, making the dough easier to work. After this rest period, knead again for three to four minutes, which further develops gluten and produces a noticeably smoother surface texture. This two-stage kneading approach proves more effective than extended single-session kneading, as the rest period facilitates better gluten development than continuous mechanical action.
The Resting Period: Patience Pays Dividends
Following successful kneading, wrap your dough tightly in plastic wrap or place it in a bowl covered with plastic wrap, then allow it to rest at room temperature for a minimum of thirty minutes, though one hour proves preferable. This extended rest accomplishes multiple objectives: it allows complete gluten relaxation, promotes continued flour hydration, and develops subtle flavor complexity through enzymatic action.
The resting period represents non-negotiable pasta dough preparation. Attempting to roll or shape dough that hasn’t rested adequately results in excessive springback and tears as the gluten resists extension. Conversely, properly rested dough rolls smoothly and accepts the shape you impose upon it, producing thin, even sheets without resistance or cracking.
Shaping and Working with Your Dough
Once resting completes, your dough enters the shaping stage, which varies considerably depending on your desired final product and available equipment.
Portion Division for Easier Handling
Divide the rested dough into four equal portions, as working with the entire mass simultaneously proves unwieldy. This subdivision allows manageable working sessions while keeping unused dough covered to prevent surface drying. Beginning with a single portion, flatten it gently into an oval disk shape using your hands or a rolling pin.
Pasta Machine Processing
If you possess a pasta maker or KitchenAid attachment with roller capability, run your flattened dough through the widest setting (typically level one) three times, folding it in thirds after each pass like an envelope. This repeated feeding and folding further develops gluten while progressively thinning the dough. After completing three passes on the widest setting, progress to progressively narrower settings, typically running the dough through level two three times, level three three times, then level four, five, and six once each, adjusting your roller setting based on your specific machine’s capabilities.
Throughout this process, maintain light flour dusting to prevent sticking while avoiding excessive flour incorporation that would toughen the final product. The dough should emerge from this progression as a thin, delicate sheet of even thickness suitable for cutting into noodles or wrapping around fillings.
Manual Rolling Method
Without mechanical assistance, rolling implements like a French rolling pin or standard rolling pin prove invaluable for gradually extending the dough to your desired thickness. This method requires more physical effort and patience but produces equally satisfactory results. Work methodically from the center outward, maintaining even pressure and rotating the dough occasionally to prevent uneven thinning. The manual approach connects you intimately to the dough and allows intuitive adjustment based on how the dough feels and responds.
Storage and Final Preparation
Once rolled to your desired thickness, properly prepare your pasta sheets for storage or immediate use. Lay half of each finished sheet onto a lightly floured baking sheet, sprinkle additional flour on the exposed surface, then fold the remaining half on top and sprinkle flour again. This careful layering prevents sheets from sticking together while allowing adequate air circulation for drying.
Fresh pasta sheets can be used immediately, refrigerated for several days covered with plastic wrap, or frozen for extended storage. For cutting into noodles, allow fresh sheets to dry slightly before cutting, which facilitates cleaner separation of individual strands.
Common Questions About Pasta Dough
Frequently Asked Questions
What’s the best flour for beginning pasta makers?
All-purpose flour offers the most accessible starting point for home pasta makers, delivering excellent results without requiring specialty ingredient sourcing. As your skills develop and you gain confidence, experimenting with 00 flour or semolina flour allows you to explore subtle texture and flavor variations.
Why does my dough feel sticky?
Sticky dough typically results from excessive moisture or insufficient flour relative to egg content. Combat this by adding flour one tablespoon at a time while kneading, or by recognizing that environmental humidity affects dough consistency. Climate variations mean some occasions require additional flour while other times your original proportions work perfectly.
Can I make pasta dough without a pasta machine?
Absolutely—traditional Italian pasta predates mechanical pasta makers by centuries. A rolling pin and elbow grease produce equally excellent results, requiring only additional time and physical effort. This method connects you to authentic pasta-making traditions while delivering superior results to any mechanical shortcut.
How do I know when my dough has rested sufficiently?
A thirty-minute minimum rest allows adequate gluten relaxation and flour hydration, though waiting a full hour produces noticeably superior results. Your dough is ready when it feels soft, pliable, and doesn’t spring back aggressively when poked.
Should I add salt to my pasta dough?
Salt strengthens gluten networks and enhances flavor development, making it a valuable addition despite some traditional recipes omitting it entirely. Including kosher salt improves the final product’s character and texture without negatively impacting results.
Troubleshooting Your Pasta Dough
Even experienced pasta makers occasionally encounter challenges. Understanding common problems and their solutions empowers you to adapt and recover when issues arise.
Dough won’t come together: This typically indicates insufficient moisture. Add water one teaspoon at a time while kneading, or slightly dampen your hands to introduce moisture gradually. Ensure adequate kneading time—the transformation sometimes requires longer than anticipated.
Dough feels overly soft or sticky: Add flour one tablespoon at a time while kneading. Remember that humidity influences dough consistency, so the amount required varies by location and season.
Dough tears during rolling: This suggests insufficient resting time or gluten development. Allow extended rest periods before attempting to roll, and ensure adequate kneading has occurred.
Finished pasta seems tough: Over-kneading or excessive flour incorporation toughens pasta. Measure ingredients carefully and avoid adding unnecessary flour beyond what’s required for manageable consistency.
Flavor Enhancement Strategies
While traditional pasta dough relies on simple ingredients for its elegant flavor, creative variations allow personal expression and culinary exploration. Incorporating finely minced herbs, vegetable purees, or specialty flours creates visually striking and flavorful variations that elevate simple dishes.
Spinach additions produce vibrant green pasta with subtle vegetable undertones, while beet puree creates striking pink or red hues. Herb-infused doughs featuring basil, parsley, or oregano introduce aromatics that complement specific sauce pairings. These variations maintain the fundamental technique while expanding your creative possibilities and impressing dinner guests with thoughtfully flavored pasta.
Conclusion: From Flour to Table
Homemade pasta dough transforms humble ingredients into restaurant-quality results through understanding fundamental techniques and patient execution. The process requires no special equipment beyond basic kitchen tools, making fresh pasta accessible to any home cook willing to invest minimal time and effort. Whether you choose traditional hand mixing, efficient food processor preparation, or mechanical stand mixer assistance, the end result proves infinitely superior to dried pasta from commercial sources. Your homemade pasta delivers superior texture, subtle flavor complexity, and the satisfaction of creating something genuinely special from scratch. Begin today, embrace the process despite its messy intermediate stages, and discover why countless cooks throughout history have considered fresh pasta dough preparation a culinary cornerstone worthy of repeated practice and refinement.
References
- Easy Homemade Pasta Dough — The Burnt Butter Table. Accessed 2026. https://www.theburntbuttertable.com/easy-homemade-pasta-dough/
- Homemade Pasta Dough — Kendall Andronico. Accessed 2026. https://www.kendallandronico.com/all-recipes/homemade-pasta-dough
- Homemade Pasta — Love and Lemons. Accessed 2026. https://www.loveandlemons.com/homemade-pasta-recipe/
- Easy Homemade Pasta Dough — Salt & Wind Travel. Accessed 2026. https://saltandwind.com/italian-pasta-dough-recipe/