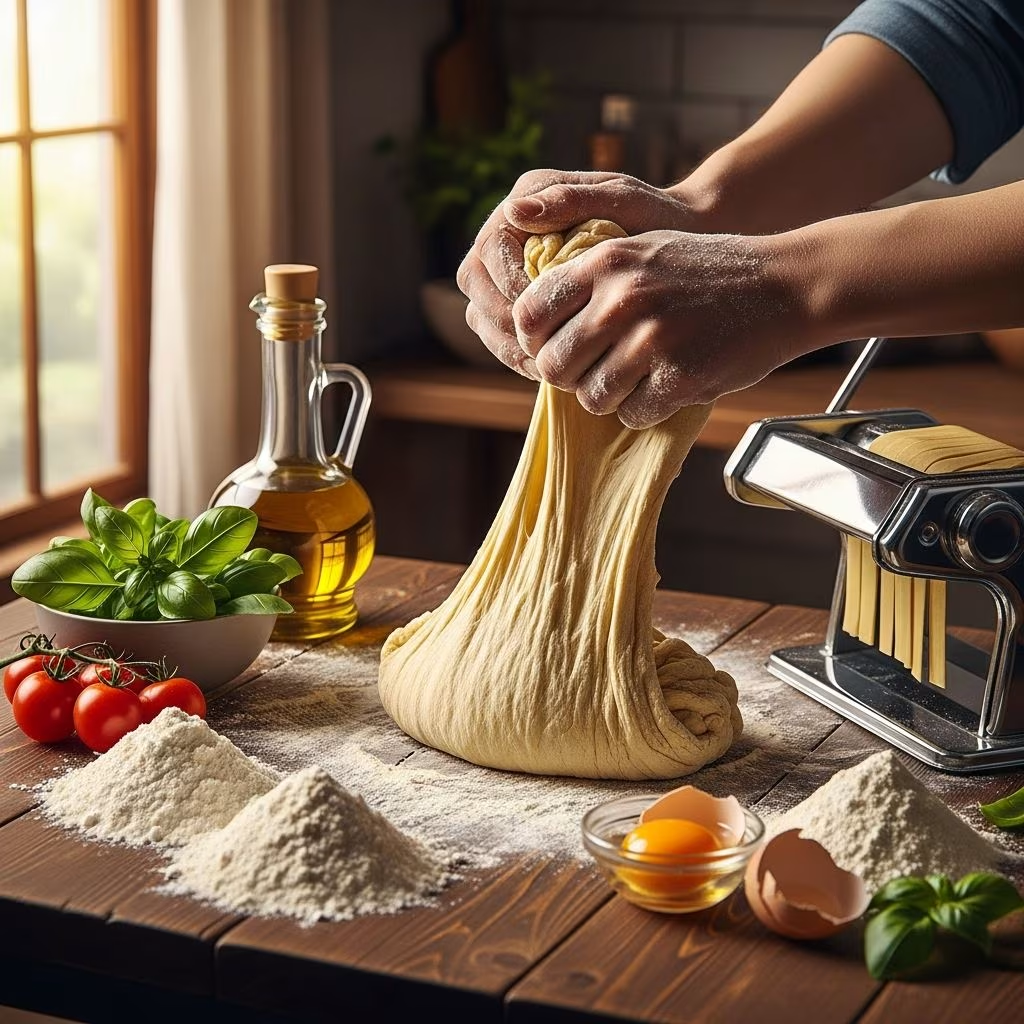
Creating pasta from scratch is one of the most rewarding culinary experiences, transforming just a handful of pantry staples into silky, delicate noodles that far surpass their dried counterparts. While many home cooks assume pasta-making requires specialized equipment or years of training, the reality is refreshingly straightforward. With basic understanding of ingredient selection, proper technique, and patience through the kneading process, anyone can produce restaurant-quality fresh pasta in their own kitchen.
Understanding Your Flour Options
The foundation of exceptional pasta begins with flour selection, and this choice dramatically influences your final product’s texture and workability. Three primary flour types dominate the fresh pasta landscape, each offering distinct characteristics that shape your cooking experience.
Italian Tipo 00 Flour: The Premium Choice
Tipo 00 flour represents the gold standard for delicate, tender pasta preparations. This finely milled wheat flour creates an exceptionally smooth dough that yields silky noodles ideal for thin, elegant shapes like fettuccine and pappardelle. The fine particle size allows superior hydration, resulting in dough that feels luxurious under your hands. When working with Tipo 00 flour, expect faster gluten development and a dough that reaches optimal smoothness more quickly than coarser alternatives. This flour particularly excels for egg-based pasta recipes, where richness and delicacy are paramount. Professional pasta makers frequently recommend brands like Molino Grassi or Caputo for consistent, reliable results.
All-Purpose Flour: The Practical Alternative
Standard all-purpose flour offers surprising versatility for fresh pasta production. Contrary to assumptions that specialty flours are essential, all-purpose flour delivers chewy, bouncy noodles with excellent texture and structure. This option proves particularly practical for home cooks who prioritize convenience and already maintain all-purpose flour in their pantry. While all-purpose flour produces slightly different results than Tipo 00—often with marginally more elasticity and structure—the difference remains minimal when proper technique is applied. This flour works excellently for beginners, as its slightly higher protein content provides greater forgiveness during the kneading phase.
Semolina Flour: The Sturdy Foundation
Semolina flour, milled from durum wheat, creates dough with greater structure and density than softer wheat varieties. This coarser flour suits pasta shapes that benefit from sturdiness, such as cavatelli and orecchiette, and works wonderfully in egg-free preparations. Semolina produces dough that resists stickiness and maintains distinct texture throughout cooking, making it ideal when robust mouthfeel matters more than delicate refinement.
Essential Ingredients and Precise Measurements
Fresh pasta’s elegance lies partly in its ingredient simplicity—typically requiring nothing beyond flour, eggs, olive oil, and salt. However, precise proportions matter significantly in achieving consistent results.
| Component | Measurement (by weight) | Measurement (approximate) | Purpose |
|---|---|---|---|
| Tipo 00 Flour | 300g | 2¼ cups | Structure and body |
| Eggs (whole) | 3 large | 185g combined | Binding and richness |
| Egg Yolk (extra) | 1 large | 20g | Enhanced silkiness |
| Extra Virgin Olive Oil | 1-2 tablespoons | 15-30ml | Suppleness and flavor |
| Kosher Salt | ¾ teaspoon | 4g | Flavor development |
Weight measurements provide superior accuracy compared to volume measurements, particularly for flour which compacts variably depending on how tightly it’s packed. If measuring by volume, spoon flour gently into your measuring cup and sweep excess away without pressing down.
The Dough-Making Process: From Dry to Silky
Initial Mixing and Hydration
Begin by mounding your flour directly onto a clean work surface, or alternatively, place it in a large mixing bowl for easier cleanup. Create a well in the flour’s center—imagine a volcano crater with walls tall enough to contain liquid without spilling. Crack your eggs and extra yolk into this well, then beat gently with a fork, just as if you were preparing scrambled eggs. This gentle beating begins incorporating flour from the inner walls while keeping the egg mixture contained.
Gradually draw flour from the outer walls into the center using your fork, working deliberately and patiently. Don’t rush this phase—controlling the pace prevents dry flour pockets and uneven hydration. When the mixture becomes too thick for fork work, transition to using your hands, bringing the remaining flour into contact with the egg mixture. Expect this first stage to feel somewhat stiff and dry; this is completely normal and requires patience to develop into cohesive dough.
The Often-Overlooked Rest Period
After bringing your ingredients together into a rough, somewhat shaggy dough, cover it with plastic wrap or an inverted bowl and allow it to rest for 10 minutes at room temperature. This seemingly minor step significantly impacts your kneading experience and final dough quality. During this rest, the flour gradually hydrates as moisture from the eggs slowly penetrates the dry particles. This hydration period transforms stiff, difficult-to-work dough into supple, responsive material that actually enjoys being kneaded.
Kneading Technique and Development
After resting, begin kneading using the heel of your hand with firm, purposeful motions. Push the dough away from you, then fold it back over itself, rotate it slightly, and repeat. Work consistently for 5-7 minutes, maintaining steady pressure and rhythm. Initially, your dough will feel quite stiff and dense, potentially even crumbly. Continue regardless—gradual warmth from friction and continued hydration will transform this unpromising beginning into smooth, elastic dough that demonstrates wonderful spring-back when poked.
Throughout kneading, if you notice small dry flour bits remaining after several minutes of work, add only a few drops of water or olive oil rather than attempting to incorporate dry flour directly. Olive oil serves double duty, contributing both to dough hydration and creating wonderfully supple, satisfying material that’s genuinely pleasant to handle. The finished dough should feel smooth and pliable, demonstrating slight elasticity and returning to shape when pressed.
Final Rest Before Rolling
Once kneading is complete, form your dough into a tight ball, wrap it thoroughly with plastic wrap, and allow it to rest at room temperature for a minimum of 30 minutes. This resting period, crucial though often underappreciated, allows gluten to relax and redistribute evenly throughout the dough. Properly rested dough rolls out more cooperatively and produces more tender pasta than dough used immediately after kneading.
Alternative Preparation Methods
Food Processor Approach
For cooks preferring mechanical assistance, food processors handle pasta dough exceptionally well. Simply combine flour and eggs in the bowl, pulse several times until the mixture comes together into rough dough, then remove and rest for one minute. If the dough feels sticky after this brief rest, dust lightly with additional flour. Transition to hand kneading for just 1-2 minutes to finish the process—the food processor accomplishes most heavy kneading work. This method proves especially helpful for those with hand strength limitations or who prefer delegating repetitive kneading to machinery.
Stand Mixer Method
Stand mixers equipped with paddle attachments can combine ingredients efficiently. Mix your eggs, yolks, and any additional liquid together until homogeneous, then gradually incorporate flour while mixing on low speed. Once the dough comes together, transition to hand kneading briefly to complete the development process.
Flavor Variations and Creative Additions
While traditional plain pasta dough offers timeless elegance, numerous flavor variations enrich your pasta-making repertoire. Each variation maintains the fundamental dough-making process while substituting or adding complementary ingredients.
- Spinach pasta: Incorporate approximately ½ cup thawed frozen spinach that’s been minced and thoroughly squeezed dry, reducing egg content proportionally
- Saffron pasta: Soak 5 threads of saffron in 2 tablespoons of warm water for about 30 minutes, then incorporate this infused liquid into your egg mixture
- Squid ink pasta: Mix 2½ tablespoons squid ink into your egg mixture before combining with flour
- Beet pasta: Puree one small roasted red beet until smooth and incorporate into your wet ingredients
Working with Your Fresh Dough: Rolling and Shaping
After resting, your dough is ready for transformation into noodles or shapes. Begin by dividing your dough into manageable portions—about one quarter at a time—keeping unused portions covered to prevent drying.
Dust your work surface lightly with semolina flour rather than regular all-purpose flour. Semolina absorbs less moisture than regular flour and effectively prevents sticking without being absorbed into the dough itself. Rice flour also serves this purpose admiringly. Work with approximately ⅛-inch thickness for most noodle shapes, adjusting based on your intended pasta type.
When rolling is complete, fold your pasta sheets gently in half and lay them on semolina-dusted sheet pans or parchment paper to prevent sticking. If making shaped pasta like fettuccine or pappardelle, cut your sheets into desired widths, then arrange them in loose nests rather than tightly wound bundles—this prevents adhesion and facilitates even drying or cooking.
Drying and Storage Considerations
Fresh pasta presents several storage options depending on your immediate cooking plans. Freshly made dough intended for same-day cooking can rest at room temperature for up to 30 minutes before final rolling. For storage beyond immediate use, cover finished shapes loosely with kitchen towels and refrigerate for up to 24 hours, or freeze for several weeks on sheet pans before transferring to freezer bags.
Troubleshooting Common Dough Issues
Frequently Asked Questions
Why is my dough crumbly and difficult to bring together?
Crumbly dough typically indicates insufficient hydration. Add water or olive oil just a few drops at a time, mixing gently between additions. Never add more than a few drops at once, as over-hydration creates sticky, unworkable dough. Ensure you’ve completed the 10-minute rest period—this allows flour to fully hydrate without requiring additional liquid additions.
My dough feels sticky and won’t hold shape—what went wrong?
Over-hydrated dough requires additional flour, but add it conservatively. Dust your work surface generously with semolina and knead briefly, incorporating flour gradually until the dough feels manageable. Ensure room temperature remains moderate—warm kitchens can activate gluten prematurely and increase stickiness.
Can I use egg whites only, or do I need yolks?
Yolks contribute richness, color, and silkiness that egg whites cannot replicate. While technically possible to use whole eggs without yolks, the result will be less luxurious. The extra yolk in traditional recipes specifically enhances final pasta quality and texture.
How do I know when kneading is complete?
Properly kneaded dough feels smooth and pliable, with elasticity that demonstrates spring-back when poked. The surface should be relatively uniform without visible striations or dry patches. If uncertain, continue kneading for another minute—modest over-kneading rarely damages pasta dough.
Can I prepare dough in advance?
Yes, refrigerated dough maintains quality for up to 24 hours. Allow cold dough to reach room temperature before rolling—approximately 30 minutes—which restores pliability. Frozen dough remains viable for several weeks and should similarly reach room temperature before use.
Conclusion: Your Fresh Pasta Journey Begins
Creating fresh pasta transforms simple ingredients into an expression of culinary craftsmanship. By understanding flour types, respecting crucial resting periods, and developing consistent kneading technique, you’ll achieve results that justify the modest effort involved. Each batch you produce builds muscle memory and intuition, gradually making the process feel increasingly natural and effortless. Whether you pursue delicate ribbon pastas, perfect for light sauces, or venture into flavored variations and shaped preparations, your foundation in dough fundamentals ensures success across the entire pasta spectrum.
References
- Beginner’s Guide To Fresh Homemade Pasta Dough — The Clever Carrot. 2021-12-15. https://www.theclevercarrot.com/2021/12/beginners-guide-fresh-homemade-pasta-dough/
- Homemade Pasta – Recipes by Love and Lemons — Love and Lemons. Accessed 2026-04-08. https://www.loveandlemons.com/homemade-pasta-recipe/
- Homemade Pasta Dough — Kendall Andronico. Accessed 2026-04-08. https://www.kendallandronico.com/all-recipes/homemade-pasta-dough
- Homemade Pasta Dough (with variations) — Spoon Fork Bacon. Accessed 2026-04-08. https://www.spoonforkbacon.com/homemade-pasta/
- Homemade Pasta Recipe | The Mediterranean Dish — The Mediterranean Dish. Accessed 2026-04-08. https://www.themediterraneandish.com/homemade-pasta-recipe/