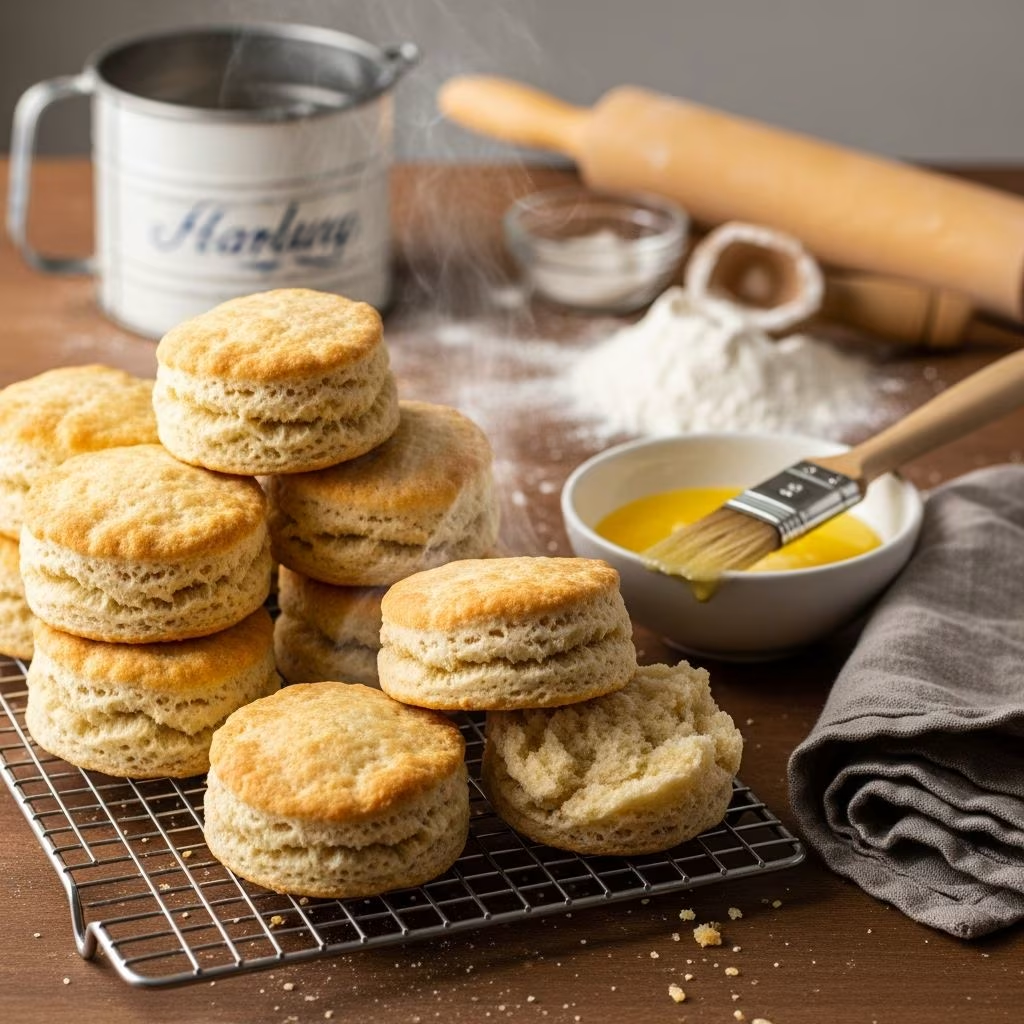
Buttermilk biscuits represent one of the most cherished staples in American baking tradition, particularly across Southern kitchens where they grace tables for breakfast, lunch, and dinner. These golden, tender pastries deliver a satisfying crunch on the outside paired with a soft, pillowy interior that melts in your mouth. Despite their elegant appearance and seemingly complex nature, achieving restaurant-quality buttermilk biscuits at home requires nothing more than understanding fundamental baking principles and respecting a handful of critical techniques.
The appeal of buttermilk biscuits extends beyond their delicious flavor profile. Their versatility allows them to complement both sweet and savory dishes, making them an invaluable addition to any baker’s repertoire. Whether served alongside jam and butter for breakfast, used as a vehicle for sausage gravy, or paired with soup, these biscuits adapt seamlessly to any meal context. Most importantly, the barrier to entry remains remarkably low—requiring no specialized equipment, exotic ingredients, or years of culinary training.
Understanding the Foundation: Core Ingredients and Their Roles
Successful biscuit baking begins with recognizing how each ingredient contributes to the final texture and flavor profile. The ingredient list appears deceptively simple, yet each component serves a specific and important purpose in the baking process.
Flour Selection and Measurement
All-purpose flour forms the structural backbone of buttermilk biscuits. Using quality all-purpose flour ensures consistent results and proper gluten development. The protein content in all-purpose flour—typically around 10-12%—provides sufficient structure without creating the tough, dense crumb associated with bread flour. Accurate measurement proves crucial; many home bakers make the mistake of packing flour into measuring cups, which dramatically increases the amount used and results in dry, dense biscuits. Weighing flour on a kitchen scale provides the most reliable measurement method, though spooning flour into a cup and leveling it off with a knife also works effectively.
The Critical Role of Cold Butter
Butter serves as the primary leavening agent in buttermilk biscuits, though not in the conventional sense. Rather than incorporating air through whipping, solid butter pieces create steam pockets during baking. When cold butter melts in the oven’s heat, it leaves behind tiny cavities that become filled with steam, creating the signature flaky layers that distinguish superior biscuits from mediocre ones. This process demands that butter remain cold throughout preparation—ideally chilled to between 32-40 degrees Fahrenheit. Many bakers find it helpful to cut butter into small cubes and return it to the refrigerator while preparing other ingredients, ensuring optimal coldness during mixing.
Buttermilk’s Contribution Beyond Moisture
Traditional buttermilk, a byproduct of butter production containing lactic acid, reacts chemically with baking soda to produce carbon dioxide—the gas that creates lift and rise in biscuits. This acidic component also tenderizes the gluten network, preventing overdevelopment and resulting in a more tender crumb. The acidity further enhances flavor by developing subtle tangy notes that round out the buttery, savory profile. Cold buttermilk proves essential; using room-temperature buttermilk causes it to incorporate too thoroughly into the flour mixture, resulting in over-mixed dough that bakes into tough, dense biscuits.
Leavening Agents: Baking Powder and Baking Soda
Most buttermilk biscuit recipes rely on baking powder as the primary leavening agent, with baking soda included to neutralize excess acidity from the buttermilk while adding additional lift. Baking powder contains baking soda plus acidic compounds, providing two-stage leavening—some activation during mixing and additional activation during baking. This dual-action approach ensures biscuits rise properly and develop good height. Some advanced bakers prepare homemade baking powder by combining cream of tartar with baking soda, though commercially produced baking powder delivers reliable, consistent results for most home bakers.
Salt and Optional Sweeteners
Salt enhances flavors and strengthens gluten development, though it must be added judiciously—too much salt overwhelms the delicate butter flavor. Some recipes incorporate small amounts of sugar or honey, which adds subtle sweetness and promotes browning through the Maillard reaction, creating deeper golden color on the biscuit surface. However, sugar remains optional; traditional savory biscuits contain no sweetness at all.
Preparation Techniques: Building the Foundation for Success
Combining Dry Ingredients
Begin by whisking together flour, baking powder, baking soda, and salt in a large bowl. This whisking action serves multiple purposes: it distributes the leavening agents evenly throughout the flour, prevents clumping in the baked biscuits, and aerates the flour slightly. Some bakers prefer using their fingers to combine dry ingredients, working them together gently until well-distributed. Either method proves acceptable provided you avoid compacting the mixture.
Incorporating Cold Butter: The Critical Cutting Technique
Once dry ingredients are combined, add chilled butter pieces and begin cutting them into the flour mixture using a pastry cutter, two knives, or fingertips. The goal involves breaking the butter into increasingly smaller pieces while distributing it throughout the flour, without allowing it to fully blend into the mixture. When completed successfully, the mixture should resemble coarse breadcrumbs or small peas, with visible butter particles throughout. This texture indicates that adequate steam pockets will form during baking.
The cutting-in process requires a light touch and speed; warm hands or prolonged mixing can cause butter to soften and incorporate too thoroughly, eliminating the steam-pocket formation that creates flakiness. If butter begins warming during this process, refrigerate the mixture for 15 minutes before continuing. Some professional bakers use a box grater to grate frozen butter directly into flour, a technique that produces particularly flaky results.
Adding Buttermilk and Achieving Proper Dough Consistency
Pour cold buttermilk into a well created in the center of the butter-flour mixture. Using a fork or spatula, gently combine the wet and dry components, stirring until the dough just comes together with no visible dry flour remaining. The resulting dough should feel slightly sticky and shaggy—not smooth, cohesive, or over-worked.
This stage presents the most common mistake in home biscuit baking: over-mixing. Excessive mixing develops gluten strands, creating a tough, dense crumb instead of the tender, flaky texture desired. The goal involves minimal mixing—just enough to incorporate all ingredients. This requires discipline and represents a significant mental shift for bakers accustomed to thoroughly mixing cake or cookie dough.
Shaping and Layering: Creating Structural Flakiness
Turning Out and Preliminary Handling
Transfer the mixed dough onto a lightly floured work surface, being gentle to avoid compacting it. The dough will appear rough and uneven at this stage—this is perfectly normal and actually desirable. Avoid the temptation to knead or smooth the dough, as this develops gluten and eliminates the layered texture.
The Folding Technique for Lamination
Advanced biscuit recipes employ a technique borrowed from French laminated pastry making: gently folding the dough over itself 3-4 times. Each fold creates additional layers of butter and dough that separate during baking, producing biscuits with visible, distinct layers throughout. To fold, gently lift one portion of dough and fold it over another section, then rotate the dough a quarter turn and repeat. This technique requires a light touch—the goal involves building structure without deflating or compacting the dough.
Achieving Optimal Thickness and Cut Size
Pat the dough to approximately 1/2 inch to 1 inch thickness, depending on desired biscuit height. Thinner doughs produce flatter, more tender biscuits, while thicker doughs create taller, airier results. Using a round biscuit cutter, cut out biscuits by pressing straight down without twisting—twisting seals the edges, preventing proper rising and creating biscuits that don’t reach their full height potential. A 3-inch cutter typically yields 6-8 biscuits from a standard recipe, though this varies based on thickness.
Re-rolling dough scraps requires gentle handling; pat scraps together lightly, re-establish proper thickness, and cut additional biscuits. Repeated re-rolling can slightly toughen biscuits, so minimize the number of re-rolls when possible.
Baking Methods and Pan Selection
Pan Choices and Their Impact on Results
The choice of baking vessel influences the final biscuit texture. Placing biscuits close together on a baking sheet or cast-iron skillet creates softer sides—the steam generated by adjacent biscuits prevents browning and crust formation on the sides. This technique produces the tender, pillowy biscuits characteristic of Southern biscuit traditions. Conversely, spacing biscuits apart on a baking sheet allows all sides to brown evenly, creating biscuits with crisper exteriors on all sides. Cast-iron skillets particularly shine for biscuit baking, as they conduct heat evenly and add a subtle rustic appeal to the final presentation.
Temperature and Timing Considerations
Most buttermilk biscuits bake successfully at temperatures between 425-450 degrees Fahrenheit. Higher temperatures promote rapid rising before the exterior sets, allowing biscuits to achieve maximum height and creating a crisp, golden exterior. Bake times typically range from 13-15 minutes, though this varies based on oven characteristics, biscuit thickness, and pan choice. Biscuits are done when the tops turn golden brown and the sides feel firm when gently pressed.
Post-Baking Finishing Touches
Immediately upon removal from the oven, brush hot biscuits with melted butter, which adds richness and enhances browning. Some bakers brush biscuits with a honey-butter mixture, creating subtle sweetness without altering the savory profile. This finishing step proves entirely optional but significantly enhances both flavor and visual appeal.
Troubleshooting Common Biscuit Challenges
| Problem | Likely Cause | Solution |
|---|---|---|
| Dense, tough biscuits | Over-mixing dough | Mix only until ingredients just combine; handle dough minimally |
| Flat biscuits with no rise | Expired leavening agents or twisted cutter edges | Check baking powder date; use straight-down cutting motion |
| Dry, crumbly biscuits | Too much flour or insufficient buttermilk | Measure flour by weight; use proper buttermilk amount |
| Greasy, oily biscuits | Butter too warm during mixing | Refrigerate ingredients and work quickly; chill dough if needed |
| Pale or under-browned tops | Low oven temperature or insufficient baking time | Verify oven temperature with thermometer; bake until golden |
Buttermilk Substitutes for Home Bakers
Traditional buttermilk may not always be available or convenient, but several effective substitutes deliver comparable results:
- Combine 1 tablespoon white vinegar or lemon juice with enough milk to make 1 cup; let sit for 5-10 minutes until slightly curdled
- Mix 4 tablespoons regular milk with 3/4 cup sour cream
- Blend 2 tablespoons milk with enough plain yogurt to total 1 cup
These substitutes provide the necessary acidity to react with baking soda and create the tangy flavor profile characteristic of traditional buttermilk biscuits. The yogurt-based option creates particularly tender biscuits due to its additional fat content.
Storage and Serving Suggestions
Freshly baked buttermilk biscuits taste best served warm, ideally within a few hours of baking. Store cooled biscuits in an airtight container at room temperature for up to two days; they can be gently reheated in a 300-degree oven for 5-10 minutes. Frozen biscuits keep for up to three months when wrapped individually and placed in an airtight freezer container. Reheat frozen biscuits at 350 degrees for 15-20 minutes until warmed through.
Frequently Asked Questions
Why are my biscuits not rising properly?
Improper rising typically results from expired leavening agents, sealed dough edges from twisting the biscuit cutter, or over-mixing. Check your baking powder’s expiration date and verify you’re pressing the cutter straight down without twisting. Minimize mixing to the bare minimum needed to combine ingredients.
Can I make biscuit dough in advance?
Yes. Prepare dough through the cutting stage, then refrigerate in an airtight container for up to 24 hours. You can also freeze unbaked biscuits for up to three months, baking directly from frozen with an additional 2-3 minutes of baking time.
What’s the best flour for buttermilk biscuits?
All-purpose flour delivers the best balance of structure and tenderness for traditional buttermilk biscuits. Avoid bread flour, which contains too much protein and creates tough biscuits, and cake flour, which lacks sufficient protein for proper rising.
Should biscuits be brushed with egg wash?
Egg wash isn’t necessary for buttermilk biscuits and can create excessive browning. Brushing with melted butter immediately after baking provides better flavor and achieves the desired golden appearance.
Why is my butter melting into the flour?
Warm hands or room temperature during mixing causes butter to soften prematurely. Work quickly, chill your tools and ingredients, and refrigerate the mixture if it feels warm. Some bakers chill their mixing bowl before beginning.
References
- Southern Buttermilk Biscuits Recipe — The Gracious Wife. Accessed 2026. https://www.thegraciouswife.com/old-fashioned-buttermilk-biscuits-recipe/
- Best Southern Buttermilk Biscuits Recipe — YouTube Cooking Channel. Accessed 2026. https://www.youtube.com/watch?v=XYKr3-WxaXw
- Carla Hall’s Perfect Buttermilk Biscuits Recipe — Carla Hall Official. Accessed 2026. https://carlahall.com/carla-halls-perfect-buttermilk-biscuits-recipe/
- Flaky Layers Buttermilk Biscuits — The Appalachian Tale. Accessed 2026. https://www.theappalachiantale.com/recipes-1/flaky-layers-buttermilk-biscuits
- Buttermilk Biscuits with Honey Butter — The Cozy Cook. Accessed 2026. https://thecozycook.com/buttermilk-biscuit-recipe/
- How to Make Buttermilk Biscuits — Chef Virginia Willis. Accessed 2026. https://virginiawillis.com/how-to-make-buttermilk-biscuits/