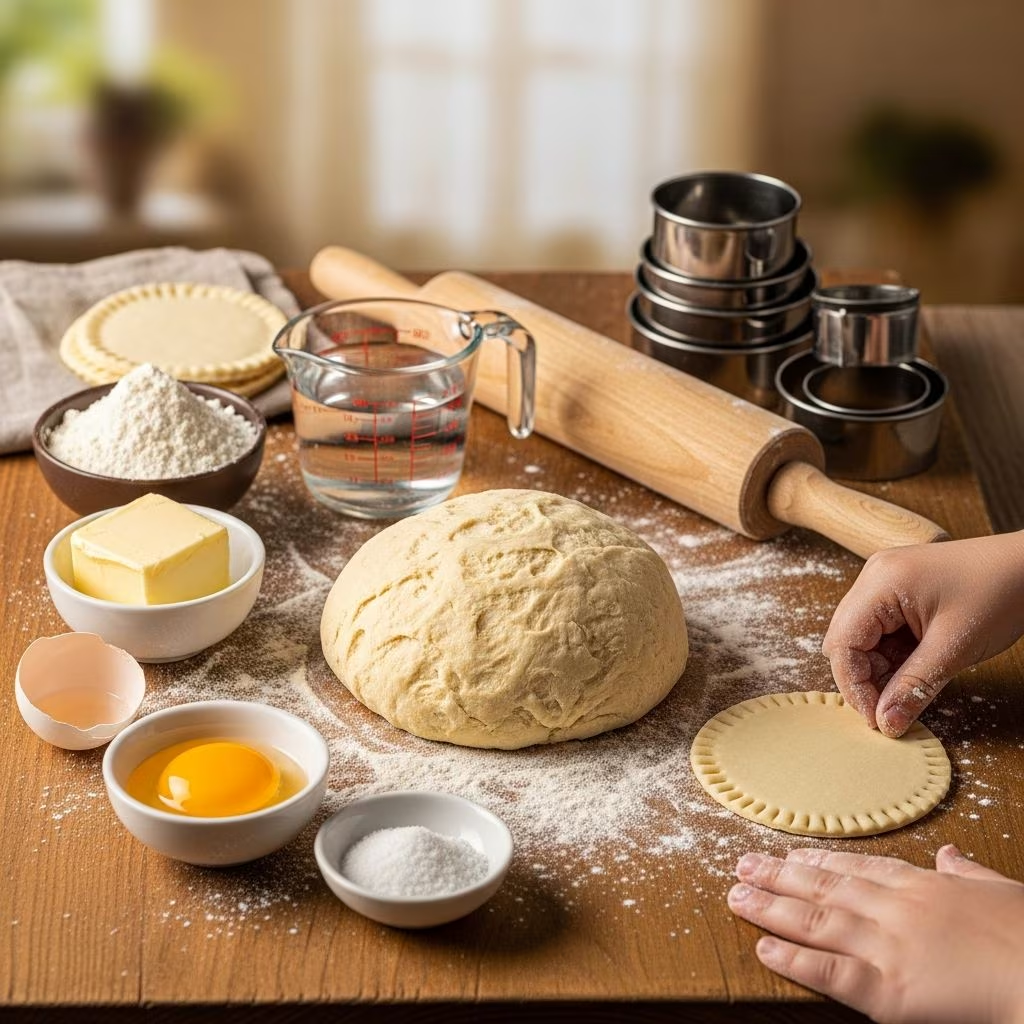
Creating empanada pastry from scratch is a rewarding culinary endeavor that combines simple ingredients with proper technique to produce a tender, flaky crust. Whether you’re preparing these pastries for the first time or refining your existing skills, understanding the fundamentals of dough preparation ensures consistent success. This comprehensive guide explores the essential components, preparation methods, and professional techniques that transform basic pantry staples into an exceptional pastry shell suitable for your favorite fillings.
Understanding the Foundation: Key Ingredients and Their Roles
The beauty of traditional empanada pastry lies in its straightforward ingredient list. Each component serves a specific purpose in developing the dough’s texture, flavor, and workability. Success begins with selecting quality ingredients and understanding how they interact during the preparation process.
Flour Selection and Measurement
All-purpose flour forms the structural backbone of empanada pastry, providing the gluten network necessary for achieving the desired texture. A standard recipe typically calls for two and a half to three and a half cups, though exact quantities may vary based on humidity and specific flour brand characteristics. The protein content in all-purpose flour—typically between ten and twelve percent—strikes an optimal balance, preventing the dough from becoming tough while maintaining sufficient structure for proper pastry formation.
When measuring flour, the most accurate method involves using a kitchen scale, though the spoon-and-level technique works acceptably when no scale is available. Scooping directly from the bag compacts flour and results in excess, leading to dry, dense pastry. To ensure consistency, spoon flour gently into your measuring cup and level the top with a straight edge before adding to your mixture.
The Role of Fat in Creating Texture
Fat—whether unsalted butter, vegetable shortening, or oil—fundamentally determines your pastry’s flakiness and tenderness. These ingredients coat flour particles, preventing complete gluten hydration and creating the desirable layered structure characteristic of quality empanada pastry. Unsalted butter remains the preferred choice among traditional cooks, contributing superior flavor while allowing precise salt control. Cold butter cubed into small pieces creates steam pockets during baking, producing the sought-after flaky texture.
Some regional variations employ vegetable oil or shortening instead. Oil-based doughs tend to be softer and more workable immediately after mixing, requiring less resting time, while butter-based doughs benefit from refrigeration before rolling.
Binding Agents and Moisture Control
Eggs and water work together to hydrate the flour and bind ingredients into cohesive dough. Eggs contribute richness and aid browning, while water provides the necessary moisture for gluten development. Ice water proves particularly valuable, as cold temperatures keep fat from melting prematurely and maintain the distinct particles that produce flakiness. Typical recipes employ one large egg combined with one-third to one-half cup ice water, though precise amounts depend on flour absorption rates and ambient humidity.
Seasoning and Optional Enhancements
Salt amplifies overall flavor and should not be overlooked, as even small quantities significantly impact the final taste. Between one-quarter and one teaspoon of salt suffices, depending on your butter’s salt content and personal preference. Some traditional recipes incorporate one tablespoon of white vinegar or a teaspoon of baking powder. Vinegar inhibits excessive gluten development, keeping pastry tender, while baking powder introduces slight leavening for enhanced texture.
Preparation Techniques: Two Primary Methods
The choice between food processor and hand mixing depends on your available equipment, comfort level, and desired results. Both approaches produce excellent pastry when executed properly.
Food Processor Method
This approach offers speed and consistency while minimizing overworking risk. Begin by combining three cups all-purpose flour with your chosen salt measure in the food processor bowl. Pulse several times to ensure even distribution. Cut one stick of unsalted butter into quarter-inch cubes and add to the flour mixture. Pulse approximately fifteen times until the butter particles resemble coarse sand or pea-sized pieces—this size is critical, as smaller fragments don’t create adequate steam pockets for flakiness.
In a separate small bowl, whisk together one large egg with one-quarter to one-half cup ice water, adding one tablespoon white vinegar if using. Pour this liquid mixture into the processor bowl and pulse six to eight times, just until the ingredients combine into a shaggy, wet texture. Avoid the temptation to continue processing; overworking develops excessive gluten, resulting in tough, dense pastry.
Hand-Mixing Approach
Traditional hand-mixing develops equally satisfactory results and offers greater tactile feedback. Combine flour and salt in a large mixing bowl using a whisk or fork. Create a well in the center and add your cubed cold butter. Using your fingertips or a pastry cutter, work the butter into the flour by pinching and rubbing motions until the mixture reaches a breadcrumb-like consistency. This process requires patience but provides excellent control over how small the butter particles become.
Pour the egg and ice water mixture over the flour gradually while mixing gently with a fork. Once the dough begins forming, transfer it to a clean work surface lightly dusted with flour. Knead gently for three to five minutes by folding the dough over itself repeatedly until it becomes smooth and cohesive. Avoid aggressive kneading, which promotes gluten development and toughens the final product.
Resting and Storage Protocols
Proper resting allows gluten strands to relax and flavors to meld, significantly improving rolling and baking characteristics. Divide your prepared dough into two or three portions and flatten each into a disk roughly half-inch thick. This shape allows faster, more even refrigeration compared to whole dough balls.
Wrap disks tightly in plastic wrap or parchment paper and refrigerate for at least thirty minutes, though two hours provides optimal results. The dough can be refrigerated for up to two days without quality deterioration. For longer storage, freeze wrapped dough portions for up to three months. Thaw frozen dough in the refrigerator overnight before rolling.
Rolling and Shaping Your Pastry
Remove your dough from refrigeration and allow it to sit at room temperature for five to ten minutes, which softens it slightly for easier rolling without warming the fat excessively. Dust your work surface generously with flour to prevent sticking. Place one dough disk in the center and begin rolling from the center outward, rotating the disk frequently to maintain even thickness of approximately one-eighth inch.
If the dough resists rolling or springs back, cover it with a kitchen towel and rest for five minutes to allow the gluten to relax further. Using a three to four-inch circular cutter, mold, or even a small plate, cut round discs from your rolled dough. Reroll scraps gently, adding a small splash of water if necessary to prevent excessive dryness.
Filling and Assembly Guidelines
Place approximately one to two tablespoons of your chosen filling in the center of each dough circle, leaving a quarter-inch border. Fold the dough in half over the filling and press edges firmly to seal. For a more decorative finish, use the tines of a fork to crimp and seal edges, creating an attractive pattern while ensuring the filling remains enclosed during baking.
Baking Instructions and Finishing Touches
Preheat your oven to 400 degrees Fahrenheit and line baking sheets with parchment paper. Arrange filled empanadas on prepared sheets, leaving approximately one inch between each pastry to allow air circulation and even browning.
For enhanced golden appearance, prepare an egg wash by whisking one beaten egg with one tablespoon water. Brush this mixture lightly over each empanada, avoiding the sealed edges where excess egg can prevent proper sealing. Bake for thirty to forty minutes until the pastry achieves a deep golden-brown color, rotating the baking sheet halfway through the cooking time for even browning.
Allow baked empanadas to cool on the baking sheet for five minutes before transferring to a wire rack. This brief cooling period allows the pastry to set without becoming brittle.
Troubleshooting Common Challenges
| Challenge | Cause | Solution |
|---|---|---|
| Dense, tough pastry | Overworking dough or insufficient fat | Handle dough minimally during mixing and ensure adequate cold butter distribution |
| Dough too dry to work with | Insufficient liquid or high humidity absorption | Add ice water one tablespoon at a time until dough reaches desired consistency |
| Dough too wet and sticky | Excess liquid or warm working conditions | Add flour one tablespoon at a time and work in a cooler environment |
| Filling leaking during baking | Inadequate sealing or excessive filling quantity | Use proper sealing techniques and reduce filling amount by approximately one-quarter |
| Pastry not browning evenly | Uneven oven temperature or stationary baking sheet | Rotate baking sheet halfway through cooking and verify oven calibration |
Frequently Asked Questions
Can I make empanada dough without a food processor?
Absolutely. Hand-mixing produces equally excellent results and remains the traditional method used in many regions. The hand method requires slightly more time and effort but develops superior understanding of proper dough texture through tactile feedback. Many professional bakers prefer hand-mixing for its superior control.
What happens if I don’t have ice water?
While ice water is preferable because it keeps fat cold and distinct, room temperature water works acceptably if you work quickly and maintain a cool work environment. Refrigerate your mixed dough for an additional thirty minutes before rolling to compensate for the warmer liquid.
How can I tell when my dough has proper consistency?
The dough should come together into a cohesive ball without excessive stickiness or dryness. When squeezed gently, it should hold together without crumbling. If it sticks to your hands excessively, add flour; if it crumbles and won’t cohere, add ice water one tablespoon at a time.
Can I use whole wheat flour instead of all-purpose flour?
Whole wheat flour produces different texture and color but can be used in combination with all-purpose flour. A fifty-fifty blend maintains reasonable flakiness while introducing whole grain flavor. Pure whole wheat dough tends toward denser, less flaky results.
What’s the best way to store baked empanadas?
Store cooled baked empanadas in an airtight container at room temperature for up to three days. For longer storage, freeze them in freezer-safe containers for up to three months. Reheat frozen empanadas directly in a 350-degree oven for fifteen to twenty minutes until heated through.
Should I refrigerate the dough if I’m in a hurry?
While refrigeration significantly improves results, dough can be used immediately after mixing in warm environments. However, resting at room temperature for at least thirty minutes before rolling provides worthwhile improvements in texture and handling characteristics.
Regional Variations and Flavor Considerations
Different Latin American regions employ distinct variations reflecting local ingredients and preferences. Argentine empanada dough traditionally substitutes vegetable oil for butter, producing a softer, lighter texture. Puerto Rican versions frequently incorporate lard and baking powder for enhanced flakiness and slight leavening. Some Colombian preparations add minimal fat, relying instead on careful water incorporation for tenderness.
Regardless of regional variation, the core principles remain consistent: cold fat, minimal overworking, proper resting, and accurate baking temperatures ensure success across all approaches.
Conclusion: Mastering Your Empanada Pastry Skills
Creating traditional empanada pastry develops fundamental baking skills applicable to numerous other pastries including pie crusts and hand pies. With practice, the techniques become intuitive, and you’ll develop sensitivity to dough texture variations based on seasonal humidity and ingredient variations. The investment in mastering proper technique rewards you with exceptional pastries that showcase your favorite fillings elegantly, impressing family and friends while providing deep personal satisfaction.
References
- The Science of Cooking — McGee, H. Scribner, 2004. https://www.harlowandharned.com/science-of-cooking
- Latin American Food Culture — Andrews, J. Oxford University Press, 2007. https://global.oup.com/academic/product