Dandelion jelly represents one of nature’s most overlooked culinary treasures. This delicate preserve captures the essence of spring in a jar, offering a subtle floral sweetness that distinguishes it from conventional fruit jellies. The process of transforming bright yellow dandelion blossoms into a smooth, spreadable jelly combines traditional foraging techniques with time-tested preservation methods. Understanding both the science and art behind this creation allows home cooks to produce professional-quality preserves in their own kitchens.
Understanding Dandelion Jelly and Its Characteristics
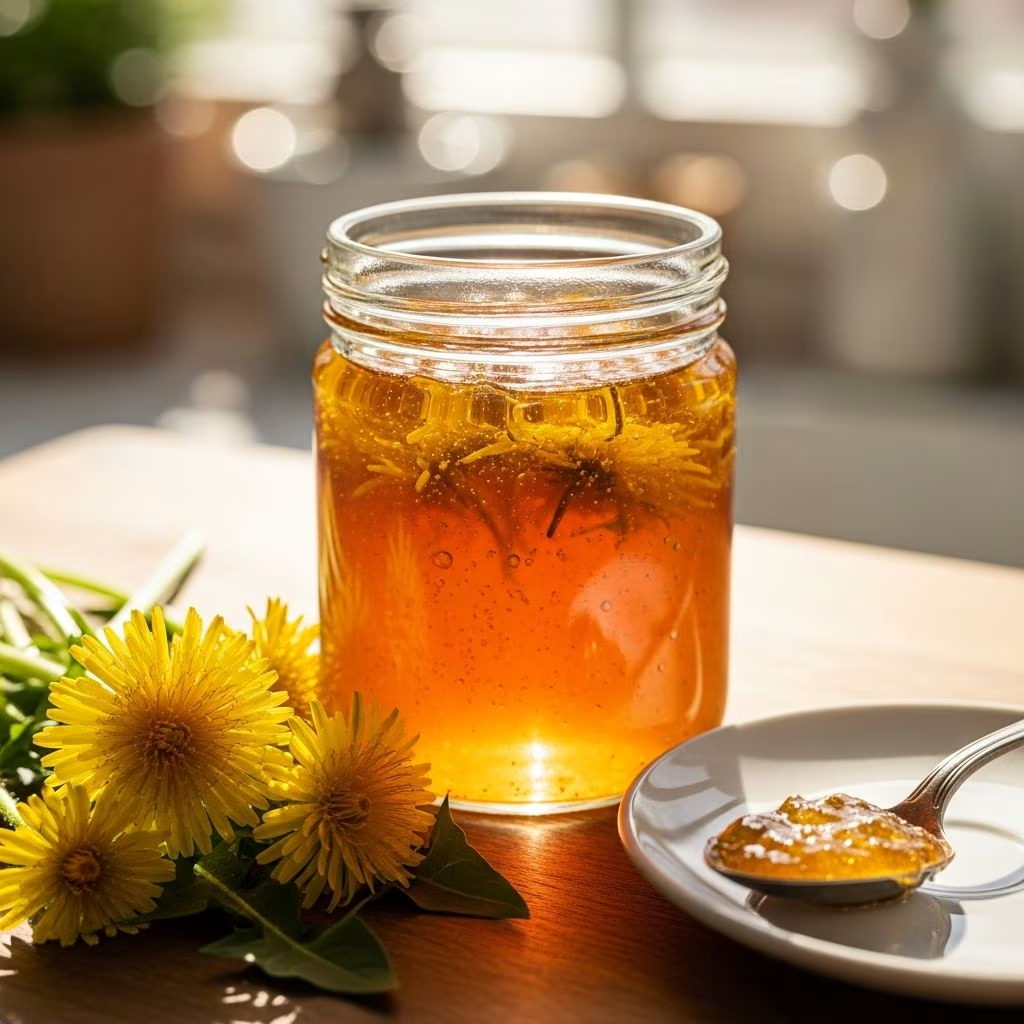
Dandelion jelly occupies a unique place in the world of homemade preserves. Unlike fruit-based jellies that rely on natural pectin content from berries or stone fruits, dandelion jelly requires a more intentional approach to achieve proper consistency and texture. The resulting product possesses a honey-like quality, with a translucent golden appearance that suggests both elegance and natural goodness.
The flavor profile of dandelion jelly is distinctly floral yet not overpowering, making it an excellent companion to both sweet and savory applications. Many enthusiasts describe the taste as reminiscent of wildflower honey with subtle herbal undertones. This versatility explains why dandelion jelly has maintained popularity across generations, particularly among traditional cooks and modern foraging enthusiasts alike.
Creating this preserve requires attention to several critical factors. The timing of harvest, the quality of water used, the precise balance of sugar and acid, and the proper use of pectin all contribute to successful outcomes. Temperature control during cooking and appropriate cooling periods after jarring also play essential roles in achieving that coveted silky texture.
Selecting and Preparing Your Dandelion Blossoms
The foundation of exceptional dandelion jelly begins with thoughtful flower selection. Choosing the right blossoms ensures both flavor quality and safety in the finished product. Ideal dandelion flowers display vibrant yellow coloration and remain fully open, indicating optimal bloom stage and flavor concentration.
Critical harvesting considerations include:
- Source selection: Gather dandelions from areas confirmed free from chemical treatments, pesticides, and herbicides. Avoid roadsides where vehicles deposit exhaust residue and locations where pets frequent
- Time of collection: Morning hours after dew dries offer the freshest flowers, though any daylight harvest works satisfactorily
- Quantity requirements: Expect to harvest approximately ten cups of whole flowers to yield the four cups of separated petals needed for standard jelly recipes
- Visual inspection: Select flowers with tight, vibrant petals rather than those showing browning, wilting, or insect damage
Preparation of harvested flowers demands patience and precision. The green base of each blossom must be removed entirely, leaving only the bright yellow petals. This step proves crucial because green matter can impart bitterness to the finished jelly. Many cooks accomplish this separation while sitting outdoors, creating a meditative aspect to the preservation process while ensuring thorough removal of undesired plant material.
After separation, rinse the petals gently under cool running water to eliminate any dirt, insects, or debris. This washing step requires a delicate touch to preserve petal integrity and avoid unnecessary bruising that could affect extraction efficiency.
Creating the Foundational Dandelion Tea
The transformation from fresh petals to finished jelly begins with tea preparation. This intermediate step extracts the essential flavors, colors, and compounds that give dandelion jelly its distinctive character. Understanding proper tea-making techniques directly impacts final product quality.
The basic process involves steeping prepared petals in boiling water. Standard ratios call for approximately one cup of water for each cup of petals, though minor variations accommodate personal preference and ambient humidity conditions. The water temperature must reach a full boil to effectively extract volatile compounds and pigments from the delicate petals.
After pouring boiling water over the petals, the mixture requires cooling. Many experienced preservers recommend allowing the tea to cool completely to room temperature before proceeding, sometimes even refrigerating overnight. This extended cooling period maximizes color extraction and develops more complex flavor notes. Some cooks observe that patient cooling produces noticeably darker, more vibrant tea compared to rushing this stage.
Straining represents the next critical phase. Using coffee filters or specialized jelly bags rather than conventional mesh strainers prevents fine particles from clouding the finished product. This filtering should be unhurried, allowing gravity to draw liquid through without pressing or squeezing the petals, which would introduce unwanted solids into the tea.
The resulting dandelion tea typically appears pale yellow to golden amber, depending on brewing time and dandelion variety. Measure this liquid carefully, as recipes require specific volumes. Should your tea fall short of required amounts, simply add cool water to reach the target measurement.
Essential Ingredients and Their Functions
Dandelion jelly production relies on four primary components working in concert:
| Ingredient | Typical Amount | Primary Function |
|---|---|---|
| Dandelion Tea | 3-4 cups | Base liquid providing flavor and body |
| Powdered Pectin | 1 box (1.75 oz) | Thickening agent enabling proper gel formation |
| Granulated Sugar | 4-4.5 cups | Preservative and sweetener |
| Lemon Juice | 2 tablespoons | Acid component balancing sweetness and aiding gel set |
Pectin serves as the cornerstone of jelly texture. This naturally occurring plant polysaccharide responds to specific conditions—adequate sugar concentration, proper acid levels, and appropriate temperature—to form a gel network. Powdered pectin varieties offer consistency and predictability compared to liquid versions, making them preferable for beginners developing their preservation skills.
Sugar’s role extends beyond mere sweetening. The substance functions as a preservative, inhibiting microbial growth that would otherwise spoil stored jelly. Additionally, sugar interacts with pectin molecules to create the gel structure that distinguishes jelly from syrup. The substantial quantity required—four or more cups—reflects these multiple functions rather than simple flavor preference.
Lemon juice contributes essential acidity that serves multiple purposes. The acid brightens the jelly’s color, developing golden and amber tones that emerge only in properly acidified products. Additionally, acid creates the chemical environment necessary for pectin gel formation, explaining why gelation fails when this ingredient is omitted or significantly reduced.
The Cooking Process: Transforming Tea Into Jelly
Converting prepared tea into finished jelly requires precise technique and careful attention to temperature and timing. This phase determines whether your product achieves the desired silky consistency or results in either a runny syrup or overly stiff, rubbery texture.
Begin by combining your measured dandelion tea with lemon juice and powdered pectin in your largest available pot. This vessel selection matters significantly—a deep pot accommodates the vigorous boiling and foaming that occurs during cooking, preventing messy overflow. Stir this mixture continuously as you bring it to a hard, rolling boil.
Once the mixture achieves a rolling boil, simultaneously add all the sugar while maintaining vigorous stirring. The addition of such large sugar quantities requires careful incorporation to ensure even distribution and prevent crystallization. Continue stirring until the sugar dissolves completely and the mixture returns to a hard boil.
At this point, begin timing a vigorous boil lasting one to two minutes. Some traditional recipes call for slightly longer cooking, though modern pectin products engineered for quick setting perform optimally with brief boiling. During this boiling period, the mixture will foam substantially, sometimes doubling in volume. Ensure your pot depth accommodates this expansion.
Remove the pot from heat and skim away white foam accumulating on the surface. This foam, though harmless, impairs the finished jelly’s appearance and clarity. A slotted spoon or specialized skimming tool effectively removes this layer.
Jarring and Setting Your Finished Jelly
The transition from hot jelly to finished product requires attention to jarring technique and patience during the setting process. Proper execution at this stage ensures both food safety and optimal texture development.
Sterilized half-pint jars with new lids work best for dandelion jelly. Before jarring, warm these containers in simmering water to prevent thermal shock when filled with hot jelly. Using warm jars also promotes proper lid sealing.
Ladle the hot jelly into prepared jars, leaving about one-quarter inch headspace. This spacing allows for proper lid sealing without jelly seeping around the rim. Wipe jar rims with damp cloth to remove any spilled jelly that could prevent seal formation.
Apply new lids and bands immediately, tightening bands securely but not excessively. Place jarred jelly on a kitchen counter away from drafts and allow to cool completely—typically overnight or for twelve to twenty-four hours. Patience during this cooling period proves essential, as jelly continues setting as temperature drops. Resist the temptation to move jars or check consistency, as disturbance interferes with gel formation.
For shelf-stable storage extending beyond several months, water bath canning provides appropriate preservation. This process involves processing sealed jars in boiling water for designated periods, creating additional safety margins and extending shelf life significantly.
Troubleshooting Common Dandelion Jelly Challenges
Even experienced cooks occasionally encounter setbacks when making dandelion jelly. Understanding common issues and their solutions builds confidence and improves success rates.
Jelly won’t set: This common problem usually results from inadequate acid, insufficient pectin, or under-cooking. Verify that you added the full lemon juice amount and used fresh pectin within its expiration date. Some recipes call for additional acid through citric acid alternatives. Re-cooking overly soft jelly with additional pectin can salvage the batch.
Jelly sets too firmly: Occasional over-cooking produces excessively stiff jelly with an unappealing rubbery texture. This cannot be reversed, but future batches benefit from reducing cooking time to the lower end of recommended ranges.
Cloudy appearance: Pressing or squeezing petals during tea straining introduces fine particles causing cloudiness. Future batches should employ patient straining without pressure.
Weak or absent dandelion flavor: Using petals from flowers harvested during poor weather or storing flowers too long before processing reduces flavor intensity. Always use freshly picked flowers and process immediately after collection.
Storage and Usage Recommendations
Properly prepared dandelion jelly maintains quality for extended periods under appropriate storage conditions. Unopened jars kept in cool, dark locations remain suitable for consumption for one to two years. Once opened, refrigerated jelly remains fresh for several weeks.
Dandelion jelly transitions seamlessly between sweet and savory applications. Spread it on morning toast or scones for traditional jelly enjoyment. Alternatively, pair it with soft cheeses as an elegant appetizer component, or use it as a glaze for roasted poultry and vegetables, adding sophisticated floral sweetness to dinner preparations.
Frequently Asked Questions
Can I make dandelion jelly without pectin?
While possible, dandelion jelly without commercial pectin requires extended cooking to achieve gel consistency and involves more unpredictability. Pectin ensures reliable results and superior texture.
Where should I harvest dandelions?
Select locations away from roadways, treated lawns, and public spaces where pesticides or herbicides may have been applied. Private properties where you have permission or designated foraging areas provide safer options.
How long does dandelion jelly last?
Unopened jars processed through water bath canning remain shelf-stable for one to two years. Refrigerated opened jars stay fresh for three to four weeks.
Can I substitute the sugar with alternatives?
Honey or maple syrup can partially replace sugar, though this affects gel formation. Complete substitution with alternatives produces inconsistent results; most successful recipes combine alternative sweeteners with standard sugar.
Why is my jelly cloudy?
Cloudiness typically results from pressing petals during straining or using a strainer with holes too large. Future batches should employ coffee filters or jelly bags with patient gravity-based straining.
References
- Dandelion Jelly Recipe-Delicate, Honey-Like Flavor of Spring — Baker’s Brigade. Accessed April 2026. https://www.bakersbrigade.com/recipe/moms-dandelion-jelly/
- Dandelion Jelly — Practical Self Reliance. Accessed April 2026. https://practicalselfreliance.com/dandelion-jelly/
- Wild Dandelion Jelly — Hilda’s Kitchen Blog. Accessed April 2026. https://hildaskitchenblog.com/recipe/wild-dandelion-jelly/
- Dandelion Jelly Recipe; Tastes like Honey? — Simply Canning. Accessed April 2026. https://www.simplycanning.com/dandelion-jelly/
- How to Make Dandelion Jelly — Lonely Pines Farm. Accessed April 2026. https://www.lonelypinesfarm.com/how-to-make-dandelion-jelly/