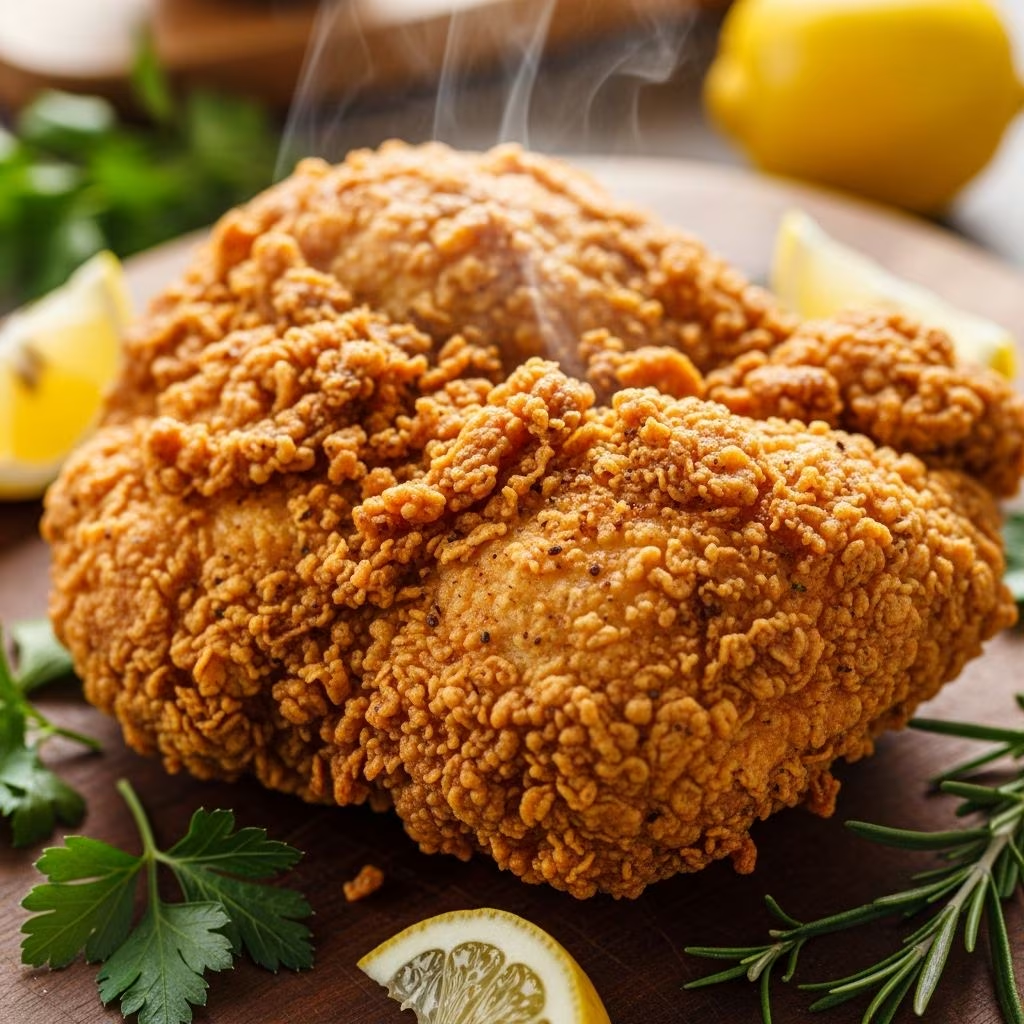
Creating restaurant-quality crispy fried chicken requires more than just throwing chicken pieces into hot oil. The process involves understanding the science behind moisture retention, coating adhesion, and temperature control. This comprehensive guide walks you through each stage of preparing and frying chicken to achieve that coveted golden-brown exterior while maintaining juicy, tender meat inside.
Understanding the Foundation: Why Brining Matters
The first critical step in achieving superior fried chicken begins before you ever see a drop of oil. Brining—soaking chicken in a seasoned liquid—serves multiple purposes that directly impact the final result. A buttermilk brine acts as both a tenderizer and flavor enhancer, breaking down the proteins in the chicken while allowing seasoning to penetrate throughout the meat.
When you submerge chicken pieces in whole-fat buttermilk mixed with Cajun seasoning or other complementary spices, the lactic acid works to gently denature the proteins, making the meat more tender and capable of retaining moisture during the frying process. This is why brined chicken typically tastes juicier and more flavorful than chicken that hasn’t been treated this way. The brine also creates a slightly slippery surface that helps the coating adhere more uniformly to each piece.
For optimal results, allow chicken pieces to soak in the buttermilk brine for at least two hours, though overnight brining yields even better flavor penetration. The extended time allows the seasoning to work deeper into the meat, ensuring consistent taste from the exterior to the center of thicker pieces like thighs and breasts.
The Coating Formula: Creating the Perfect Crust
The coating is where the magic happens. A single layer of flour would produce a thin, fragile crust that doesn’t stay crispy for long. Professional cooks and home enthusiasts have discovered that combining multiple dry ingredients creates a superior crust structure. The combination of all-purpose flour and cornstarch forms the foundation of an exceptional coating.
Cornstarch plays a particularly important role in achieving crispiness. Because cornstarch has a lower protein content than all-purpose flour, it fries up crunchier and stays crisp longer. The cornstarch granules gelatinize during frying, creating a shatteringly crisp texture that pure flour cannot match. Most professional recipes recommend a ratio of about three parts flour to one part cornstarch, though experimentation based on personal preference is encouraged.
Adding baking powder to your flour mixture introduces another dimension of crispiness. The baking powder releases carbon dioxide during frying, creating tiny air pockets throughout the coating that contribute to a lighter, crunchier texture. These air pockets also allow steam to escape more efficiently, preventing the soggy interior problems that plague many homemade attempts.
The seasoning blend determines the flavor profile of your fried chicken. A traditional approach combines paprika, cayenne pepper, black pepper, garlic powder, onion powder, and seasoned salt. Some recipes add Cajun seasoning for a more robust flavor or incorporate hot sauce directly into the liquid coating component. The key is balancing these flavors so no single seasoning overwhelms the natural taste of the chicken.
The Double-Coating Technique for Maximum Crispiness
Many recipes call for a double-dipping process that significantly enhances the final texture. After preparing your seasoned flour mixture, you first dip each chicken piece into a liquid coating—typically an egg-based mixture or buttermilk—then dredge it thoroughly in the flour mixture. Rather than proceeding directly to frying, the best results come from placing the coated chicken on a baking sheet and allowing it to rest for fifteen to thirty minutes.
During this resting period, the flour coating absorbs some moisture from the chicken’s surface and the coating itself, creating a thicker, more cohesive shell. After this initial rest, you dip the chicken back into your liquid coating and then dredge it once more in the flour mixture. This second coating layer creates a substantially thicker and more durable crust that resists oil penetration and maintains its crispiness longer after frying.
Some innovative cooks have experimented with unconventional ingredients in the liquid coating. Using vodka instead of water or regular milk provides an interesting advantage: vodka evaporates faster than water at frying temperatures, allowing the coating to crisp more quickly rather than becoming tough and overly crunchy. The alcohol content cooks off completely during frying, leaving no detectable taste behind.
Oil Selection and Temperature Control
The choice of oil dramatically affects both the cooking process and the final flavor. Oils with high smoke points—such as vegetable oil, peanut oil, or canola oil—are essential because you need to maintain temperatures around 350°F throughout the frying process. If your oil begins to smoke excessively or break down, it will impart off-flavors and create unhealthy compounds in your food.
Temperature control represents perhaps the most critical element in achieving perfect fried chicken. If your oil temperature drops below 325°F, the chicken will absorb excess oil before the exterior crisps, resulting in greasy, heavy chicken. Conversely, if the temperature climbs above 375°F, the exterior burns before the interior cooks through. The ideal range maintains a steady 350°F, which requires careful monitoring with a reliable thermometer.
A candy or deep-fry thermometer proves invaluable here. Don’t rely on visual cues or guesswork regarding oil temperature. Insert the thermometer into the oil before you begin frying and check it frequently throughout the process. If you’re frying multiple batches, the temperature will drop when you add cold chicken to hot oil; anticipate this drop and adjust your heat accordingly to maintain the target temperature.
Strategic Batching and Timing
How you organize and execute the frying process affects the consistency of your results. Start with the darker meat pieces—thighs and legs—which require longer cooking times than lighter, thinner pieces like breasts. This approach allows you to remove the light meat once it reaches the proper internal temperature without having to remove undercooked dark meat.
Never overcrowd your frying vessel. Placing too many pieces in the oil at once causes the temperature to plummet and forces the chicken to steam rather than fry. Leaving adequate space between pieces allows hot oil to circulate freely around all surfaces, ensuring even cooking and uniform browning. Typically, you can comfortably fry four to six pieces depending on your pot size.
Initially fry the chicken uncovered until both sides develop a light golden color, then cover the pot with a lid. This covering traps steam that helps cook the interior of thicker pieces. After a few minutes under the lid, remove it and continue frying until the coating achieves deep golden brown color. Monitoring for the right color is important because the exterior should be deeply browned but not blackened.
Essential Safety and Quality Considerations
Internal temperature represents the most important measure of doneness. Using an instant-read meat thermometer, verify that the thickest part of each piece—usually near the thigh bone for legs and thighs—reaches 165°F. Don’t rely solely on exterior color, as you can have perfectly browned chicken with an undercooked interior if your oil temperature wasn’t high enough.
After removing chicken from the oil, place it on paper towels or a wire cooling rack to drain excess oil. The rack method provides superior results because it allows air circulation around all surfaces, preventing the bottom from becoming soggy. If using paper towels, change them as they become saturated with oil.
Keep finished batches warm while completing the frying by placing them on a baking sheet in a 200°F oven. This gentle heat maintains the crispiness while keeping the meat warm for serving.
Flavor Enhancement Strategies
Beyond the basic seasoning blend, several techniques enhance the overall flavor profile. Some cooks add a teaspoon or two of hot sauce to their liquid coating to create subtle heat that builds through the eating experience. Worcestershire sauce contributes umami depth that amplifies the savory qualities of the fried coating and chicken itself.
Consider adjusting the spice level based on personal preference and intended audience. Reducing cayenne pepper and black pepper creates a milder version suitable for children, while increasing these components satisfies those seeking more heat. Fresh garlic powder and onion powder contribute aromatic complexity that pure salt cannot match.
Paprika serves dual purposes: contributing color and a subtle smoky flavor. Using Hungarian paprika versus Spanish smoked paprika creates noticeably different flavor outcomes, so experimentation helps you discover your preferred style.
Troubleshooting Common Problems
If your fried chicken turns out greasy rather than crispy, the most likely culprit is oil temperature that was too low during frying. This allowed the chicken to absorb oil before the exterior hardened. Ensure your thermometer is accurate and your heat source is responding appropriately.
Coating that falls off during frying usually indicates inadequate resting time between coating and frying, or that your liquid coating wasn’t thick enough to properly adhere the flour mixture. Ensure your egg-based liquid is well-whisked and evenly coats each piece before dredging in flour.
Uneven browning suggests overcrowding the pot or inconsistent temperature. Practice spacing pieces properly and monitor your oil temperature throughout the frying process with regular thermometer checks.
Comparing Coating Approaches
| Coating Method | Key Ingredients | Crispiness Level | Preparation Time |
|---|---|---|---|
| Single Flour Coat | Flour, Salt, Pepper | Low | 10 minutes |
| Flour + Cornstarch | Flour, Cornstarch, Spices | High | 15 minutes |
| Double-Dipped Coating | Flour, Cornstarch, Baking Powder, Spices | Very High | 45 minutes (with resting) |
| Vodka-Based Batter | Flour, Cornstarch, Vodka, Spices | Very High | 20 minutes |
Frequently Asked Questions
Q: How long should I brine chicken before frying?
A: Minimum brining time is two hours, but overnight brining produces superior flavor penetration. If time is limited, even one hour provides noticeable improvement over unbrined chicken.
Q: Can I use vegetable oil instead of peanut oil?
A: Yes, vegetable oil works well for frying chicken. Both have high smoke points suitable for the 350°F frying temperature. Peanut oil adds subtle flavor some prefer, but vegetable oil is equally functional.
Q: What’s the best way to reheat fried chicken?
A: Reheating in a 350°F oven for ten to fifteen minutes restores crispiness better than microwaving, which tends to create rubbery texture. An oven also heats the interior without overcooking the coating.
Q: Why does my coating sometimes fall off in the oil?
A: This usually indicates insufficient contact between the coating and the chicken surface. Ensure your liquid coating thoroughly covers the chicken, and allow adequate resting time for the flour to set before frying.
Q: Can I make fried chicken ahead of time?
A: Coated chicken can be refrigerated for up to 24 hours before frying, which actually improves adhesion. For longer storage, freeze coated chicken for up to three months and fry directly from frozen, adding a few extra minutes to cooking time.
Storage and Food Safety
Properly stored fried chicken maintains quality for several days. Once cooled to room temperature, store it in an airtight container in the refrigerator for up to four days. Before consuming refrigerated chicken, verify it smells fresh and shows no signs of discoloration or mold. Fried chicken frozen in airtight containers maintains quality for up to three months.
Always practice safe food handling when working with raw chicken. Wash your hands, utensils, and any surfaces that contacted raw chicken with hot soapy water. Never cross-contaminate by using the same cutting board for raw chicken and vegetables without washing thoroughly between uses.
References
- Proper Food Safety and Handling Procedures — United States Department of Agriculture (USDA). 2024. https://www.fsis.usda.gov/food-safety/safe-food-handling-and-preparation/food-safety-basics
- Meat Temperature Safety Guidelines — Centers for Disease Control and Prevention (CDC). 2024. https://www.cdc.gov/foodsafety/poultry-cooking-guidelines.html
- Cooking Oils and Smoke Points — Food & Wine Magazine. 2024. https://www.foodandwine.com/cooking-guides/cooking-oils
- Protein Denaturation and Brining Effects — America’s Test Kitchen. 2023. https://www.americastestkitchen.com/guides/equipment-and-gear/food-thermometers-and-temperatures