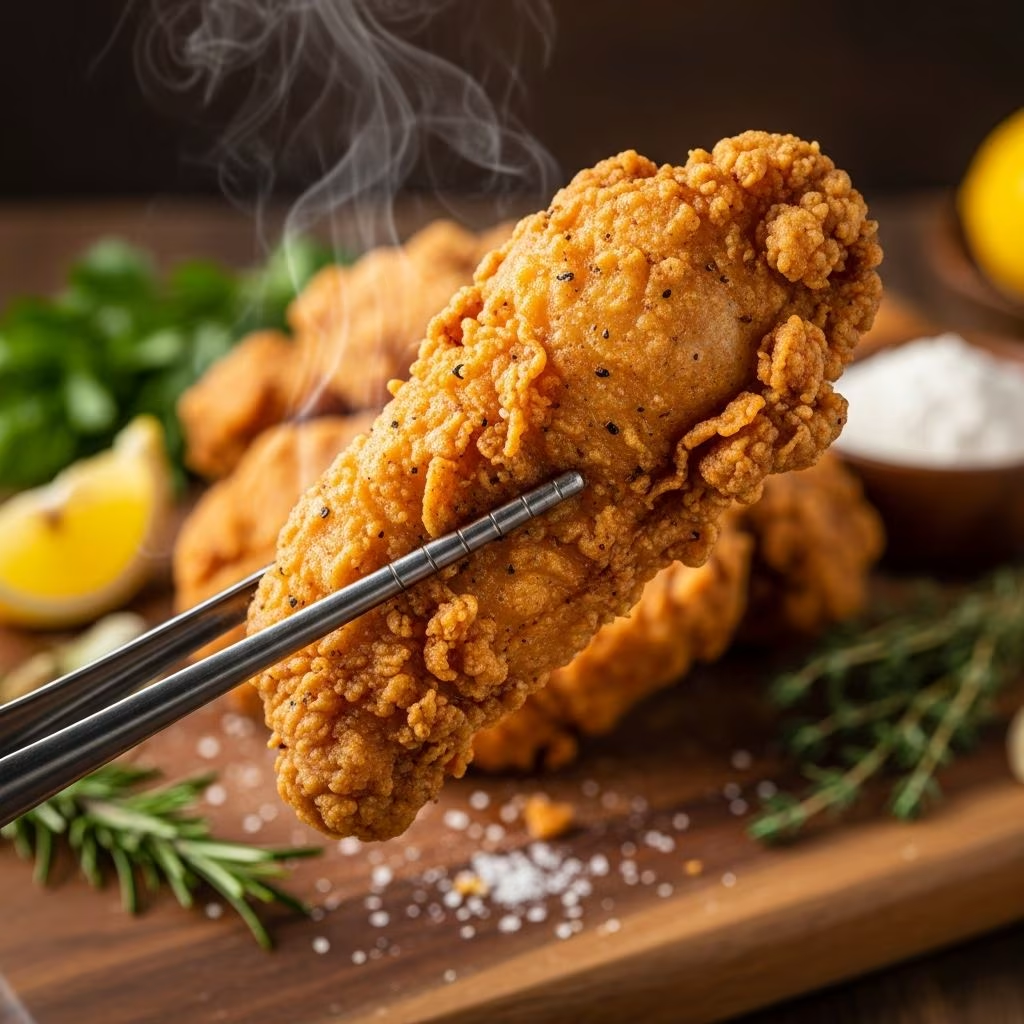
Achieving that perfect golden-brown, crispy exterior on fried chicken has long been considered a culinary skill reserved for professional kitchens and established restaurants. However, the truth is that anyone can replicate this satisfying result in their own kitchen by understanding the science behind the coating and mastering a few fundamental techniques. The key lies not in complicated ingredients or advanced equipment, but rather in knowing how specific components work together and maintaining precise control over the cooking environment.
The Foundation: Understanding Your Coating Components
The most critical factor in producing exceptionally crispy fried chicken is the composition of your flour mixture. While many home cooks rely solely on all-purpose flour, professionals understand that combining multiple dry ingredients creates a superior texture and appearance. The traditional flour-only approach results in a coating that can become tough and rubbery, lacking the desirable crunch that distinguishes truly excellent fried chicken.
The Power of Cornstarch
Cornstarch serves as a game-changer in fried chicken preparation. When combined with flour, cornstarch prevents excessive gluten development, which is the primary cause of dense, chewy coatings. The starch granules create a more delicate network structure that fries up incredibly crispy. Additionally, cornstarch contributes to that appealing golden-brown color that catches the eye before you even taste the chicken. The ratio matters significantly—combining equal parts flour and cornstarch creates an optimal balance between structural integrity and crispiness.
Baking Powder’s Role in Texture
Baking powder functions differently than most home cooks realize when used in fried chicken coatings. Rather than leavening the chicken itself, the baking powder reacts with the hot oil during frying, creating microscopic air bubbles throughout the coating. These tiny pockets of air contribute substantially to the final texture, creating a coating that shatters satisfyingly when bitten into. The chemical reaction between baking powder and oil is what separates an adequate fried chicken coating from an exceptional one.
Preparing the Bird: Pre-Frying Treatment
What happens to your chicken before it ever touches the flour mixture significantly influences the final result. The preparation phase establishes the foundation for tender, flavorful meat beneath that crispy exterior.
The Brining Process
Brining is a moisture-retention technique that transforms the texture and flavor of chicken dramatically. By submerging chicken pieces in a saltwater solution, you allow the salt to penetrate the protein structure and help the meat retain moisture during cooking. A basic brine consists of water or milk, salt, and aromatics like garlic, peppercorns, and bay leaves. The acidic quality of buttermilk or milk-based brines additionally helps break down proteins, resulting in more tender meat.
The minimum brining time is 2-3 hours, but overnight brining produces noticeably superior results. During this extended time, the salt equilibrates throughout the meat, ensuring even seasoning and moisture distribution. After brining, pat the chicken thoroughly dry—moisture on the surface interferes with coating adhesion and prevents proper browning.
Creating the Wet Component
The wet batter serves as an adhesive that helps your seasoned flour mixture cling to the chicken. Rather than using plain water or milk, incorporating a small portion of your seasoning mixture into the wet batter creates a more complex flavor profile. Reserve approximately one cup of your dry mixture and combine it with cold water to form a smooth paste. This approach ensures that flavors are distributed more evenly throughout the coating and creates a stronger bond between the chicken and the exterior layer.
Building Your Signature Seasoning Blend
While the base mixture of flour and cornstarch provides the structure, your seasoning blend defines the chicken’s flavor profile. The following components work together to create depth and complexity:
- Kosher salt – Enhances all other flavors and helps develop a more flavorful crust
- White and black pepper – Provide subtle heat and complexity; white pepper contributes a slightly different flavor profile than black
- Garlic powder – Delivers concentrated savory notes without the moisture of fresh garlic
- Onion powder – Adds umami and a subtle sweetness that balances the savory components
- Smoked paprika – Contributes depth and a hint of smokiness that suggests professional preparation
- Cayenne pepper – Provides adjustable heat levels based on personal preference
- Chicken bouillon powder – Amplifies the chicken flavor through concentrated seasoning
Unlike mixtures that are merely sprinkled onto chicken, incorporating a portion of your brining liquid into the dry mixture creates textured, craggly bits that adhere more effectively and brown more evenly. This technique produces those desirable irregularities in the coating that catch the eye and provide varied textures in each bite.
Mastering Oil Selection and Temperature
The oil you choose and how you manage its temperature determine whether your fried chicken emerges golden and crispy or greasy and heavy.
Choosing the Right Oil
The ideal frying oil possesses a high smoke point and neutral flavor profile. Oils that break down at high temperatures release unpleasant flavors and create inferior crusts. Recommended options include avocado oil, canola oil, vegetable oil, grapeseed oil, and peanut oil. Each offers a smoke point above 350°F, which is necessary for proper frying. Peanut oil adds a subtle flavor that some cooks prefer, while completely neutral oils allow the chicken seasonings to shine without competition.
Temperature Control and Monitoring
Maintaining proper oil temperature is non-negotiable for successful fried chicken. The ideal frying temperature falls between 325-350°F, with adjustments depending on your chicken pieces’ size. When chicken enters cool oil, it absorbs excess fat rather than developing a crispy exterior. Conversely, oil that is too hot burns the exterior before the interior cooks through.
Starting your oil at a slightly higher temperature than your target compensates for the temperature drop that occurs when cold chicken enters the pot. This strategy allows you to fry at your target temperature throughout the process. An infrared or deep-fry thermometer removes guesswork and ensures consistent results across multiple batches.
Practical Oil Management
Use a heavy-bottomed pot or Dutch oven that distributes heat evenly and retains temperature effectively. The oil depth should allow chicken pieces to be fully submerged—typically requiring 2 quarts depending on your vessel size. Never overcrowd the pot, as this causes temperature fluctuations and oil overflow. Fry in groups of similar-sized pieces to ensure even cooking.
The Coating Application Process
How you apply the flour mixture directly affects coating quality and adhesion. This step requires attention and technique rather than speed.
Dredging Technique for Maximum Coverage
Work with one piece of chicken at a time rather than batching multiple pieces together, which leads to messy, uneven coating. Dip each piece in your wet batter, allowing excess to drip off naturally. Transfer immediately to your seasoning mixture and press firmly, ensuring complete coverage. Use both hands—one keeps your dry hand for applying flour, while the other manages the wet chicken. Press and squeeze the mixture against the chicken, forcing it to adhere to the surface.
This active pressing process is what creates those desirable irregular textures and ensures the coating bonds securely to the meat. Once fully coated, place the chicken on a baking sheet lined with parchment paper and allow it to rest while you prepare the oil. This resting period helps the coating set and adhere more firmly.
Frying and Finishing Techniques
The actual frying process requires attention and careful management to produce consistent results.
Lowering and Monitoring
When introducing chicken to hot oil, lower it gradually rather than dropping it suddenly. This technique allows the oil temperature to adjust gradually and prevents splattering. Once submerged, allow the chicken to cook without moving it around excessively. Gently wave pieces occasionally to prevent sticking, but constant movement disrupts crust formation.
Determining Doneness
Frying times vary based on piece size and thickness. Small pieces may require 8 minutes, while larger pieces need 12+ minutes. Visual cues include golden-brown coloring and the coating appearing crispy. The only reliable way to verify doneness is using a meat thermometer—the internal temperature must reach 165°F. Checking temperature prevents both undercooking and the overcooking that results in dry meat.
Post-Frying Drainage
Remove fried chicken onto a paper towel-lined baking sheet to allow excess oil to drain. This step prevents the exterior from becoming soggy as the chicken cools. For pieces that need additional cooking time to reach proper internal temperature, transfer them to a 375°F oven for several minutes while the exterior remains crispy.
Troubleshooting Common Issues
| Problem | Likely Cause | Solution |
|---|---|---|
| Greasy, heavy coating | Oil temperature too low | Use thermometer to verify temperature; maintain 325-350°F |
| Coating separates from chicken | Insufficient pressing during dredging; moisture on chicken surface | Press firmly when coating; pat chicken dry after brining |
| Burnt exterior, raw interior | Oil temperature too high; pieces too large | Lower temperature; cut larger pieces into smaller sections |
| Pale, non-crispy coating | Missing cornstarch or baking powder; temperature too low | Use full coating formula; verify oil temperature |
| Dry chicken meat | Overcooking; skipped brining step | Reduce cooking time; always brine beforehand |
Equipment Recommendations
Investing in proper tools eliminates variables and improves consistency:
- Infrared thermometer – Quickly reads oil temperature without contact
- Meat thermometer – Confirms internal chicken temperature accurately
- Dutch oven or heavy-bottomed pot – Distributes heat evenly and retains temperature
- Wire cooling rack – Allows air circulation for optimal drainage
- Splatter screen – Reduces hot oil splashing during frying
Storing and Reheating Your Creation
Properly stored fried chicken maintains quality for several days. Keep cooled chicken in an airtight container in the refrigerator for up to four days. When reheating, use a 350°F oven for 10-15 minutes rather than a microwave, which softens the crispy coating. Adding a few tablespoons of water to the bottom of your baking pan creates steam that moisturizes the meat while the oven heat restores the coating’s crispiness.
Frequently Asked Questions
Should I rinse the brine off the chicken before coating?
Pat the chicken dry with paper towels rather than rinsing it. Surface moisture interferes with coating adhesion, and gentle patting removes excess brine while maintaining the beneficial effects of the brining process.
Can I use all-purpose flour exclusively?
You can, but results will be noticeably different. The cornstarch and baking powder combination creates texture that all-purpose flour alone cannot achieve. These additions are inexpensive and make a significant difference.
What oil temperature is best?
Target 325-350°F depending on your pieces’ size. Smaller pieces cook adequately at 325°F, while larger pieces benefit from 350°F to cook through before over-browning.
How often should I replace frying oil?
Strain oil between uses to remove food particles. Replace completely after 4-6 frying sessions or if it begins smoking at lower temperatures or smells off.
Can I make this gluten-free?
Substitute all-purpose flour with gluten-free flour blends from reputable brands like Bob’s Red Mill or King Arthur. Maintain the cornstarch and baking powder for texture and crispiness.
Conclusion
Creating restaurant-quality fried chicken at home requires understanding component functions, managing temperature precisely, and applying proven techniques consistently. The coating formula of flour, cornstarch, and baking powder provides superior crispiness compared to traditional methods. Proper brining ensures moist, flavorful meat, while careful oil temperature management and appropriate frying times produce the golden exterior that makes fried chicken so appealing. With these principles mastered, you’ll produce fried chicken that rivals any restaurant version and impresses family and guests every single time.
References
- Easy Fried Chicken — CJ Eats Recipes. 2024. https://cjeatsrecipes.com/easy-fried-chicken/
- How To Make The Best Fried Chicken — YouTube. 2024. https://www.youtube.com/watch?v=AJbJYwEduso
- The CRAZIEST Fried Chicken Recipe Ever — YouTube. 2024. https://www.youtube.com/watch?v=Tllvbptc7CA