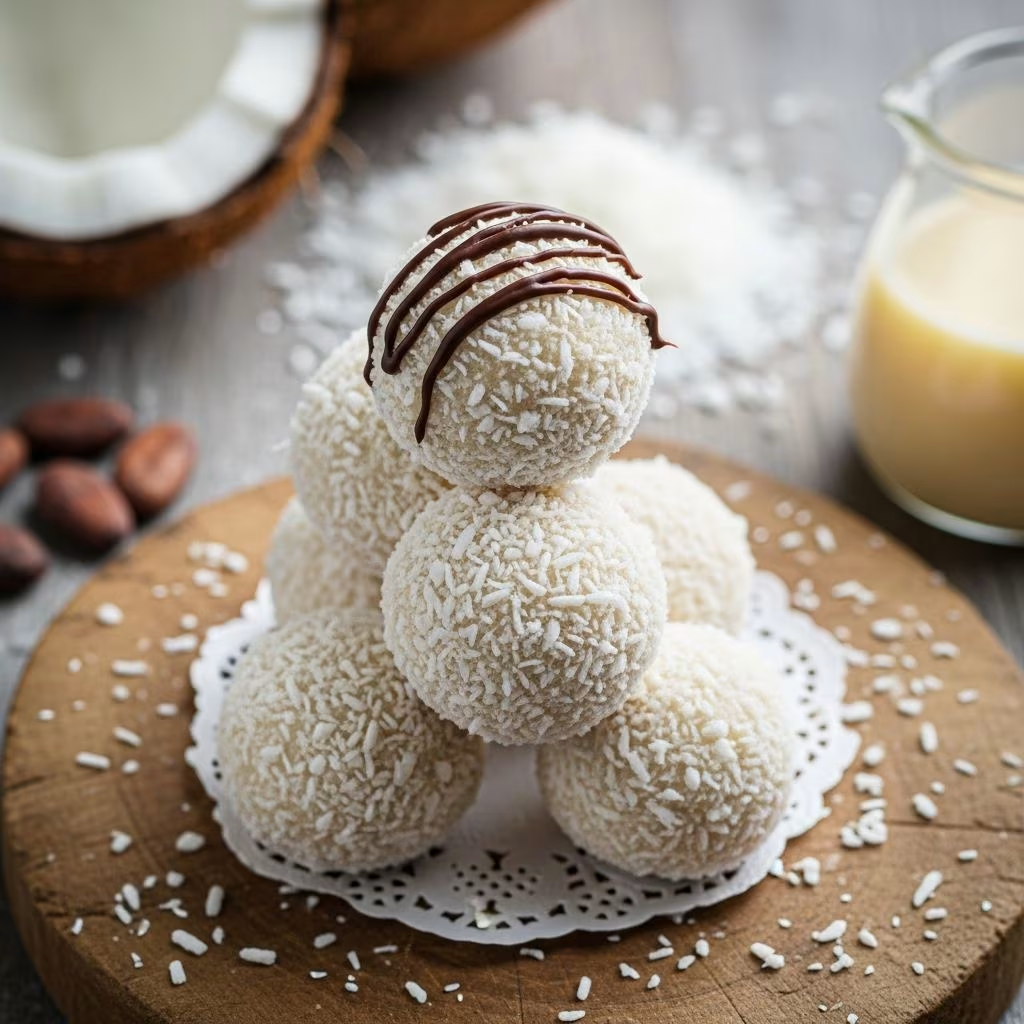
Creating handmade coconut bon bons at home transforms simple pantry ingredients into elegant confections that rival professional chocolatiers. These bite-sized treasures feature a tender coconut filling encased in a silky chocolate shell, making them ideal for holiday gatherings, gift-giving, or satisfying sudden sweet cravings. Unlike store-bought alternatives, homemade versions allow complete control over ingredient quality and customization options, resulting in superior flavor and texture.
Understanding the Fundamentals of Coconut Bon Bon Construction
Coconut bon bons consist of three fundamental components working in harmony: a coconut-based filling core, a protective chocolate coating, and optional embellishments. The filling serves as the foundation, combining sweetened condensed milk, shredded coconut, and binding ingredients to create a moldable mixture. The chocolate shell provides texture contrast and visual appeal, while toppings such as nuts, sprinkles, or drizzles add personalization and sophistication.
The beauty of this confection lies in its simplicity. With minimal equipment and readily available ingredients, even novice candy makers can achieve professional results. The process involves five primary phases: filling preparation, shaping, chilling, chocolate coating, and final setting.
Essential Ingredients and Their Functions
The Foundation: Coconut Components
Shredded coconut forms the textural base of your bon bon filling. Most recipes utilize sweetened flaked coconut, which offers convenience and consistent sweetness. The quantity typically ranges from 14 to 28 ounces depending on your desired yield and texture preference. Unsweetened coconut presents an alternative for those seeking to control sugar content more precisely, though this requires flavor balancing through other ingredients.
Binding and Texture Agents
Sweetened condensed milk acts as the primary binding agent, providing moisture and richness while helping ingredients cohere into a workable paste. This ingredient eliminates the need for additional liquids and contributes distinctive sweetness. Butter, typically ranging from one-half to one full stick depending on the recipe, enhances texture and adds depth of flavor. Some formulations incorporate powdered sugar to achieve desired consistency and sweetness levels, with quantities varying from 2 to 3.5 cups.
Flavor Enhancement and Optional Additions
Vanilla extract provides subtle complexity to the filling, though many recipes omit it entirely. Chopped nuts—particularly pecans and walnuts—introduce textural variety and can be mixed into the filling or used as a dusting on the chocolate exterior. Creative variations include incorporating food coloring into the filling for festive presentations or adding finely ground nuts for different flavor profiles.
Chocolate Coating Selection
Melting chocolate, chocolate chips, or almond bark comprise the outer shell, with 24 ounces being standard for most recipes. Quality significantly impacts the final result; premium chocolate produces smoother, glossier coating compared to lower-grade alternatives. Some recipes recommend adding coconut oil or vegetable oil to the melted chocolate to achieve optimal consistency for dipping, improving flow and reducing thickness of the final coating.
Preparation Methodology and Process Steps
Combining the Filling Components
Begin by melting butter in a large mixing bowl, or use softened butter if preferred. Add the shredded coconut and powdered sugar gradually, mixing thoroughly to ensure even distribution. Pour in the sweetened condensed milk while continuing to mix, combining ingredients until a uniform, moldable dough-like consistency develops. The mixture may initially appear too dry or crumbly; persistent mixing and kneading by hand typically resolves this, as the ingredients gradually hydrate and consolidate.
Shaping Your Bon Bons
Roll the coconut mixture into uniform 1-inch balls, aiming for approximately 48 pieces from a standard recipe. Using a measuring tablespoon ensures consistent sizing, promoting even cooking and professional appearance. Line baking sheets with wax paper or parchment paper to prevent sticking and facilitate later transfer. Roll each ball as smoothly as possible to minimize ridges that might affect chocolate coating quality.
Critical Chilling Phase
Transfer prepared balls to the freezer for 30 to 45 minutes. This chilling period solidifies the filling sufficiently to withstand chocolate dipping without dissolving or losing shape. Some recipes recommend refrigerating for extended periods—up to 1.5 hours—for maximum firmness, particularly beneficial when dipping a large batch where individual balls might soften while waiting in room temperature conditions.
Chocolate Melting and Application
Melt chocolate using either a double boiler or microwave in 30-second intervals, stirring between rounds to prevent scorching. If using a double boiler, ensure water doesn’t contact the chocolate bowl, as even small moisture amounts can cause seizing. For microwave melting, use 50% power settings with frequent stirring to maintain optimal temperature. Add coconut oil or vegetable oil—approximately one tablespoon per 12 ounces of chocolate—to achieve dipping consistency without excessive thickness.
The Dipping Process
Remove chilled coconut balls from the freezer in small batches to prevent premature softening. Using a fork or dipping tool, submerge each ball into the melted chocolate, coating completely, then tap the utensil against the bowl’s rim to remove excess coating. Transfer dipped bon bons immediately to a clean parchment-lined baking sheet. Work methodically to establish a rhythm that prevents filling from warming and softening.
Final Setting and Storage
Refrigerate completed bon bons for approximately one hour until the chocolate shell hardens completely. Some recipes suggest freezing for extended preservation, though room temperature storage in an airtight container works for shorter timeframes. Properly stored homemade bon bons maintain quality for up to two weeks, though they’re typically consumed much sooner.
Ingredient Quantity Variations and Customization Options
| Recipe Variation | Key Ingredient Differences | Yield and Characteristics |
|---|---|---|
| Classic Buttery Version | ½ cup butter, 2 lbs. powdered sugar, 14 oz. coconut, nuts optional | Yields approximately 48 pieces; denser, more buttery texture |
| Simplified Minimalist Recipe | 2.67 cups coconut, ½ cup condensed milk, ⅔ cup powdered sugar | Yields approximately 24-30 pieces; lighter, more delicate texture |
| Nutty Enhancement | Standard filling plus 1 cup chopped nuts mixed in, ⅓ cup fine nuts for dusting | Yields approximately 48 pieces; added crunch and flavor complexity |
| Extra-Rich Formulation | Full stick butter, 3.5 cups powdered sugar, 28 oz. coconut | Yields approximately 60 pieces; intensely flavored, creamy center |
Professional Techniques for Superior Results
Temperature Management
Maintaining optimal temperatures throughout the process directly impacts final quality. Excessively warm chocolate becomes too thin, resulting in thick, uneven coatings that pool at the bottom of each bon bon. Conversely, chocolate that cools too much becomes too thick for proper dipping and may require reheating. Similarly, insufficiently chilled filling softens during dipping, compromising shape and causing filling to escape the chocolate shell.
Batch Processing Strategy
Rather than dipping all balls simultaneously, remove them from the freezer in smaller batches—perhaps eight to ten at a time. This approach prevents the first balls from softening while later ones are still being dipped. Maintain the freezer batch at cold temperature while actively dipping the working batch.
Chocolate Consistency Perfection
The melted chocolate should flow smoothly off a fork without being so thin that it drips constantly. If the mixture becomes too thick, gently reheat it briefly. If too thin, allow it to cool slightly before resuming dipping. Adding small amounts of coconut oil helps achieve this balance without compromising flavor.
Troubleshooting Common Challenges
Filling Mixture Not Coming Together
If the combination remains crumbly despite mixing efforts, the issue typically stems from insufficient moisture. Add additional sweetened condensed milk one tablespoon at a time while kneading by hand. The mixture should eventually consolidate into a cohesive dough.
Chocolate Coating Cracking or Peeling
Cracks indicate rapid temperature changes or insufficient freezing before dipping. Ensure coconut balls are properly hardened before chocolate application. Additionally, avoid placing freshly dipped bon bons directly into the refrigerator; allow them to set at room temperature first before refrigerating for final hardening.
Chocolate Shell Separation
This occurs when residual moisture on the coconut ball prevents chocolate adhesion. Pat balls dry with paper towels after removing from the freezer, or ensure filling is sufficiently firm before dipping.
Creative Variations and Personalization Ideas
While the classic version provides a delightful foundation, numerous adaptations cater to specific preferences and occasions. Incorporate food coloring into the filling mixture for festive presentations—pastel pink for Valentine’s Day or mint green for spring gatherings. Layer different chocolate types, combining milk chocolate with dark or white chocolate for visual appeal and flavor contrast.
Experiment with coatings beyond traditional chocolate: white chocolate offers a lighter option, while almond bark provides different flavor dimensions. Finish with creative toppings such as crushed candy canes, toasted coconut flakes, edible glitter, or drizzles of contrasting chocolate. For nutty variations, process coconut in a blender before mixing to achieve finer texture, or incorporate ground nuts into the filling for enhanced complexity.
Helpful Questions About Coconut Bon Bon Making
How Long Do Homemade Coconut Bon Bons Last?
Properly stored bon bons remain fresh for approximately two weeks in an airtight container kept at room temperature. Refrigeration extends shelf life to three weeks, while freezing preserves them for up to three months without significant quality deterioration.
Can You Make Coconut Bon Bons Without Nuts?
Absolutely. Nuts serve as optional additions rather than essential components. The basic filling of coconut, sweetened condensed milk, butter, and powdered sugar creates perfectly delicious bon bons without any nut inclusions.
What’s the Best Chocolate Type for Dipping?
Melting chocolate or chocolate wafers specifically formulated for candy making work best, as they contain higher fat content and fewer additives than regular chocolate chips. Premium brands produce smoother, more professional-looking finishes.
Can You Refrigerate the Filling Before Shaping?
Yes. Refrigerating the filling for 1 to 1.5 hours before rolling into balls can make handling easier, particularly with recipes containing higher proportions of condensed milk, which may be stickier at room temperature.
Is Double Boiler Necessary for Melting Chocolate?
No. Microwave melting works effectively when using 50% power settings and frequent stirring. The double boiler simply provides more gradual, controlled heating that reduces scorching risk. Choose whichever method you find most manageable.
Conclusion: Mastering This Elegant Confection
Creating homemade coconut bon bons represents an accessible entry point into candy making, requiring minimal specialized equipment and basic cooking skills. The combination of tender coconut filling and smooth chocolate coating delivers satisfaction rivaling expensive professional confections. By understanding ingredient functions, following systematic processes, and applying professional techniques, candy makers at any experience level can produce stunning results worthy of gift presentation or special occasion tables.
References
- Grandma’s Bon Bons with Coconut — Cooking With Carlee. Accessed 2026. https://cookingwithcarlee.com/grandmas-bon-bons-with-coconut/
- Chocolate Coconut Bonbons Recipe — Powered By Mom. Accessed 2026. https://powered-by-mom.com/chocolate-coconut-bon-bons-recipe/
- Easy Coconut Bonbons — Now Cook This. Accessed 2026. https://nowcookthis.com/easy-coconut-bonbons/
- Coconut Bon Bons #2 — My Country Table. Accessed 2026. https://mycountrytable.com/coconut-bon-bons-2/
- Chocolate Coconut Bonbons — Desserts Required. Accessed 2026. https://www.dessertsrequired.com/chocolate-coconut-bonbons