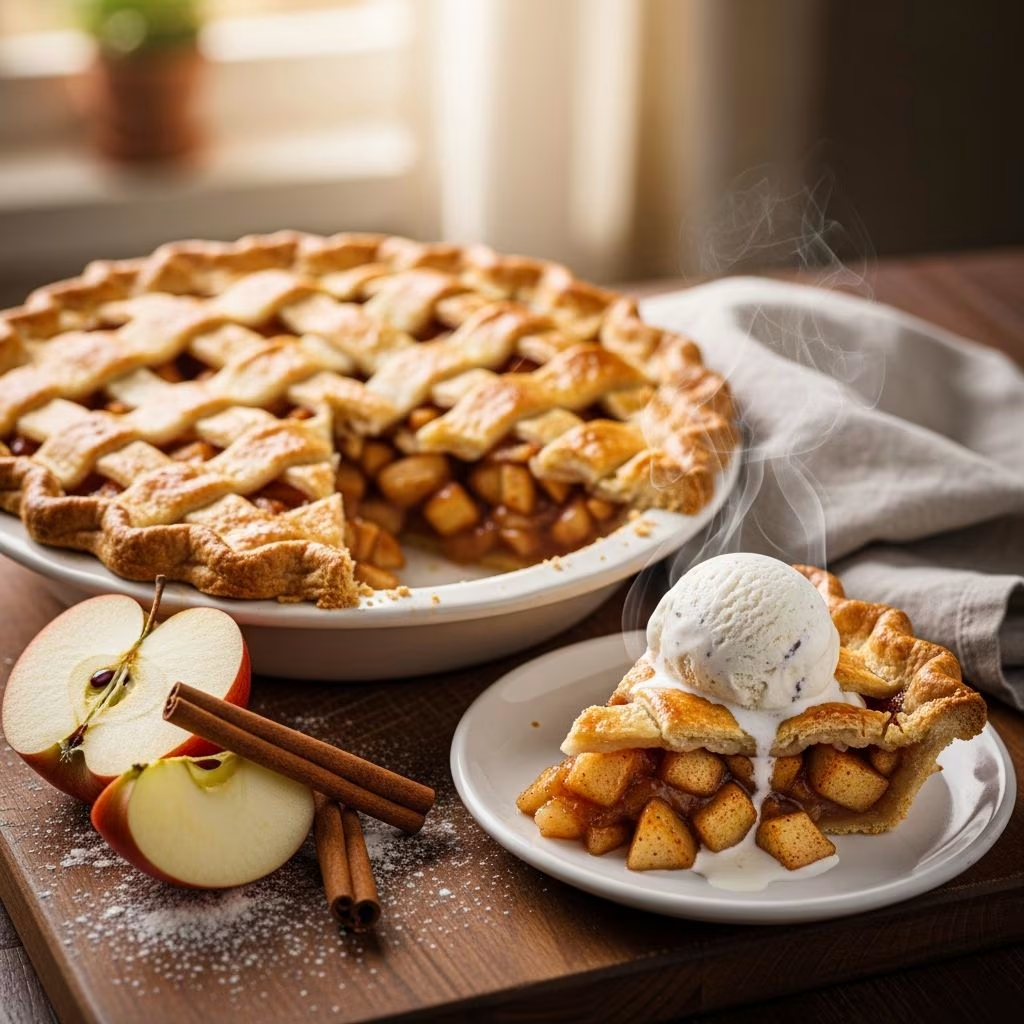
Apple pie represents one of America’s most cherished desserts, embodying warmth, comfort, and the satisfaction that comes from creating something delicious from scratch. Whether you’re preparing for a holiday gathering or simply craving a homemade treat, mastering the art of apple pie baking opens the door to countless variations and family traditions. This comprehensive guide walks you through every step of the process, from assembling your ingredients to pulling a golden-brown masterpiece from your oven.
Understanding the Fundamentals of Apple Pie
Apple pie consists of two primary components: the pastry crust and the fruit filling. The success of your finished pie depends on understanding how each element contributes to the overall result. The crust provides structural support and delivers that coveted flaky texture that makes homemade pie distinct from store-bought alternatives. The filling, meanwhile, creates the sweet, spiced interior that makes each bite memorable.
The beauty of apple pie lies in its simplicity. With basic pantry staples and fresh apples, you can create a dessert that rivals anything from a professional bakery. The key is respecting the process and understanding the role of each ingredient.
Selecting the Right Apples for Your Pie
The choice of apples significantly impacts your pie’s final flavor and texture. Unlike sweet eating apples, baking apples hold their shape during cooking and offer a pleasant tartness that balances the sugar in the filling. Granny Smith apples are widely recommended for their firm texture and bright, acidic flavor that prevents the filling from becoming overly sweet or mushy.
Many experienced bakers prefer using a combination of apple varieties. Mixing tart Granny Smith apples with sweeter Rome apples creates complexity and depth. This blending approach allows you to achieve multiple flavor notes—tartness from one variety and subtle sweetness from another—resulting in a more sophisticated finished product.
For a single pie, you’ll typically need between six and ten large apples, depending on their size and how thickly you slice them. Selecting firm apples without soft spots ensures you’re starting with the best possible raw materials.
Preparing Your Apple Filling
Begin by peeling your apples using a vegetable peeler or paring knife. Remove the core using an apple corer or by carefully slicing the apple into quarters and cutting away the center. Slice each apple into uniform pieces, approximately one-quarter to one-half inch thick. Uniform sizing ensures even cooking throughout the filling.
Transfer your sliced apples to a large mixing bowl. This is where the magic begins—combining your fruit with the seasonings that define the pie’s character. The core ingredients for your spice mixture include:
- Granulated sugar (between one-third to one-half cup)
- All-purpose flour (two to three tablespoons)
- Ground cinnamon (one and one-half teaspoons)
- Salt (one-half teaspoon)
Some recipes incorporate additional spices like nutmeg or use a combination of granulated and brown sugar. The flour serves an important purpose beyond flavoring—it helps absorb excess moisture released by the apples as they cook, preventing a soggy crust.
Mix these ingredients thoroughly with your apple slices, ensuring each piece is evenly coated. This step is crucial because it allows the apples to begin releasing their juices, which will combine with the sugar and flour to create the pie’s natural sauce. Let this mixture rest for at least thirty minutes, or preferably several hours, before assembling your pie.
Crafting the Perfect Pie Crust
The crust demands careful attention and proper technique. Whether you prepare it from scratch or use prepared dough, understanding crust basics helps you achieve results that are both delicious and visually appealing.
From-Scratch Crust Components: A traditional pie crust combines all-purpose flour, salt, sugar, cold fat (typically butter and sometimes lard), and ice-cold water. The proportions generally follow this pattern: two and one-half cups flour, one teaspoon salt, one and one-half teaspoons sugar, one-half cup cold butter, and five to seven tablespoons of ice-cold water.
The Mixing Process: Combine your dry ingredients in a large bowl, whisking them together to distribute the salt and sugar evenly. Cut your cold butter into small cubes and add it to the flour mixture. Using a pastry blender, two knives, or your fingertips, work the butter into the flour until the mixture resembles coarse breadcrumbs or peas. This step is essential because the small pockets of butter create steam during baking, which produces the characteristic flaky layers.
Add your ice-cold water gradually, stirring gently with a fork until the dough just comes together. Avoid overworking the dough, as excessive mixing develops gluten, resulting in a tough crust. The dough should hold together when pressed but shouldn’t be wet or sticky.
Divide the dough in half, shape each half into a disc, wrap in plastic wrap, and refrigerate for at least one hour. This resting period allows the gluten to relax and the fat to firm up, both of which contribute to a flaky finished crust.
Rolling Out Your Crusts
Remove one dough disc from the refrigerator and let it sit at room temperature for five to ten minutes. This brief warming makes the dough more pliable and easier to work with. Generously dust your work surface with flour, then place the disc in the center.
Using a rolling pin, start rolling from the bottom of the disc, moving away from your body. After two or three rolls, rotate the dough ninety degrees and repeat. This rotation ensures even thickness and prevents the dough from sticking to the surface. Continue until you achieve a circle approximately twelve inches in diameter and one-eighth inch thick.
Carefully transfer the rolled crust to your nine-inch pie plate, allowing any excess to hang over the edges. Repeat this process with your second dough disc, but keep it on the work surface or transfer it to a baking sheet until you’re ready to top your pie.
Assembling Your Pie
Preheat your oven to between 350 and 400 degrees Fahrenheit, depending on your recipe. The exact temperature affects baking time and browning, so follow your specific recipe’s guidance.
Pour your apple filling into the prepared pie crust, discarding any excess liquid that has accumulated at the bottom of the bowl. Dot the surface of the filling with small knobs of butter, approximately two tablespoons total. These butter pieces will melt into the filling during baking, enriching its flavor.
Dampen the exposed edge of the bottom crust with a little water using your fingertips. This moisture acts as a seal, helping the top crust adhere securely. Carefully roll your second crust onto your rolling pin and unroll it over the filling. Press gently around the edges to seal the two crusts together.
Trim any excess dough using a sharp knife or kitchen shears, aiming to leave an even amount extending beyond the pie plate’s edge. Fold this edge under itself, creating a rim that sits on top of the pie plate’s edge. Using your fingers, create a decorative fluted or crimped edge by pressing your thumb and forefinger together at intervals around the perimeter.
Cut three to four slits in the top crust to allow steam to vent during baking. This prevents excess pressure buildup and helps regulate moisture loss from the filling. If you’re using an egg wash for browning, brush it over the entire top crust now, being careful not to seal your vent slits.
Baking Your Pie to Perfection
Place your assembled pie on a baking sheet to catch any drips. Bake at your recipe’s specified temperature for the recommended duration. Most apple pies bake for approximately one hour to one hour and thirty minutes. The exact time depends on your oven’s characteristics and whether the crust browns quickly.
Rotate the pie halfway through baking to ensure even browning. Some recipes recommend initially baking at a higher temperature (around 400°F) for the first twenty-five minutes, then reducing to 350°F for the remainder of the baking time. This approach helps set the crust while allowing the filling to cook through.
Your pie is done when the crust achieves a deep golden-brown color and the filling is visibly bubbling around the vent slits. The bubbling indicates that the filling is properly cooked and the starches in the flour have absorbed the excess moisture.
If your crust browns too quickly before the filling finishes cooking, cover the edges with a pie shield or aluminum foil to prevent burning.
Cooling and Serving
Remove your pie from the oven and place it on a wire cooling rack. Resist the temptation to slice into it immediately. The filling needs time to set as it cools. The pectin and flour in the filling continue to gel as the temperature drops, creating a filling that slices neatly rather than running across the plate.
Allow your pie to cool at room temperature for at least one to three hours before slicing. Some bakers prefer letting their pie cool completely, which can take several hours or overnight. A fully cooled pie will hold its shape best when cut.
Serve slices slightly warm or at room temperature, optionally topped with vanilla ice cream, whipped cream, or a drizzle of caramel sauce. Leftover pie can be refrigerated for up to four days, though it’s best consumed within the first two days for optimal texture and flavor.
Common Challenges and Solutions
| Challenge | Cause | Solution |
|---|---|---|
| Soggy Crust | Excess moisture from filling | Use flour in filling; discard excess liquid; place pie on baking sheet in lower oven rack position |
| Tough Crust | Overworked dough or too much water | Handle dough minimally; use ice-cold water; don’t skip the resting period |
| Uneven Browning | Hot spots in oven | Rotate pie halfway through; use pie shield; monitor closely |
| Runny Filling | Inadequate thickening or over-ripe apples | Increase flour amount; use firmer apple varieties; extend cooling time |
| Burnt Edges | High oven temperature or long baking time | Cover edges with foil; reduce temperature slightly; check doneness regularly |
Variations to Explore
Once you master the basic recipe, consider experimenting with variations. Adding lemon zest and juice brightens the filling and enhances the apple flavors. A touch of nutmeg or cardamom introduces warmth and complexity. Brown sugar can replace some of the granulated sugar for deeper caramel notes.
For texture variations, some bakers use tapioca starch instead of flour as a thickener, which creates a more transparent filling. Others add a crumb topping instead of a top crust, creating a hybrid between traditional pie and crisp.
Storage and Make-Ahead Tips
Pie dough can be prepared up to two days in advance and refrigerated, or frozen for up to three months. The apple filling can be prepared and refrigerated for up to eight hours before assembly, making this recipe convenient for advance preparation.
Once baked, covered pie keeps in the refrigerator for up to four days. To reheat, warm slices in a 350°F oven for approximately ten minutes, which restores the crust’s crispness while warming the filling.
Frequently Asked Questions
Can I use pre-made pie crust?
Yes, store-bought crusts offer convenience and produce satisfactory results. While homemade crusts typically provide superior texture and flavor, quality store-bought options are acceptable if time is limited.
Why is my crust shrinking?
Shrinkage occurs when dough is overworked or insufficiently rested. Ensure you refrigerate your dough for at least one hour before rolling and baking.
Should I blind bake the bottom crust?
For apple pie, blind baking isn’t necessary. The relatively long baking time allows the bottom crust to cook through adequately.
What’s the best apple variety for pie?
Granny Smith apples are ideal for their tartness and firm texture. Combining them with sweeter varieties creates balanced flavor.
How do I know when my pie is done?
The crust should be golden brown and the filling should bubble visibly around the vent slits. Use a thermometer to check that the filling reaches 195-205°F at the center.
References
- Grandma’s Old Fashioned Apple Pie — Coley Cooks. Retrieved from https://coleycooks.com/grandmas-apple-pie/
- Grandma’s Old Fashioned Apple Pie — Art and the Kitchen. Retrieved from https://www.artandthekitchen.com/grandmas-old-fashioned-apple-pie/
- Easy Apple Pie Recipe (Just like Grandma Made!) — Little Spoon Farm. Retrieved from https://littlespoonfarm.com/apple-pie-recipe/
- Great Grandma’s Old Fashioned Apple Pie Recipe — A Bright Moment. Retrieved from https://abrightmoment.com/great-grandmas-old-fashioned-apple-pie-recipe/
- Grandma’s Apple Pie Recipe From Scratch — Attainable Sustainable. Retrieved from https://www.attainable-sustainable.net/apple-pie-recipe/