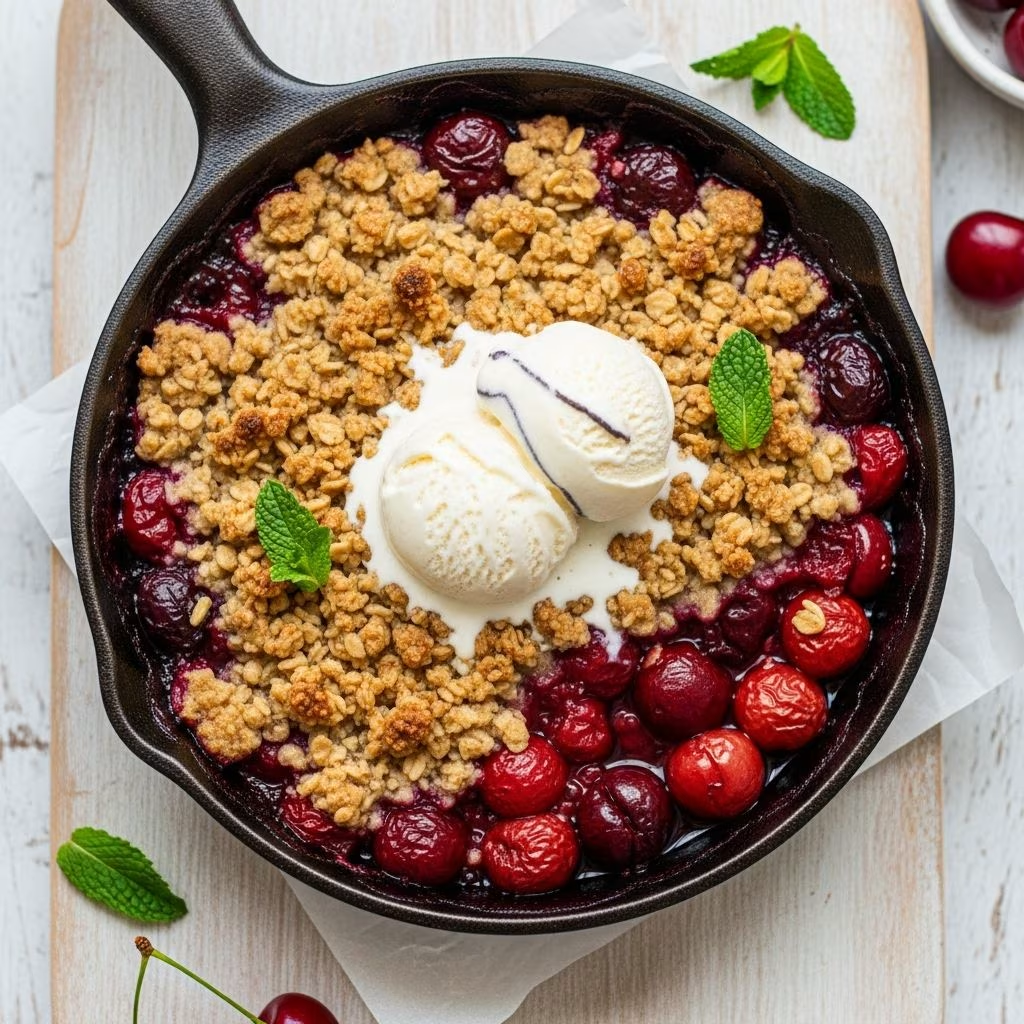
Cherry crisp represents one of the most approachable yet impressive fruit-based desserts that can grace any dinner table. This timeless preparation combines the natural sweetness of fresh cherries with a textured, buttery topping that becomes golden and crispy as it bakes. Whether you’re preparing for a casual family gathering or a more formal occasion, understanding the fundamentals of creating a memorable cherry crisp will elevate your dessert-making capabilities.
Understanding Cherry Crisp Fundamentals
A cherry crisp consists of two primary components working in harmony: a filling layer and a topping layer. The filling delivers the fruit-forward flavor and moisture, while the topping provides structural contrast and textural interest. Unlike more complicated desserts requiring specialized techniques, cherry crisp remains forgiving and adaptable, making it an ideal choice for both novice and experienced bakers.
The charm of this dessert lies in its simplicity combined with its versatility. The basic formula remains consistent across variations, yet each baker can introduce personal touches through ingredient selection and preparation methods. Understanding each layer’s purpose enables you to troubleshoot issues and customize the recipe to suit your preferences and dietary considerations.
Selecting and Preparing Cherry Varieties
The foundation of exceptional cherry crisp begins with selecting high-quality fruit. Fresh sweet cherries form the traditional choice, with several prominent varieties available during peak season. Bing cherries, recognizable by their deep mahogany color, deliver robust sweetness and firm texture ideal for baking applications. Rainier cherries, distinguished by their golden-red appearance, offer a slightly milder sweetness with delicate flavor profiles.
For those preferring tartness or working outside prime cherry season, sour cherries present an excellent alternative. When using sour varieties, increase the sugar content by two to three tablespoons to balance acidity. Additionally, frozen and thawed cherries work effectively as substitutes when fresh options prove unavailable; ensure they’re thoroughly drained before combining with other filling ingredients to prevent excess moisture in the finished dessert.
Cherry Preparation Steps:
- Rinse cherries under cold running water and pat dry with paper towels
- Remove the pits using a cherry pitter tool, which simplifies an otherwise tedious process
- Halve each pitted cherry to promote even cooking and juice release
- Allow prepared cherries to rest briefly before mixing with other filling components
Crafting the Perfect Filling Layer
The filling layer requires careful attention to balance moisture, sweetness, and texture. Begin by combining pitted and halved cherries with granulated sugar, which draws out natural juices and creates a syrupy consistency. The typical ratio includes approximately one-half cup of sugar for five cups of prepared cherries, though adjustments may be necessary based on the selected variety’s inherent sweetness.
Acidic components enhance cherry flavor complexity and prevent the dessert from becoming cloying. Fresh lemon juice, typically one tablespoon per five-cup batch, brightens the profile while its zest adds subtle aromatic dimension. Some preparations incorporate vanilla extract or almond extract, introducing subtle depth that complements rather than overshadows the fruit’s natural characteristics.
Thickening agents prove essential for achieving proper consistency. Cornstarch works reliably, absorbing excess moisture while remaining transparent in the finished product. Arrowroot starch offers a similar function with a slightly different texture. Allow the mixture to macerate for approximately ten minutes after combining ingredients, enabling the cherries to release their juices and develop cohesion before transfer to the baking vessel.
Developing the Crisp Topping
The topping layer provides both textural contrast and visual appeal. Traditional crisp toppings combine old-fashioned rolled oats with flour, creating a base that achieves crispness during baking. Brown sugar adds depth and moisture to the topping, resulting in texture that remains pleasantly crunchy rather than hard.
Cold unsalted butter forms the binding agent that, when cut into the dry ingredients, creates pea-sized pieces. These butter pieces melt during baking, distributing throughout the topping and producing the characteristic crumbly texture. The cutting-in process requires a pastry blender, fork, or fingertips; work methodically until the mixture resembles coarse breadcrumbs.
Spice selections personalize the topping layer. Ground cinnamon appears in virtually all versions, contributing warmth and complementary flavor. Optional additions include ground cardamom for exotic depth, nutmeg for subtle sweetness, or ginger for gentle heat. A pinch of sea salt enhances overall flavor development and balances sweetness.
Topping Ingredient Composition:
- Old-fashioned oats: 0.75 to 1 cup (provides texture and structure)
- All-purpose flour: 0.33 to 0.5 cup (creates binding structure)
- Brown sugar: 0.5 cup packed (adds moisture and depth)
- Cold unsalted butter: 4 to 6 tablespoons (creates crispness through proper fat distribution)
- Ground cinnamon: 1 teaspoon (primary spice component)
- Additional spices: varying amounts based on preference
- Sea salt: small pinch (enhances flavor complexity)
Assembly and Baking Techniques
Proper assembly ensures even cooking and optimal texture development. Transfer the cherry mixture, including accumulated juices, into a prepared baking vessel. Nine-by-nine-inch square pans, ten-inch skillets, and two-quart rectangular dishes all work effectively. Grease vessels with butter or cooking spray to prevent sticking and facilitate removal.
Distribute the topping mixture evenly across the cherry layer, covering all fruit. Avoid pressing or compacting the topping, as this creates a dense crust rather than the desired crispy texture. Uneven distribution results in some areas that brown excessively while others remain pale.
Bake at 350 to 375 degrees Fahrenheit, with most preparations requiring forty to fifty minutes. The crisp reaches completion when the topping achieves golden-brown color and the filling bubbles visibly at the edges. If the topping browns too rapidly before the filling achieves proper consistency, tent the dessert loosely with aluminum foil during the final ten to fifteen minutes.
Allow the finished crisp to cool for fifteen to twenty minutes before serving, though many prefer waiting longer. This resting period enables the filling to set slightly, resulting in more defined portions. Cooling also allows flavors to marry and develop greater complexity.
Serving Variations and Accompaniments
The finished cherry crisp welcomes numerous serving presentations. Vanilla ice cream provides the classic accompaniment, with its coolness and creaminess contrasting beautifully with warm fruit and textured topping. Plain Greek yogurt offers a lighter alternative, adding subtle tartness without overwhelming the cherry flavor.
Fresh mint leaves supply visual appeal and aromatic complexity. Whipped cream, either homemade or stabilized with gelatin for extended holding, creates an elegant presentation. Some prefer serving the crisp at room temperature rather than warm, which shifts flavor perception and texture characteristics.
Individual ramekins enable elegant plating for special occasions. Dividing filling and topping evenly across small vessels creates restaurant-quality presentation while maintaining portion control. This approach also allows selective flavor adjustments for guests with dietary restrictions.
Storage and Make-Ahead Strategies
Completed cherry crisp stores effectively in the refrigerator, covered tightly with plastic wrap or aluminum foil, for up to five days. The filling maintains quality, though the topping gradually softens over time as moisture from the cherries penetrates the surface.
For advance preparation, combine filling ingredients the morning of service, leaving the mixture covered in the refrigerator. Prepare the topping separately, storing in an airtight container; combine components only immediately before assembly and baking. This approach streamlines preparation while ensuring optimal texture in the finished product.
Unbaked assembled crisps freeze successfully for one to two months. Wrap completely before freezing to prevent freezer burn. Bake directly from the frozen state, adding ten to fifteen minutes to the recommended baking time. This strategy enables preparation weeks in advance, offering convenient options for unexpected gatherings.
Customization and Dietary Modifications
Cherry crisp adapts readily to various dietary considerations. Gluten-free preparations substitute all-purpose flour with cornstarch, tapioca starch, or gluten-free flour blends in both filling and topping components. Adjust quantities slightly, as gluten-free flours often require different hydration levels.
Vegan versions replace unsalted butter with coconut oil or plant-based butter alternatives. Though texture shifts slightly, cold coconut oil achieves similar crumbly results. Maple syrup substitutes effectively for granulated sugar, creating slightly denser topping with complex caramel notes.
Dairy-free serving options include coconut milk-based whipped cream, almond milk-based yogurt, or sorbet alongside the completed crisp. These accompaniments complement rather than compete with cherry and topping flavors.
Troubleshooting Common Challenges
Soggy topping often results from inadequate filling drainage or topping moisture penetration. Ensure the thickening agent quantity matches recipe specifications, and avoid covering the crisp immediately after removal from the oven. Allowing adequate cooling time permits surface moisture evaporation.
Dry filling indicates insufficient thickening agent or excessive baking time. Verify oven temperature accuracy using an independent thermometer, as miscalibration causes extended baking beyond recommended timeframes. Increase liquid components slightly in future preparations if dryness persists.
Uneven browning suggests either rack position within the oven or insufficient topping distribution. Rotate the baking vessel halfway through cooking for more uniform results. Ensure adequate oven preheating before inserting the prepared crisp.
Exploring Flavor Combinations
While cherries work beautifully alone, introducing complementary fruits expands possibilities. Raspberries pair naturally with cherries, their tartness balancing cherry sweetness. Blueberries contribute earthy notes and appealing color variation. Stone fruits including peaches or nectarines create harmonious flavor combinations when combined with cherries in equal proportions.
Liqueur additions enhance sophisticated preparations. Kirsch, a cherry-based brandy, intensifies cherry character. Amaretto adds almond undertones that complement both fruit and topping. Bourbon introduces subtle warmth without overwhelming delicate cherry flavor. Use sparingly, approximately one to two tablespoons, ensuring alcohol cooks off completely during baking.
Making Cherry Crisp for Gatherings
Cherry crisp scales efficiently for feeding groups. Double or triple recipes proportionally, using larger baking vessels to accommodate increased volume. Multiple standard-sized pans bake more evenly than single oversized vessels, as heat penetration remains more uniform.
For larger gatherings, assemble multiple crisps and stagger baking times using different oven racks. Monitor browning carefully, rotating pans between racks halfway through cooking to ensure consistent color development across all vessels.
Nutritional Considerations
Cherry crisp offers nutritional benefits beyond its pleasurable taste. Fresh cherries contain significant levels of antioxidants and beneficial compounds. The combination of fruit and whole grains in the topping provides fiber and sustained energy. While not a health food, cherry crisp remains a more fruit-forward dessert than many alternatives, delivering actual fruit nutrition alongside indulgence.
Frequently Asked Questions
Can I prepare cherry crisp ahead of time?
Yes, both fully baked crisps and uncooked assembled versions freeze well. Baked crisps reheat effectively in a 300-degree oven for 10 to 15 minutes. Uncooked versions bake directly from frozen, requiring 10 to 15 additional minutes of baking time.
What distinguishes crisp from crumble?
Terminology varies regionally. Crisp typically includes oats in the topping, while crumble omits them. Both feature similar baking methods and fill-to-topping ratios. The distinction remains primarily semantic rather than technical.
How do I prevent cherry juice from staining?
Wear an apron and work over a light-colored cloth or paper towels to contain spills. If staining occurs, treat immediately with cold water before washing. Some prefer working directly over the baking vessel to minimize spillage.
Can I use canned cherries?
While canned cherries contain added sugars and sodium, they work in emergencies. Drain thoroughly and reduce added sugar in the recipe to compensate. Fresh or frozen options deliver superior flavor and texture.
What baking vessel size works best?
A nine-by-nine-inch square pan or two-quart rectangular dish provides ideal dimensions for even cooking. Ten-inch skillets work similarly well. Avoid extremely shallow or deep vessels, as they alter cooking time and texture development.
References
- Antioxidant Capacity and Polyphenolic Compounds of Tart Cherries (Prunus sp.) — Journal of Agricultural and Food Chemistry. 2005. https://pubs.acs.org/doi/abs/10.1021/jf0484097