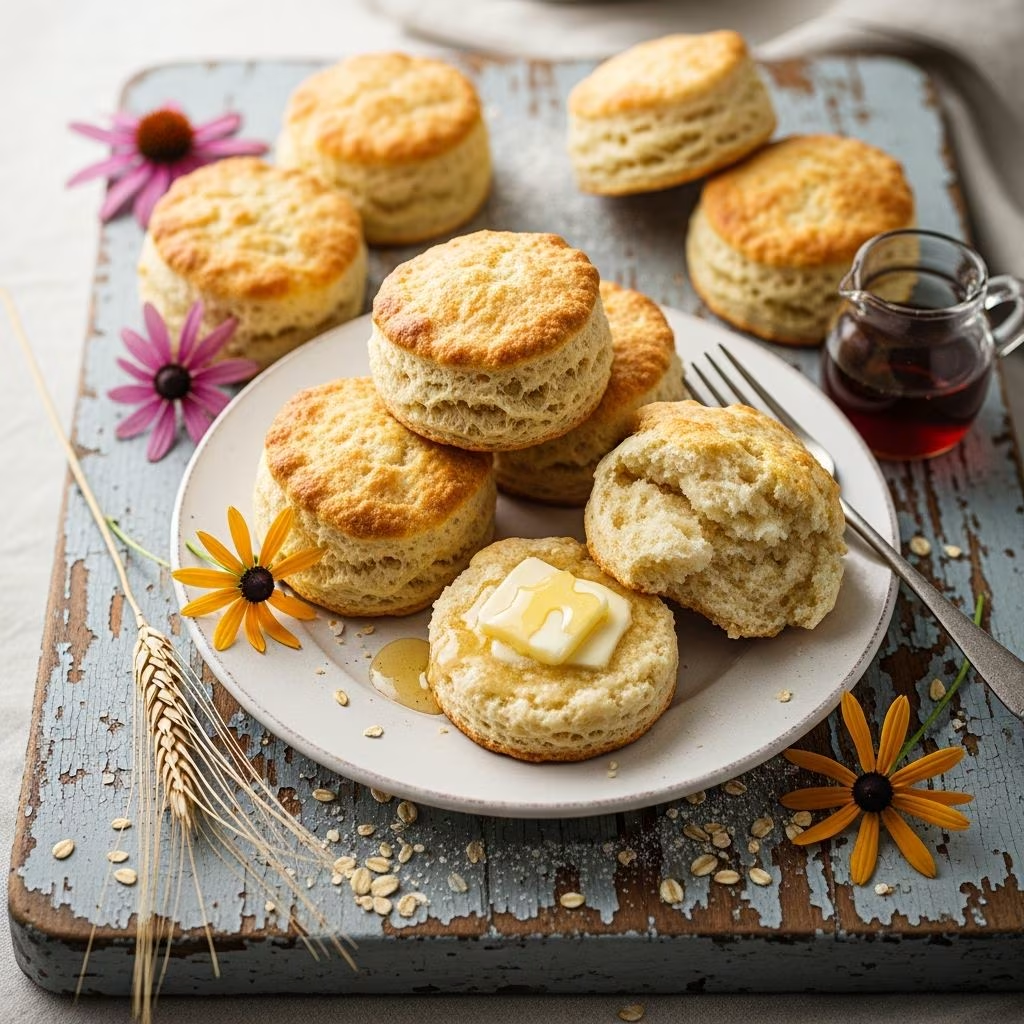
Buttermilk biscuits represent one of the most cherished staples in home baking, bringing together simple ingredients to create something truly extraordinary. This guide explores the complete process of making these golden, flaky delights, drawing from traditional methods perfected across generations. Whether you’re preparing breakfast, lunch, or dinner, understanding the fundamentals of biscuit-making will elevate your baking repertoire and impress family and friends alike.
The Foundation: Understanding Your Ingredients
Creating exceptional buttermilk biscuits begins with understanding each ingredient’s role in the final product. The interplay between dry and wet components determines texture, flavor, and rise. Unlike many other baked goods, biscuits rely on precise proportions and technique rather than complex ingredient lists.
Dry Ingredients: Building Structure
All-purpose flour serves as the primary structural component, providing gluten development that gives biscuits their characteristic texture. Baking powder and baking soda work as leavening agents, creating the rise that produces those desirable layers. Cream of tartar stabilizes the rising process and adds subtle tanginess, while salt enhances overall flavor and strengthens gluten strands. Together, these dry components create the framework for your biscuits.
Fats: The Secret to Flakiness
The fat component—whether lard, butter, or shortening—fundamentally determines biscuit texture. Traditional recipes often use lard because it creates exceptionally flaky results through its unique melting properties. When kept cold and cut into small pea-sized pieces throughout the flour, fat remains partially solid during initial mixing. As biscuits bake, these fat pockets melt, creating steam and separation between layers, resulting in the prized flaky texture.
Buttermilk: Moisture and Tanginess
Buttermilk provides essential moisture while adding subtle tangy flavor that distinguishes biscuits from bread. The acidity in buttermilk reacts with baking soda, creating additional lift and tenderness. If fresh buttermilk isn’t available, you can create a substitute by adding lemon juice or vinegar to regular milk and allowing it to sit for five to ten minutes until slightly thickened and curdled.
Essential Equipment and Preparation
Success with biscuits depends not only on ingredients but also on proper equipment and workspace preparation. Having the right tools streamlines the process and improves consistency.
- Pastry blender or two knives: These tools cut fat into flour without generating excessive heat through hand friction
- Large mixing bowl: Provides adequate space for combining ingredients without spilling
- Biscuit cutter or round glass: Creates uniform shapes that bake evenly
- Ungreased baking sheet: Allows biscuits to develop a golden exterior without sticking
- Accurate oven thermometer: Ensures proper baking temperature, critical for consistent results
- Floured work surface: Prevents sticking during rolling and cutting
Before beginning, ensure all ingredients remain cold, especially buttermilk and fat. Cold ingredients preserve the structure needed for flaky layers. Additionally, preheat your oven to the specified temperature well in advance, allowing it to reach optimal heat distribution.
Step-by-Step Method for Perfect Biscuits
Combining Dry Ingredients
Start by whisking together flour, salt, baking soda, cream of tartar, and baking powder in a large bowl. This whisking action distributes the leavening agents evenly throughout the flour, promoting consistent rise across all biscuits. Proper distribution prevents pockets of baking soda or powder that could create unpleasant flavors or uneven browning.
Incorporating Fat
Cut the cold fat into the flour mixture using a pastry blender, working in a rocking motion until the mixture resembles coarse breadcrumbs. This stage demands attention—you’re aiming for pea-sized fat pieces distributed throughout. Avoid overworking, as excessive mixing generates heat and melts the fat, eliminating the steam pockets necessary for flakiness. The goal is rough, irregular texture rather than smooth, uniform crumbs.
Adding Moisture
Pour the cold buttermilk into the flour mixture and stir gently using a fork or wooden spoon. Mix only until the dry ingredients are just moistened; overmixing develops gluten, resulting in tough, dense biscuits. The dough should appear slightly shaggy and moist, not smooth or fully incorporated.
Kneading and Shaping
Turn the dough onto a floured surface and knead just a few times—typically three to five gentle folds—to form a cohesive mass. Minimal kneading preserves the fat distribution and maintains tenderness. Roll the dough to approximately one-inch thickness using even, gentle pressure. Cut biscuits with a floured cutter, pressing straight down without twisting, which seals the edges and promotes even rising.
Baking Process
Place biscuits on an ungreased baking sheet, positioning them close together so they support each other during baking. The contact between biscuits encourages upward rise rather than spreading. Bake at 450 degrees Fahrenheit for approximately twelve to fifteen minutes, until the tops achieve a golden-brown color. The exact timing depends on your oven’s characteristics, so begin checking around the twelve-minute mark.
Common Challenges and Solutions
| Problem | Likely Cause | Solution |
|---|---|---|
| Dense, Heavy Texture | Overmixing or warm ingredients | Mix minimally and keep all ingredients cold before beginning |
| Flat Biscuits | Insufficient leavening or dull baking soda | Check expiration dates and measure accurately |
| Lack of Flakiness | Fat melted into dough or overworked mixture | Use cold fat, cut in gently, minimize mixing and kneading |
| Burnt Bottoms | Oven rack too low or temperature too high | Position rack in center, verify oven temperature with thermometer |
| Uneven Browning | Oven hot spots or inconsistent biscuit size | Rotate sheet halfway through baking, cut uniform sizes |
| Tough, Crumbly Texture | Too much flour or insufficient buttermilk | Measure flour by spooning into cup, measure buttermilk accurately |
Recipe Variations and Adaptations
Sweet Biscuits for Breakfast
Transform standard biscuits by adding one tablespoon of sugar to the dry ingredients. This subtle sweetness pairs beautifully with jam, honey, or butter. Some bakers incorporate vanilla extract or almond extract for additional depth. These variations work particularly well for breakfast service, alongside eggs, bacon, or sausage.
Herb-Infused Varieties
Fresh or dried herbs elevate biscuits beyond breakfast applications. Adding one-half teaspoon of dried dill, chives, or Italian seasoning to the dry mixture creates savory options perfect for dinner service. Cheddar cheese—about one-half cup finely grated—can be stirred in with the buttermilk for a rich, tangy variation.
Alternative Fat Options
While traditional recipes utilize lard or vegetable shortening, butter produces excellent results, though with slightly less pronounced flakiness. Coconut oil offers an interesting alternative for those seeking dairy-free options, creating a tender crumb with subtle coconut undertones. Each fat type produces distinct flavor profiles and texture variations worth exploring.
Storage, Serving, and Enjoyment
Immediate Service
Buttermilk biscuits taste their absolute best served warm from the oven, with butter melting into the hot layers. The flakiness remains optimal during the first few hours after baking, making fresh biscuits a special treat worth timing correctly for mealtimes.
Short-Term Storage
Cooled biscuits can be stored in an airtight container at room temperature for up to two days, though texture gradually diminishes. To revive slightly stale biscuits, wrap them in foil and warm briefly in a 350-degree oven for about five minutes. This gentle reheating restores some of the original softness and fragrance.
Freezing for Later
Both baked and unbaked biscuits freeze successfully. Unbaked biscuits can be placed on a baking sheet, frozen solid, then transferred to freezer bags for up to three months. Bake directly from frozen, adding a minute or two to the baking time. Baked biscuits freeze well for up to two months, thawing naturally or warming from frozen in a 325-degree oven.
Frequently Asked Questions
Can I use non-fat buttermilk?
Non-fat buttermilk produces noticeably less flaky, somewhat denser biscuits. Full-fat or reduced-fat buttermilk contains more fat solids that contribute to the desired texture. If only non-fat buttermilk is available, adding one tablespoon of melted butter per cup can partially compensate for the missing fat.
What’s the difference between biscuits and scones?
While visually similar, biscuits typically contain more fat and less sugar than scones, resulting in a savory, flaky texture. Scones often include eggs and additional sugar, creating a slightly sweeter, more cake-like crumb. Biscuits prioritize flakiness and tender texture, while scones emphasize richness and slight sweetness.
Why shouldn’t I twist the biscuit cutter?
Twisting the cutter seals the cut edges, trapping gluten and preventing the biscuits from rising properly. Pressing straight down creates a clean cut that allows layers to separate freely during baking, promoting height and flakiness. This seemingly minor technique significantly impacts final results.
Can I make these ahead of time?
Yes, prepare unbaked biscuits several hours ahead, keeping them refrigerated on the baking sheet. This chilling time actually improves results by allowing the fat to resolidify, enhancing flakiness. Bake directly from the refrigerator, adding just a minute or two to the baking time if needed.
What oven temperature produces best results?
Most buttermilk biscuit recipes specify 425 to 450 degrees Fahrenheit. This relatively high temperature creates quick exterior browning while interior crumb remains tender. Temperatures below 400 degrees produce pale, flat biscuits, while temperatures above 475 degrees risk burnt exteriors with underdone centers.
Mastering the Art of Biscuit Making
Creating perfect buttermilk biscuits rewards attention to detail and respect for traditional techniques. The combination of cold ingredients, minimal mixing, proper fat distribution, and correct baking temperature produces exceptional results consistently. Whether following heritage recipes passed through families or experimenting with creative variations, understanding the fundamental principles ensures success. These golden, flaky rounds elevate everyday meals while providing comfort and satisfaction that connects us to baking traditions across generations and regions. With practice and attention to the techniques outlined in this guide, anyone can master the art of crafting bakery-quality buttermilk biscuits at home.
References
- PantryLink Recipes — PantryLink. Sadie’s Buttermilk Biscuits Recipe. https://pantrylink.app/recipes/sadies-buttermilk-biscuits-recipe
- Divas Can Cook — Divas Can Cook. Grandma Barb’s Southern Buttermilk Biscuits. https://divascancook.com/grandmas-southern-buttermilk-biscuits-recipe/
- Carla Hall — Carla Hall’s Official Recipe Collection. Carla Hall’s Perfect Buttermilk Biscuits Recipe. https://carlahall.com/carla-halls-perfect-buttermilk-biscuits-recipe/
- The Café Sucre Farine — The Café Sucre Farine. Ridiculously Easy Buttermilk Biscuits. https://thecafesucrefarine.com/ridiculously-easy-buttermilk-biscuits/
- United States Department of Agriculture — USDA. FoodData Central: All-Purpose Flour Nutritional Composition. 2024. https://fdc.nal.usda.gov/