Vertical roasting has become one of the most popular methods for cooking whole chicken, and for good reason. The technique involves positioning a chicken upright over a partially filled beverage can, creating an innovative cooking method that delivers exceptional results. This approach produces exceptionally moist meat while developing a crispy, flavorful exterior that’s difficult to achieve with traditional roasting methods. Whether you’re planning a backyard gathering or simply looking to expand your cooking repertoire, mastering this technique will elevate your culinary skills.
Understanding the Vertical Roasting Method
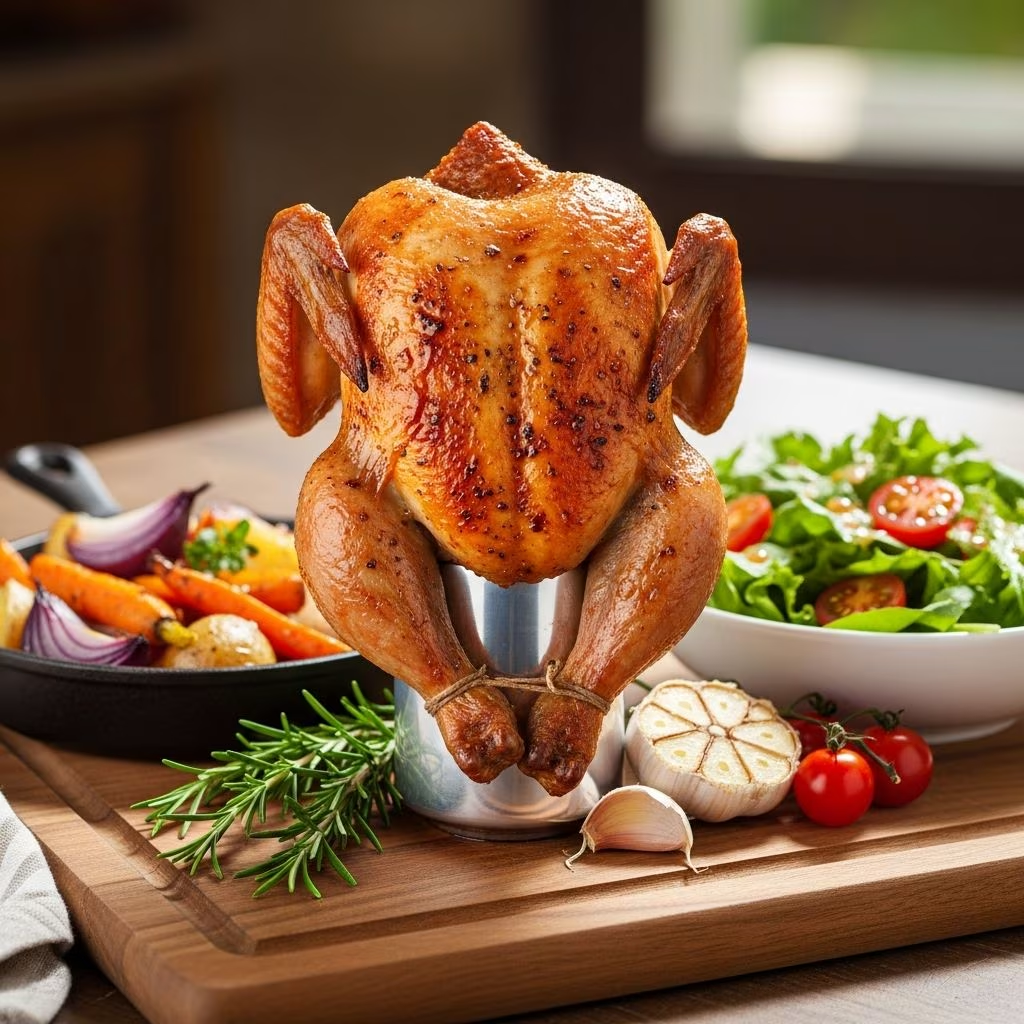
At its core, vertical roasting is a straightforward concept that yields remarkable outcomes. The bird sits atop an open beverage can positioned inside its cavity, with the liquid remaining in the can. This positioning serves multiple purposes throughout the cooking process. The liquid inside the can creates steam as it heats, which permeates the interior of the bird, keeping the meat exceptionally moist and tender. Simultaneously, the upright position allows heat to circulate evenly around the entire surface of the chicken, ensuring that all areas cook uniformly and develop that coveted golden-brown skin.
The vertical orientation also prevents the common problem of uneven cooking where breasts dry out before thighs finish cooking. By exposing all sides equally to the heat source, this method significantly reduces cooking time compared to traditional flat roasting. Additionally, the cavity remains open throughout cooking, allowing any internal moisture to escape gradually rather than becoming trapped and creating soggy skin.
Selecting Your Ingredients and Equipment
Choosing the Right Chicken
The foundation of any successful vertical roast begins with selecting an appropriate bird. Most recipes call for a whole chicken weighing between four and five pounds, which is the standard size found in most grocery stores and provides adequate servings for a typical family gathering. This size range ensures balanced cooking times and produces enough meat for generous portions. Ensure that your chicken is fresh or properly thawed if previously frozen, and always remove the neck and giblets from the cavity before beginning your preparation.
Beverage Selection
The name of this cooking method hints at the beverage container used, though the actual contents matter less than one might assume. Any standard twelve-ounce can will work, whether filled with beer, soft drinks, or even broth. The flavor contribution from the beverage is minimal, as the primary purpose is to provide moisture through steam generation. Choose whatever liquid you have available or prefer, keeping in mind that the choice won’t significantly impact the final taste of your chicken. Many cooks use whatever beverage they have on hand rather than purchasing something specifically for cooking.
Essential Equipment Considerations
While a simple can works adequately, several specialized tools can improve your results. Beer can chicken holders or stands are available commercially and provide enhanced stability, reducing the risk of the bird tipping over during cooking. If using a standard can, place it in a shallow roasting pan or cast iron skillet to catch drippings and prevent spills. For grill cooking, ensure your grill has sufficient space to accommodate the upright bird with the lid closed, or position it on the cooler side of a two-zone grill setup.
Preparing Your Bird for Cooking
Critical Drying Steps
One of the most important—yet often overlooked—preparation steps involves thoroughly drying the chicken’s exterior. Remove the bird from its packaging and pat it completely dry using paper towels, paying special attention to the skin folds and underside. Moisture on the surface creates steam rather than browning, resulting in pale, flabby skin instead of the crispy, golden exterior that makes this method so appealing. Spend adequate time on this step, as the extra effort directly correlates with final results.
Oil and Seasoning Application
Once the chicken is completely dry, lightly coat the entire bird with a thin layer of oil. This step serves multiple purposes: it helps seasoning adhere to the skin, promotes browning through the Maillard reaction, and prevents sticking. Use a high-heat cooking oil such as vegetable, canola, or light olive oil for best results. Apply the oil evenly across all surfaces, including the underside and between the legs and wings.
After oiling, generously coat the entire bird with your chosen seasoning blend. The spice layer creates complex flavors and an appetizing exterior. A basic blend typically includes kosher salt, paprika, garlic powder, onion powder, and optional heat elements like cayenne pepper or chili powder. Apply seasoning inside the cavity as well, ensuring consistent flavor throughout the bird. The spice rub creates a seasoned crust that locks in juices and delivers flavor with every bite.
Seasoning Blends and Flavor Combinations
Classic Spice Rub Formula
A foundational seasoning blend provides a balanced flavor profile that complements the natural taste of chicken without overwhelming it. Combine one tablespoon of kosher salt, one tablespoon of packed brown sugar, one tablespoon of paprika, two teaspoons each of garlic powder and onion powder, plus one teaspoon of chili powder with approximately one-half to one teaspoon of cayenne pepper. This ratio creates a versatile seasoning that delivers savory, slightly sweet, and subtly spicy notes. Mix these dry ingredients in a small bowl before applying to ensure even distribution.
Customization Options
The beauty of vertical roasting lies in its adaptability to various flavor preferences. For Mediterranean-inspired versions, incorporate oregano, thyme, and lemon zest into your blend. BBQ enthusiasts might substitute the basic rub with their preferred competition-style blends. Smoky flavors can be achieved by adding smoked paprika and chipotle powder. Some cooks prefer brining the chicken before roasting, creating additional moisture and flavor penetration throughout the meat. Experimenting with different seasonings allows you to create variations that suit your preferences and available ingredients.
Positioning and Stabilizing Your Bird
The Vertical Positioning Process
With your chicken properly seasoned, it’s time to position it on the beverage can. First, open your chosen can and pour out approximately half of its contents into a shallow pan or skillet. This reduction prevents excessive spillage during the cooking process. Working carefully, insert the can into the bird’s cavity until approximately two inches of the can remains outside the body. The chicken should sit firmly atop the can, appearing upright and stable. Adjust the position to ensure the bird won’t tip during cooking.
Ensuring Stability
Stability throughout cooking is essential for both safety and even results. If using a standard can, place the entire assembly on a sturdy, heat-safe surface, preferably a shallow roasting pan or cast iron skillet that will catch drippings. Some cooks tie the legs together with cotton butcher’s twine to create additional stability. For grill cooking, position the skillet or pan on the cooler side of your grill setup. If your bird remains wobbly, consider investing in a specialized beer can chicken holder that provides reinforced support, particularly if you’re cooking at higher temperatures or on a windy day.
Cooking Methods: Grill Versus Oven
Grilling Technique
Grilling produces the most traditional results and develops superior flavor through direct heat and smoke exposure. Preheat your grill to approximately 375 degrees Fahrenheit, ensuring grates are clean and well-oiled to prevent sticking. If using a gas grill, establish a two-zone temperature setup by preheating one side to medium-high and leaving the other burner off. Place your bird on the cooler side, maintaining heat around 350 degrees Fahrenheit. Close the lid and cook for approximately 90 minutes, checking the thickest part of the thigh with a meat thermometer for the target temperature of 165 degrees Fahrenheit.
During the final stages of grilling, you may increase heat briefly to crisp the skin further. If the wings begin darkening excessively, cover them with small aluminum foil pieces to prevent burning. Basting every 15 minutes after the first 30 minutes of cooking with melted butter and pan drippings enhances moisture and develops richer flavors.
Oven Roasting Alternative
Oven cooking provides an excellent alternative when grilling isn’t possible or preferred. Preheat your oven to 375 degrees Fahrenheit, positioning the racks in the lower third to ensure proper heat circulation around the bird. Place your prepared chicken assembly on the middle rack and roast for approximately 90 minutes until the thigh reaches 165 degrees Fahrenheit internally. Some recipes suggest starting at 400 degrees for slightly shorter cooking times, approximately one and one-half hours. The oven method produces slightly less crispy skin compared to grilling but remains highly effective for developing moist, tender meat.
Cooking Time Guidelines and Temperature Monitoring
Time Estimates Based on Weight
While exact cooking times vary based on equipment, starting temperature, and environmental factors, a general guideline suggests 15 to 20 minutes of cooking per pound. This calculation provides a reasonable estimate for planning purposes. A four-pound bird typically requires 60 to 75 minutes of cooking time, while a five-pound chicken generally needs 75 to 90 minutes. Smoking methods using lower temperatures around 225 degrees Fahrenheit require extended cooking times of two to three hours. However, these estimates serve only as starting points—relying on accurate temperature measurement ensures superior results regardless of timing variables.
Proper Temperature Verification
The only reliable method for determining doneness involves using an accurate meat thermometer. Insert the probe into the thickest part of the thigh without touching bone, as bone conducts heat differently than meat and produces inaccurate readings. The target internal temperature is 165 degrees Fahrenheit, the USDA-recommended safe temperature for poultry. Check the temperature at approximately the 75-minute mark for a typical grill setup, then continue monitoring every 10 minutes until the target is reached. This approach eliminates guesswork and ensures food safety without overcooked, dried-out meat.
Finishing Touches and Resting Protocol
Achieving Optimal Skin Texture
The final minutes of cooking significantly impact skin quality. Toward the end of your estimated cooking time, once the internal temperature approaches 160 degrees Fahrenheit, increase heat slightly to accelerate skin browning. This technique creates the crispy, golden exterior that makes vertical roasting so appealing without compromising interior moisture. If certain areas begin darkening too quickly, shield them with foil while allowing other sections to continue browning.
Critical Resting Period
Once your bird reaches the target temperature, resist the urge to carve immediately. Remove the chicken from heat and allow it to rest for at least 10 minutes before carving. During this resting period, the meat’s muscle fibers relax and reabsorb the juices that accumulated during cooking. Cutting immediately after cooking causes these valuable juices to escape onto the plate rather than remaining in the meat, resulting in drier, less flavorful portions. This seemingly simple step dramatically improves the eating experience.
Troubleshooting Common Issues
| Problem | Likely Cause | Solution |
|---|---|---|
| Pale, Rubbery Skin | Inadequate drying or insufficient heat | Ensure thorough pre-cooking drying and increase temperature during final cooking minutes |
| Dry Meat | Overcooking beyond 165°F | Use meat thermometer; remove bird immediately at target temperature |
| Uneven Cooking | Poor heat circulation or improper positioning | Verify bird is truly upright; ensure consistent heat source around entire bird |
| Burned or Charred Areas | Excessive heat or insufficient shielding | Reduce temperature; cover vulnerable areas with foil partway through cooking |
| Tipping During Cooking | Inadequate stabilization | Invest in proper chicken stand or ensure secure positioning in roasting pan |
Frequently Asked Questions
Can I use the same technique with different beverages?
Yes, absolutely. While the method is traditionally called beer can chicken, the actual beverage matters minimally. Soft drinks, broth, or even water work equally well. The primary function is steam generation rather than flavor contribution. Choose whatever you have available or prefer based on household preferences.
Is vertical roasting suitable for smaller or larger chickens?
The technique works best with birds in the 4-5 pound range, which cook more uniformly and fit standard roasting pans. Significantly smaller birds (under 3 pounds) may cook too quickly, while larger birds (over 6 pounds) require extended cooking times. For dramatically different sizes, adjust your cooking time estimates accordingly using the 15-20 minute per pound guideline.
What if my bird tips over during cooking?
Tipping is frustrating but recoverable. If you notice tipping, immediately remove the bird and reposition it carefully. Allow a few additional minutes of cooking time since the interruption disrupts the cooking process. Investing in a proper chicken stand prevents this issue entirely.
Should I brine the chicken before vertical roasting?
Brining isn’t necessary but does enhance moisture and flavor. If you choose to brine, prepare a saltwater solution 24 hours before cooking, then proceed normally with your vertical roasting. Pat the bird completely dry before seasoning to ensure proper skin browning.
Variations for Advanced Cooks
Once you’ve mastered the basic technique, explore variations that expand your culinary horizons. Smoking enthusiasts can adapt this method to smoking equipment, using lower temperatures around 225 degrees Fahrenheit for extended cooking periods that develop complex smoky flavors. Combine smoking with beer brining techniques using inexpensive beer to hydrate and season the bird. Some advanced cooks experiment with different rubs, herb butter injections, or vegetable infusions inside the cavity to create distinctive flavor profiles.
Serving and Storage Recommendations
Once your perfectly cooked bird reaches the table, consider how best to present and preserve any leftovers. Remove all meat from the carcass and store in airtight containers for up to three days. The carcass makes excellent stock for soups and sauces. Leftover meat works beautifully in sandwiches, salads, grain bowls, or shredded into tacos. Proper storage maintains quality and extends your meal’s versatility.
References
- Beer Can Chicken (Beer Butt Chicken) – Countryside Cravings — Countryside Cravings. 2024. https://www.countrysidecravings.com/beer-can-chicken/
- Beer Can Chicken | The Modern Proper — The Modern Proper. 2024. https://themodernproper.com/beer-can-chicken
- Moist & Juicy Beer Can Chicken (Grilled or Baked) — So Much Food. 2024. https://somuchfoodblog.com/beer-can-chicken/
- Roasted Beer Can Chicken Recipe — Traeger Grills. 2024. https://www.traeger.com/recipes/beer-can-chicken
- The Best Smoked Beer Can Chicken Recipe — Midwest Life and Style. 2024. https://www.midwestlifeandstyle.com/the-best-smoked-beer-can-chicken-recipe/
- Smoked Beer Can Chicken – Learn to Smoke Meat with Jeff Phillips — Smoking Meat. 2024. https://www.smoking-meat.com/october-31-2013-smoked-beer-can-chicken
- Pitmaster Field Guide: Smoky Beer-Brined Beer Can Chicken — Live Fire Republic. 2024. https://livefirerepublic.com/recipe/beer-brined-beer-can-chicken/