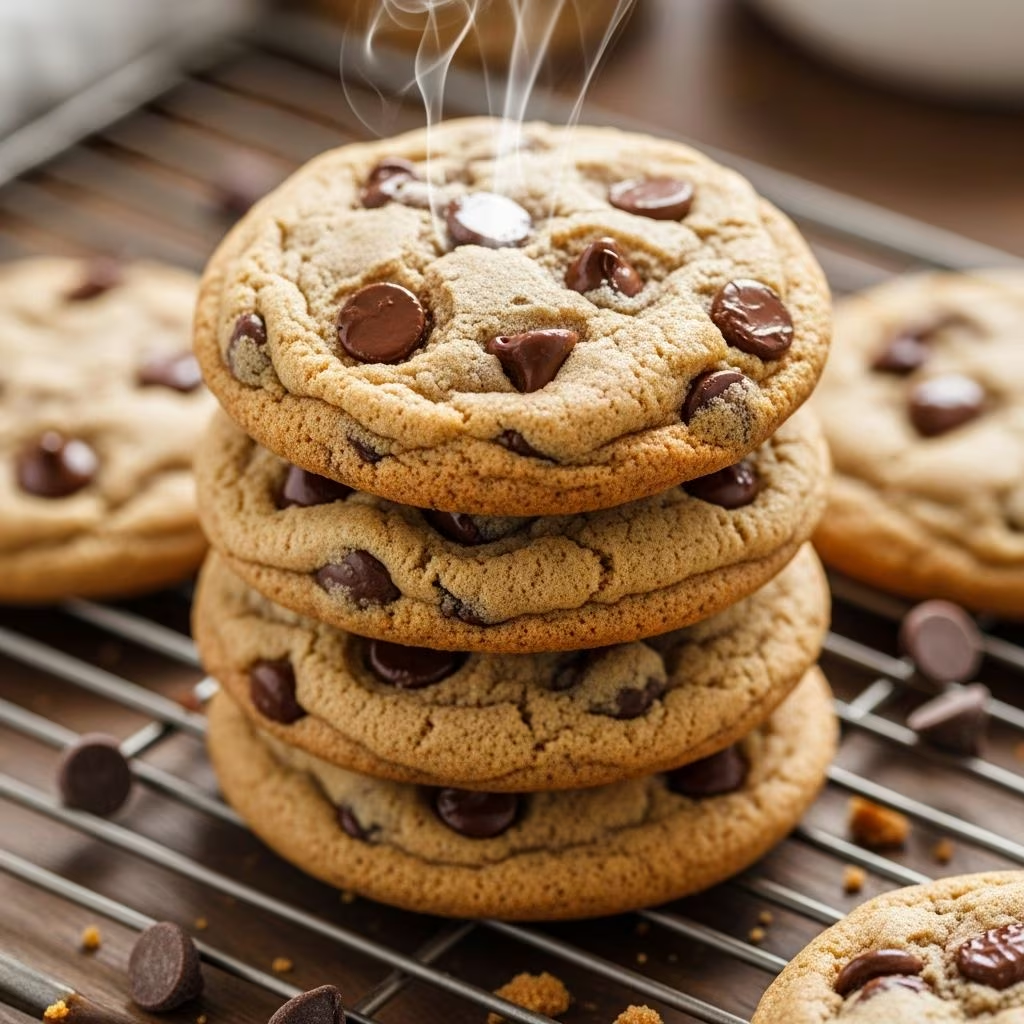
Creating the perfect chocolate chip cookie at home requires more than just following a recipe. It demands understanding the science behind each ingredient, recognizing how different techniques impact texture and flavor, and knowing when to deviate from conventional methods to achieve superior results. This comprehensive guide explores the essential elements of cookie craftsmanship, from ingredient selection through final baking techniques, enabling home bakers to produce cookies that rival their favorite bakery offerings.
Understanding Your Flour Selection
Flour serves as the structural foundation of any cookie, yet many bakers overlook how their flour choice fundamentally affects the final product. The type of flour you select, its protein content, and its processing history all contribute meaningfully to texture, spread, and chewiness.
Bread flour, which contains approximately 12-14% protein, creates a denser, chewier cookie with less spread. This higher protein content develops more gluten, resulting in a more robust structure that can support heavier chocolate chunks and remain slightly underbaked in the center. Conversely, all-purpose flour with its moderate 10-12% protein content offers a balanced approach, producing cookies with moderate spread and a tender crumb.
Beyond protein content, the bleaching process affects flavor development. Unbleached flour retains its natural characteristics and often delivers more complex, wheaty flavors that enhance the overall taste profile. For those seeking to deepen these natural flavors, a simple but effective technique involves toasting flour before incorporating it into your dough. Placing flour in a 300-degree Fahrenheit oven for 12-15 minutes develops deeper, more nuanced flavors that become particularly noticeable in the finished cookie.
Mastering Sugar Balance and Caramelization
Sugar serves dual purposes in cookie baking: providing sweetness while also influencing texture through caramelization and moisture retention. The ratio and types of sugars you employ directly impact cookie spread, browning, and mouthfeel.
Granulated cane sugar contributes to cookie spread and aids in creating crispy edges through caramelization at higher temperatures. Light brown sugar, which contains molasses, adds moisture, deeper flavor, and contributes to a chewier interior. The molasses in brown sugar also extends baking time slightly and promotes browning due to its acidic properties.
Combining equal parts granulated and brown sugar creates an ideal balance, producing cookies with complex flavor notes, golden-brown edges, and a tender center with slight chewiness. Using softened butter creamed with both sugars ensures proper incorporation and aeration, creating a foundation for cookies with desirable texture and structure.
Fat and Its Critical Role
Butter quality and temperature management significantly influence cookie texture and flavor. Unsalted butter provides superior flavor control, allowing you to manage the saltiness of your finished cookies precisely. Using chilled butter cubed into smaller pieces, rather than fully softened butter, offers distinct advantages.
When cold butter pieces are beaten into sugar, they create small air pockets and remain partially intact within the dough. Rather than creating a uniform, creamy base, this technique produces a slightly crumbly mixture that yields cookies with better texture variation—crispy edges with a tender center. The moisture retained in butter also contributes to cookie texture, and starting with cold butter slows its incorporation, preventing overworking of the dough.
The Science of Leavening Agents
Baking soda and baking powder work through different chemical mechanisms, and using both in appropriate proportions creates cookies with optimal rise, spread, and browning patterns.
Baking soda (sodium bicarbonate) reacts with acidic components in your dough, immediately producing carbon dioxide gas that aids browning through the Maillard reaction. This produces the desirable golden-brown edges characteristic of well-baked cookies. Baking powder contains baking soda plus acidic ingredients and starch, releasing gas more slowly and over a longer period, providing additional lift throughout the baking process.
Using baking powder as the primary leavening agent with a smaller amount of baking soda creates cookies that rise properly while developing attractive golden-brown exteriors. This combination produces better volume and more consistent browning patterns than using either leavening agent alone.
Eggs: Building Richness and Structure
Eggs play multiple roles in cookie architecture, far beyond simple binding. They contribute moisture, richness, emulsification, and the ability to incorporate air, all of which influence final texture and flavor.
Chilled eggs integrate differently into cold butter and sugar mixtures than room-temperature eggs. When you add chilled eggs gradually to your mixture, they incorporate slowly, creating a slightly separated appearance that signals proper integration. This technique prevents the dough from becoming too homogeneous, preserving the desirable texture variations that make cookies interesting.
Eggs’ proteins denature during mixing and baking, creating structure and trapping moisture. The lecithin in egg yolks acts as an emulsifier, helping fat and water-based ingredients blend smoothly. The moisture eggs provide extends shelf life and maintains cookie softness longer than cookies made without them.
Vanilla and Flavor Enhancement
Pure vanilla extract contributes vanilla flavor while its alcohol content helps dissolve and distribute flavor compounds throughout your dough. The amount of vanilla used affects both flavor intensity and the way other flavors present themselves in the finished cookie.
Beyond vanilla, consider how toasting flour or using unbleached flour contributes additional flavor complexity. These subtle flavor layers create cookies that taste more sophisticated and interesting than those made with basic ingredients.
Chocolate Selection and Preparation
Your chocolate choice determines the flavor profile and texture of your finished cookies. Semi-sweet and bittersweet chocolate offer different tasting experiences and work synergistically when combined.
Semi-sweet chocolate provides approachable sweetness and melts readily during baking, distributing throughout the cookie. Bittersweet chocolate offers deeper, more complex flavors with less sweetness, balancing the sugar in your dough. Using roughly chopped chocolate pieces rather than uniform chips provides texture variation—some chocolate melts into the dough while other pieces retain their shape, creating multiple sensations with each bite.
High-quality chocolate brands deliver superior flavor compared to basic chip varieties. The cocoa butter content and processing methods used by premium chocolate manufacturers result in smoother melting, richer flavor, and better overall cookie quality.
Essential Baking Techniques
Proper technique transforms quality ingredients into exceptional cookies through careful attention to mixing, portioning, and baking practices.
Mixing Methodology: Using a stand mixer with a paddle attachment provides consistent mixing without overdeveloping gluten. The goal involves mixing just until ingredients combine, avoiding the smooth, uniform dough that results from overmixing. Streaks of butter visible in your dough indicate proper mixing—the fat will continue incorporating during baking.
Dough Portioning: Using heaping half-cup mounds or approximately 120-gram balls creates properly-sized cookies that bake evenly. The roughness and irregularity of hand-portioned dough contributes character and texture variation compared to uniform scooped cookies.
Freezing Before Baking: Placing portioned dough in the freezer for at least one hour before baking serves multiple purposes. Cold dough spreads more slowly, allowing cookies to rise before excess spreading occurs. This technique produces cookies with better thickness and chewier texture. Additionally, freezing dough can develop flavor through the resting period, allowing ingredients to fully hydrate and flavors to meld.
Temperature and Timing Guidelines
Baking temperature significantly affects cookie structure and browning patterns. A 375-degree Fahrenheit oven provides the ideal environment for developing golden-brown edges while maintaining a slightly underbaked center.
Baking duration typically ranges from 9-10 minutes for smaller cookies to 19-22 minutes for larger portions, though these times serve as guidelines rather than absolutes. The goal involves removing cookies from the oven when edges appear golden brown but the center still looks slightly underbaked—the residual heat continues cooking the cookie as it cools on the baking sheet.
Rotating the baking sheet halfway through the baking time ensures even browning and prevents overcooking on one side. Removing cookies from the oven slightly early ensures tenderness and chewiness, as extended baking produces dry, overly crispy cookies.
Cooling and Final Texture Development
The cooling process substantially influences final texture. Leaving cookies on the baking sheet for 5 minutes allows the structure to set without becoming brittle. Transferring to a wire rack then permits air circulation, preventing steam from accumulating and softening crispy edges.
A gentle tap on the baking sheet before cooling settles the cookies and encourages the characteristic underbaked interior to continue cooking evenly as it cools.
Common Mistakes and Solutions
- Overmixing dough: Results in tough, dense cookies. Mix only until ingredients combine.
- Using room-temperature butter: Creates overly spread, thin cookies. Use chilled, cubed butter.
- Baking too long: Produces dry, crispy cookies without chewy centers. Remove slightly early.
- Skipping freezer time: Cookies spread excessively and bake unevenly. Freeze dough minimum one hour.
- Poor chocolate quality: Compromises flavor significantly. Invest in premium chocolate brands.
Troubleshooting Your Results
| Issue | Likely Cause | Solution |
|---|---|---|
| Cookies spread too much | Butter too soft or dough too warm | Use chilled butter and freeze dough before baking |
| Dense, cake-like texture | Overmixing or too much flour | Mix minimally and measure flour by weight if possible |
| Pale or uneven browning | Oven temperature inaccurate or insufficient leavening | Use oven thermometer and verify baking soda/powder amounts |
| Cookies too crispy throughout | Overbaking or dough overworked | Remove earlier when edges are golden but center underbaked |
| Bland flavor | Quality ingredients or insufficient vanilla | Use premium chocolate and increase vanilla extract |
Storage and Preservation
Proper storage extends cookie freshness significantly. Room-temperature storage in an airtight container maintains cookies for up to one week. For extended shelf life, freeze baked cookies in freezer-safe containers for up to three months. Alternatively, freeze portioned dough balls and bake fresh cookies whenever desired—frozen dough bakes only slightly longer than refrigerated dough.
Frequently Asked Questions
Can I make the dough ahead?
Yes, dough can be prepared up to three days ahead and refrigerated in an airtight container. Freeze-portioned dough balls keep for up to three months.
What if my oven temperature fluctuates?
Invest in an oven thermometer to verify actual temperature. Many home ovens run hotter or cooler than indicated, significantly affecting baking results.
Can I substitute ingredients?
Limited substitutions work successfully. Using all-purpose flour instead of bread flour produces slightly less chewy cookies. Margarine generally produces inferior results compared to butter. Premium chocolate makes a noticeable difference and isn’t worth substituting.
Why are my cookies cakey rather than chewy?
This typically results from too much flour, overmixing, or extended baking. Measure flour by weight when possible and remove cookies slightly underbaked.
How do I achieve different textures?
Chewier cookies result from slightly underbaking and using more brown sugar. Crispier cookies come from extended baking and using more granulated sugar. Thicker cookies require freezing dough before baking.
References
- The Science of Good Cooking — America’s Test Kitchen. 2012. https://www.americastestkitchen.com/
- Baking Science and Technology — Sosland Publishing Company. 2006. https://www.bakingtech.com/
- Flavor, Functionality and The Maillard Reaction in Baking — Institute of Shortening and Edible Oils. 2020. https://www.iseo.org/
- Flour Composition and Its Effect on Baking Quality — Grain Foods Association. 2021. https://www.grainnet.com/