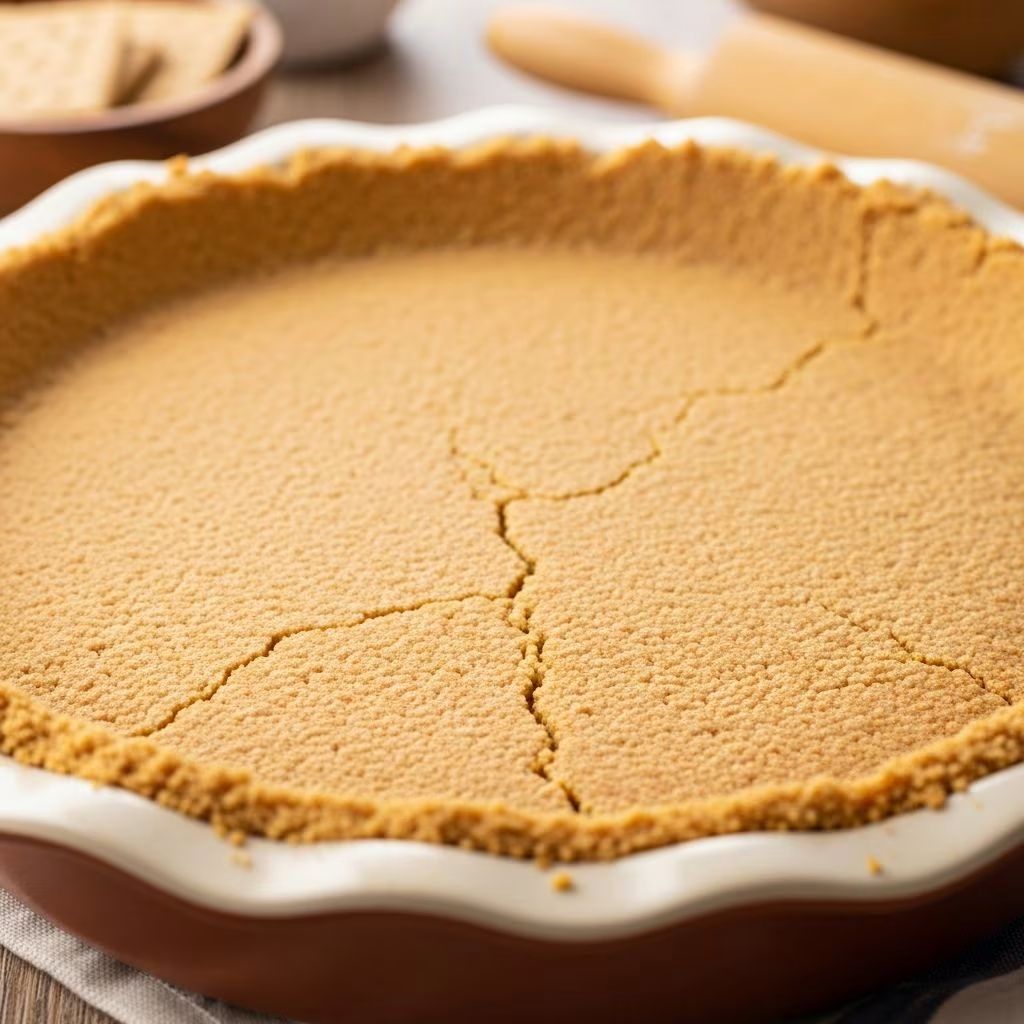
The graham cracker crust stands as a cornerstone of modern baking, offering a buttery, crumbly foundation that elevates pies, cheesecakes, and bars. Unlike traditional pastry dough, this simple concoction requires minimal ingredients and effort, yet delivers maximum flavor and texture. Crafters of desserts worldwide appreciate its versatility, pairing seamlessly with creamy fillings, tangy custards, or fruity toppings. This guide explores everything from foundational recipes to advanced techniques, ensuring your crusts emerge golden, firm, and irresistible.
Why Opt for a Graham Cracker Crust?
Graham cracker crusts shine in their ease of preparation and adaptability. They demand no rolling pins or chilling periods, making them ideal for spontaneous baking sessions. The natural honeyed notes from graham crackers provide a subtle sweetness that complements rich fillings without overpowering them. Bakers often prefer this style for no-bake desserts, as it sets firmly in the fridge or freezer. Moreover, its gluten-free potential opens doors for dietary inclusivity when using appropriate crackers.
Structurally, the crust binds through melted butter and sugar, creating a cohesive layer that holds up under slicing. When baked briefly, it develops a crisp edge that contrasts beautifully with soft interiors. This combination of crunch and tenderness defines its appeal in classics like key lime pie or pumpkin custard.
Essential Ingredients Breakdown
At its core, a graham cracker crust relies on three staples: crumbs, sweetener, and fat. Each plays a pivotal role in texture and taste.
- Graham Crackers: Start with full sheets—typically 10 to 12 per standard pie—to yield about 1.5 cups of fine crumbs. Honey varieties offer classic warmth, while cinnamon or chocolate-infused options add flair. For gluten-free bakes, select certified alternatives.
- Sugar: Granulated sugar provides structure and caramelization, but incorporating brown sugar introduces molasses depth for a chewier bite. A blend of both enhances complexity.
- Butter: Melted and preferably salted, it acts as the glue. Unsalted works with a pinch of salt added. Aim for 6 to 7 tablespoons to ensure even coating without sogginess.
Proportions matter: too little butter leads to crumbling, while excess creates greasiness. Fresh ingredients guarantee the best outcome.
Step-by-Step Preparation Methods
Creating the perfect crust begins with uniform crumbs. Here’s a reliable base recipe for a 9-inch pie plate, yielding 8-12 servings and ready in under 20 minutes.
Basic Recipe
| Ingredient | Amount |
|---|---|
| Graham cracker crumbs | 1.5 cups (about 12 sheets) |
| Granulated sugar | 1/3 cup |
| Brown sugar (optional) | 1 Tbsp |
| Melted butter | 6-7 Tbsp |
- Crush Crackers: Pulse full sheets in a food processor until sandy. Alternatively, seal in a zip-top bag and crush with a rolling pin for control over texture. Avoid large chunks for structural integrity.
- Mix Dry Ingredients: Combine crumbs and sugars in a bowl. Stir thoroughly to distribute sweetness evenly.
- Incorporate Butter: Drizzle in warm melted butter. Toss with a fork until the mixture resembles wet sand and clumps when squeezed.
- Press into Pan: Dump into a pie plate or springform. Use a flat-bottomed glass or measuring cup to pack firmly across the bottom and up sides, creating an even 1/4-inch thickness.
- Bake or Chill: For crispness, bake at 350°F for 8-10 minutes until fragrant and set. Cool completely. No-bake versions firm up in the fridge for 1 hour.
This method produces a crust that withstands heavy fillings like cheesecakes without buckling.
Crushing Techniques Compared
| Method | Pros | Cons | Best For |
|---|---|---|---|
| Food Processor | Fast, uniform crumbs | Requires equipment | Large batches |
| Rolling Pin + Bag | No appliances, therapeutic | More effort, less even | Small amounts |
| Pre-Crushed Crumbs | Quickest option | May lack freshness | Beginners |
Food processors yield the finest results for professional textures, but manual methods suffice for home cooks.
Customization Ideas for Every Palate
Elevate your crust beyond basics with thoughtful tweaks.
- Nutty Additions: Fold in 1/4 cup finely chopped pecans or almonds for crunch and earthiness, ideal for pecan pie analogs.
- Spiced Variations: Add 1/2 tsp cinnamon or ginger to complement fall pies like pumpkin.
- Chocolate Twist: Mix in 2 Tbsp cocoa powder or use chocolate grahams for decadent cheesecakes.
- Vegan Adaptation: Swap butter for coconut oil or plant-based alternatives; the flavor shifts subtly tropical.
- Savory Shift: Reduce sugar and incorporate herbs for quiches, though sweet remains dominant.
Experimentation keeps baking exciting—start small to test adhesion.
Baking vs. No-Bake: Key Differences
Baking at 350°F for 10 minutes melds fats and sugars, yielding a toasty, sliceable crust that resists sogginess from moist fillings. No-bake suits lighter recipes or hot climates, relying on refrigeration for set. Baked versions excel in custards like key lime, where heat firms the base. Always cool fully to prevent melting fillings.
Troubleshooting Common Pitfalls
Even seasoned bakers encounter issues. Here’s how to fix them:
- Crust Crumbles: Insufficient butter or loose pressing. Add 1 Tbsp more fat next time and compact rigorously.
- Soggy Bottom: Skip baking or overfill. Blind-bake longer or use cornstarch in fillings.
- Uneven Texture: Poor crushing. Aim for powder-fine consistency.
- Overly Sweet: Dial back sugar by 1 Tbsp, especially with sweet pies.
Storage tip: Unfilled crusts freeze up to 3 months, wrapped tightly. Thaw before filling.
Pairing with Iconic Fillings
Graham cracker crusts transform ordinary fillings into showstoppers.
- Key Lime Pie: Tart lime custard cuts through buttery sweetness, a timeless Florida favorite.
- Pumpkin Pie: Spiced puree nestles perfectly, mimicking traditional crust warmth.
- Cheesecake: Creamy blocks demand the crust’s contrast; bake together for unity.
- Pecan Delight: Brown sugar-enhanced crust mirrors the nutty caramel filling.
- No-Bake Lemon Bars: Zesty curd sets lightly atop chilled base.
These pairings highlight the crust’s chameleon-like quality.
Scaling for Different Pans
Adjust recipes based on pan size for optimal thickness.
| Pan Size | Crumb Amount | Butter | Sugar |
|---|---|---|---|
| 9-inch pie | 1.5 cups | 6 Tbsp | 1/3 cup |
| 10-inch pie | 2 cups | 8 Tbsp | 1/2 cup |
| 9×9 square | 1.75 cups | 7 Tbsp | 1/3 cup |
| Springform (9-inch) | 2.5 cups | 10 Tbsp | 1/2 cup |
Maintain a 1/4-inch depth to avoid thin spots.
Advanced Tips from Seasoned Bakers
For pro-level results:
- Dust pans lightly with flour or spray for release.
- Press with parchment for easy removal in bars.
- Chill dough 15 minutes pre-bake to prevent sliding.
- Test doneness by light tapping—edges should hold shape.
These nuances separate good crusts from great ones.
FAQs
Can I make graham cracker crust ahead?
Yes, prepare up to 2 days ahead or freeze for months. Bake or chill as needed.
What’s the best sugar for flavor?
Brown sugar adds moisture and depth; mix with white for balance.
How do I avoid a greasy crust?
Measure butter precisely and ensure crumbs absorb fully before pressing.
Gluten-free options?
Use GF grahams—no other changes required.
Why bake the crust?
Baking sets the structure, enhancing crispness and flavor via caramelization.
References
- Graham Cracker Crust — Tastes Better from Scratch. 2023-05-15. https://tastesbetterfromscratch.com/graham-cracker-crust/
- Best Graham Cracker Crust Recipe — The Pioneer Woman. 2024-11-20. https://www.thepioneerwoman.com/food-cooking/recipes/a62670776/graham-cracker-crust-recipe/
- Easy Graham Cracker Crust Recipe — Sugar Spun Run. 2023-08-10. https://sugarspunrun.com/graham-cracker-crust-recipe/
- Graham Cracker Crust Recipe — Just a Taste. 2022-09-05. https://www.justataste.com/graham-cracker-crust-recipe/
- 30 Delicious Pie Recipes with Graham Cracker Crust — Tikkido. 2023-10-30. https://tikkido.com/blog/graham-cracker-crust-pie-recipes