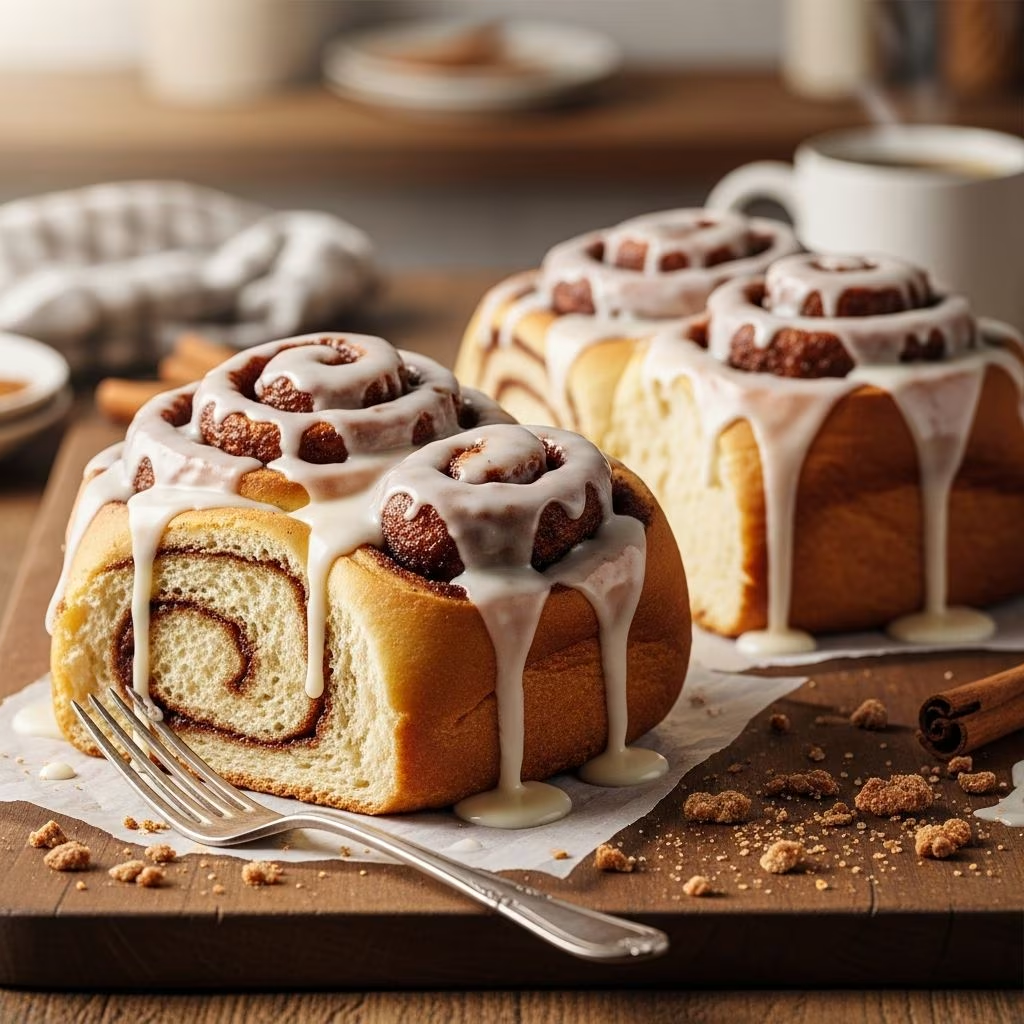
Creating a spectacular giant cinnamon roll transforms an ordinary morning into something truly memorable. Unlike traditional individual rolls, an oversized version serves as an impressive centerpiece for brunch gatherings, holiday celebrations, or simply indulging in weekend baking. The challenge lies not just in scaling up the recipe, but in understanding the science behind yeast dough fermentation, proper filling distribution, and achieving that ideal balance between a tender crumb and structural integrity. This comprehensive guide walks you through every stage of the process, from mixing your initial dough to adding the finishing frosting.
Understanding the Foundation: Dough Composition
The dough represents the backbone of any exceptional cinnamon roll. Unlike quick breads that rely on chemical leavening agents, yeast dough depends on living microorganisms to create rise and develop flavor over time. The fundamental ingredients remain consistent across most formulations: flour, liquid, fat, sugar, salt, and yeast. However, the specific ratios and techniques dramatically influence your final product’s texture and taste.
The flour selection matters considerably. All-purpose flour works adequately for most home bakers and provides a balanced protein content that creates adequate gluten structure without becoming overly tough. Bread flour, containing higher protein levels, produces a chewier crumb with stronger gluten networks, making it an excellent choice if you prefer a more substantial texture. The liquid component—whether milk, buttermilk, or water—affects both hydration levels and final flavor profile. Milk-based doughs develop a richer, slightly sweeter character compared to water-based versions.
Fat integration plays a crucial role in dough tenderness and richness. Butter contributes both flavor and creates layers within the dough structure, though it requires proper room-temperature softening for even distribution. The sugar serves dual purposes: feeding yeast organisms during fermentation and creating browning during baking through the Maillard reaction. Salt enhances flavor complexity while controlling fermentation speed by regulating yeast activity.
Yeast Selection and Activation Strategies
Active dry yeast remains the most accessible option for home bakers. This form consists of yeast cells mixed with inert carriers, requiring activation in warm liquid to ensure viability. The temperature of your liquid proves critical—too cold and yeast remains dormant; too hot and you risk killing the microorganisms entirely. The optimal range falls between 100°F and 110°F (37°C to 43°C). Using a thermometer removes guesswork from this essential step.
The bloom or proof stage represents your first opportunity to verify yeast viability. When you combine warm liquid with sugar and yeast, a foamy layer should develop within five to ten minutes. This visual confirmation indicates that live yeast cells are actively consuming sugars and producing carbon dioxide gas. Without this foam, your yeast may be expired or the temperature may be incorrect, warranting fresh yeast or technique adjustment.
The Mixing and Development Process
Combining wet and dry ingredients follows a logical sequence that prevents clumping and ensures even hydration. Begin by whisking your yeast mixture into the dry ingredients gradually, incorporating flour in stages rather than all at once. This staged approach prevents the formation of tough flour clumps that resist complete hydration.
Once a shaggy dough mass forms, the incorporation of softened butter requires patience and technique. Adding butter to a partially developed dough, rather than incorporating it from the start, prevents it from coating flour particles and inhibiting gluten development. Break the butter into small pieces and gradually work it in until the dough transitions from sticky and loose to smooth and elastic.
Kneading develops the gluten network essential for trapping gas bubbles and creating structure. Whether working by hand or using a stand mixer, this phase typically requires eight to ten minutes. Your dough should transform from shaggy to smooth, becoming increasingly elastic and less sticky. The windowpane test—stretching a small piece between your fingers until light passes through without tearing—indicates adequate gluten development.
First Rise and Fermentation Dynamics
After kneading, your dough enters the bulk fermentation phase. Placing it in a lightly oiled bowl and covering with a damp cloth creates an environment where yeast can work undisturbed. Room temperature fermentation typically requires one to two hours, though cooler environments extend this timeline. During this period, yeast consumes sugars, produces carbon dioxide for rise, and develops complex flavors through metabolic byproducts.
Rather than waiting for a specific time, evaluate readiness through visual observation. The dough should approximately double in volume, appear puffy, and spring back slowly when poked with a floured finger. If it springs back immediately, it requires additional fermentation. If it collapses without resistance, fermentation may have proceeded too far.
Shaping and Filling Technique
Shaping represents a critical juncture where proper technique ensures even baking and attractive presentation. After the first rise, turn your dough onto a lightly floured surface and gently press out gas. Roll the dough into a large rectangle, approximately twelve by eighteen inches, using consistent pressure to avoid thick and thin areas.
The filling layer requires even distribution for balanced flavor throughout. Spread softened butter across the entire dough surface, ensuring complete coverage to the edges. The cinnamon and sugar mixture—typically combining white and brown sugars with ground cinnamon—should be sprinkled evenly and pressed gently into the butter layer. Common ratios involve equal parts white and brown sugar with cinnamon at approximately half the quantity of combined sugars.
Rolling technique determines whether your final roll has evenly distributed swirls or uneven, compressed areas. Beginning at the long edge, roll the dough firmly but not aggressively, using your fingers to tuck and shape as you progress. A tight roll prevents loose, flaky layers from separating during baking, while an overly compressed roll can create a dense, compact texture. Aim for consistent tension throughout the rolling process.
Cutting and Pan Arrangement
The size and arrangement of your cut pieces influence baking time and final appearance. A giant roll might comprise a single spiral occupying a nine-by-thirteen-inch baking pan, or multiple large pieces arranged in the same space. When cutting into multiple rolls, use a sharp serrated knife or dental floss for clean cuts that prevent squishing the dough. Cutting through cinnamon-sugar filling requires confidence and a swift motion rather than sawing back and forth.
Spacing within the pan affects how rolls expand during the second rise and bake. Pieces placed close together support each other and produce connected rolls with soft sides, while those spaced apart develop crusty exteriors on all sides. Your preference determines placement strategy—connected rolls offer cozy indulgence, while separated rolls showcase individual structure.
The Critical Second Rise
After shaping and placing in the baking pan, your rolls enter a second fermentation period. Covering the pan with plastic wrap or a damp towel allows continued yeast activity while preventing surface drying. This rise typically requires one to two hours at room temperature, though timing varies based on dough temperature and ambient conditions.
Signs of adequate proofing include visible puffiness and slightly increased height. When gently pressed with a floured finger, properly proofed rolls should spring back slowly without completely returning to their original impression. This stage determines whether your baked rolls emerge tender and pillowy or dense and tough.
Cream Cheese Frosting Preparation
While rolls undergo their second rise, frosting preparation ensures you can apply it immediately after baking when the rolls remain warm and receptive to the topping. Combining softened cream cheese with butter creates a base that provides tanginess, richness, and spreadability. Powdered sugar adds sweetness and adjusts consistency, while vanilla extract and salt enhance overall flavor complexity.
Achieving the proper consistency requires attention during mixing. If frosting appears too stiff to spread, add milk one tablespoon at a time while beating. If it becomes too thin, incorporate additional powdered sugar gradually. The ideal consistency spreads smoothly without running off the warm rolls.
Baking Guidelines and Temperature Control
Preheating your oven ensures consistent heat distribution from the moment rolls enter. Most recipes specify 350°F (175°C) as the standard baking temperature, though some prefer 375°F (190°C) for faster browning. Baking time ranges from twenty-five to forty minutes depending on roll size, oven characteristics, and how densely they were packed.
Visual indicators guide doneness assessment. The rolls should develop golden-brown coloring on top while remaining tender inside. If browning too quickly, tent with foil to prevent excessive darkening. A toothpick inserted into the thickest roll should emerge without wet dough clinging to it, though some moisture is acceptable.
Cooling and Frosting Application
Removing rolls from the oven initiates the final stages. Allowing five to ten minutes of cooling on a wire rack prevents extremely hot frosting from sliding off, while the rolls remain warm enough for the topping to spread easily and partially melt into crevices. Some bakers prefer applying frosting immediately to maximize this effect, while others wait for slight cooling.
Troubleshooting Common Challenges
Despite careful technique, baking variables sometimes produce unexpected results. Rolls that emerge dense and heavy typically indicate either insufficient fermentation, dead yeast, or excessive flour in the dough. Conversely, rolls that spread excessively or lose structure usually suffered from overproofing or insufficient gluten development. Dry, crumbly rolls often result from overbaking or insufficient butter in the filling. Unevenly baked rolls frequently indicate oven hot spots or improper rack positioning.
Storage and Make-Ahead Options
Freshly baked giant cinnamon rolls taste optimal within hours, but proper storage extends enjoyment. Storing uncovered rolls at room temperature preserves crispness for several hours. Covered storage with plastic wrap or in airtight containers maintains softness for up to two days. Freezing unbaked, shaped rolls allows you to prepare ahead—thaw overnight in the refrigerator before the final rise and baking.
Customization and Flavor Variations
Beyond classic cinnamon-sugar filling, numerous variations appeal to different palates. Adding nutmeg, cardamom, or allspice creates warm spice complexity. Incorporating finely chopped pecans or walnuts provides textural contrast. Swirling chocolate mixed with cinnamon creates decadent variations, while maple-brown butter combinations offer alternative sweetness profiles.
References
- The Science of Baking: A Guide to the Chemistry of Bread and Pastries — Baker’s Institute. 2024. https://www.bakers-institute.org/science-of-baking
- Yeast Fermentation in Bread Dough — International Journal of Food Microbiology. 2023. https://doi.org/10.1016/j.ijfoodmicro.2023.109812
- Home Baking Best Practices — U.S. Department of Agriculture Food Safety and Inspection Service. 2024. https://www.fsis.usda.gov/food-safety/safe-food-handling-and-preparation/food-safety-basics/home-food-safety
- Gluten Development and Texture in Baked Goods — Cereal Chemistry Society. 2023. https://onlinelibrary.wiley.com/journal/17580432