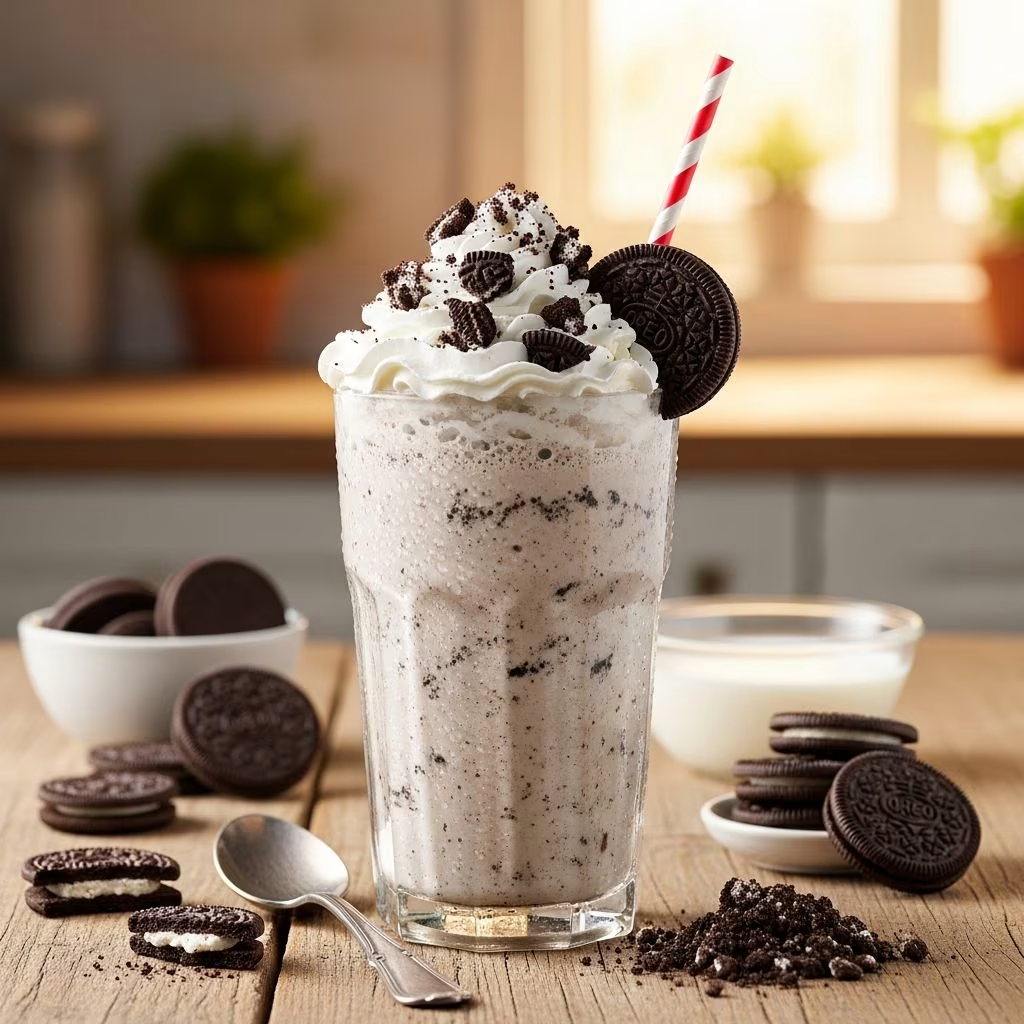
A cold, creamy milkshake topped with whipped cream and chocolate sauce represents one of life’s simple pleasures. When you combine the classic appeal of vanilla ice cream with the beloved taste of Oreo cookies, you create a beverage that transcends age groups and occasions. Whether you’re looking for an afternoon treat on a warm day or a special dessert for entertaining guests, mastering the art of making an Oreo milkshake at home offers both convenience and satisfaction.
Understanding the Foundation of Your Milkshake
The beauty of an Oreo milkshake lies in its elegant simplicity. At its core, this frozen beverage requires only three essential components: premium vanilla ice cream, whole milk, and Oreo cookies. These straightforward ingredients, when combined thoughtfully, create a drink that rivals those served at professional ice cream parlors. The foundation of your milkshake depends heavily on the quality of each ingredient you select.
Vanilla ice cream serves as the primary base for your milkshake, providing the creamy texture and cold temperature that defines the drink. Rather than opting for the most inexpensive option available, choosing a higher-quality vanilla ice cream makes a noticeable difference in the final product. Premium ice cream contains more fat and less air, resulting in a denser, more satisfying consistency. When selecting your ice cream, look for brands that list cream and milk as primary ingredients rather than those heavy in additives and stabilizers.
Whole milk acts as the binding agent that brings your milkshake together. Unlike skim or reduced-fat milk, whole milk provides the fat content necessary for achieving that signature creamy texture. The milk also determines the thickness of your final beverage—a component you can control based on personal preference.
Oreo cookies contribute both flavor and texture to your creation. The combination of the crispy cookie wafer and smooth vanilla filling creates contrast when incorporated into your shake. Whether you choose regular Oreos or Double Stuf varieties, both work beautifully in this application.
Selecting Your Ingredients with Intention
Choosing the Right Ice Cream
The ice cream you select fundamentally impacts your milkshake’s quality. Full-fat vanilla ice cream provides superior creaminess compared to lighter alternatives. Softening your ice cream slightly before blending allows it to incorporate more smoothly into the milk without requiring excessive blending. However, if your ice cream is too soft, your milkshake may become watery rather than thick and substantial.
Milk Selection and Its Role
While whole milk remains the traditional choice, you have flexibility based on dietary preferences. Whole milk creates the richest result, but those preferring lighter options can experiment with alternatives. The key consideration is that higher-fat milk produces better texture than ultra-low-fat varieties.
Cookie Considerations
Beyond regular Oreos, you can incorporate various Oreo flavors available on the market. The number of cookies you add affects both the intensity of cookie flavor and the final consistency. Most recipes call for eight to twelve cookies, though you can adjust based on how intensely you want the Oreo flavor to shine through your milkshake.
The Art and Science of Blending
Preparation Before Blending
Before adding ingredients to your blender, ensure your equipment is clean and dry. Having all ingredients at hand streamlines the process and prevents unnecessary delays that might affect the texture of your finished shake.
Blending Technique Matters
The method you employ when blending significantly influences your milkshake’s final texture. Rather than immediately combining all ingredients, many experienced makers recommend a two-stage blending process. First, blend the vanilla ice cream with milk for approximately thirty seconds to one minute. This creates a smooth base. Subsequently, turn off the blender, add your Oreo cookies, and pulse the mixture two to three times. This technique preserves some cookie chunks while ensuring adequate mixing.
Pulsing rather than continuous blending prevents over-processing the cookies, which can create an overly fine texture that some find less satisfying than a shake with discernible cookie pieces. If you prefer a smoother consistency, you can certainly blend continuously or add the cookies at the beginning of the process. The flexibility of this recipe allows you to customize based on your texture preferences.
Achieving Your Desired Thickness
One significant advantage of homemade milkshakes is the ability to control thickness precisely. If you prefer a thicker shake similar to a frappe, add additional ice cream or reduce the milk quantity. Conversely, if you enjoy a thinner, more drinkable consistency, increase the milk proportionally. Starting with the standard recipe and adjusting incrementally helps you discover your ideal balance without waste.
Ingredient Proportions and Scaling
| Serving Size | Vanilla Ice Cream | Whole Milk | Oreo Cookies |
|---|---|---|---|
| Single Serving (1 person) | 1 to 1.5 cups | 1/3 cup | 4 to 5 cookies |
| Standard Recipe (2 servings) | 2 to 4 cups | 1/2 to 2/3 cup | 8 to 12 cookies |
| Larger Batch (4 servings) | 4 to 8 cups | 1.25 to 1.5 cups | 16 to 24 cookies |
The above proportions provide flexibility for different occasions. When doubling recipes, maintain the same ratio of ingredients for consistent results across servings.
Enhancing Your Shake Beyond the Basics
Optional Flavor Additions
While the classic three-ingredient version stands on its own merit, several optional additions elevate your milkshake further. A quarter to one teaspoon of vanilla extract intensifies the vanilla notes already present in the ice cream and cookies. This addition particularly appeals to vanilla enthusiasts seeking deeper flavor complexity.
For chocolate lovers, substituting chocolate ice cream for vanilla creates a double-chocolate variation that maintains all the textural benefits of the original recipe. Alternatively, adding chocolate syrup or cocoa powder creates a hybrid experience combining vanilla and chocolate elements.
Topping Strategies
The presentation and topping of your milkshake transform it from a simple beverage into a dessert worthy of special occasions. Traditional toppings include:
- Whipped cream piled generously on top
- Chocolate sauce or hot fudge drizzled over the whipped cream
- Crushed or whole Oreo cookies as garnish
- A cherry placed atop the whipped cream for visual appeal
- A dusting of cocoa powder for sophistication
These toppings serve both aesthetic and flavor purposes, adding textural variety and allowing consumers to engage with multiple layers of taste and texture as they enjoy their shake.
Serving and Consumption Recommendations
Milkshakes achieve optimal texture and temperature when consumed immediately after preparation. Delays allow the ice cream to soften and the mixture to become watery, diminishing the satisfying thickness that makes homemade milkshakes special.
Pour your completed shake into appropriate glassware—traditional tall fountain glasses present a classic appearance, though any cold-appropriate glass works functionally. The presentation enhances the overall experience, particularly when serving to guests or creating special treats for family members.
Frequently Asked Questions About Oreo Milkshakes
Can I prepare milkshake components in advance?
While you can pre-measure dry ingredients and chill your glassware ahead of time, blending should occur immediately before serving. Ice cream exposed to room temperature begins deteriorating quickly, and pre-blended shakes separate and lose their optimal consistency.
What blender type works best for milkshake preparation?
Any standard kitchen blender handles this recipe adequately. High-powered blenders offer no particular advantage for milkshakes compared to conventional models, though they do blend more quickly and quietly.
Are there dairy-free alternatives for this recipe?
Dairy-free ice cream combined with plant-based milk options creates a vegan variation. The texture differs slightly from the traditional version, but many find the result satisfying and delicious.
How can I prevent my milkshake from becoming too watery?
Use thoroughly frozen ice cream straight from the freezer, work quickly during preparation, and consume immediately after blending. Pre-chilling your serving glasses also helps maintain temperature during consumption.
Can I add protein powder or nutritional supplements?
Yes, protein powders in vanilla or neutral flavors integrate seamlessly into this recipe without noticeably altering taste. Add approximately one scoop and blend until fully incorporated.
Creative Variations Worth Exploring
Once you master the basic recipe, experimentation becomes enjoyable. Create a cookies-and-cream version by using crushed cookies throughout rather than pulsing them. Develop a mint-chocolate-Oreo variation by incorporating mint extract and chocolate ice cream. Build layers by pouring half the shake into a glass, adding chocolate syrup, and topping with the remaining shake for a visual treat.
Consider seasonal variations—adding pumpkin puree and spices during autumn, or developing an eggnog-Oreo shake during holiday months. The fundamental recipe provides a reliable foundation supporting endless creative possibilities.
Making Oreo Milkshakes for Groups
When preparing milkshakes for multiple people simultaneously, consider your blender’s capacity. Most standard blenders accommodate one to two servings comfortably. For larger groups, prepare shakes in batches, keeping finished servings briefly in the freezer while completing additional rounds. Alternatively, assemble all dry ingredients in advance and blend in succession for efficiency.
Establishing a topping station where guests customize their own garnishes adds interactive fun and ensures everyone receives their preferred combination of toppings and flavor intensities.
Storage and Make-Ahead Considerations
Milkshakes are fundamentally designed for immediate consumption and do not store well. If you find yourself with excess shake, you have limited options. Partially frozen shakes can be returned briefly to the freezer, though they will separate and require re-blending. For true make-ahead scenarios, consider preparing all components separately and assembling shakes to order rather than attempting storage of the completed beverage.
Conclusion: Mastering Your Milkshake Skills
Creating a perfect Oreo milkshake combines straightforward ingredients with thoughtful technique. By understanding how each component contributes to the final product and mastering the blending process, you develop the ability to produce consistent, delicious results every time. Whether you’re treating yourself on a warm afternoon or creating a memorable dessert experience for loved ones, this approachable recipe delivers satisfaction without requiring specialized equipment or complex procedures. Start with the basic formula, discover your preferred texture and flavor intensity, and build from there. The joy of homemade milkshakes lies not just in the finished product but in the simplicity and control you maintain throughout the entire process.
References
- Oreo Milkshake Recipe — Salt & Baker. Retrieved April 2026. https://saltandbaker.com/oreo-milkshake/
- Oreo Milkshake Recipe — About a Mom. Retrieved April 2026. https://www.aboutamom.com/oreo-milkshake-recipe/
- Oreo Milkshake — The Weeknd Whisk. Retrieved April 2026. https://www.theweekndwhisk.com/recipes/oreo-milkshake
- Oreo Milkshake — Confessions of a Baking Queen. Retrieved April 2026. https://confessionsofabakingqueen.com/oreo-milkshake/
- Homemade Oreo Milkshake | Easy Dessert Recipe — The Diary of a Real Housewife. Retrieved April 2026. https://www.thediaryofarealhousewife.com/oreo-milkshake/
- Oreo Milkshake Recipe — The Salty Marshmallow. Retrieved April 2026. https://thesaltymarshmallow.com/oreo-milkshake-recipe/