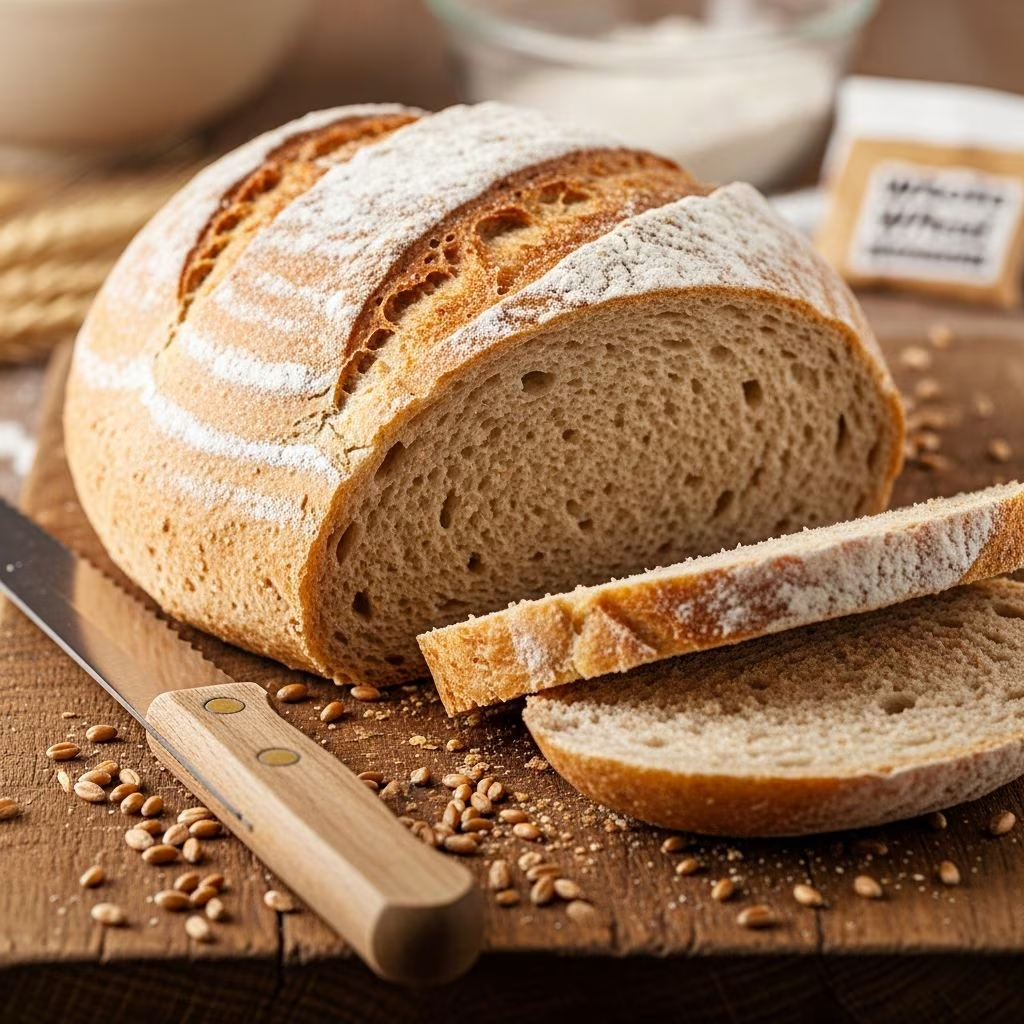
Creating your own 100% whole wheat bread at home delivers a nutritious, hearty loaf packed with fiber, vitamins, and natural flavors. This straightforward method relies on minimal ingredients and basic techniques to produce a soft, sliceable bread ideal for sandwiches, toast, or fresh eating. Unlike store-bought versions loaded with preservatives, homemade bread lets you control quality and customize to your taste.
Why Choose 100% Whole Wheat Bread?
Whole wheat bread stands out for its health benefits. The bran and germ in whole wheat flour retain essential nutrients like B vitamins, iron, and magnesium, which refined flours often lose during processing. A single slice provides sustained energy and supports digestion thanks to high fiber content. Bakers appreciate its nutty taste and versatility, making it a staple for balanced diets.
- Fiber boost: Promotes gut health and fullness.
- Nutrient density: Retains more vitamins than white bread.
- Flavor profile: Earthy notes enhance meals naturally.
- Cost-effective: Bulk flour saves money over commercial loaves.
Essential Ingredients for Success
Gathering high-quality components ensures optimal texture and rise. Focus on fresh whole wheat flour, which contains intact bran for structure and taste.
| Ingredient | Amount | Purpose |
|---|---|---|
| Whole wheat flour | 4-6 cups (480-720g) | Main structure; provides fiber and nutrients |
| Warm water | 2-2.5 cups (475-590ml) | Hydrates dough; activates yeast |
| Active dry yeast | 1-2 tbsp (7-14g) | Leavening agent for rise |
| Salt | 2 tsp (12g) | Enhances flavor; controls yeast |
| Honey or molasses | 1/4 cup (60ml) | Natural sweetener; tenderizes crumb |
| Oil or butter | 1/3 cup (80ml) | Adds softness and moisture |
| Vital wheat gluten (optional) | 1/4 cup (30g) | Improves rise in heavy whole wheat dough |
Variations include adding seeds like sunflower or flax for extra crunch and omega-3s. Use freshly milled flour for peak freshness if possible.
Step-by-Step Baking Guide
Follow these precise steps for consistent results. Total time: about 3-4 hours, including rises.
Prepare the sponge (15-90 minutes): In a large bowl or stand mixer, combine 2 cups warm water (105-110°F), 1 tbsp yeast, and 2 cups flour. Stir into a thick batter. Cover and let sit until bubbly and doubled, 15-90 minutes. This pre-ferment develops flavor and lightens texture.
Mix the dough: Add honey, oil, salt, vital gluten (if using), and 2-3 more cups flour. Mix until a shaggy dough forms. Knead with a dough hook or by hand for 6-10 minutes, adding flour gradually until smooth and tacky—not sticky. Whole wheat absorbs more liquid, so adjust as needed.
First rise (1 hour): Place dough in an oiled bowl, cover with a damp cloth or plastic. Let rise in a warm spot until doubled. Punch down gently to release gases.
Shape the loaf: On a lightly floured surface, roll dough into a 10×12-inch rectangle. Roll tightly into a log, pinching seams. Place seam-side down in a greased 9×5-inch loaf pan.
Second rise (30-60 minutes): Cover loosely and let rise until dough crests 1 inch above pan rim. Preheat oven to 375-400°F meanwhile.
Bake to perfection (35-45 minutes): Bake until golden and internal temperature hits 200-212°F. Tent with foil if browning too fast. Cool in pan 10 minutes, then on a wire rack fully.
Troubleshooting Common Issues
Bread baking involves variables like humidity and flour type. Address problems proactively.
- Dense loaf: Use vital gluten or ensure proper kneading for gluten development.
- No rise: Check yeast freshness—test in warm water with sugar; it should foam.
- Gummy texture: Measure flour by weight; bake longer to evaporate excess moisture.
- Flat top: Avoid overproofing; dough should spring back slowly when poked.
- Crust too hard: Brush with butter post-bake or add more fat to dough.
Storage and Freezing Tips
Proper storage maintains freshness. Store cooled loaves in a paper-lined plastic bag at room temperature for 3-4 days. For longer, slice and freeze in airtight bags up to 3 months. Thaw slices in toaster for instant use. Avoid refrigerating, as it accelerates staling.
Healthy Variations and Add-Ins
Customize for dietary needs or flavors.
- No-knead version: Mix 3.5 cups flour, 1.5 cups water, 1.5 tsp salt, 0.5 tsp yeast. Rest overnight, shape, and bake.
- Seeded loaf: Fold in 1/4 cup mixed seeds during shaping.
- Sweetener swap: Use maple syrup for milder taste.
- Vegan option: Substitute oil for butter.
- Herbed bread: Add 2 tbsp dried herbs like rosemary.
Experiment with white whole wheat for lighter color and milder flavor.
Nutritional Breakdown Per Slice
Approximate values for a 12-slice loaf (based on standard recipe).
| Nutrient | Amount | % Daily Value |
|---|---|---|
| Calories | 120 | 6% |
| Protein | 4g | 8% |
| Fiber | 3g | 11% |
| Carbs | 22g | 8% |
| Fat | 2g | 3% |
Pairing Ideas for Your Fresh Loaf
Elevate meals with this versatile bread.
- Sandwiches: Turkey, avocado, and sprouts.
- Toast: Top with nut butter and fruit.
- Soups: Crusty slices for dipping.
- Breakfast: French toast with cinnamon.
Frequently Asked Questions (FAQs)
Can I use all-purpose flour instead?
No, stick to whole wheat for 100% benefits. All-purpose yields a different texture and nutrition.
How do I know if my yeast is active?
Sprinkle in warm water with a pinch of sugar. Bubbles within 10 minutes confirm viability.
Why is my bread crumbly?
Increase hydration or kneading time to build stronger gluten networks.
Can I make this without a stand mixer?
Yes, knead by hand on a floured surface for 10-12 minutes until elastic.
Does vital wheat gluten make a big difference?
Yes, especially with coarser flours—it boosts lift and chewiness.
Advanced Techniques for Expert Bakers
Refine your skills with these methods. Try a longer autolyse: Mix flour and water, rest 30 minutes before adding yeast. This hydrates bran fully, improving extensibility. For overnight flavor, refrigerate dough after first rise. Incorporate a preferment like a biga using 50% of flour and water for deeper taste. Experiment with oven steaming: Place a pan of water in the oven for the first 15 minutes to mimic professional crusts. Track dough temperatures—ideal mixing at 75-80°F ensures predictable rises. Scale recipes precisely with a digital scale for consistency across batches. These tweaks transform good bread into exceptional artisan loaves.
Mastering 100% whole wheat bread rewards patience with wholesome, delicious results. Regular practice hones intuition for flour hydration and proofing times tailored to your kitchen. Share your bakes with family for motivation, and soon you’ll rely less on store shelves.
References
- USDA FoodData Central: Whole Wheat Flour Nutrition — United States Department of Agriculture. 2023-05-15. https://fdc.nal.usda.gov/fdc-app.html#/food-details/168917/nutrients
- Whole Grains Council: Health Benefits of Whole Wheat — Oldways Whole Grains Council. 2024-02-20. https://wholegrainscouncil.org/whole-grains-101/whole-grains-and-health
- King Arthur Baking: Baking with Whole Wheat Flour — King Arthur Baking Company. 2025-01-10. https://www.kingarthurbaking.com/learn/guides/whole-wheat
- Journal of Cereal Science: Gluten Development in Whole Wheat Dough — Elsevier. 2023-11-01. https://doi.org/10.1016/j.jcs.2023.103789
- Harvard T.H. Chan School of Public Health: Whole Grains and Heart Health — Harvard University. 2024-08-05. https://www.hsph.harvard.edu/nutritionsource/what-should-you-eat/whole-grains/