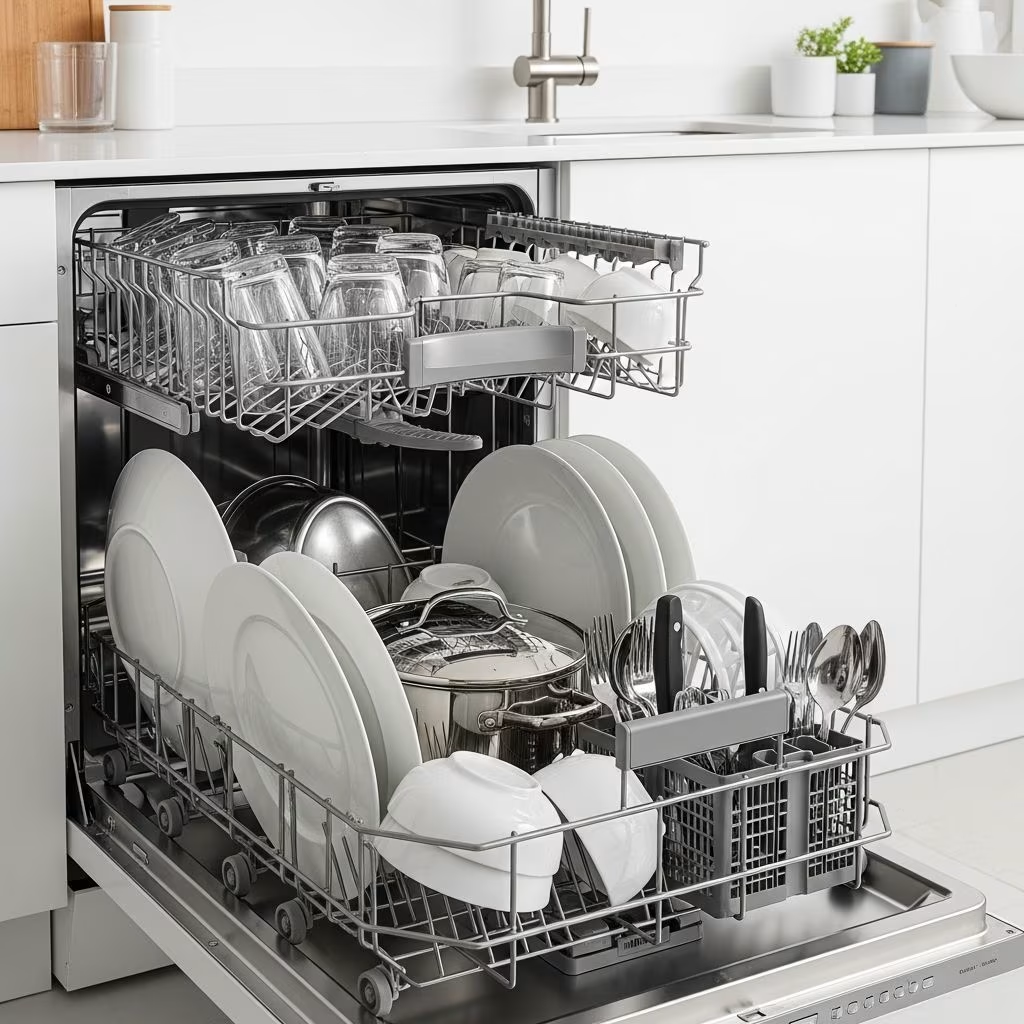
Properly arranging items in your dishwasher transforms it from a basic cleaner to a highly effective machine that delivers sparkling results while preserving both dishes and the appliance itself. By understanding water flow dynamics, rack configurations, and material sensitivities, you can achieve thorough cleaning without residue or damage.
Why Loading Technique Matters for Performance
The core principle of effective dishwasher use revolves around ensuring uninterrupted water spray from the rotating arms, which blast detergent and rinse water onto surfaces. When items block these arms or nest together, cleaning falters, leading to spots, films, or bacterial buildup. Studies from appliance testing labs show that correct loading improves cleaning by up to 30% in standard cycles.
Overloading strains motors and pumps, shortening lifespan, while poor drainage causes water pooling and mildew. High-quality manufacturers emphasize strategic placement to optimize jet access and heat distribution for drying.
Essential Preparation Before Loading
Start by scraping loose food debris into the trash or disposal—avoid pre-rinsing, as modern detergents need residue to activate enzymes effectively. Excess rinsing dilutes the formula, potentially causing etching on glassware or cracking in fine china due to unbalanced chemistry.
- Scrape, don’t rinse: Removes bulk waste without stripping surfaces needed for soap adhesion.
- Sort by material: Group plastics away from heat sources; reserve bottom for durable items.
- Check compatibility: Skip wood, brass, gold-leafed china, non-stick pans, and cast iron to prevent warping or dulling.
Bottom Rack: Foundation for Heavy-Duty Cleaning
The lower rack handles the bulk of washing power from the primary spray arm below. Position larger, sturdier pieces here to leverage intense jets and heating elements.
Optimal Plate and Bowl Arrangement
Secure plates between tines, angling soiled sides inward toward the center for direct jet impact. Alternate sizes to prevent stacking—nesting traps water and food particles.
- Plates: Side-by-side in rows, tilted slightly downward.
- Bowls and platters: Back and sides, concave side facing center; oversized items along edges to avoid dispenser interference.
- Cutting boards: Upright on sides, not flat to allow circulation.
Pots, Pans, and Bakeware Placement
Face baked-on areas downward toward the lower arm. Use rear positions for bulkier items, ensuring handles don’t impede arm rotation. For heavily soiled pots, a targeted cycle enhances results without mixing with delicates.
| Item Type | Position | Angle/Direction |
|---|---|---|
| Plates | Between tines, front rows | Dirty side to center |
| Bowls | Back/sides | Downward, open to jets |
| Pots/Pans | Rear, upright | Soiled face down |
Top Rack: Delicate and Lightweight Items
Reserve this for items needing gentler treatment and better drainage. The upper arm provides focused rinsing, ideal for stemware and plastics.
Glasses, Mugs, and Stemware
Place upside down along edges or in designated holders to prevent pooling. Avoid tines over interiors to dodge scratches; side positioning on angled rails promotes runoff. Wine glasses secure via fold-down stems if available.
Small Bowls, Lids, and Plastics
Fit between tines, angled downward. Keep plastics here, away from bottom heat that can warp them. Lids tuck securely to evade flipping.
- Mugs/cups: Front-to-back on sides.
- Small plates/bowls: Fill gaps, facing center.
- Utensil lids: Wedged firmly between prongs.
Utensil and Silverware Best Practices
The basket demands separation to combat nesting. Load forks and spoons alternately—half tines up, half down—for full exposure. Knives blade-down for safety; separate sharp ones in slots.
Distribute evenly: spoons in one section, forks in another. Avoid overloading; loose items risk jamming arms. For mixed loads, prioritize separation over quantity.
Avoiding Common Loading Errors
Mistakes like overcrowding halve efficiency by restricting spray and airflow. Key pitfalls include:
- Blocking arms: Check rotation manually post-loading; handles or tall items often culprit.
- Overstacking: Leads to uncleaned undersides and breakage risk.
- Upside-up glasses: Causes water spots and bacterial growth.
- Bottom plastics: Melts or deforms near elements.
Test arm spin after loading; a full turn confirms clearance.
Advanced Tips for Peak Efficiency
Leverage adjustable tines for custom fits—fold for pots or secure lids. For third racks, reserve for flatware overflow or small tools. Energy-saving: Run full loads only, selecting cycles matching soil levels.
Drying hacks: Angle maximizes drainage; add rinse aid for sheeting action. Unload bottom-first to prevent top drips onto clean plates.
Dishwasher Models and Adaptations
While principles universal, features vary: two-rack models prioritize basics; multi-arm units handle denser loads. Consult manuals for specifics, like stemware clips or folding prongs.
| Model Type | Key Feature | Loading Adjustment |
|---|---|---|
| Standard 10-Place | Basic tines | Maximize tine use; avoid overhangs |
| 12-Place w/ 3rd Rack | Extra spray arms | Top for utensils; bottom for heavies |
| Adjustable Tines | Folding prongs | Customize for odd shapes |
Frequently Asked Questions
Should I pre-rinse dishes?
No—scrape only. Sensors detect soil and adjust; rinsing weakens detergent action, risking films or cracks.
Can I wash pots with fine china?
Avoid mixing; heavy soils from pots redeposit on delicates. Separate loads for best results.
How do I prevent glass etching?
Skip pre-rinse, use quality detergent, and cycle-match soil levels. Soft water aids too.
What’s the best unloading order?
Bottom rack first—avoids drips from top items onto plates.
Does overloading save time?
No—impairs cleaning, risks leaks, and wears machine. Full but spaced loads optimal.
Maintaining Long-Term Dishwasher Health
Monthly: Clean filters, run vinegar cycles for mineral buildup. Annual pro-inspection prevents clogs. Proper loading reduces strain, extending life to 10+ years.
Track performance: Cloudy glasses signal hard water or over-rinsing; spots indicate poor drying or jet blocks.
References
- How to Load a Dishwasher Properly — Whirlpool. 2023-05-15. https://www.whirlpool.com/blog/kitchen/proper-way-to-load-a-dishwasher.html
- How to Correctly Load your Dishwasher — Boulevard Home (YouTube Transcript). 2022-08-10. https://www.youtube.com/watch?v=T_RgHkuYMKU
- How to Load a Dishwasher the Right Way — Consumer Reports (YouTube Transcript). 2023-11-20. https://www.youtube.com/watch?v=y-OBJm_ov9w