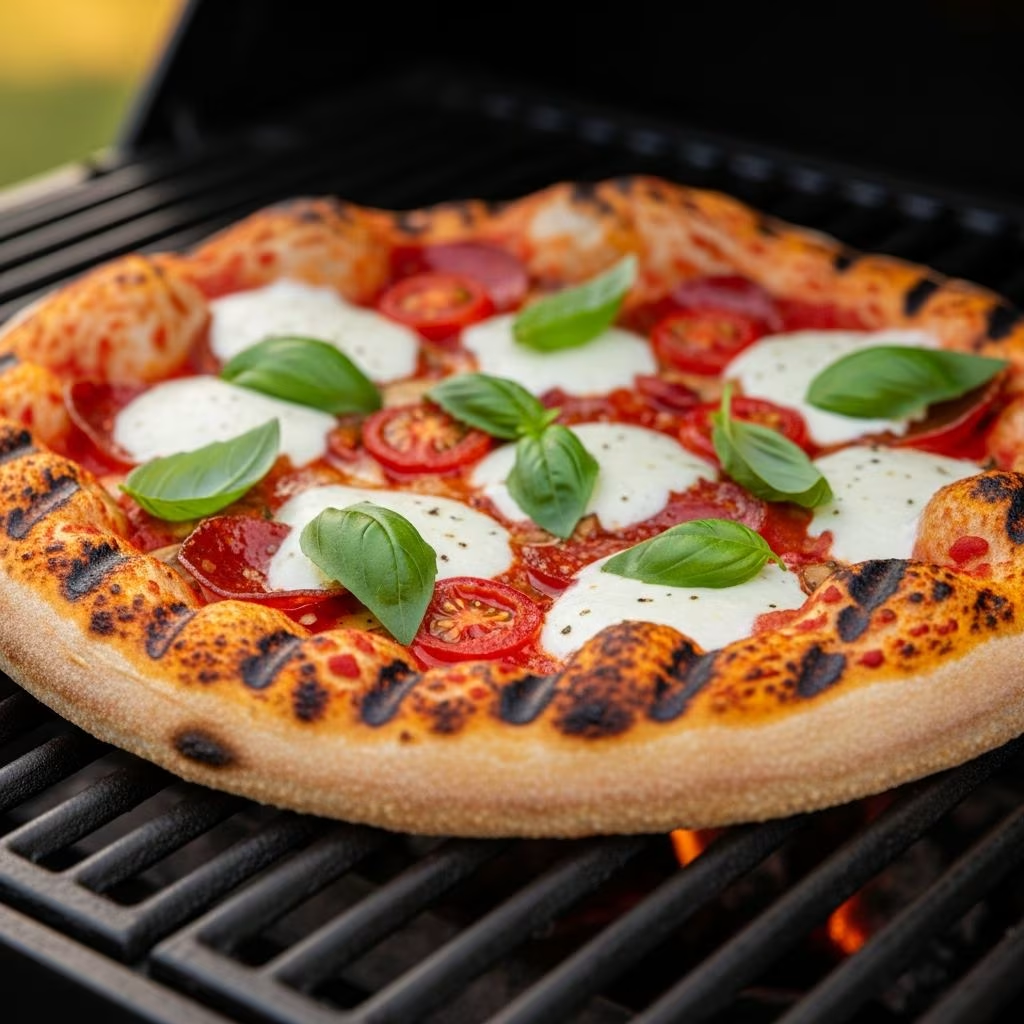
Grilled pizza represents one of the most accessible yet impressive culinary achievements for home cooks. Unlike traditional oven-baked preparations, grilling pizza demands understanding how direct flames interact with dough, cheese, and toppings. This transformative cooking method produces distinctly different results—a combination of smoky depth, charred exterior elements, and a textural complexity that conventional ovens struggle to achieve. Whether you’re planning a casual weeknight dinner or entertaining guests, mastering grilled pizza elevates your outdoor cooking repertoire.
Understanding the Fundamentals of Grill-Based Pizza Preparation
Before positioning pizza on your grill grates, recognize that grilling fundamentally differs from traditional baking. A standard oven distributes heat evenly through convection and direct radiation. Grills, conversely, create hot spots and cooler zones naturally. This characteristic demands strategic heat management and thoughtful timing adjustments. Additionally, grills generally operate at lower maximum temperatures than specialized pizza ovens, requiring multiple cooking phases rather than a single intense blast of heat. Understanding these distinctions prevents undercooked centers and burnt exteriors—common pitfalls for beginners.
The cooking surface itself influences technique. Metal grates conduct and radiate heat differently than oven walls. Direct contact with flames creates grill marks and charred spots, contributing to visual appeal and complex flavoring. However, this same directness can quickly burn delicate ingredients or undercooked dough centers. Successful grilled pizza requires balancing these competing forces through deliberate heat zoning and precise timing.
The Two-Zone Heat System: Your Essential Technique
Professional grilled pizza relies on establishing two distinct temperature zones on your cooking surface. One zone maintains high direct heat—this is where your initial dough contact occurs. The second zone operates at reduced indirect heat, providing a gentler environment for finishing the pizza. This dual-zone approach mirrors professional pizza techniques while working within home equipment limitations.
To establish proper zones, arrange your charcoal or activate burners strategically. On charcoal grills, pile briquettes on one side, leaving the opposite side empty or with minimal heat. Gas grills allow direct burner control—activate one side fully while leaving the other off or at low settings. Position your cooking grate at least 6 inches above heat sources to prevent excessive bottom browning during extended cooking periods.
The logic behind this system addresses grill physics directly. Your dough requires initial searing on high heat to set its structure and create those desirable grill marks. This 2-3 minute phase occurs over direct heat. Toppings, cheese, and final cooking then occur over indirect heat, allowing thorough warming without exterior burning. This staged approach produces evenly cooked pizza with properly melted cheese and warm toppings throughout.
Dough Selection and Preparation Strategies
Pizza dough serves as your foundation, and grill-specific demands shape preparation choices. Dough thickness matters considerably—ultra-thin crusts risk drying out or burning, while excessively thick versions remain gummy inside despite exterior browning. Most successful grilled pizzas utilize dough ranging from 1/4 to 3/8 inches in thickness, struck between crispy and chewy characteristics.
Whether you prepare dough from scratch or purchase prepared versions, certain characteristics prove essential. Dough must possess sufficient structure to resist sticking to grates while remaining flexible enough to stretch without tearing. Proper hydration—balanced water content—creates this ideal texture. Dough that’s too dry becomes brittle; overly wet dough sticks and tears easily.
If making dough from scratch, allow sufficient fermentation time. Overnight refrigerated fermentation develops flavor complexity and creates desirable texture. Room temperature rest periods of 1-2 hours before grilling further relax the gluten structure, making stretching easier. Remove dough from coolers about 15-20 minutes before grilling—cold dough resists stretching and may crack.
For convenience, quality store-bought dough works admirably. Choose varieties without excessive oil content or supplemental ingredients that might burn on direct heat. Standard pizza dough weights of 1-1.5 pounds create appropriately sized home grilling portions.
Preparation Techniques Before Heat Exposure
Proper dough handling before grilling determines success or failure. Begin by dusting your work surface with semolina flour or cornmeal—both provide non-stick properties while adding subtle flavor nuances. These granular substances also allow dough movement without friction-based sticking.
Stretch dough gently using your fingertips, working from the center outward. Create even thickness throughout, avoiding thin spots near edges that burn quickly or thick centers that remain undercooked. A 10-inch diameter creates ideal single-portion sizing for most home grills. If dough resists stretching, allow it 5-minute rest periods between attempts—muscle memory in gluten relaxes, facilitating easier shaping.
Construct a garlic-infused basting oil before grilling begins. Whisk together quality olive oil with minced garlic, storing this mixture for quick application during cooking phases. This preparation streamlines your grilling process and ensures every surface receives adequate oil for browning and flavor development.
The Three-Phase Cooking Sequence
Phase One: Establishing the Foundation
Position your stretched dough directly over high-heat zones with the oiled side facing downward. Close the grill lid immediately—this traps heat and partially cooks the dough’s underside while the lid’s interior radiates from above. After 2-3 minutes, lift the dough using tongs or a pizza peel. The bottom should display golden-brown coloring with distinct grill marks. If the surface appears pale, extend cooking by an additional minute.
Phase Two: Creating Structural Integrity
Carefully flip the partially cooked dough using tongs, now exposing the previously grilled side upward. Immediately brush the new bottom surface with your garlic-infused oil. Return the dough to the grill over high heat, closing the lid again. This 2-3 minute phase establishes complete structural integrity, ensuring the dough won’t collapse under topping weight. Both surfaces should now display light golden coloring with subtle charring.
Phase Three: Cheese Melting and Topping Integration
Move the dough to your indirect heat zone while keeping the grill lid closed. Apply your desired cheese—typically 6-8 ounces of sliced or shredded mozzarella for standard pizzas. Allow the lid to remain closed for approximately 1-2 minutes until cheese begins showing clear melting characteristics. This gentle heating prevents surface burning while ensuring thorough cheese liquefaction throughout.
Topping Philosophy and Flavor Development
Grilled pizza topping strategies differ fundamentally from oven-baked approaches. Grills impart significant smoky characteristics and caramelization that complement specific flavor profiles while potentially overwhelming others.
Mediterranean-Inspired Combinations
Lighter, fresher toppings work beautifully when prepared post-grilling. Create a simple Mediterranean salsa by combining halved grape tomatoes, fresh basil, sliced Kalamata olives, minced garlic, and a generous drizzle of robust extra-virgin olive oil. Toss these ingredients gently in a bowl, allowing juices to meld. Apply this mixture only after the cheese has melted completely and the pizza has been removed from heat. This technique preserves the ingredients’ fresh character while preventing sogginess.
Hearty, Cooked Topping Layers
Heavier toppings demand pre-cooking before pizza assembly. Par-cook sausage, pepperoni, or bacon to render fats and develop flavors before grilling. Vegetables like onions, peppers, and mushrooms benefit from quick grilling in advance—this concentrates flavors and removes surface moisture that would otherwise create a steamed texture. Layer these prepared ingredients before moving to the indirect heat zone, allowing them to warm through as the cheese melts.
Sauce Application Timing
The traditional pizza assembly sequence—dough, sauce, cheese, toppings—requires modification for grilled pizza. When using traditional tomato-based sauce, apply it to the raw side of dough before heat exposure, brushing it on after initial oiling. This prevents sauce from dripping through grill grates into flames. For white pizzas or oil-based foundations, eliminate sauce entirely or apply it after cooking as a finishing element.
Topping Inspiration and Customization Framework
| Pizza Style | Foundation | Proteins | Vegetables | Finishing Elements |
|---|---|---|---|---|
| Classic Margherita | Tomato sauce | Fresh mozzarella | Sliced tomatoes | Fresh basil, EVOO |
| Spicy Sausage | Tomato sauce | Cooked Italian sausage | Red onion, jalapeño | Hot honey drizzle |
| Green Vegetable | Pesto base | Mozzarella | Grilled zucchini, bell peppers | Lemon juice, oregano |
| Artisan White | Olive oil rub | Ricotta dollops | Caramelized onions | Fresh herbs, black pepper |
| BBQ Chicken | BBQ sauce | Grilled chicken | Red onion, corn | Cilantro, extra sauce |
Equipment Essentials and Material Considerations
Successful grilled pizza requires specific tools beyond your basic grill. A pizza peel—either wood or metal—facilitates safe dough transfer onto heated grates. If you lack a dedicated peel, parchment paper serves as an acceptable alternative. Position dough on parchment, grill it, then invert onto grates and peel back the paper once the dough sets slightly.
Long-handled tongs enable safe dough flipping without burns. Heat-resistant silicone or leather gloves protect hands during manipulation. A small brush facilitates oil application evenly across dough surfaces. Semolina flour or cornmeal creates non-stick conditions superior to all-purpose flour.
Thermometers measuring grate temperatures help establish proper heat levels. Most grilled pizza succeeds at grate temperatures between 450-500°F for the direct heat zone, with the indirect zone maintaining 300-350°F. Understanding these numerical targets removes guesswork from heat management.
Troubleshooting Common Grilled Pizza Challenges
Dough Sticking and Tearing Issues
Dough adhering to grates typically indicates inadequate oiling or insufficient grate temperature. Ensure both dough surfaces receive generous oil application before heat exposure. If grate temperature has dropped below 450°F, allow additional preheating time. Cold dough also resists movement more readily—remove refrigerated dough 20 minutes before grilling for improved flexibility.
Burnt Exteriors with Undercooked Centers
This imbalance suggests excessive direct heat exposure. Verify that your indirect heat zone genuinely operates at reduced temperature. Allow more time in the indirect zone—cheese melting and topping warming should occur slowly and gently. Consider tenting with foil if browning accelerates too quickly.
Soggy Pizza with Pooling Grease
Excessive moisture typically originates from fresh toppings or inadequate initial dough cooking. Reduce fresh topping quantities or apply them only after full cooking completion. For pre-cooked toppings, ensure thorough fat rendering before assembly. Cheese layers also trap moisture—spread thin rather than heaping thickly.
Cheese Refusing to Melt
Ensure sufficient time in the indirect heat zone with the lid closed. Low grate temperatures in this zone prevent proper melting—raise heat slightly if cheese shows no movement after 2 minutes. Alternatively, slice cheese thinner for faster melting, or switch to fresh mozzarella varieties that melt more readily than aged cheeses.
Flavor Development Through Heat and Technique
Grilling fundamentally transforms pizza through chemical reactions impossible in conventional ovens. The Maillard reaction—browning caused by heat-driven protein and sugar interactions—creates complex savory notes on dough surfaces and charred toppings. Caramelization of sugars in tomato-based sauces develops depth and mild sweetness. Wood smoke (if using charcoal) imparts subtle aromatic complexity.
Understanding these reactions guides topping selection. Vegetables with higher sugar content—tomatoes, peppers, corn, caramelized onions—benefit tremendously from grilling’s intense heat. Delicate herbs like basil or arugula achieve better results when applied post-grilling, preserving their volatile aromatic compounds. Hard cheeses offer nuanced melting patterns that contribute to texture variety.
Seasonal and Climate Adaptations
Weather significantly impacts grilled pizza success. Cold ambient temperatures require extended grill preheating—allow 15-20 minutes rather than the typical 10 minutes when outdoor temperatures drop below 60°F. Wind patterns affect heat distribution, making two-zone cooking even more critical for consistency.
Summer cooking advantages extend beyond pleasant outdoor conditions. Peak season produces superior fresh ingredients—tomatoes, basil, corn, and peppers reach their flavor apex. Plan Mediterranean or vegetable-forward pizzas during summer months when ingredient quality justifies their fresh preparation.
Hosting Grilled Pizza Gatherings
Grilled pizza entertainment involves unique considerations beyond standard grilling. Prepare all ingredients in advance—pre-cooked toppings, chopped fresh elements, prepared cheese, and sauce represent the bulk of preparation. Assemble stretched dough rounds 30 minutes before guests arrive, covering them with damp towels to prevent drying.
Create a simple assembly station where guests can customize their individual pizzas. Provide 2-3 sauce options, various cheese selections, and diverse topping combinations. Demonstrate the grilling technique once, then allow experienced cooks to attempt their own pizzas—this transforms cooking into interactive entertainment rather than chef-as-performer theater.
Frequently Asked Questions
Can I grill frozen pizza directly?
Frozen pizzas require thawing before grilling for best results. Cooking frozen pizzas directly produces burnt exteriors before centers warm completely. Thaw on a countertop for 2-3 hours, then proceed using standard techniques.
What grill type works best for pizza?
Both gas and charcoal grills produce excellent results. Charcoal offers superior smoke flavor and higher heat potential, while gas provides more precise temperature control. Three-burner grills facilitate easier two-zone heat management than single-burner models.
How many pizzas can I grill simultaneously?
Most home grills accommodate 2-3 pizzas per cooking cycle. Overcrowding prevents adequate heat circulation and complicates maneuvering. Plan cooking in batches if serving larger groups.
Should I oil the grill grates?
Yes, oil grates before preheating using high-smoke-point oils. This prevents sticking and facilitates easy dough removal. Reapply oil between pizza batches.
Can I use alternative cheeses?
Absolutely. Fontina, Gruyère, smoked varieties, or combinations work beautifully. Avoid low-moisture mozzarella exclusively—blend with other varieties for texture complexity.
References
- Grilled Pizza with Tomato and Mozzarella — The Mediterranean Dish. 2024. https://www.themediterraneandish.com/grilled-pizza/
- BEST Grilled Pizza Recipe – How to Grill Pizza + Tons of Toppings — Plays Well With Butter. 2024. https://playswellwithbutter.com/grilled-pizza-recipe/
- Grilled Pizza Recipe — King Arthur Baking. 2024. https://www.kingarthurbaking.com/recipes/grilled-pizza-recipe