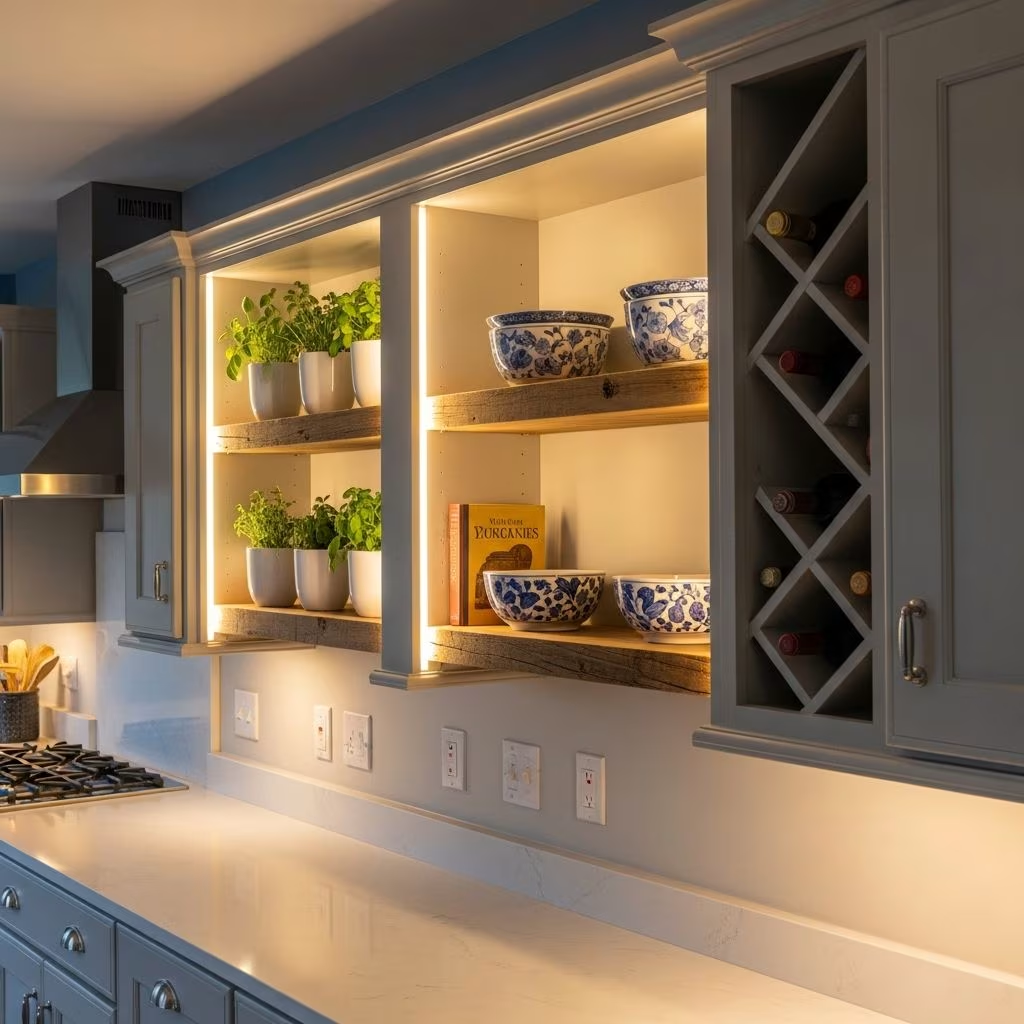
The area above kitchen cabinets often becomes an afterthought, leaving a stark gap that can make even the most beautiful kitchens feel incomplete. Whether your cabinets stop short of the ceiling by a foot or more, this space presents both a challenge and an opportunity to enhance your kitchen’s overall aesthetic. By choosing intentional decoration or structural solutions, you can create a cohesive, visually appealing environment that draws the eye upward and adds personality without overwhelming the room.
Assessing Your Kitchen’s Needs: Decorate or Leave Bare?
Before diving into ideas, evaluate your kitchen’s layout and style. High ceilings amplify the emptiness above cabinets, making decoration essential to balance the proportions. Conversely, in sleek, minimalist designs where cabinets reach the ceiling, leaving the space empty aligns with modern trends, promoting a clean, airy feel.
- Decorate if: Ceilings are tall (over 9 feet), cabinets have warm tones that halt visual flow, or the room needs softening elements like texture.
- Leave bare if: Gap is under 12 inches, kitchen is ultra-modern, or proximity to vents invites dust and grease buildup.
This decision hinges on functionality too—hard-to-reach spots prone to grime may fare better unenclosed and empty.
Minimalist Styling: Less is More for Timeless Appeal
The golden rule for decorating above cabinets is restraint: opt for a few oversized items rather than a crowd of trinkets. This approach avoids the dated, cluttered vibe of past trends like garlands or figurines, replacing it with curated elegance.
Select **2-3 large groupings** spaced generously. For instance, position a tall ceramic urn flanked by matching vases on one section, copper cookware on another, and glass vessels elsewhere. The key is scale—items should nearly touch the ceiling to fill vertical space effectively while leaving breathing room between groups. This negative space prevents visual overload, making the arrangement feel purposeful.
| Do’s | Don’ts |
|---|---|
| Use oversized, neutral pieces (urns, pots, baskets) | Crowd with small knick-knacks or faux ivy |
| Incorporate subtle lighting like LED strips | Overfill every inch of the ledge |
| Layer for depth (e.g., art behind objects) | Ignore dust collection—choose low-maintenance materials |
Layering artwork behind decor adds color and dimension, especially in neutral kitchens. Soft, hidden lighting elevates everyday items to gallery status, creating a museum-like display.
Bringing Life with Greenery and Natural Elements
Plants inject vitality into the upper kitchen zone, transforming it into a lush extension of your space. Low-maintenance options like succulents, preserved greenery, or realistic faux fronds thrive here, as they withstand neglect better than live varieties in greasy environments.
Arrange trailing ivy or potted ferns along the edges, elevating them on books or boxes for height variation. For a vineyard-inspired nook, weave in faux grapes alongside vases and tilted baskets. This biophilic touch softens hard cabinet lines and connects the kitchen to nature.
- Succulents in ceramic pots for drought tolerance.
- Faux leaf garlands draped casually, mimicking model home polish.
- Baskets with linens or serveware for texture.
Pro tip: Test plant viability by considering light exposure—indirect sunlight suits most, but avoid direct heat from overhead fixtures.
Creative Storage Solutions That Double as Decor
Turn the gap into functional storage without sacrificing style. Line up oversized bowls, platters, or surplus serveware, illuminated by discreet string lights for a curated collection effect. Baskets tipped sideways reveal linens, while vertical displays of vases on risers maximize usability.
This method suits practical homeowners, keeping items accessible yet out of daily reach. Ensure cohesion by sticking to a monochromatic scheme—whites, woods, or metallics unify the look.
DIY Enclosure: A Permanent, Seamless Fix
For those seeking a no-fuss solution, enclosing the gap mimics full-height cabinetry, instantly modernizing the kitchen. This budget-friendly project uses basic lumber and plywood to create a framed panel topped with molding.
Step-by-Step Enclosure Guide
- Frame the base: Secure 2×2 boards atop cabinets, inset 1/4 inch from the edge using brad nails. Align with ceiling studs using a level and scrap wood spacer.
- Ceiling support: Attach matching 2x2s to ceiling joists with screws for stability.
- Add plywood: Measure gap height minus 1/4 inch; cut 1/4-inch plywood sheets. Slot into frame, nailing securely. One clean edge faces out.
- Crown it off: Install molding along the bottom and ceiling with brad nails. Straight cuts suffice for single-wall runs.
- Finish: Caulk seams, prime, and paint in a satin finish like soft white for durability in high-traffic areas.
This transformation makes rooms feel taller and more custom-built, ideal for builder-grade kitchens. Total cost per linear foot: under $50 with basic tools.
Advanced Ideas: Lighting, Art, and Custom Touches
Elevate beyond basics with integrated lighting—recessed LEDs or plug-in strips wash decor in warm glows, highlighting textures after dark. Gallery walls of framed prints or mirrors expand perceived space, perfect for expansive gaps.
Custom touches like push-up soffits (hinged panels for hidden storage) or fabric panels offer access while concealing. For renters, tension rods with sheer curtains provide a soft, temporary veil.
Common Pitfalls and How to Avoid Them
Dust magnets like fabric-heavy displays spell maintenance nightmares; prioritize ceramics, metals, and sealed woods. Overly busy patterns clash with cabinetry—stick to harmonious palettes. Measure twice: ill-fitting items underscore awkwardness.
- Pitfall: Clutter overload. Solution: Edit ruthlessly to 20% occupancy.
- Pitfall: Mismatched scale. Solution: Eyeball from below—aim for ceiling-grazing heights.
- Pitfall: Ignoring kitchen style. Solution: Echo materials (e.g., wood cabinets pair with rattan).
FAQs: Quick Answers to Top Questions
Q: Can I use real plants above cabinets?
A: Yes, but choose hardy, low-water types like pothos or ZZ plants. Faux alternatives endure better in humid, oily air.
Q: What’s the best paint for enclosures?
A: Satin or semi-gloss formulas resist grease; popular picks include durable whites for clean lines.
Q: How do I clean decor up there safely?
A: Use a soft duster on an extendable pole weekly; for deep cleans, a stepladder and microfiber cloth suffice.
Q: Does enclosing add home value?
A: Absolutely—full-height treatments signal quality craftsmanship, appealing to buyers.
Q: Ideas for small gaps (under 12 inches)?
A: Skip decor; slim crown molding or paint bridging creates seamless flow.
Styling for Every Kitchen Personality
Tailor to your vibe: Farmhouse fans layer dough bowls and lanterns; industrials stack matte black pipes and Edison bulbs; coastals weave seashells into driftwood. Consistency ties it all—repeat colors, shapes, or themes from countertops below.
In conclusion, the space above cabinets need not languish unused. Whether through sparse, sculptural vignettes, verdant accents, or built-in enclosures, thoughtful intervention yields a kitchen that feels complete, taller, and distinctly yours. Experiment iteratively, stepping back to assess from multiple angles for that just-right polish.
References
- How to Decorate Above Kitchen Cabinets Without Looking Cluttered — Southern Home and Hospitality. 2023. https://southernhomeandhospitality.com/decorate-above-kitchen-cabinets/
- What Do You Do With That Awkward Space Above Your Kitchen Cabinets — Style by Emily Henderson. 2022. https://stylebyemilyhenderson.com/how-to-style-above-kitchen-cabinets
- How to Enclose the Space Above Kitchen Cabinets — Angela Maria Made. 2021. https://angelamariemade.com/how-to-enclose-the-space-above-kitchen-cabinets/
- Style above Kitchen cabinets for a curated and collected home — Angela Jones DIY (YouTube). 2023. https://www.youtube.com/watch?v=wD1YGTNUfwk