Preparing a rump roast can seem challenging for those new to cooking larger cuts of beef, but with the right approach and understanding of fundamental techniques, anyone can produce restaurant-quality results in their home kitchen. The key to success lies in temperature management, proper seasoning, and knowing which cooking method best suits your schedule and preferences. Whether you prefer traditional oven roasting or the convenience of slow-cooking, this guide explores multiple pathways to achieving the juicy, tender beef that makes this cut so beloved for family dinners and special occasions.
Understanding the Rump Roast Cut
The rump roast comes from the hindquarters of the beef animal and is known for its lean muscle structure. This characteristic makes it an economical choice that appeals to budget-conscious cooks while still delivering excellent flavor when prepared correctly. Because this cut contains less marbling than fattier options, understanding moisture retention becomes essential to preventing dryness during cooking.
A typical rump roast weighs between 2.5 and 5 pounds, making it suitable for serving 4 to 8 people depending on portion size and accompanying dishes. The size of your roast directly influences cooking time, so accurate measurements matter when planning your meal preparation.
Foundational Preparation Steps
Before applying any cooking method, several preparatory steps significantly influence the final outcome. Beginning with proper thawing ensures even cooking throughout the meat. If starting with a frozen roast, transfer it to the refrigerator 24 hours before cooking, or use the cold-water thawing method for faster preparation. Never thaw at room temperature, as this creates conditions favorable for bacterial growth.
Removing the roast from cold storage 30 to 120 minutes before cooking allows the interior to approach room temperature. This practice promotes even heat penetration during cooking, reducing the likelihood of a cold center surrounded by overcooked exterior. The duration depends on roast size, with larger cuts requiring the full two hours and smaller roasts needing approximately 30 minutes.
Trimming excess external fat creates a better surface for seasoning adhesion and prevents excessive smoke during searing. However, leaving a thin fat layer protects the meat during cooking and contributes valuable flavor.
Seasoning Approaches and Flavor Development
Seasoning strategy determines whether your rump roast tastes bland or develops complex, satisfying flavors. Simple salt-and-pepper combinations work effectively and allow the natural beef flavor to shine. More elaborate approaches incorporate fresh or dried herbs like rosemary, thyme, and garlic. Creating a cohesive herb mixture by combining minced garlic, chopped fresh herbs, salt, pepper, and olive oil allows the seasonings to meld before application. Setting this mixture aside for 5 to 10 minutes lets the oil absorb the herb essences, creating a more flavorful paste.
An alternative technique involves piercing the roast with a sharp knife and inserting garlic cloves and salt into deep slits. This method distributes garlic throughout the meat interior, creating flavor pockets that release during cooking. Making three slits on each side of a 4-pound roast provides adequate seasoning distribution without compromising meat integrity.
High-Temperature Oven Roasting Method
The rapid initial-sear approach begins by preheating your oven to 450°F. This intense heat creates a flavorful crust through the Maillard reaction, a chemical process that develops complex brown flavors. After applying your chosen seasoning to all exposed surfaces, place the roast directly in a roasting pan and cook at this high temperature for 20 minutes.
Following this searing phase, reduce oven temperature to 275°F and add liquid to the pan bottom—typically beef broth, wine, or water. This moisture prevents the lean meat from drying and creates savory pan juices for grazing. Depending on roast size and desired doneness, cooking at this lower temperature requires 35 to 40 minutes per pound. A 2-pound roast typically needs 1 hour 15 minutes total, while a 4-pound roast requires approximately 2 hours 45 minutes from start to finish.
Traditional Oven Roasting at Moderate Temperature
A gentler approach uses a consistent moderate temperature throughout cooking. Preheating your oven to 375°F and roasting without an initial high-temperature sear produces equally tender results with different flavor characteristics. This method suits cooks who prefer simpler procedures without multiple temperature adjustments.
Traditional herb-crusted roasts prepared with this approach develop flavor through extended contact between seasonings and meat surface rather than through browning reactions. Cooking times run slightly longer—approximately 12 to 15 minutes per pound—allowing gentle, even cooking that minimizes the risk of overdone exteriors with rare centers.
Extended Low-Temperature Roasting
The longest cooking approach involves baking at 350°F for two hours initially, then reducing to 250°F for an additional three to five hours. This ultra-slow method suits large roasts and produces exceptionally tender results by breaking down connective tissue through prolonged gentle heat application. While this technique demands significant time commitment, it requires minimal attention after initial setup, making it ideal for weekend cooking when you’re home managing other tasks.
Slow Cooker Convenience Method
Slow-cooking offers supreme convenience for busy schedules, transforming a rump roast into fork-tender beef with minimal active preparation. The process begins by trimming excess fat from a 3 to 3.5-pound roast and placing it in the slow cooker basin. Arranging chopped vegetables—typically potatoes, carrots, and onions—around the roast adds nutrition and flavor while cooking in the trapped steam.
Combining beef broth with flavor enhancers like Worcestershire sauce creates the cooking liquid. Sprinkling the entire arrangement with ranch seasoning or your preferred spice blend and dotting with butter completes the setup. Cooking on low for 8 hours produces meat so tender it shreds easily, creating ideal conditions for simple plating or using the meat for subsequent dishes like sandwiches or grain bowls.
Achieving Optimal Internal Temperature
Understanding meat doneness levels prevents overcooking, which renders this lean cut undesirably dry. A meat thermometer becomes essential equipment for monitoring progress without cutting into the roast and releasing precious juices. Rare beef registers 125°F internally, medium-rare reaches 135°F, medium achieves 145°F, and well-done surpasses 160°F.
For maximum juiciness, target 140 to 145°F, removing the roast from heat when it reaches 5 degrees below your target, as residual heat continues cooking during the essential resting period. Insert your thermometer into the thickest portion of meat, avoiding contact with bone or pan surfaces that would provide inaccurate readings.
The Critical Resting Phase
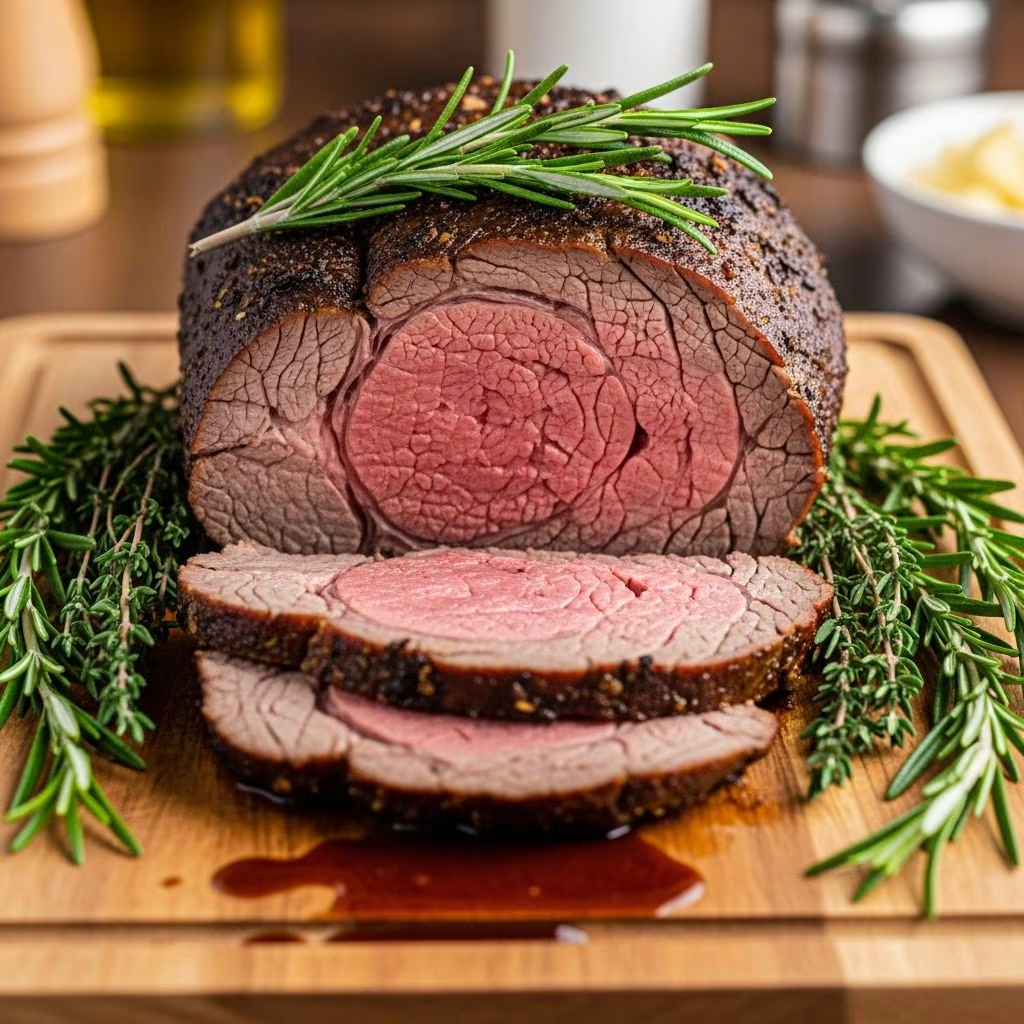
After removing your roast from heat, allowing it to rest undisturbed for 10 minutes permits muscle fibers to relax and retain their internal moisture. During cooking, intense heat causes muscle proteins to contract and expel liquid. The resting period allows these proteins to relax, reabsorbing the released moisture. Cutting immediately after cooking results in juices flowing onto the plate rather than remaining in the meat.
Position your resting roast on a cutting board tented loosely with foil, creating an insulating barrier that maintains warmth without trapping excessive steam that would soften the exterior crust.
Slicing and Serving Strategies
When ready to slice, observe the grain direction—the pattern of muscle fibers—and cut perpendicular to this grain. Cutting against the grain shortens the individual muscle fibers, making each bite more tender and easier to chew. Uniform slice thickness ensures even presentation and consistent texture throughout servings.
Rump roast pairs beautifully with traditional accompaniments like roasted root vegetables, creamy mashed potatoes, or simple green vegetables. The pan juices, enriched with beef flavor and vegetable essence, serve as an excellent gravy requiring only minimal flour or cornstarch thickening if desired.
Common Mistakes to Avoid
Insufficient resting time: Rushing to slice immediately sacrifices juiciness and flavor retention.
Cooking without temperature monitoring: Guessing doneness by touch or appearance often results in overdone, dry meat.
Excessive seasoning application: Over-salting draws moisture from the meat surface, creating a dehydrated exterior.
Skipping the sear step: While not mandatory, browning develops complex flavors difficult to achieve through gentle cooking alone.
Using insufficient liquid: Lean cuts require adequate moisture during cooking to prevent surface drying.
Flavor Enhancement Techniques
Incorporating umami-rich ingredients elevates roast beef from pleasant to memorable. Worcestershire sauce, soy sauce, and beef bone broth contribute savory depth. Red wine introduces tannins and acidity that brighten flavors while contributing wine’s characteristic richness. Fresh rosemary and thyme provide aromatic complexity, while garlic adds pungent sweetness when roasted alongside the meat.
Creating compound butter—softened butter blended with minced herbs, garlic, and salt—and placing it atop the roast during the final cooking phase bastes the meat with richly flavored fat, contributing moisture and taste.
Equipment Recommendations
A quality meat thermometer eliminates guesswork and ensures perfect doneness every time. Digital models with alarm features notify you when target temperature is reached, preventing distraction-related overcooking. A sturdy roasting pan with raised sides contains drippings while allowing adequate air circulation. Sharp carving knives make clean slices without tearing muscle fibers, improving presentation and eating experience.
Frequently Asked Questions
How long should a rump roast cook per pound?
Cooking time varies by method. High-temperature initial searing followed by lower-temperature roasting requires approximately 45 minutes per pound total. Gentle 375°F roasting needs 12 to 15 minutes per pound. Ultra-low 250°F cooking can extend 45 minutes to over an hour per pound. Always use a meat thermometer rather than relying solely on time calculations, as roast shape, starting temperature, and oven characteristics create significant variation.
Can I cook rump roast without searing?
Yes. While searing develops browning flavors through the Maillard reaction, it’s not essential. Gentle oven roasting or slow-cooking produces tender, flavorful meat without this step. Searing primarily affects flavor complexity rather than meat tenderness or juiciness.
What’s the difference between rump roast and chuck roast?
Chuck roast comes from the shoulder area and contains more intramuscular fat, making it forgiving during cooking and ideal for braises and stews where extended gentle cooking breaks down connective tissue. Rump roast, being leaner, requires careful temperature monitoring to prevent dryness but produces lighter results when properly prepared.
Should I cover the roast during cooking?
Covering traps steam, which prevents browning and creates a braised rather than roasted texture. Most methods avoid covering except during the resting phase. Some recipes recommend loosely tenting foil over the roast if the exterior browns too quickly while the interior remains undercooked, though adjusting oven temperature usually achieves better results.
How do I store leftover rump roast?
Refrigerate cooled roast in airtight containers for up to four days. Freeze for up to three months. Reheat gently to 130°F to avoid further moisture loss. Shredded leftover roast works excellently for sandwiches, grain bowls, or composed salads.
References
- Safe Food Handling: Thawing — United States Department of Agriculture Food Safety and Inspection Service. 2024. https://www.fsis.usda.gov/food-safety/safe-food-handling-and-preparation/food-safety-basics/safe-thawing-methods
- Maillard Reaction and Meat Browning — McGee, H. Food and Cooking: The Science and Lore of the Kitchen (Revised Edition). Scribner. 2004.
- Internal Temperature Guidelines for Beef — United States Department of Agriculture Food Safety and Inspection Service. 2024. https://www.fsis.usda.gov/food-safety/safe-food-handling-and-preparation/food-safety-basics/safe-minimum-internal-temperature-chart
- The Science of Meat Cooking and Protein Structure — López-Carrillo, N., & López-Malo, A. Food Science and Technology International, 2(3), 147-171. 1996. https://doi.org/10.1177/108201329600200301
- Slow Cooker Safety and Best Practices — United States Department of Agriculture Food Safety and Inspection Service. 2024. https://www.fsis.usda.gov/food-safety/safe-food-handling-and-preparation/food-safety-basics/appliances-food-safety