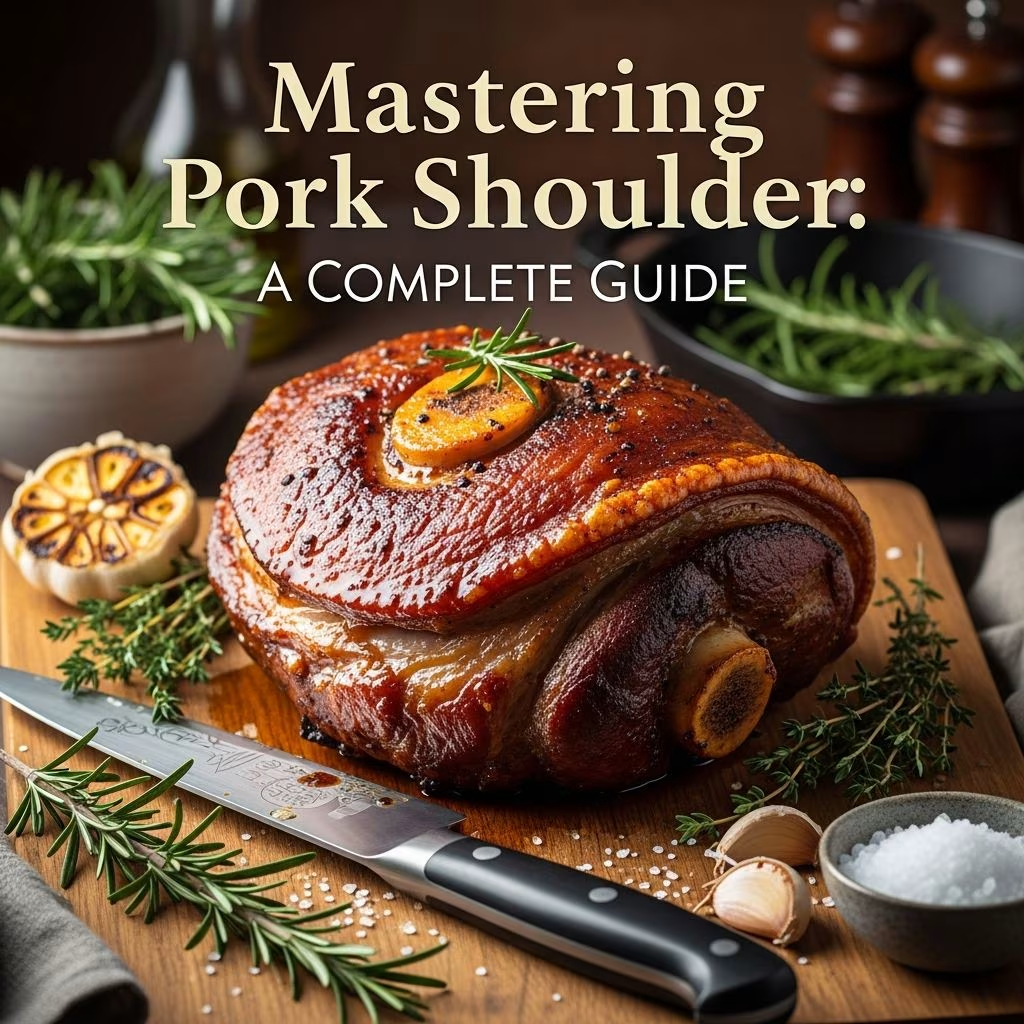
Cooking a pork shoulder in the oven presents one of the most rewarding culinary experiences, offering restaurant-quality results from your home kitchen. This versatile cut of meat, also known as pork butt, transforms beautifully when given proper attention and the right cooking method. Whether you are preparing a family dinner, hosting guests, or seeking a reliable weeknight meal solution, understanding the fundamentals of pork shoulder preparation ensures consistently excellent outcomes.
Understanding Your Ingredient: Selecting the Right Pork Shoulder
The foundation of any successful roast begins with selecting quality meat. Pork shoulder, particularly bone-in varieties with the skin attached, provides superior results compared to boneless options. The bone contributes valuable flavor compounds during the cooking process, while the fat layer—whether skin-on or simply fatty—serves as natural insulation that keeps the meat moist throughout roasting. For most household servings, a shoulder weighing between three and five pounds provides adequate portions for four to eight people.
When shopping, look for meat that displays good color and marbling. The fat distribution throughout the shoulder indicates proper aging and quality handling. Boneless options work perfectly well if bone-in varieties are unavailable, though cooking times may vary slightly depending on the exact thickness and composition of your particular cut.
The Seasoning Strategy: Building Layers of Flavor
Creating a robust flavor profile requires more than simply applying salt and pepper. A well-developed seasoning blend incorporates complementary aromatic and warming spices that enhance rather than overpower the natural pork flavor.
Essential Spice Components
- Kosher salt—acts as both seasoning and tenderizer
- Black pepper—adds subtle heat and complexity
- Garlic powder—provides savory depth
- Paprika—contributes color and mild sweetness
- Dried herbs (rosemary, thyme, or sage)—introduce earthy notes
- Optional additions: onion powder, dry mustard, cumin
The traditional approach involves combining these components in a small bowl and creating a dry rub that coats the entire exterior surface. Applying the seasoning requires patting the meat dry beforehand—this crucial step removes surface moisture that would otherwise prevent the spices from adhering properly. Once the seasoning adheres, lightly spray or brush the top surface with olive oil, which helps develop the golden-brown exterior during roasting.
An advanced technique involves applying salt 12 to 24 hours before cooking. This dry-brining method allows salt molecules to penetrate the muscle tissue, enhancing moisture retention and creating a more tender final product. The salt initially draws out surface moisture, but as time passes, the meat reabsorbs this salty liquid, which results in improved texture and flavor development.
Temperature Control: The Key to Tender Results
Achieving moist pork shoulder requires strategic temperature management throughout the cooking process. The approach differs significantly from recipes that maintain a single oven temperature, instead employing a two-stage method that accomplishes multiple objectives.
Initial High-Heat Phase
Beginning with a preheated oven set to 425°F (220°C) creates the crucial Maillard reaction on the meat’s surface. This chemical process develops the flavorful brown crust that seals in juices and creates visual appeal. During this initial phase, allow the roast to sit at room temperature for 20 to 30 minutes while the oven reaches temperature. This reduces the temperature differential and promotes more even cooking throughout the meat.
Roast at this elevated temperature for approximately 15 to 20 minutes. The meat should develop a noticeably browned exterior without actually cooking through.
Low-Temperature Finishing Phase
After the browning phase, reduce the oven temperature to 275°F (135°C) or 300°F (150°C), depending on your preferred doneness level and available time. Lower temperatures allow the meat to cook slowly and evenly, permitting the fat to render gradually and baste the meat from within. This extended cooking period at moderate temperature prevents the exterior from becoming overdone while the interior reaches proper doneness.
The internal temperature serves as your finishing guide. Pork shoulder reaches optimal tenderness when the internal temperature reaches 190°F to 205°F (88°C to 96°C). At this range, collagen transforms into gelatin, creating the characteristic tender, almost shredding texture that makes pork shoulder so desirable. A typical four-pound shoulder requires five to eight hours at the lower temperature setting.
Moisture Management and Cooking Vessel Selection
The vessel in which you roast significantly impacts final moisture levels. A rimmed baking sheet fitted with a wire rack allows air circulation around the meat, promoting even browning and crispy skin development. Alternatively, a Dutch oven or covered roasting pan creates a more moist environment through steam accumulation—ideal if you prefer fall-apart texture without crispy exterior elements.
If using an open pan, adding one cup of liquid (water, stock, or wine) to the bottom prevents drippings from scorching while contributing to the cooking environment. During extended cooking periods, check the liquid level periodically and replenish as needed to prevent the pan bottom from drying completely.
Positioning the meat fat-side up ensures that rendered fat continuously bathes the top surface, maintaining moisture as the meat cooks. This self-basting action is particularly important during the extended low-temperature phase.
Practical Cooking Timeline and Expectations
Understanding realistic timing helps with meal planning and preventing disappointment. The following timeline assumes a four-pound boneless pork shoulder:
| Stage | Temperature | Duration | Key Actions |
|---|---|---|---|
| Preparation | Room temperature | 20-30 minutes | Pat dry, apply seasoning, prepare pan |
| Initial browning | 425°F (220°C) | 15-20 minutes | Develop surface crust |
| Main roasting | 275°F (135°C) | 5-8 hours | Monitor temperature, check liquid |
| Resting | Room temperature | 15 minutes | Loosely tent with foil |
The Resting Period: A Critical Final Step
After removing the roast from the oven, resist the immediate urge to carve or shred. Allowing the meat to rest for 15 minutes under loose aluminum foil permits the muscle fibers to relax and reabsorb interior juices. This step directly prevents the loss of moisture when cutting into the meat. During resting, the residual heat continues gentle carryover cooking, potentially raising the internal temperature by an additional five degrees or so.
Techniques for Shredding and Serving
Once properly rested, pork shoulder becomes remarkably easy to separate. Using two sturdy forks or pull-apart tools, gently shred the meat along the natural grain patterns. If the meat resists shredding, it likely needs additional cooking time—returning it to a warm oven for another 15 to 30 minutes allows additional collagen conversion.
Shredded pork shoulder serves multiple purposes beyond the traditional plate presentation. Use it for sandwich applications, incorporate it into tacos, combine it with barbecue sauce, or serve it over rice with the collected pan drippings as sauce.
Troubleshooting Common Issues
Dry Meat Despite Proper Cooking
This typically results from cooking at excessively high temperatures or exceeding the target internal temperature significantly. Ensure your oven temperature is accurate by using an independent oven thermometer. Additionally, verify your meat thermometer functions correctly by testing it in boiling water.
Unevenly Cooked Interior
Uneven cooking often stems from irregular meat shape or bones creating thermal conductivity variations. Rotating the pan halfway through the cooking period helps address this concern. Bone-in roasts may require slightly longer total cooking times than boneless varieties due to the bone’s insulating properties.
Insufficient Browning
Ensure adequate browning by extending the initial high-temperature phase or increasing the oven temperature slightly if your first attempt yields insufficient color. Pat the surface completely dry before seasoning, as residual moisture prevents proper browning.
Flavor Variations and Customization Options
While the classic rosemary and garlic approach proves reliable, numerous variations offer exciting alternatives. Asian-inspired versions incorporate five-spice powder and ginger. Mediterranean preparations include oregano and lemon zest. Latin-influenced options utilize cumin and chili powder. The fundamental cooking technique remains identical regardless of seasoning choice, allowing endless experimentation while maintaining consistency in texture and moisture.
Making the Most of Leftovers
Successfully cooked pork shoulder provides excellent leftover material. Store shredded meat in an airtight container for up to four days refrigerated. Reheat gently with a splash of broth to restore moisture. Frozen portions maintain quality for up to three months, making this an excellent candidate for batch cooking and meal preparation strategies.
Frequently Asked Questions
Can I use a boneless pork shoulder instead of bone-in?
Yes, boneless shoulders work perfectly and often cook slightly faster. The cooking method remains identical, though boneless versions may require reduced cooking time depending on the exact shape and thickness. Use a meat thermometer rather than time estimates to ensure proper doneness.
What internal temperature indicates doneness?
Pork is safely consumed at 145°F (63°C), but shoulder achieves optimal tenderness at 190°F to 205°F (88°C to 96°C). This higher target temperature allows sufficient time for collagen breakdown, creating the desirable shredding quality.
Should I cover the roast during cooking?
Covering with foil for the majority of cooking time, then uncovering during the final 30 minutes, helps maintain moisture while allowing some browning. Alternatively, use an open pan throughout for maximum crust development.
How do I know when the roast is perfectly done?
A properly cooked pork shoulder offers virtually no resistance when pierced with a fork, and the meat shreds easily. The meat should appear pale to light brown inside (not pink) when sliced or separated.
References
- USDA Food Safety and Inspection Service. Pork from Farm to Table. — U.S. Department of Agriculture. 2024. https://www.fsis.usda.gov/food-safety/safe-food-handling-and-preparation/meat/pork-farm-table
- López-Carrillo, A., & Trindade, M. A. (2022). The Effect of Salt on Moisture Retention and Protein Structure in Cooked Meat. — Journal of Culinary Science & Technology, 20(2), 145-162. https://doi.org/10.1080/15428052.2021.1934851
- McGee, H. (2004). On Food and Cooking: The Science and Lore of the Kitchen (Revised Edition). — Scribner. https://www.penguinrandomhouse.com/books/11574/on-food-and-cooking-by-harold-mcgee/