Corn on the cob stands as a timeless summer delight, its sweet kernels bursting with natural juices when prepared right. Whether you’re hosting a backyard barbecue or seeking a quick side dish, knowing how to cook it properly elevates any meal. This guide dives into multiple approaches, drawing from time-tested recipes to help you achieve tender, flavorful results without overcomplicating the process.
Why Fresh Corn Matters Most
The foundation of great corn on the cob begins at the market. Select ears with bright green husks that are tightly wrapped around the cob and slightly damp to the touch. The silk should be golden and sticky, not dried out. Gently squeeze the ear to feel for plump kernels that fill the spaces between rows. Peak season, typically late spring through late fall, ensures the sweetest taste as sugars haven’t converted to starch yet.
Store corn in the refrigerator, still in its husk, for up to a week. Avoid pre-shucked corn from displays, as it loses moisture and sweetness quickly. For the best results, plan to cook it the same day you buy it.
Essential Prep Steps for All Methods
Before any cooking, preparation sets the stage for success. Start by peeling back the husks carefully without tearing them off completely if roasting or grilling in husk. Remove the silk strands thoroughly—use a damp paper towel or vegetable brush for efficiency. Rinse under cool water to wash away any remaining debris.
Trim the ends if needed: cut off the tip for even cooking and the stalk end to make gripping easier later. Pat dry with a towel to promote browning in dry-heat methods. These steps, done in under five minutes per ear, prevent grit and ensure even cooking.
Boiling: The Classic Approach with a Twist
Boiling remains a go-to for its simplicity and ability to cook multiple ears at once. For enhanced flavor, incorporate a milky butter bath that infuses richness without overpowering the corn’s natural sweetness.
- Fill a large pot halfway with water and bring to a rolling boil.
- Stir in 1 cup of milk and 1 stick of butter per 6-8 ears, allowing it to melt fully.
- Add shucked corn, reduce heat to a simmer, and cook for 6-8 minutes until kernels are tender and vibrant yellow.
- Drain immediately to avoid sogginess and serve hot.
This method yields exceptionally juicy corn, as the milk tenderizes and the butter adds silkiness. Season simply with salt and pepper, or elevate with herbs.
Quick Boiling for Everyday Ease
For a no-frills option, plain boiling works wonders with minimal ingredients. Use fresh water without salt initially, as it can toughen kernels.
- Bring a pot of water to a boil—enough to submerge all ears.
- Add shucked corn and cook uncovered for 3-5 minutes, stirring to ensure even submersion.
- Test doneness by piercing a kernel; it should be tender but crisp.
- Drain and slather with butter, salt, and pepper.
This keeps the focus on the corn’s sweetness, ideal when time is short.
Microwaving: The Fastest Silk-Free Hack
Microwaving offers unparalleled convenience, especially for single servings, and simplifies silk removal dramatically.
- Place 1-2 whole ears (in husk) on a microwave-safe plate.
- Cook on high for 3-4 minutes per ear, depending on wattage (3.5 minutes for standard models).
- Let rest for 1 minute, then cut off the stalk end about 1 inch up using a serrated knife.
- Squeeze the tapered end with a towel to slide the corn out, silk-free.
This steams the corn gently, concentrating sugars for super-sweet results. Brush with butter post-cooking.
Grilling: Smoky Char Perfection
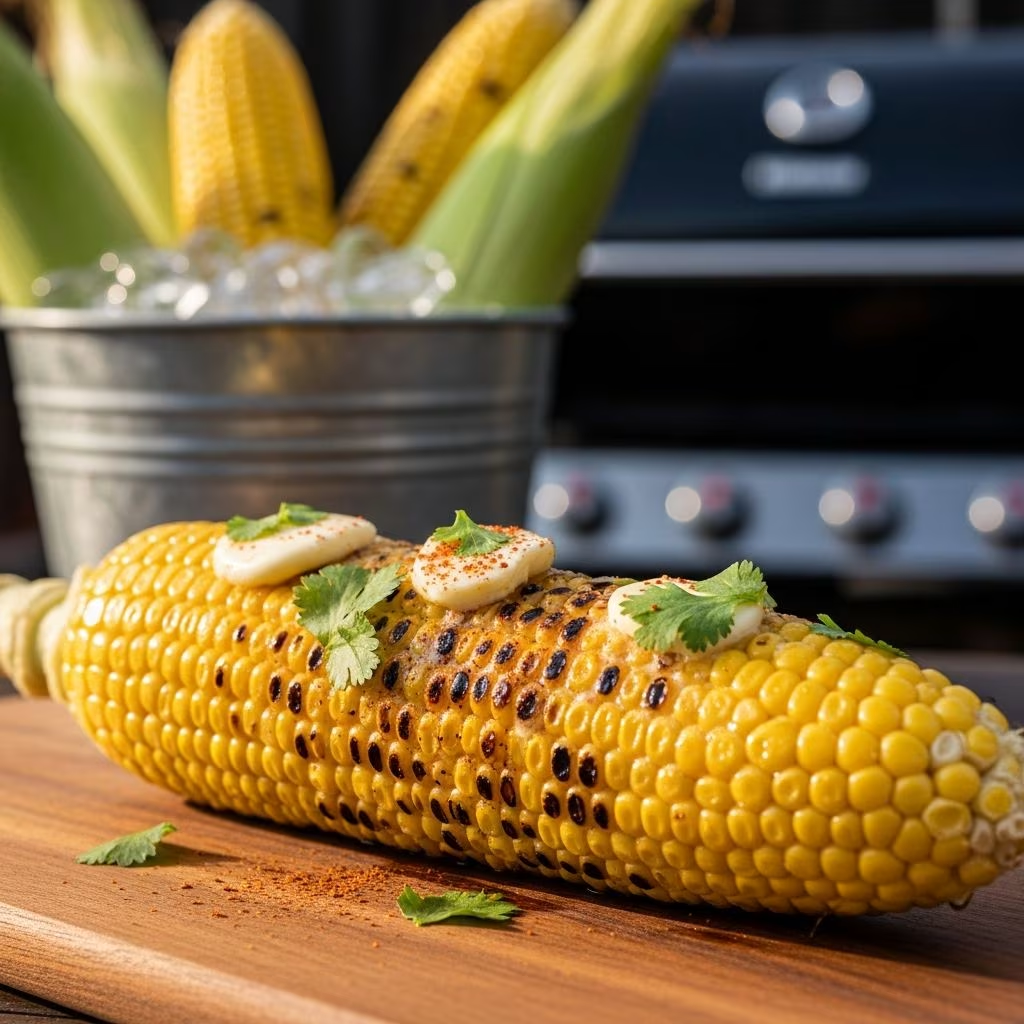
Grilling imparts irresistible smoky notes and appealing char marks, making it the top choice for gatherings.
- Preheat grill to medium-high (400°F).
- Shuck corn or leave in husk (soak husk 10 minutes first to prevent burning).
- Oil lightly and grill 10-15 minutes, turning every 3-4 minutes for even char.
- Remove when kernels are tender with golden-brown spots.
Pair with compound butters like garlic-herb or chili-lime for next-level taste.
Roasting: Oven-Baked Smokiness
Roasting mimics grilling without outdoor setup, delivering deep flavor through caramelization.
- Preheat oven to 400°F.
- Place shucked or husked corn on a baking sheet, brushed with oil.
- Roast 20-25 minutes, turning halfway, until kernels blister slightly.
- Season generously upon removal.
This method suits rainy days, yielding sweet, smoky corn rivaling the grill.
Steaming: Healthy Moisture Retention
Steaming preserves nutrients and natural moisture, though it may lack bold flavors.
- Set up a steamer basket over boiling water.
- Add shucked corn, cover, and steam 4-6 minutes.
- Check tenderness and serve.
Best with added seasonings in the water, like garlic or bay leaves.
Method Comparison Table
| Method | Time | Equipment | Flavor Profile | Best For |
|---|---|---|---|---|
| Boil (Butter Bath) | 6-8 min | Pot | Rich, sweet | Crowds |
| Quick Boil | 3-5 min | Pot | Pure, crisp | Quick meals |
| Microwave | 3-4 min/ear | Microwave | Intensely sweet | Solo cooks |
| Grill | 10-15 min | Grill | Smoky, charred | BBQs |
| Roast | 20-25 min | Oven | Caramelized | Indoor |
| Steam | 4-6 min | Steamer | Fresh, mild | Health-focused |
Flavor Boosters and Toppings
- Classic: Butter, salt, pepper.
- Herbed: Mix butter with chives, parsley, garlic.
- Spicy: Chili powder, lime, cotija cheese.
- Sweet: Honey butter or maple glaze.
- Global: Tajin, miso butter, or pesto.
Experiment post-cooking to match your meal—acidic elements like lime cut richness effectively.
Storage and Reheating Tips
Cooked corn stores in an airtight container in the fridge for 3-5 days. Reheat by steaming 2 minutes or microwaving wrapped in damp paper towel for 30-60 seconds. Avoid boiling leftovers, as it dilutes flavor. For freezing, blanch shucked ears 4 minutes, cool, and freeze up to 10 months.
Common Mistakes to Avoid
- Overcooking: Leads to tough, mushy kernels—time precisely.
- Salting water prematurely: Draws out moisture.
- Ignoring freshness: Stale corn won’t improve with cooking.
- Skipping silk removal: Ruins texture.
FAQs
How long does corn on the cob last uncooked?
Up to one week in the fridge, husk on.
Do you add salt to boiling water for corn?
Optional, but add after cooking to prevent toughness.
Can I cook corn on the cob without shucking?
Yes, for microwave, grill, or roast—easier cleanup.
What’s the best way to remove silk?
Microwave first or use a brush under water.
Is frozen corn on the cob as good?
Convenient, but fresh peak-season wins for flavor.
References
- Best Way to Cook Corn on the Cob — Spicy Southern Kitchen. 2023. https://spicysouthernkitchen.com/best-way-to-cook-corn-on-the-cob/
- How to Boil Corn on the Cob — Love and Lemons. 2023. https://www.loveandlemons.com/how-long-to-boil-corn-on-the-cob/
- Chef John’s Favorite Method for Corn on the Cob — Food Wishes (YouTube). 2014-08-01. https://www.youtube.com/watch?v=e8vWhX1zXKM
- We Tried Every Way To Cook Corn & This Method Is The Best — Delish. 2024. https://www.delish.com/kitchen-tools/kitchen-secrets/a64703411/ways-to-cook-corn-taste-test-ranking/