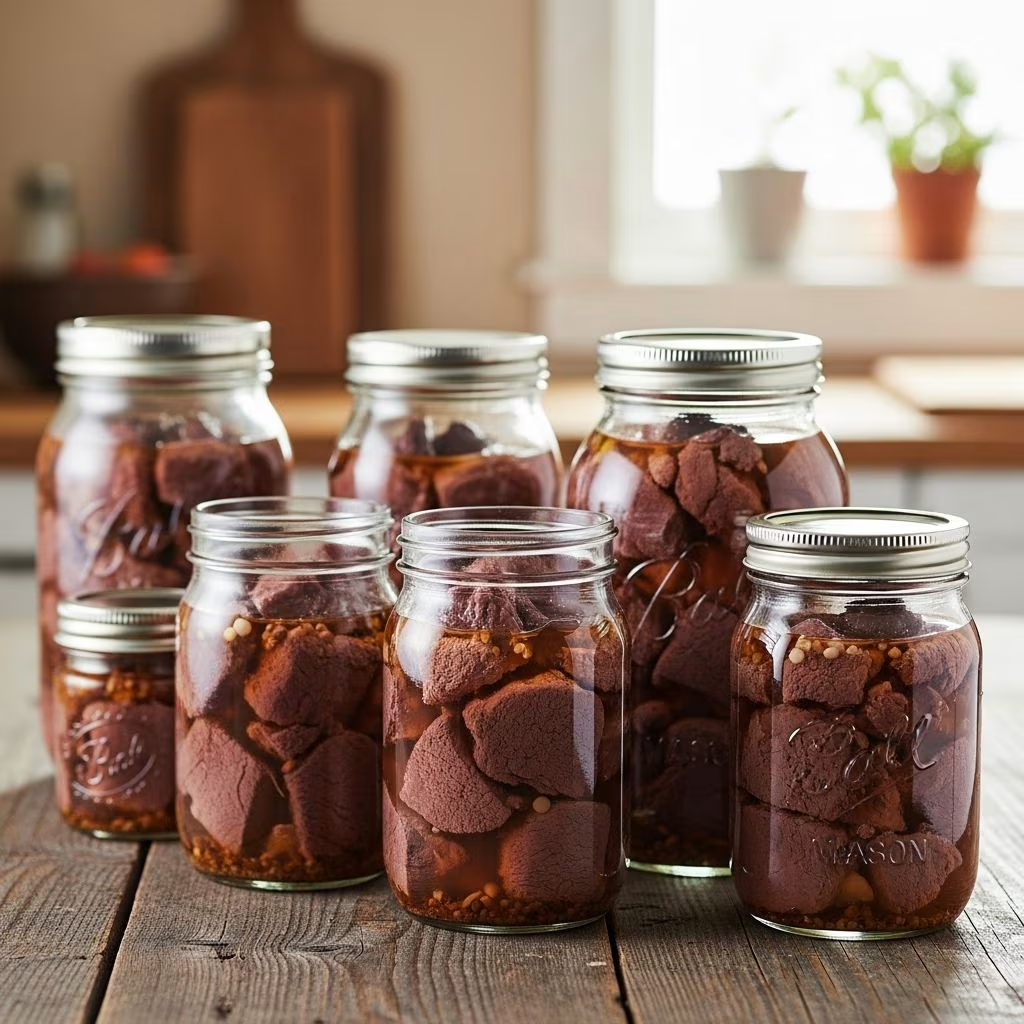
Preserving venison through canning offers hunters and home cooks a reliable way to store wild game for months or even years without relying on freezer space. This method not only extends the shelf life of deer meat but also tenderizes tougher cuts like shoulder or shank, making them versatile for quick meals. By following proper pressure canning techniques, you can create shelf-stable jars ready for stews, sandwiches, or standalone dishes.
Why Choose Canning for Venison Preservation
Canning venison stands out as a practical alternative to freezing, especially when storage space is limited. Fully processed jars remain safe at room temperature for up to two years, freeing up your freezer for other needs. The process cooks the meat during canning, resulting in a product that’s already tender and infused with natural juices. This convenience shines in busy households where a jar can transform into a hearty meal in minutes—simply heat and serve over rice, noodles, or potatoes.
Beyond storage, canning enhances flavor profiles. Venison’s lean nature benefits from the moist heat of pressure canning, which breaks down connective tissues in less tender sections. Home-canned venison also avoids preservatives found in commercial products, giving you control over seasonings like salt, pepper, or aromatics such as garlic and onion.
Gathering Essential Equipment and Supplies
Success in home canning starts with the right tools. A pressure canner is non-negotiable for low-acid foods like meat, as it reaches the high temperatures needed to kill bacteria such as Clostridium botulinum. Opt for a model with a weighted gauge or dial gauge (test the dial annually for accuracy).
Key supplies include:
- Clean, sterilized mason jars (pint or quart size; wide-mouth pints work well for single servings)
- New lids and bands (reuse bands, but always use fresh lids for a proper seal)
- Jar lifter, funnel, and bubble remover for safe handling
- Non-iodized canning salt
- Clean cloths or paper towels for wiping rims
- Optional: vinegar for the canner water to prevent mineral stains
Prepare your workspace by washing everything in hot, soapy water. Keep jars hot in simmering water or a dishwasher until filling to prevent thermal shock.
Selecting and Preparing the Best Venison Cuts
Start with fresh, high-quality venison. Trim away fat, silverskin, gristle, and any bruised areas thoroughly—venison’s low fat content means excess can lead to off-flavors or spoilage. Cuts from the hindquarter, roasts, or even tougher sections like neck work well, as canning tenderizes them.
Cut the meat into 1-inch cubes or thin strips for even packing. For ground venison, brown it lightly first to remove excess moisture, though raw packing is standard for chunks. Aim for about 1 pound per pint jar or 2 pounds per quart. Handle meat chilled to maintain safety and quality.
| Venison Cut | Best For Canning | Prep Notes |
|---|---|---|
| Hindquarter steaks | Tender chunks | Cube after trimming silver skin |
| Shoulder/roasts | Tougher meat | Canning softens fibers |
| Ground meat | Quick recipes | Brown lightly before packing |
| Neck/shank | Stews | Trim gristle heavily |
Step-by-Step Raw Packing Process
Raw packing—placing uncooked meat directly into jars—is the simplest method for venison. No added liquid is needed; the meat releases its own broth during processing.
- Pack jars tightly with meat, leaving 1-inch headspace. Use a chopstick or handle of a wooden spoon to remove air pockets, pressing meat down firmly.
- Add flavor boosters: Place sliced onion (½ tablespoon per pint), a garlic clove, or black pepper at the bottom before meat. Sprinkle ½ teaspoon canning salt per pint or 1 teaspoon per quart on top.
- Wipe rims meticulously with a vinegar-dampened cloth to remove residue, ensuring a clean seal.
- Center lids and screw bands fingertip-tight—don’t overtighten.
For hot packing ground venison, sear the meat, add broth to simmer, then fill jars with the hot mixture, maintaining headspace.
Mastering Pressure Canning Techniques
Preheat your pressure canner with 2-3 inches of water (or per manufacturer instructions) and 1-2 tablespoons vinegar. Load filled jars using a jar lifter, ensuring they’re upright and not touching.
Secure the canner lid and heat on high until steam vents steadily for 10 minutes. Add the appropriate weight: 10 pounds for elevations under 1,000 feet, 15 pounds above. Once pressure is reached (weight jiggles every 10-15 seconds), process pints for 75 minutes and quarts for 90 minutes. Maintain steady pressure; adjust heat as needed.
After processing, turn off heat and let pressure drop naturally (no quick-release). Remove jars to a towel-lined surface; check seals after cooling 12-24 hours. Store sealed jars in a cool, dark place.
References
- Complete Guide to Home Canning — National Center for Home Food Preservation, USDA. 2023-09-01. https://nchfp.uga.edu/publications/publications_usda.html
- Pressure Canning Meat Guidelines — USDA Food Safety and Inspection Service. 2024-02-15. https://www.fsis.usda.gov/food-safety/safe-food-handling-and-preparation/food-safety-basics/pressure-canning
- Easy Canned Venison Recipe — The Rustic Elk. 2023-11-20. https://www.therusticelk.com/easy-canned-venison-recipe/
- Canning Venison Instructions — Simply Canning. 2024-01-10. https://www.simplycanning.com/canning-venison/
- Easy Canned Venison — Realtree Camo. 2022-10-05. https://realtree.com/timber-2-table-wild-game-recipes/easy-canned-venison
Flavor Variations and Seasoning Ideas
Customize your canned venison for specific dishes. Basic salt and pepper yields a neutral base, while additions like onion, garlic, bay leaves, or herbs create depth. For a spicy kick, include jalapeño slices. Experiment sparingly to avoid overpowering the meat’s natural taste.
- Classic: Salt, pepper, garlic
- Italian: Oregano, basil, onion
- Southwestern: Cumin, chili powder (add post-canning for recipes)
Creative Recipes Using Your Canned Venison
Canned venison shines in slow cookers, soups, and one-pan meals. Here are three tested ideas:
Venison Vegetable Stew
Drain a quart jar into a crockpot. Add 4 sliced carrots, 3 diced potatoes, 1 cup chopped celery, 1 diced onion, 2 cups broth, 1 tsp each garlic powder, salt, and thyme. Cook low 4-5 hours. Serves 6.
Spicy Venison Chili
Combine 1 quart venison, 1 diced onion, 1 green pepper, 1 tbsp jalapeño, 1 quart stewed tomatoes, 14 oz tomato sauce, 2 tbsp each cumin and chili powder, 14 oz kidney beans. Simmer low 3-4 hours. Top with cheese.
Venison Stroganoff
Mix 1 pint venison, 10.75 oz mushroom soup, ½ cup onion, 1 cup mushrooms, 1 tbsp Worcestershire. Cook low 2 hours. Stir in ½ cup sour cream and ¼ stick butter last 30 minutes. Serve over noodles.
Safety Essentials for Long-Term Storage
Always inspect jars before use: discard if lids bulge, leak, or show mold. Boil contents 10 minutes before eating (add 1 minute per 1,000 feet elevation). Low-acid canning risks botulism, so adhere strictly to times and pressures from USDA guidelines. Label jars with dates; use within a year for peak quality.
Frequently Asked Questions
Can I reuse canning lids?
No—use new lids each time for reliable seals, though bands can be reused if undamaged.
What’s the difference between pint and quart processing times?
Pints process 75 minutes; quarts process 90 minutes at the correct pressure to ensure center temperatures kill bacteria.
Is a water bath canner safe for venison?
No, only pressure canning for meats due to low acidity.
How do I fix a failed seal?
Refrigerate and use within days, or reprocess with a new lid within 24 hours.
Can I can other wild game this way?
Yes, same methods apply to elk, bear, or beef, adjusting for fat content.
This guide empowers you to preserve venison safely and deliciously, turning hunting hauls into pantry staples for effortless, nutritious meals year-round.